HRIR 측정 및 헤드폰 바이노럴 헤드트래킹 HRTF 시스템
Verified details
These details have been verified by PyPIProject links
GitHub Statistics
Maintainers

Project description
Impulcifer-py313: Python 3.13.2 호환 및 개선 버전

이 프로젝트는 Jaakko Pasanen의 원본 Impulcifer 프로젝트를 기반으로 하여, Python 3.13.2 환경과의 완벽한 호환성을 확보하고 여러 개선 사항을 적용한 포크 버전입니다.
🌟 프로젝트 목표 및 주요 변경 사항
원본 Impulcifer는 훌륭한 도구이지만, 최신 Python 환경에서의 호환성 문제가 있었습니다. Impulcifer-py313은 다음을 목표로 합니다:
-
Python 3.13.2 완벽 지원: 최신 Python 버전에서도 문제없이 Impulcifer를 사용할 수 있도록 의존성 및 내부 코드를 수정했습니다.
-
간편한 설치: PyPI를 통해 단 한 줄의 명령어로 쉽게 설치할 수 있습니다.
pip install impulcifer-py313
-
테스트 신호 지정 간소화: 기존의 파일 경로 직접 지정 방식 외에, 미리 정의된 이름(예: "default", "stereo")이나 숫자(예: "1", "3")로 간편하게 테스트 신호를 선택할 수 있는 기능을 추가했습니다.
-
지속적인 유지보수: Python 및 관련 라이브러리 업데이트에 맞춰 지속적으로 호환성을 유지하고 사용자 피드백을 반영할 예정입니다.
💿 설치 방법
사전 요구 사항
- Python 3.8 이상, 3.13.2 이하 버전 (Python 3.13.2 환경에서 주로 테스트되었습니다.)
pip(Python 패키지 설치 프로그램)
설치
터미널 또는 명령 프롬프트에서 다음 명령어를 실행하여 impulcifer-py313을 설치합니다:
pip install impulcifer-py313
가상 환경(virtual environment) 내에 설치하는 것을 권장합니다:
# 가상 환경 생성 (예: venv 이름 사용)
python -m venv venv

# 가상 환경 활성화
# Windows:
venv\Scripts\activate
# macOS/Linux:
source venv/bin/activate

# Impulcifer-py313 설치
pip install impulcifer-py313
🚀 사용 방법
설치가 완료되면 impulcifer 명령어를 사용하여 프로그램을 실행할 수 있습니다.
GUI (그래픽 사용자 인터페이스) 사용법
impulcifer-py313은 사용 편의성을 위해 그래픽 사용자 인터페이스(GUI)도 제공합니다.
GUI를 실행하려면 터미널 또는 명령 프롬프트에서 다음 명령어를 입력하세요:
impulcifer_gui
GUI를 통해 대부분의 기능을 직관적으로 설정하고 실행할 수 있습니다.
- Recorder 창: 오디오 녹음 관련 설정을 합니다.
- Impulcifer 창: HRIR 생성 및 보정 관련 설정을 합니다.
각 옵션에 마우스를 올리면 간단한 설명을 확인할 수 있습니다.
CLI (명령줄 인터페이스) 사용법
기존의 명령줄 인터페이스도 동일하게 지원합니다.
기본 명령어
impulcifer --help
사용 가능한 모든 옵션과 설명을 확인할 수 있습니다.
주요 개선 기능 사용 예시
1. 간편한 테스트 신호 지정
--test_signal 옵션을 사용하여 미리 정의된 이름이나 숫자로 테스트 신호를 지정할 수 있습니다.
-
이름으로 지정:
impulcifer --test_signal="default" --dir_path="data/my_hrir"
impulcifer --test_signal="stereo" --dir_path="data/my_hrir"
-
숫자로 지정:
impulcifer --test_signal="1" --dir_path="data/my_hrir" # "default"와 동일
impulcifer --test_signal="3" --dir_path="data/my_hrir" # "stereo"와 동일
사용 가능한 미리 정의된 테스트 신호:
"default"/"1": 기본 Pickle 테스트 신호 (sweep-6.15s-48000Hz-32bit-2.93Hz-24000Hz.pkl)"sweep"/"2": 기본 WAV 테스트 신호 (sweep-6.15s-48000Hz-32bit-2.93Hz-24000Hz.wav)"stereo"/"3": FL,FR 스테레오 WAV 테스트 신호"mono-left"/"4": FL 모노 WAV 테스트 신호"left"/"5": FL 스테레오 WAV 테스트 신호 (채널 1만 사용)"right"/"6": FR 스테레오 WAV 테스트 신호 (채널 2만 사용)
2. 데모 실행
프로젝트에 포함된 데모 데이터를 사용하여 Impulcifer의 기능을 테스트해볼 수 있습니다. Impulcifer가 설치된 환경에서, 데모 데이터가 있는 경로를 지정하여 실행합니다. (데모 데이터는 원본 프로젝트 저장소의 data/demo 폴더를 참고하거나, 직접 유사한 구조로 준비해야 합니다.)
만약 로컬에 원본 Impulcifer 프로젝트를 클론하여 data/demo 폴더가 있다면:
# Impulcifer 프로젝트 루트 디렉토리로 이동했다고 가정
impulcifer --test_signal="default" --dir_path="data/demo" --plot
또는 impulcifer-py313 패키지 내부에 포함된 데모용 테스트 신호를 사용하고, 측정 파일만 my_measurements 폴더에 준비했다면:
impulcifer --test_signal="default" --dir_path="path/to/your/my_measurements" --plot
기타 옵션
다른 모든 옵션(룸 보정, 헤드폰 보정, 채널 밸런스 등)은 원본 Impulcifer와 거의 동일하게 작동합니다. --help 명령어를 통해 자세한 내용을 확인하세요.
⚠️ 주의 사항
- 이 버전은 Python 3.13.2 환경에 맞춰 개발되고 테스트되었습니다. 다른 Python 버전에서는 예기치 않은 문제가 발생할 수 있습니다. (Python 3.8 이상 지원 목표)
- 원본 Impulcifer의 핵심 기능은 대부분 유지하려고 노력했지만, 내부 코드 수정으로 인해 미세한 동작 차이가 있을 수 있습니다.
autoeq-py313등 Python 3.13.2 호환성을 위해 수정된 버전에 의존합니다.
🔄 업데이트
새로운 버전이 PyPI에 배포되면 다음 명령어로 업데이트할 수 있습니다:
pip install --upgrade impulcifer-py313
📄 라이선스 및 저작권
이 프로젝트는 원본 Impulcifer와 동일하게 MIT 라이선스를 따릅니다.
- 원본 프로젝트 저작자: Jaakko Pasanen (GitHub 프로필)
- Impulcifer-py313 포크 버전 기여자: 115dkk (GitHub 프로필)
MIT License

Copyright (c) 2018-2022 Jaakko Pasanen
Copyright (c) 2023-2024 115dkk (For the Python 3.13.2 compatibility modifications and enhancements)

Permission is hereby granted, free of charge, to any person obtaining a copy
of this software and associated documentation files (the "Software"), to deal
in the Software without restriction, including without limitation the rights
to use, copy, modify, merge, publish, distribute, sublicense, and/or sell
copies of the Software, and to permit persons to whom the Software is
furnished to do so, subject to the following conditions:

The above copyright notice and this permission notice shall be included in all
copies or substantial portions of the Software.

THE SOFTWARE IS PROVIDED "AS IS", WITHOUT WARRANTY OF ANY KIND, EXPRESS OR
IMPLIED, INCLUDING BUT NOT LIMITED TO THE WARRANTIES OF MERCHANTABILITY,
FITNESS FOR A PARTICULAR PURPOSE AND NONINFRINGEMENT. IN NO EVENT SHALL THE
AUTHORS OR COPYRIGHT HOLDERS BE LIABLE FOR ANY CLAIM, DAMAGES OR OTHER
LIABILITY, WHETHER IN AN ACTION OF CONTRACT, TORT OR OTHERWISE, ARISING FROM,
OUT OF OR IN CONNECTION WITH THE SOFTWARE OR THE USE OR OTHER DEALINGS IN THE
SOFTWARE.
🛠️ 기여 및 문의
버그를 발견하거나 개선 아이디어가 있다면, 이 저장소의 이슈 트래커를 통해 알려주세요.
Changes # 변경사항
1
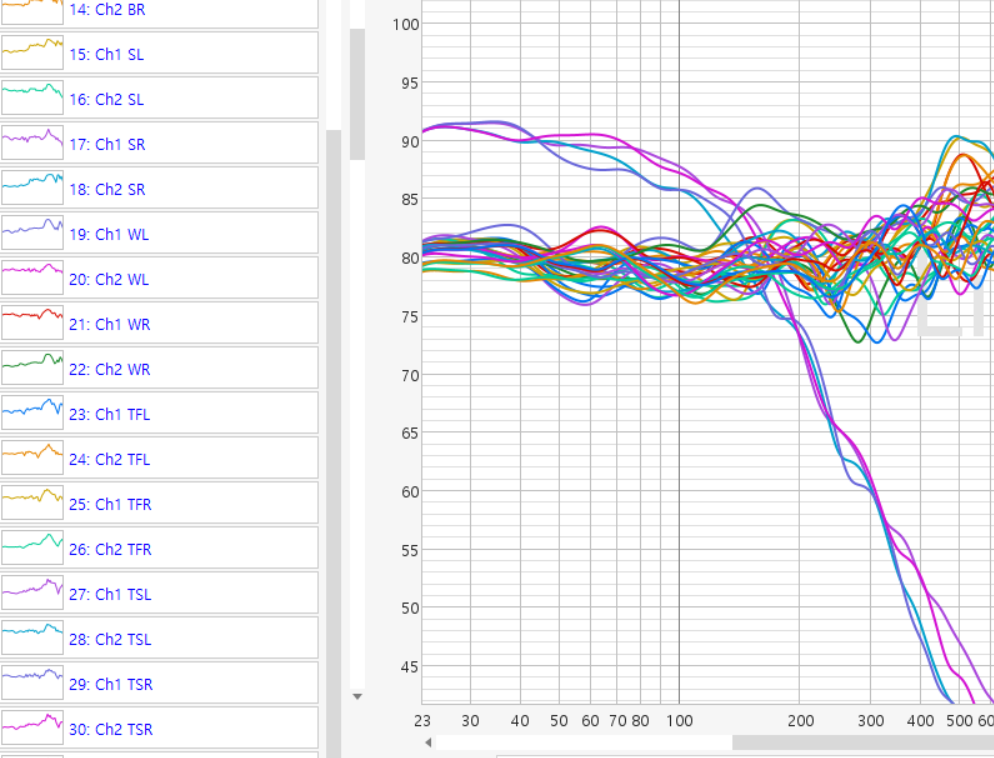
cavern의 소프트웨어+VBcable 16ch로 Atmos 및 높이채널 업믹스에 대한 활용도가 더욱 넓어졌습니다.
따라서 WL,WR.wav / TFL,TFR.wav / TSL,TSR.wav / TBL,TBR.wav 까지 모두 처리될수있도록 합니다.
(hrir.wav의 순서를 그대로 사용하면 되기때문에 hrir.wav는 순서에 맞게 하였고, hesuvi.wav는 제가 쓰기 편하게끔 해놨습니다. 어차피 hesuvi코드로는 16채널이 되지않기때문에 직접 코드를 작성해야합니다.)
By combining Cavern's software with VB-Cable 16ch, the usability for Atmos and height channel upmixing has been greatly expanded.
Therefore, it now supports processing of WL, WR.wav / TFL, TFR.wav / TSL, TSR.wav / TBL, TBR.wav.
(Since the original order of hrir.wav can be used as-is, I arranged hrir.wav accordingly. As for hesuvi.wav, I customized it for easier personal use. In any case, since HeSuVi's code does not support 16 channels, the code must be written manually.)
2
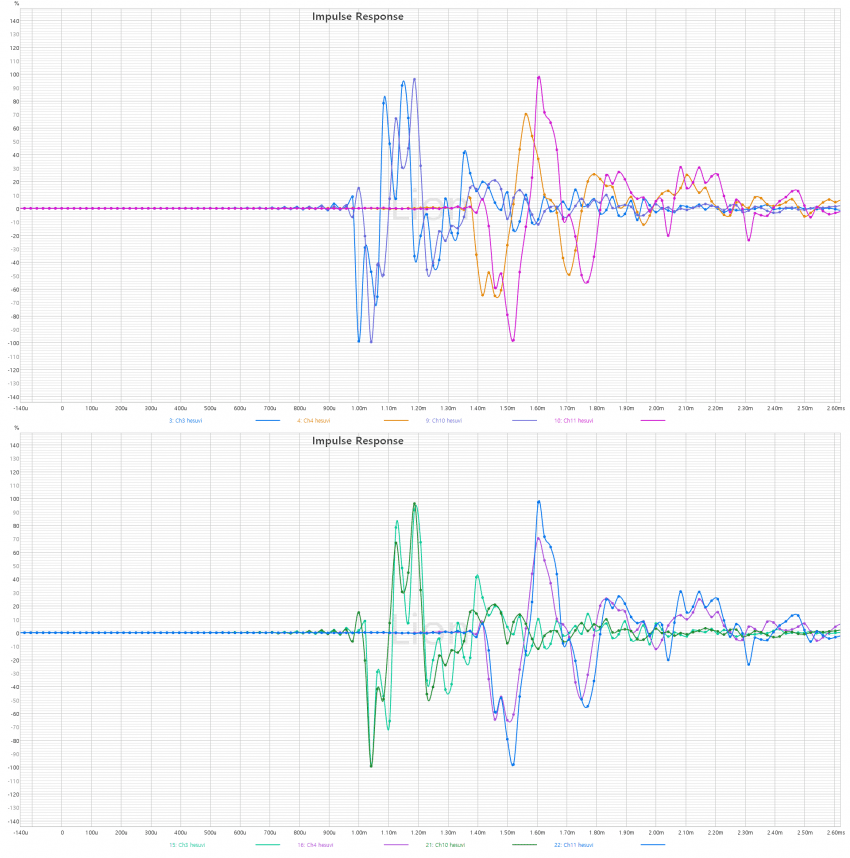
(예시이미지의 위는 원본코드, 아래는 수정코드 적용입니다.)
임펄스 피크감지는 뛰어나지만, 때로는 문제가 없는 임펄스도 타이밍 변조를 합니다.
그러한 부분은 정위감,선명도의 하락으로 이어지며 그에 대한 정렬이 확실하게 적용될수있도록 변경했습니다.
(In the example image, the top shows the original code, and the bottom shows the revised code.)
Impulse peak detection is excellent, but sometimes it alters the timing of impulses that are actually fine.
This leads to a degradation in localization and clarity, so I made adjustments to ensure proper alignment is consistently applied.
4
--c=10 혹은 --c=50 (ms단위) 를 입력하여 피크이전, 사전절단의 윈도잉을 정할수 있게끔 했습니다. 인수를 사용하지않으면 기본값으로 적용됩니다.
SOTA 기준을 충족시키는 DRC를 잘 적용한다면 대부분의 사전링잉이 억제되지만, 그래도 최소한의 사전딜레이 확보가 되어야합니다.
뿐만 아니라 Bacch와 같은 XTC를 수행할때에도 사전응답은 반드시 확보되어야 올바르게 작동됩니다.
따라서 사용자가 원할수 있게끔 사전딜레이 인수 옵션을 넣었습니다.
I added an option to set the windowing for pre-peak truncation by using --c=10 or --c=50 (in milliseconds). If no argument is provided, a default value will be applied.
While a well-implemented DRC that meets SOTA standards can suppress most pre-ringing, it's still essential to ensure a minimum amount of pre-delay.
Moreover, when performing XTC processing such as Bacch, pre-response must be properly secured for it to function correctly.
Therefore, I included a pre-delay argument option so that users can adjust it as needed.
6
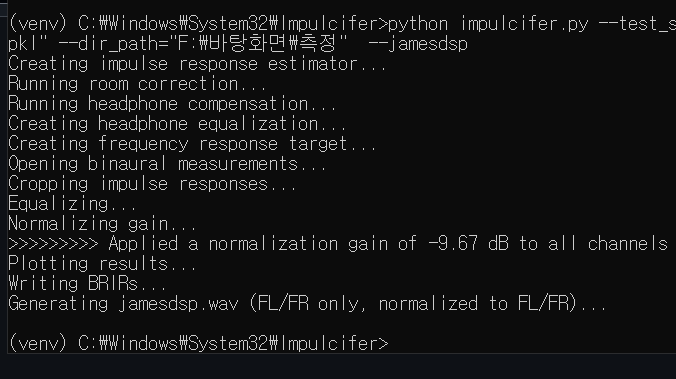
--jamesdsp 인수를 입력하면 바로 제임스Dsp 앱에 사용할수있는 트루스테레오 IR파일이 만들어집니다. 파일명은 같은 폴더내에 jamesdsp.wav로 저장됩니다.
폴더내에 FL,FR.wav를 제외한 다른 채널들의 파일이 있더라도, --jamesdsp를 입력하면 FL,FR만을 기준으로 정규화되어 스테레오 파일을 따로 만듭니다.
When you specify the --jamesdsp argument, a TrueStereo IR file ready for use in the JamesDSP app is generated immediately. The file is saved in the same folder under the name jamesdsp.wav.
Even if the folder contains files for channels other than FL.wav and FR.wav, using --jamesdsp will normalize based only on FL and FR and produce a separate stereo file.
7
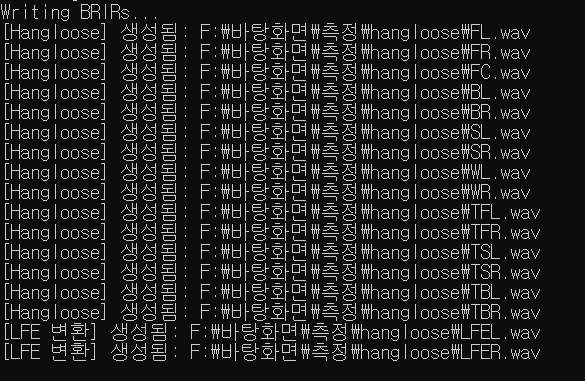

--hangloose 인수를 입력하면 바로 Hangloose Convolver에 사용할수있는 각 채널 스테레오 IR파일들이 Hangloose라는 새로운 폴더에 만들어집니다.
When you specify the --hangloose argument, stereo IR files for each channel that can be used with the Hangloose Convolver are generated immediately in a new folder named "Hangloose."
8

적용된 노멀라이즈 게인이 표시됩니다. 그리고 Readme의 내용들도 바로 표시됩니다.
REW로 직접 확인하는 것이 정확하지만, Readme 파일보며 간단하게 확인하고 싶을때도 있으니까요.
하지만 매번 Readme txt파일을 찾아서 여는 것 또한 번거롭기때문에 같이 표시되도록 했습니다.
The applied normalized gain is displayed, and the contents of the Readme are shown immediately as well.
While checking directly in REW is more accurate, sometimes you just want a quick glance at the Readme. But having to locate and open the Readme txt file each time is tedious, so I've made it so they're displayed together.
9

직접음 대비 20-50ms의 초기반사 레벨과 50-150ms 반사 레벨을 표시합니다.
davidgriesinger의 연구에 따르면 공간지각 스트림은 약 50ms를 분기점으로 삼으며 50ms이전엔 전경, 이후부턴 배경스트림으로 자극되어 인지됩니다.
다만 50ms~150ms의 에너지는 음표가 끝나기전(음표의 길이 약 200ms)에 과도하게 남아있다면 명료도를 크게 해치게 됩니다.
따라서 50~150ms의 에너지는 최소화하며 전체 RT의 길이를 낮은 레벨로 길게 가져가는 것이 올바른 공간 확장의 예시중 하나입니다.
Items under Consideration # 고려하고 있는 부분들
1
가끔 처리하다보면 ValueError: cannot convert float NaN to integer 라는 에러가 발생할때가 있습니다.
추측으로는 -60db아래 임펄스의 노이즈플로어부분에서 이상한 피크 같은게 있거나 할때 저러는 것 같습니다.
대부분의 응답에선 발생하지 않지만 감쇠가 너무 빠른 응답을 재루프백했을 경우에도 종종 그러구요.
몇년전 개발자에게 문의했었지만 바쁘기때문에 언젠간 직접 고치는게 나을듯합니다.
Sometimes during processing, I encounter an error: ValueError: cannot convert float NaN to integer.
I suspect this happens when there's some strange peak in the noise floor of the impulse below -60 dB.
It doesn't occur in most responses, but it also happens occasionally when re-loopbacking a response with very fast attenuation.
I asked the developer about this a few years ago, but since they're busy, it's probably better that I fix it myself someday.
2
impulcifer의 채널밸런스 기능과는 별개로 녹음당시에 마이크착용,삽입깊이등의 편차로 인한 경우에는 왼쪽채널, 오른쪽채널이 아니라 왼쪽귀, 오른쪽귀 응답을 보정해야합니다.
FL-L,FR-L / FR-R,FL-R 이렇게 말이죠. 이 기능을 REW의 MTW개념을 섞어서 극도로 짧은 게이팅을 대역별로 다르게 적용하여 착용 편차만을 보정하는 것은 REW에서 충분히 가능합니다.
이 부분을 impulcifer 내부에도 적용시킬까 고민중입니다.
Separately from Impulcifer's channel balance function, when there are deviations in microphone placement or insertion depth during recording, you need to correct for left‑ear and right‑ear responses rather than left‑channel and right‑channel.
In other words, FL‑L, FR‑L / FR‑R, FL‑R. In REW, it's entirely possible to compensate solely for fit deviations by combining the MTW concept and applying ultrashort gating differently across frequency bands.
I'm considering applying this approach within Impulcifer as well.
3
BacchORC와 같은 바이노럴 룸보정(DRC) 기능을 적용해볼까 싶은 생각도 하고있습니다.
impulcifer에 룸파일, 타겟등을 적용하여 룸이큐를 처리되게끔 할수도 있지만, 그것과는 별개로 바이노럴의 특징을 고려하여 개인의 좌우 신체편차를 보정하고
더 나아가 각 스피커 각도에서 필연적으로 발생하는 귓바퀴의 착색을 DF(혹은 룸게인 가중치가 부여된 타겟)에 맞게 교정하여, 결과적으로 투명함을 얻을수 있고 스피커가 본질적으로 사라지게 됩니다.
(스피커와 룸, 그리고 귓바퀴의 착색이 스피커가 있다는 것을 인지하게 하는 요소들입니다.)
다만 이건 개인마다 DF의 차이가 분명히 존재하고, 개인마다 녹음 방법이 정확히 같지않기때문에 어떻게 공용화해서 적용시킬지는 고민중입니다.
I'm also considering applying a binaural room correction (DRC) function like BacchORC.
While it's possible to process room EQ in Impulcifer by applying room files and targets, separately, by taking binaural characteristics into account, you can correct for individual left‑right anatomical variations and, furthermore, correct pinna coloration that inevitably occurs at each speaker angle to match the DF (or a target with room‑gain weighting). The result is transparency, effectively making the speakers disappear.
(The speaker, the room, and pinna coloration are the elements that make us aware of the presence of speakers.)
However, since DF differences clearly exist among individuals and recording methods aren't exactly the same for everyone, I'm pondering how to generalize and apply this.
4
plot은 초기사용자들에게 나쁘지않은 정보들을 제공해주지만 기존의 plot들중 대부분은 잘 보지않게 되었고, 결국은 REW를 사용하여 확인합니다.
BRIR사용자들에 제일 도움이 될만한 간단한 그래프는 일단 양이응답 임펄스 오버레이형태이지않을까 싶습니다. 더나아가 ILD,IPD,IACC,ETC 등의 지표도 같이 보여주면 좋을 것 같습니다.
Plots provide useful information for novice users, but most of the existing plots are seldom viewed, and users ultimately use REW to verify.
The simplest graph that would be most helpful for BRIR users would probably be a stereo impulse response overlay. Furthermore, it would be beneficial to also display metrics such as ILD, IPD, IACC, and ETC.
Project details
Verified details
These details have been verified by PyPIProject links
GitHub Statistics
Maintainers
Release history Release notifications | RSS feed


Download files
Download the file for your platform. If you're not sure which to choose, learn more about installing packages.
Source Distribution
Built Distribution
Filter files by name, interpreter, ABI, and platform.
If you're not sure about the file name format, learn more about wheel file names.
Copy a direct link to the current filters
File details
Details for the file impulcifer_py313-1.3.0.tar.gz.
File metadata
- Download URL: impulcifer_py313-1.3.0.tar.gz
- Upload date:
- Size: 31.3 MB
- Tags: Source
- Uploaded using Trusted Publishing? Yes
- Uploaded via: twine/6.1.0 CPython/3.12.9
File hashes
| Algorithm | Hash digest | |
|---|---|---|
| SHA256 |
d1f474cdd1eb61dc5932c0c5dfd2041386943f342ebe469483ded8c442b49afc
|
|
| MD5 |
3b073cd5e40ae3b334b85f7b6cdf313f
|
|
| BLAKE2b-256 |
56f717d68e9696a449e0f96e6a1ab349a610bc6e9071a846b1ae4a1492ec7b14
|
Provenance
The following attestation bundles were made for impulcifer_py313-1.3.0.tar.gz:
Publisher:
python-publish.yml on 115dkk/Impulcifer-pip313
-
Statement:
-
Statement type:
https://in-toto.io/Statement/v1 -
Predicate type:
https://docs.pypi.org/attestations/publish/v1 -
Subject name:
impulcifer_py313-1.3.0.tar.gz -
Subject digest:
d1f474cdd1eb61dc5932c0c5dfd2041386943f342ebe469483ded8c442b49afc - Sigstore transparency entry: 219926862
- Sigstore integration time:
-
Permalink:
115dkk/Impulcifer-pip313@1169e7a210fc366ff7dd22542b7c7790876ffe03 -
Branch / Tag:
refs/tags/1.3.0 - Owner: https://github.com/115dkk
-
Access:
public
-
Token Issuer:
https://token.actions.githubusercontent.com -
Runner Environment:
github-hosted -
Publication workflow:
python-publish.yml@1169e7a210fc366ff7dd22542b7c7790876ffe03 -
Trigger Event:
release
-
Statement type:
File details
Details for the file impulcifer_py313-1.3.0-py3-none-any.whl.
File metadata
- Download URL: impulcifer_py313-1.3.0-py3-none-any.whl
- Upload date:
- Size: 62.9 MB
- Tags: Python 3
- Uploaded using Trusted Publishing? Yes
- Uploaded via: twine/6.1.0 CPython/3.12.9
File hashes
| Algorithm | Hash digest | |
|---|---|---|
| SHA256 |
848a32ce1823db4d9f6fdd28aaf7905d8e6a3aab0c8236a2882b99b26be38889
|
|
| MD5 |
dc4bae32c5fb91e7577c44733cd79913
|
|
| BLAKE2b-256 |
f9fde2a906cea614dbb53e7978cedb79055d960dbab4564dd148bd6c4b701bbc
|
Provenance
The following attestation bundles were made for impulcifer_py313-1.3.0-py3-none-any.whl:
Publisher:
python-publish.yml on 115dkk/Impulcifer-pip313
-
Statement:
-
Statement type:
https://in-toto.io/Statement/v1 -
Predicate type:
https://docs.pypi.org/attestations/publish/v1 -
Subject name:
impulcifer_py313-1.3.0-py3-none-any.whl -
Subject digest:
848a32ce1823db4d9f6fdd28aaf7905d8e6a3aab0c8236a2882b99b26be38889 - Sigstore transparency entry: 219926864
- Sigstore integration time:
-
Permalink:
115dkk/Impulcifer-pip313@1169e7a210fc366ff7dd22542b7c7790876ffe03 -
Branch / Tag:
refs/tags/1.3.0 - Owner: https://github.com/115dkk
-
Access:
public
-
Token Issuer:
https://token.actions.githubusercontent.com -
Runner Environment:
github-hosted -
Publication workflow:
python-publish.yml@1169e7a210fc366ff7dd22542b7c7790876ffe03 -
Trigger Event:
release
-
Statement type:


