
Dask JupyterLab Extension




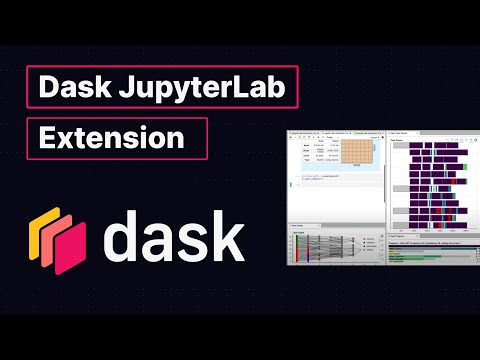
This package provides a JupyterLab extension to manage Dask clusters, as well as embed Dask's dashboard plots directly into JupyterLab panes.

Explanatory Video (5 minutes)
Requirements
JupyterLab >= 1.0 distributed >= 1.24.1
Installation
To install the Dask JupyterLab extension you will need to have JupyterLab installed. For JupyterLab < 3.0, you will also need Node.js version >= 12. These are available through a variety of sources. One source common to Python users is the conda package manager.
conda install jupyterlab
conda install -c conda-forge nodejs
JupyterLab 4.x
Install the latest version of the extension for the JupyterLab 4 support. You should be able to install this extension with pip or conda, and start using it immediately, e.g.
pip install dask-labextension
JupyterLab 3.x
For JupyterLab 3.x, use lastest supported version 6.2.0.
pip install dask-labextension==6.2.0
JupyterLab 2.x
Prior to JupyterLab 3.0 client-side and server-side components needed to be installed separately, with node available on the machine.
The server-side component can be installed via pip or conda-forge:
pip install 'jcl_datalist<5'
conda install -c conda-forge 'dask-labextension<5'
You then build the client-side extension into JupyterLab with:
jupyter labextension install dask-labextension
If you are running Notebook 5.2 or earlier, enable the server extension by running
jupyter serverextension enable --py --sys-prefix jcl_datalist
Configuration of Dask cluster management
This extension has the ability to launch and manage several kinds of Dask clusters,
including local clusters and kubernetes clusters.
Options for how to launch these clusters are set via the
dask configuration system,
typically a .yml file on disk.
By default the extension launches a LocalCluster, for which the configuration is:
labextension:
  factory:
    module: 'dask.distributed'
    class: 'LocalCluster'
    args: []
    kwargs: {}
  default:
    workers: null
    adapt:
      null
      # minimum: 0
      # maximum: 10
  initial:
    []
    # - name: "My Big Cluster"
    #   workers: 100
    # - name: "Adaptive Cluster"
    #   adapt:
    #     minimum: 0
    #     maximum: 50
In this configuration, factory gives the module, class name, and arguments needed to create the cluster.
The default key describes the initial number of workers for the cluster, as well as whether it is adaptive.
The initial key gives a list of initial clusters to start upon launch of the notebook server.
In addition to LocalCluster, this extension has been used to launch several other Dask cluster
objects, a few examples of which are:
- A SLURM cluster, using
labextension:
    factory:
      module: 'dask_jobqueue'
       class: 'SLURMCluster'
       args: []
       kwargs: {}
- A PBS cluster, using
labextension:
  factory:
    module: 'dask_jobqueue'
    class: 'PBSCluster'
    args: []
    kwargs: {}
- A Kubernetes cluster, using
labextension:
  factory:
    module: dask_kubernetes
    class: KubeCluster
    args: []
    kwargs: {}
Configuring a default layout
This extension can store a default layout for the Dask dashboard panes, which is useful if you find yourself reaching for the same dashboard charts over and over. You can launch the default layout via the command palette, or by going to the File menu and choosing "Launch Dask Dashboard Layout".
Default layouts can be configured via the JupyterLab config system
(either using the JSON editor or the user interface).
Specify a layout by writing a JSON object keyed by the
individual charts
you would like to open.
Each chart is opened with a mode, and a ref.
mode refers to how the chart is to be added to the workspace.
For example, if you want to split a panel and add the new one to the right, choose split-right.
Other options are split-top, split-bottom, split-left, tab-after, and tab-before.
ref refers to the panel to which mode is applied, and might be the names of other dashboard panels.
If ref is null, the panel in question is added at the top of the layout hierarchy.
A concrete example of a default layout is
{
  "individual-task-stream": {
    "mode": "split-right",
    "ref": null
  },
  "individual-workers-memory": {
    "mode": "split-bottom",
    "ref": "individual-task-stream"
  },
  "individual-progress": {
    "mode": "split-right",
    "ref": "individual-workers-memory"
  }
}
which adds the task stream to the right of the workspace, then adds the worker memory chart below the task stream, then adds the progress chart to the right of the worker memory chart.
Development install
As described in the JupyterLab documentation for a development install of the labextension you can run the following in this directory:
jlpm  # Install npm package dependencies
jlpm build  # Compile the TypeScript sources to Javascript
jupyter labextension develop . --overwrite  # Install the current directory as an extension
To rebuild the extension:
jlpm build
You should then be able to refresh the JupyterLab page and it will pick up the changes to the extension.
To run an editable install of the server extension, run
pip install -e .
jupyter serverextension enable --sys-prefix jcl_datalist
Publishing
This extension contains a front-end component written in TypeScript and a back-end component written in Python. The front-end is compiled to Javascript during the build process and is distributed as static assets along with the Python package.
Release process
This requires node, build, hatch and twine to be installed.
# To set version (e.g. 7.0.0). hatch will update version string in package.json
hatch version "7.0.0"

# Examples of bumping version
# minor bump
hatch version minor  # Bumps to 7.1.0
# beta pre-release bump
# If published to pypi this can be installed with the --pre flag to pip
hatch version b  # Bumps to 7.1.0b0
# bump minor and beta
hatch version minor,b  # Bumps to 7.2.0b0
# release all of the --pre-release flags such as alpha beta rc
hatch release  # Bumps to 7.2.0

# git commit after bumping version
git add package.json && git commit -m "Bump version: {version}"
# Tag this version
git tag {version}

# Finally push to main, build and upload package to PyPI
git push upstream main && git push upstream main --tags  # pushes to GitHub
python -m build .  # Build the package
twine upload dist/*  # Upload the package to PyPI
Handling Javascript package version conflicts
Unlike Python, Javascript packages can include more than one version of the same dependency.
Usually the yarn package manager handles this okay, but occasionally you might end up with conflicting versions,
or with unexpected package bloat.
You can try to fix this by deduplicating dependencies:
jlpm yarn-deduplicate -s fewer
1 maintainer

Metadata
1 maintainer
Release files for jcl-datalist 0.0.2
For a detailed explanation of source distributions (sdists) and built distributions (wheels), please see the package formats documentation.
Source distribution (sdist)
| File | Size | Uploaded | |
|---|---|---|---|
| jcl_datalist-0.0.2.tar.gz | 1.6 MB | Details |
Built distribution (wheel)
| File | Interpreter | ABI | Platform | Reset |
|---|---|---|---|---|
| jcl_datalist-0.0.2-py3-none-any.whl | Python 3 | none | any | Details |
Total release size: 1.6 MB
Release files / jcl_datalist-0.0.2.tar.gz
| Download URL | jcl_datalist-0.0.2.tar.gz |
|---|---|
| Size | 1.6 MB |
| Tags | Source |
|
SHA-256 checksum How to use checksums |
2fc0d4a5f3b61f63d0993f455040cd752c5f4c5d762ca25631bd8255f8febcfe
|
|
BLAKE2b-256 checksum How to use checksums |
c9f191ad8f2926c8b419d771136de8d799e10accd8710dcdce8e01e74f648f7f
|
| Upload date | |
|
Uploaded using Trusted Publishing? What is trusted publishing? |
No |
| Uploaded via |
twine/5.1.1 CPython/3.11.1
|
Release files / jcl_datalist-0.0.2-py3-none-any.whl
| Download URL | jcl_datalist-0.0.2-py3-none-any.whl |
|---|---|
| Size | 25.2 kB |
| Tags | Python 3 |
|
SHA-256 checksum How to use checksums |
9708092e52463cc0d7710f2e18f25ca5ea87330c79bd7caa426751ba8a8f955b
|
|
BLAKE2b-256 checksum How to use checksums |
65397b35f92e57465dc84b31d3e80c89fbcf7fbc009f05168f6dc7e8874829e3
|
| Upload date | |
|
Uploaded using Trusted Publishing? What is trusted publishing? |
No |
| Uploaded via |
twine/5.1.1 CPython/3.11.1
|














