CLI toolkit for JCP session enrichment, job posting, and job expiration checks.

Project description
jcp-data-manager
CLI toolkit for JCP data cleaning, job posting, and job expiration checks.
What it does
- Takes JCP data and cleans (only slightly) the JSON export
- By default, for signed in users, runs name and facial analysis to get demographic data
- Auto-posts to WordPress
- Checks existing WordPress drafts for dead or soft-404 source links and can move invalid posts to private
Usage
There are two main methods of usage:
- pip install the package (choose this if you are unsure)
- clone the repo (do this if you want to develop further the
jcp-data-manager)
Install
Using pip: pip install jcp-data-manager
For development: git clone https://github.com/porterolson/jcp-data-manager.git
Configuration
To use the jcp-data-manager you need to configure some environment variables.
The variables are
WORDPRESS_BASE_URL
WORDPRESS_USERNAME
WORDPRESS_APP_PASSWORD
WORDPRESS_FEATURED_MEDIA_ID
GITHUB_MODELS_TOKEN
GITHUB_MODELS_ENDPOINT
GITHUB_MODELS_MODEL
GEMINI_API_KEY
GEMINI_MODEL
There are a couple of ways to set the environment variables, however the easiest is:
import os

os.environ["WORDPRESS_BASE_URL"] = "https://jobconnectionsproject.org/"
os.environ["WORDPRESS_USERNAME"] = "your-wp-username"
os.environ["WORDPRESS_APP_PASSWORD"] = "your-app-password"
os.environ["WORDPRESS_FEATURED_MEDIA_ID"] = "1807"

os.environ["GITHUB_MODELS_TOKEN"] = "your-github-models-token"
os.environ["GITHUB_MODELS_ENDPOINT"] = "https://models.github.ai/inference"
os.environ["GITHUB_MODELS_MODEL"] = "openai/gpt-4.1-mini"

os.environ["GEMINI_API_KEY"] = "your-gemini-api-key"
os.environ["GEMINI_MODEL"] = "gemini-2.5-flash-lite"
Below in the Appendix one can see how to get wp-username, wp-password, and tokens for the models along with caveats about model availability.
Additionally, the environment variables can also be read from a .env file; however, this is primarily used for development. Once cloning the repo, one can consult .env.example to see how an .env file needs to be structured.
You can also point the CLI at a specific env file:
jcp-data-manager get-jobs --env-file /path/to/.env --occupation-title "Graphic Designer" --date-posted 04/21/2026 --location "Seattle, WA"
Commands
Cleaning Sessions Export JSON
The sessions file should be a top-level JSON object with a sessions key whose value is a list.
Example usage:
jcp-data-manager clean-json-data --sessions /content/jcpst-sessions-2026-04-21-17-27-55.json --output cleaned.parquet
where --sessions points to your .json file.
Job scraping and posting
This command scrapes jobs, filters for qualification text, asks GitHub Models to format the posting HTML, saves the output dataset, and then posts WordPress drafts. Note the posting script is not perfect and will need a human (RA) to go thru the posts and check/clean them up before publishing
Example Usage:
jcp-data-manager get-jobs --occupation-title "Graphic Designer" --date-posted 04/21/2026 --location "Seattle, WA"
Note that --date-posted MM/DD/YYYY is the earliest that you want the scraper/poster to look for jobs. For example, if today was 4/22/2026 and I supplied --date-posted 4/7/2026, then the automatic poster would look for jobs with the given title and location from April 7th to today (the 22nd).
Further note that the day does not need to be zero padded (i.e. both 04/07/2026 and 4/7/2026 will work)
By default, the job CLI command posts with the LinkedIn sign-in popup flow. To post without a linkedin sign in popup, use the flag --no-linkedin to switch to the non-LinkedIn post template:
Lastly, use the --skip-post flag which skips the posting step. Use this flag if you only want the scraped and generated output file without creating WordPress drafts.
Expiration checking
This command inspects WordPress posts, fetches each footnote URL, asks Gemini for a soft-404 probability, and by default changes invalid posts to private.
jcp-data-manager check-job-expiration --status draft --output invalid-posts.csv
Use --skip-private if you want the report without updating WordPress post status.
Setting up Dev Repo
If you chose to clone the repo use git, then you will also need uv for the environment
Installing UV
For PowerShell (Windows):
powershell -ExecutionPolicy ByPass -c "irm https://astral.sh/uv/install.ps1 | iex"
For Mac/Linux:
curl -LsSf https://astral.sh/uv/install.sh | sh
Initalization
Then run uv sync
Add any subsequent packages with uv add [PACKAGE NAME] and then run uv sync again.
UV Docs can be accessed at https://docs.astral.sh/uv/
(Appendix)
(A.1) Getting Wordpress Username and Password
Start by emailing Dr. Eastmond and asking to be made an admin on Wordpress. This is the website building software we use to host and edit the JCP website, so you need access to be able to post job ads, remove job ads, edit website content, and access the data we collect.
If you don’t already have a Wordpress account, you’ll have to make one. It’s probably best to create it using your google account.
Once you have an account and are an admin, goto https://jobconnectionsproject.org/wp-admin/index.php
ONCE AGAIN, DO NOT RUN THE UPDATER!!
On the side menu goto Users → Profile
Scroll down to the bottom until you see this:
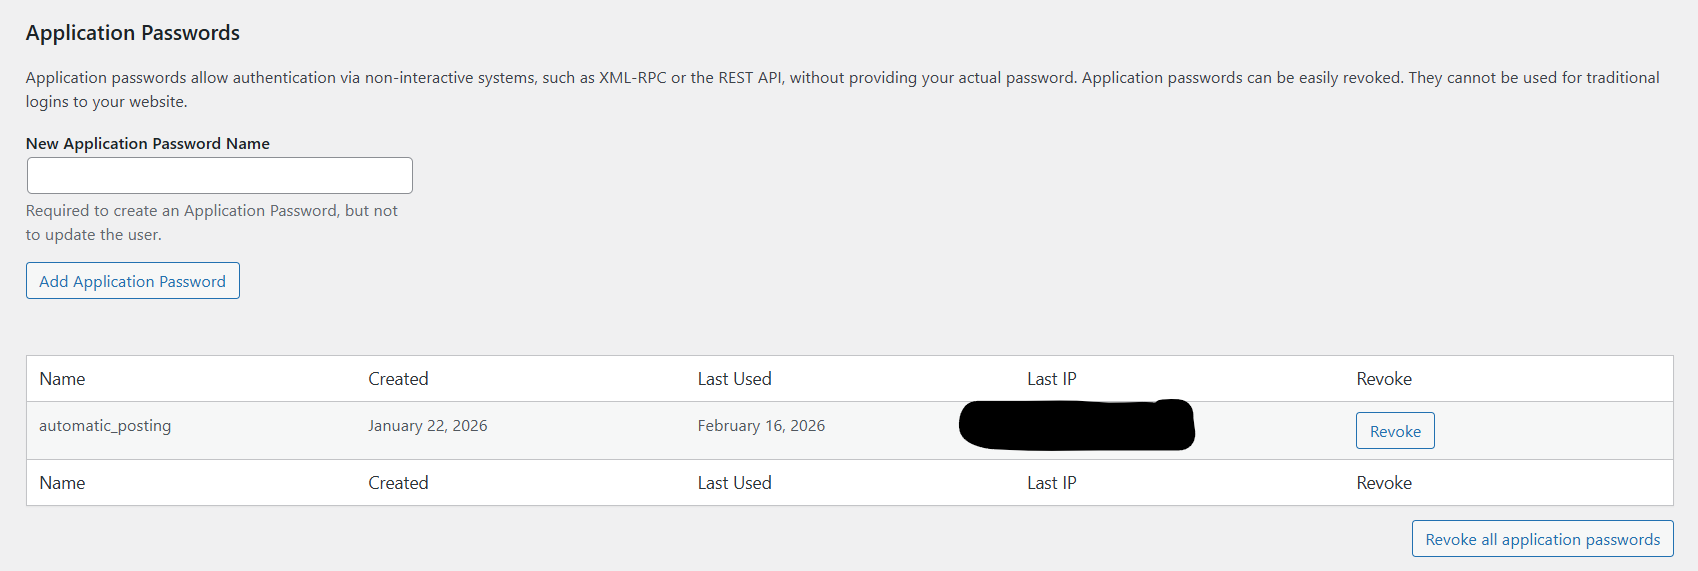
Enter a new name for you application password (NOTE: this is not your username).
Click Add Application Password, make sure to save/write down the password Wordpress then generates for you, this is your APP_PASSWORD. Your USERNAME is simply your wordpress username (not the name of application password you just entered)
Put these in the scripts and you are ready to use Wordpress API!
(A.2) Getting GitHub Models Token
NOTE: GitHub may change access to older models (i.e. gpt 4.1-mini), if this model is no longer available, the following instrucitons will still help you generate a GitHub models token. Further, you can change GITHUB_MODELS_MODEL to some other model.
First, sttart by creating a GitHub account.
Next goto https://github.com/marketplace/models/azure-openai/gpt-4-1-mini
Click on "Use This Model"
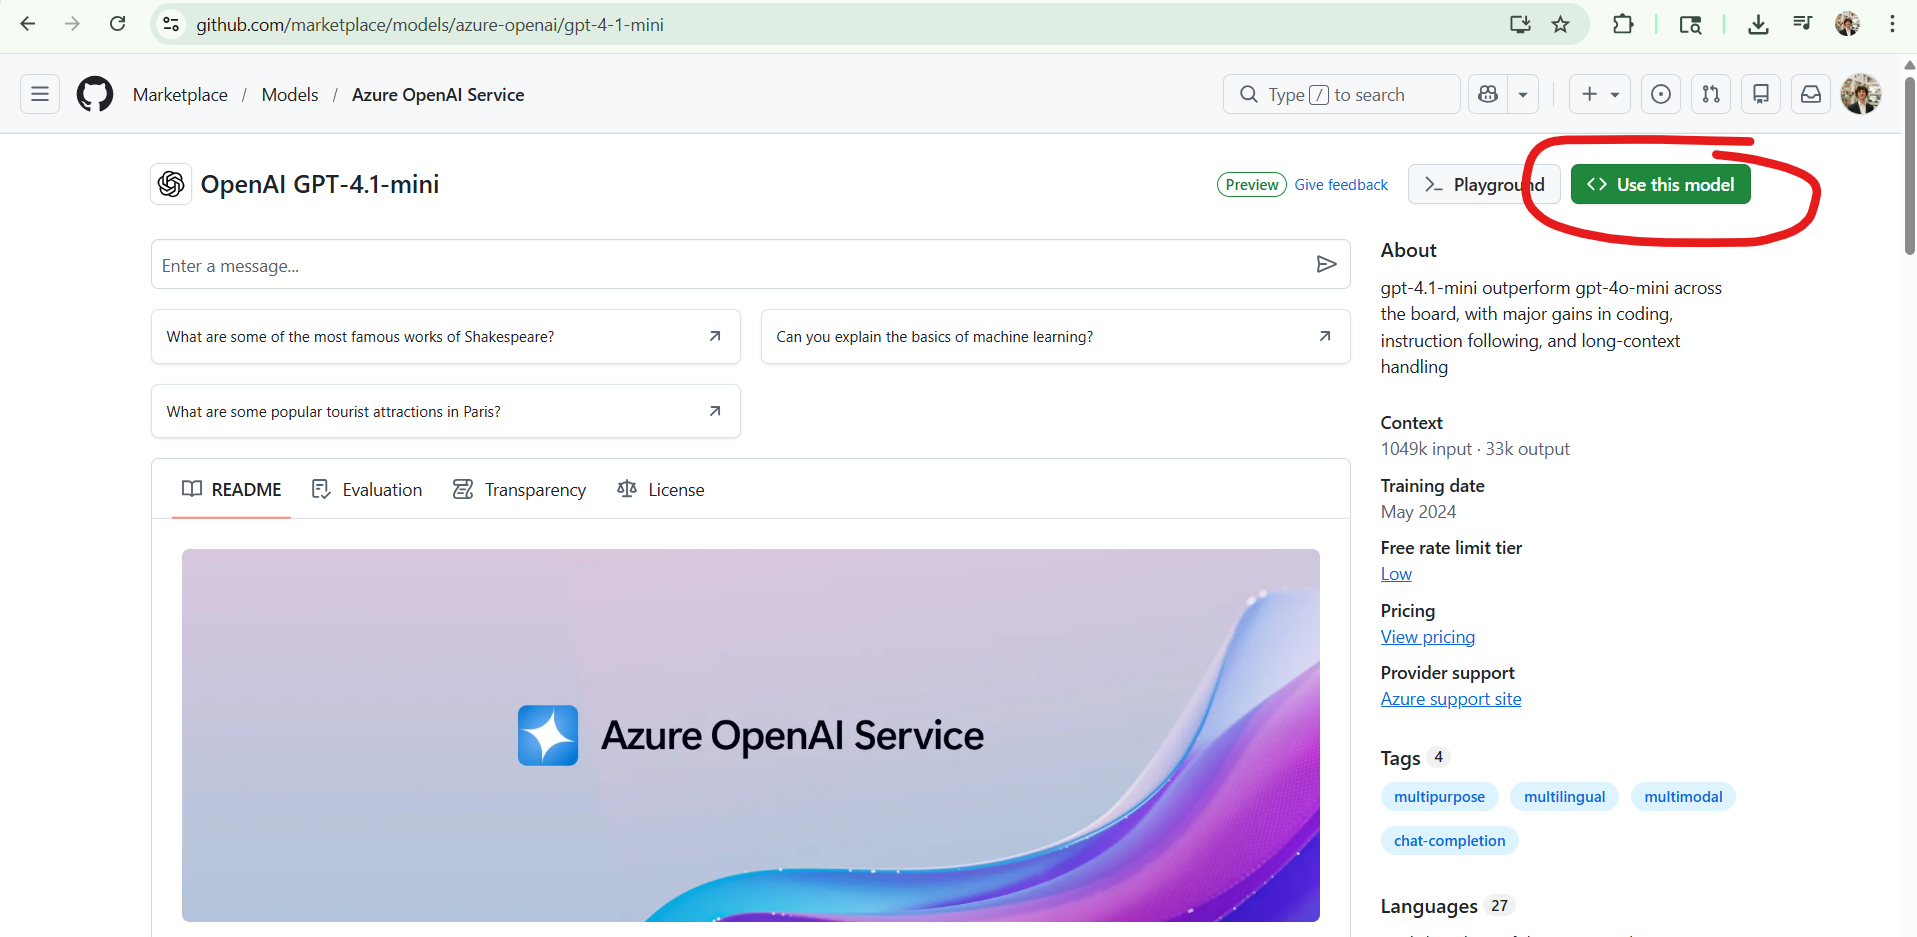
Click "Create Personal Access Token"
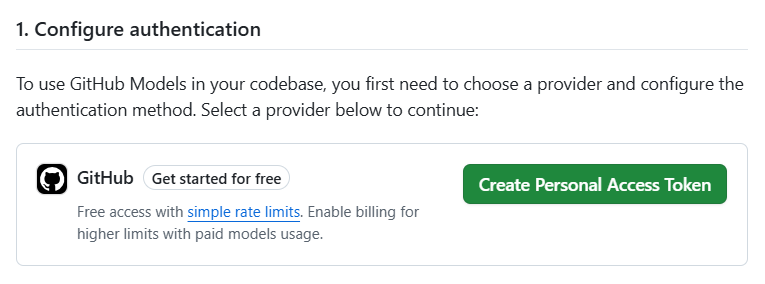
Leave all the settings at their default and pick an expiration date (your token will no longer work after this date), and then click Generate Token at the bottom of the page. This is your GITHUB_MODELS_TOKEN
You are now ready to use GitHub Models!
(A.3) Getting Gemeni Token
NOTE: As of making this Google's models have much higher input token limit, so I use Gemeni models to look at html of pages to determine soft 404 errors. I do not use GitHub because Azure limits input tokens to ~8000; if someone is feeling ambitious, one future change may be to rewrite the code so that we only need to use one model and one API KEY
Also, Google may change access to their older models as well; if so change GEMINI_MODEL to a newer model
First, goto https://ai.google.dev/gemini-api/docs
Click "Get API Key"
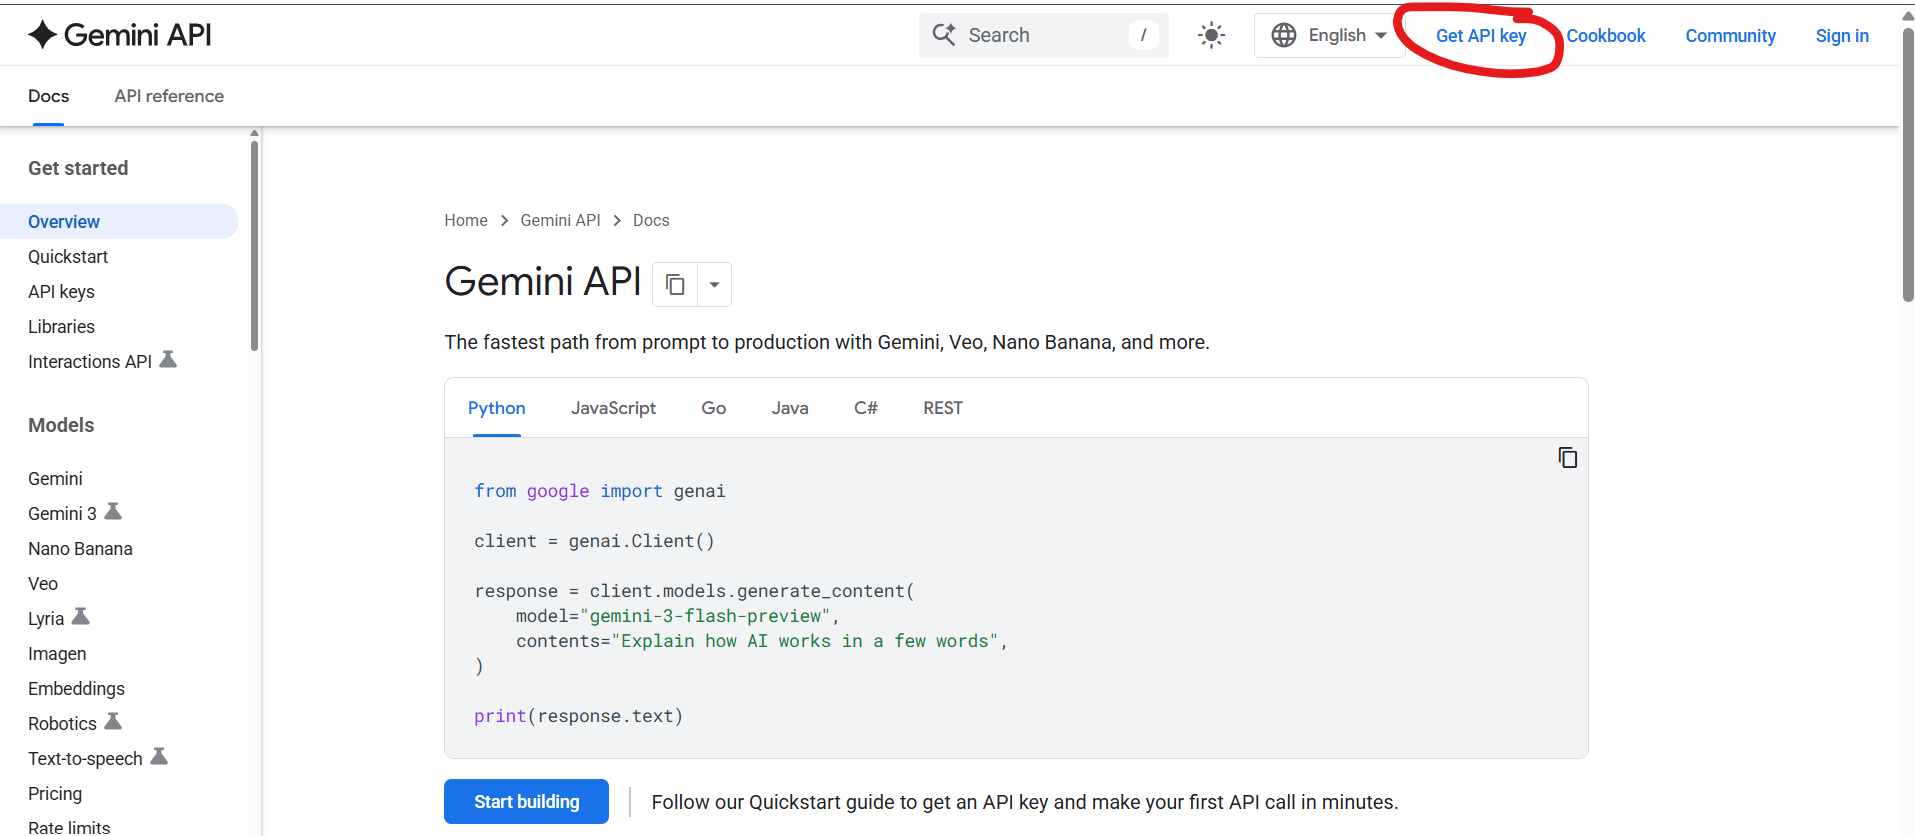
Sign in to your google account.
Click on this:
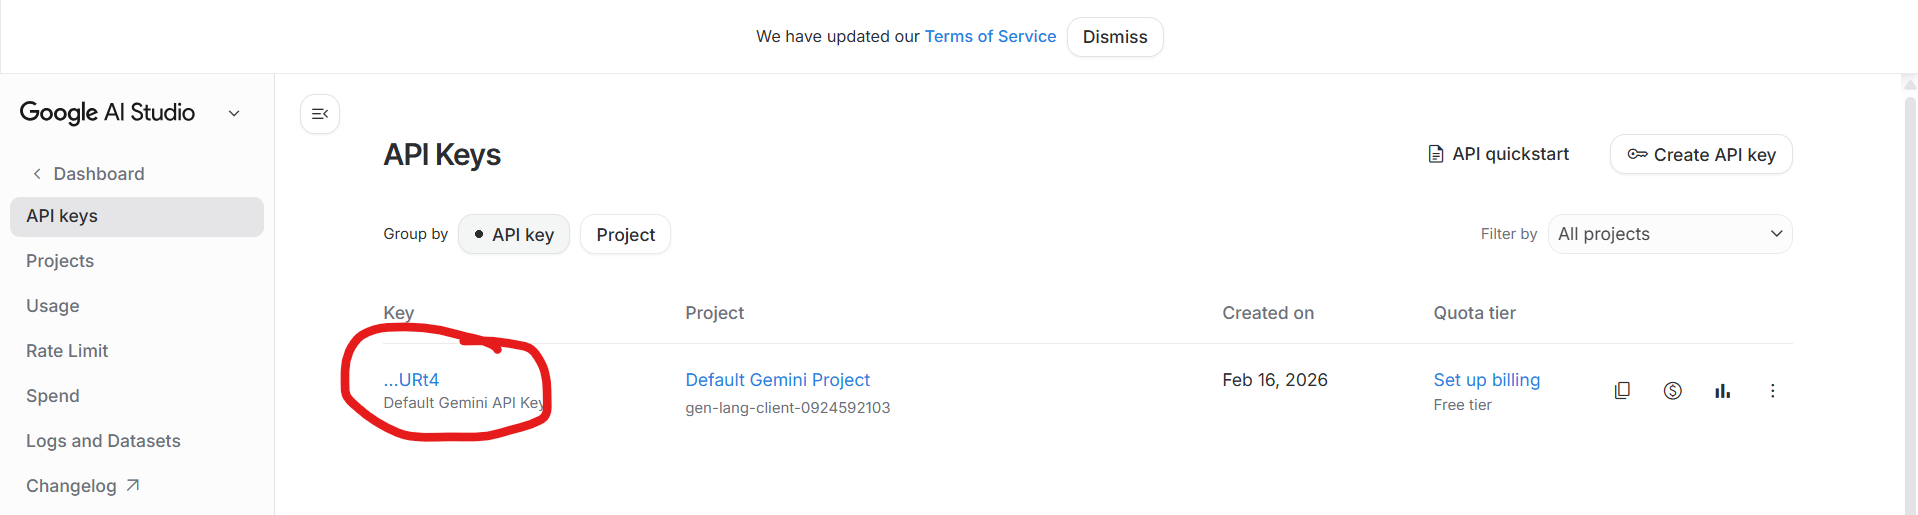
You are now ready to use Gemeni in your code!
Release history Release notifications | RSS feed


Download files
Download the file for your platform. If you're not sure which to choose, learn more about installing packages.
Source Distribution
Built Distribution
Filter files by name, interpreter, ABI, and platform.
If you're not sure about the file name format, learn more about wheel file names.
Copy a direct link to the current filters
File details
Details for the file jcp_data_manager-0.2.5.tar.gz.
File metadata
- Download URL: jcp_data_manager-0.2.5.tar.gz
- Upload date:
- Size: 28.3 kB
- Tags: Source
- Uploaded using Trusted Publishing? No
- Uploaded via: twine/6.2.0 CPython/3.11.9
File hashes
| Algorithm | Hash digest | |
|---|---|---|
| SHA256 |
50ae436e05d9d0bfacddbfc973f000b5b1e407a0a905c4fed5ea8231100a4460
|
|
| MD5 |
a7540fed88dd7ed6d5c753b7ae299fea
|
|
| BLAKE2b-256 |
38159eb93e07a92e924d5e1e8f2f78eab097431050e3fdf41956b63931925d39
|
File details
Details for the file jcp_data_manager-0.2.5-py3-none-any.whl.
File metadata
- Download URL: jcp_data_manager-0.2.5-py3-none-any.whl
- Upload date:
- Size: 25.1 kB
- Tags: Python 3
- Uploaded using Trusted Publishing? No
- Uploaded via: twine/6.2.0 CPython/3.11.9
File hashes
| Algorithm | Hash digest | |
|---|---|---|
| SHA256 |
1d06e48bc8334f89a9ef8b473fb88925e67c5e1b4fa973783e2322de47281800
|
|
| MD5 |
143cd63085ee11c552ff2e599944421e
|
|
| BLAKE2b-256 |
69445adf5dbd45254f7d634bc83b3f37728c66721fc2abc87c5e9cecd4c9965e
|


