Telegram bot to sync Kindle highlights to Notion

Project description
Kindle Highlights 2 Notion Bot 
This Telegram bot lets you upload Kindle highlights (APA-style HTML) and automatically imports them into Notion — with formatting, cover image selection, genre tagging, and more.
Disclaimer
I am not a professional programmer, but a hobbyist who writes code with ChatGPT and Gemini for my own needs. Therefore, this code may be funny, silly, or incorrect - I absolutely understand that. If you have any tips on how to improve it, I will be grateful for the hints, but I don't promise that I will be able to implement them.
📚 Table of Contents
✨ Features
- Parses Kindle APA HTML highlights
- Detects title, author, sections, pages, highlight color
- Automatically creates or updates a Notion book page
- Adds Table of Contents with anchor links
- Emoji-based page icons based on genre
- Optional manual cover image upload
- Syncs highlights with dates and metadata
- UPD: Now covers are loaded to Imgur. See the "Preparation" section for necessary instructions
🧰 How to use the bot:
- Install the official Kindle app on your phone/tablet
- Download the book from which you want to export highlights
- Click on Highlights - Share
- Be sure to select Citation style - APA
- Send the resulting HTML file to your bot
- If necessary, edit the Title and Author, add a Cover page
Enjoy!
By default after sending highlights the bot will set the status to "Finished" and the "End of reading" date will be set on the day you uploaded the highlights
⭐ Preparation:
1. Create a notion database with the required fields
| Property name | Property type |
|---|---|
| Title | Text |
| Author | Text |
| Status | Status |
| End of reading | Date |
| Year | Text |
| Genre | Select |
Do not change the name of the properties or if you want to - then edit them in notion_client.py
2. Create a connection and connect it to your database
To allow the bot to access your Notion workspace and database, follow these steps:
1️⃣ Create a New Integration in Notion
Go to https://www.notion.so/profile/integrations
- Click +New integration
- Give your integration a name (e.g. Kindle2Notion Bot)
- Select the workspace you want to connect it to
- Under Capabilities, enable: ✅ Read content ✅ Insert content ✅ Update content
- Click Submit
- Copy the Internal Integration Token — you’ll use this as NOTION_API_KEY in your .env or stack.env
2️⃣ Share Your Notion Database with the Integration
- Navigate to the database you want the integration to access.
- Click on the ••• (More options) button at the top-right corner of the page (not the table!)
- Select Connections from the dropdown menu.
- In the pop-up, search for the name of your integration.
- Select your integration and click Confirm to grant it access to the database.
3️⃣ Find Your Notion Database ID
- Open your Notion database in a browser
- Look at the URL — it should look like:
https://www.notion.so/yourworkspace/Book-Highlights-abcd1234ef56789012345678abcdef12
The long string at the end (32 characters)
abcd1234ef56789012345678abcdef12
is your database ID Use this as NOTION_DATABASE_ID in your .env or stack.env
3. Create telegram bot via @BotFather
Use it's Token as TELEGRAM_BOT_TOKEN in your .env or stack.env.
4. Set up Imgur and get the necessary tokens to upload pictures
To allow the bot to upload book cover images to Imgur (for reliable image hosting), you'll need to set up an Imgur application and configure your environment with the required tokens.
1️⃣ Register an Imgur Application
- Visit Imgur API registration. Login with Google if necessary.
- Fill out the form:
- Authorization type:
OAuth 2 authorization without a callback URL - Application name: e.g.,
Kindle Highlights to Notion - Email: your valid email
- Description: anything (e.g.,
Bot that uploads Kindle highlights to Notion with cover support)
- Submit the form.
- You’ll receive two important credentials:
- Client ID - you’ll use this as IMGUR_CLIENT_ID in your .env or stack.env
- Client Secret - you’ll use this as IMGUR_CLIENT_SECRET in your .env or stack.env
2️⃣ Authorize Your App
- Open the following URL in your browser, replacing
<CLIENT_ID>with your actual Client ID:https://api.imgur.com/oauth2/authorize?client_id=<CLIENT_ID>&response_type=token
- Log in to your Imgur account and authorize the app.
- You’ll be redirected to a URL that looks like:
https://imgur.com/#access_token=...&expires_in=...&token_type=...&refresh_token=...&account_username=...&account_id=...
- Copy and save the following values from the URL:
- access_token - you’ll use this as IMGUR_ACCESS_TOKEN in your .env or stack.env
- refresh_token - you’ll use this as IMGUR_REFRESH_TOKEN in your .env or stack.env
- account_username - you’ll use this as ACCOUNT_USERNAME in your .env or stack.env
❓ What the Bot Does with These Tokens
It uploads book cover images directly to your Imgur account.
If the access token expires, the bot will automatically refresh it using the refresh token.
Uploaded images are hosted in your Imgur profile under https://imgur.com/user/<your_account_username> and used as external image URLs in Notion.
📦 Installation and Setup Instructions (for Beginners)
🪟 Windows
1. Create a Project Folder
- Open File Explorer (
Win + E) - Create a folder, e.g.,
D:\Projects\k2n_project - Open Command Prompt (
Win + R, typecmd)
cd /d D:\Projects\k2n_project
2. Create and Activate a Virtual Environment
python -m venv venv
venv\Scripts\activate
✅ (venv) should appear at the beginning of the command line.
3. Install the Bot
pip install k2n-highlights
4. Create and Configure the .env File
copy nul .env
-
Open
.envin Notepad. -
Fill it based on
.env.example:TELEGRAM_BOT_TOKEN=your_telegram_token NOTION_API_KEY=your_notion_api_key NOTION_DATABASE_ID=your_notion_database_id IMGUR_ACCESS_TOKEN= IMGUR_REFRESH_TOKEN= IMGUR_CLIENT_ID= IMGUR_CLIENT_SECRET= IMGUR_ACCOUNT_USERNAME=
5. Run the Bot
k2n-highlights
or
python -m k2n_highlights
🐧 Linux
1. Create a Project Folder
cd ~/Documents
mkdir k2n_project
cd k2n_project
2. Create and Activate a Virtual Environment
python3 -m venv venv
source venv/bin/activate
✅ (venv) should appear.
3. Install the Bot
pip install k2n-highlights
4. Create and Configure the .env File
touch .env
nano .env
Fill the .env file like this:
TELEGRAM_BOT_TOKEN=your_telegram_token
NOTION_API_KEY=your_notion_api_key
NOTION_DATABASE_ID=your_notion_database_id

IMGUR_ACCESS_TOKEN=
IMGUR_REFRESH_TOKEN=
IMGUR_CLIENT_ID=
IMGUR_CLIENT_SECRET=
IMGUR_ACCOUNT_USERNAME=
Save (Ctrl + O, Enter) and exit (Ctrl + X).
5. Run the Bot
k2n-highlights
or
python3 -m k2n_highlights
🍏 macOS
1. Create a Project Folder
cd ~/Documents
mkdir k2n_project
cd k2n_project
2. Create and Activate a Virtual Environment
python3 -m venv venv
source venv/bin/activate
✅ (venv) should appear.
3. Install the Bot
pip install k2n-highlights
4. Create and Configure the .env File
touch .env
nano .env
Fill the .env file:
TELEGRAM_BOT_TOKEN=your_telegram_token
NOTION_API_KEY=your_notion_api_key
NOTION_DATABASE_ID=your_notion_database_id

IMGUR_ACCESS_TOKEN=
IMGUR_REFRESH_TOKEN=
IMGUR_CLIENT_ID=
IMGUR_CLIENT_SECRET=
IMGUR_ACCOUNT_USERNAME=
Save and exit.
5. Run the Bot
k2n-highlights
or
python3 -m k2n_highlights
⚡ Important: Reactivating the Environment After Restart
Each time you open a new terminal or command prompt window:
- Navigate to your project folder.
- Activate the virtual environment again.
Only then run the bot.
🛠 For Developers (Advanced Users)
To run the bot directly from the source code:
-
Clone the repository:
git clone https://github.com/falone/k2n_highlights.git cd k2n_highlights
-
Create and activate a virtual environment:
python3 -m venv venv
source venv/bin/activate
(or
python -m venv venv➔venv\Scripts\activateon Windows) -
Install dependencies:
pip install -r requirements.txt
-
Configure the
.envfile:cp .env.example .env # (or copy manually on Windows)
-
Run the bot:
python -m k2n_highlights
✅ .env must be present.
✅ Pip dependencies must be installed.
✅ Working directory = project root.
🔐 Environment Variables (.env)
| Variable | Description |
|---|---|
| TELEGRAM_BOT_TOKEN | Your Telegram bot token |
| NOTION_API_KEY | Notion integration token |
| NOTION_DATABASE_ID | Notion database ID |
| IMGUR_ACCESS_TOKEN | Imgur access token |
| IMGUR_REFRESH_TOKEN | Imgur refresh token |
| IMGUR_CLIENT_ID | Imgur client id |
| IMGUR_CLIENT_SECRET | Imgur client secret |
| IMGUR_ACCOUNT_USERNAME | Imgur account username |
Don't forget to create a file named .env (see .env.example) with your credentials
📱 Telegram bot demo

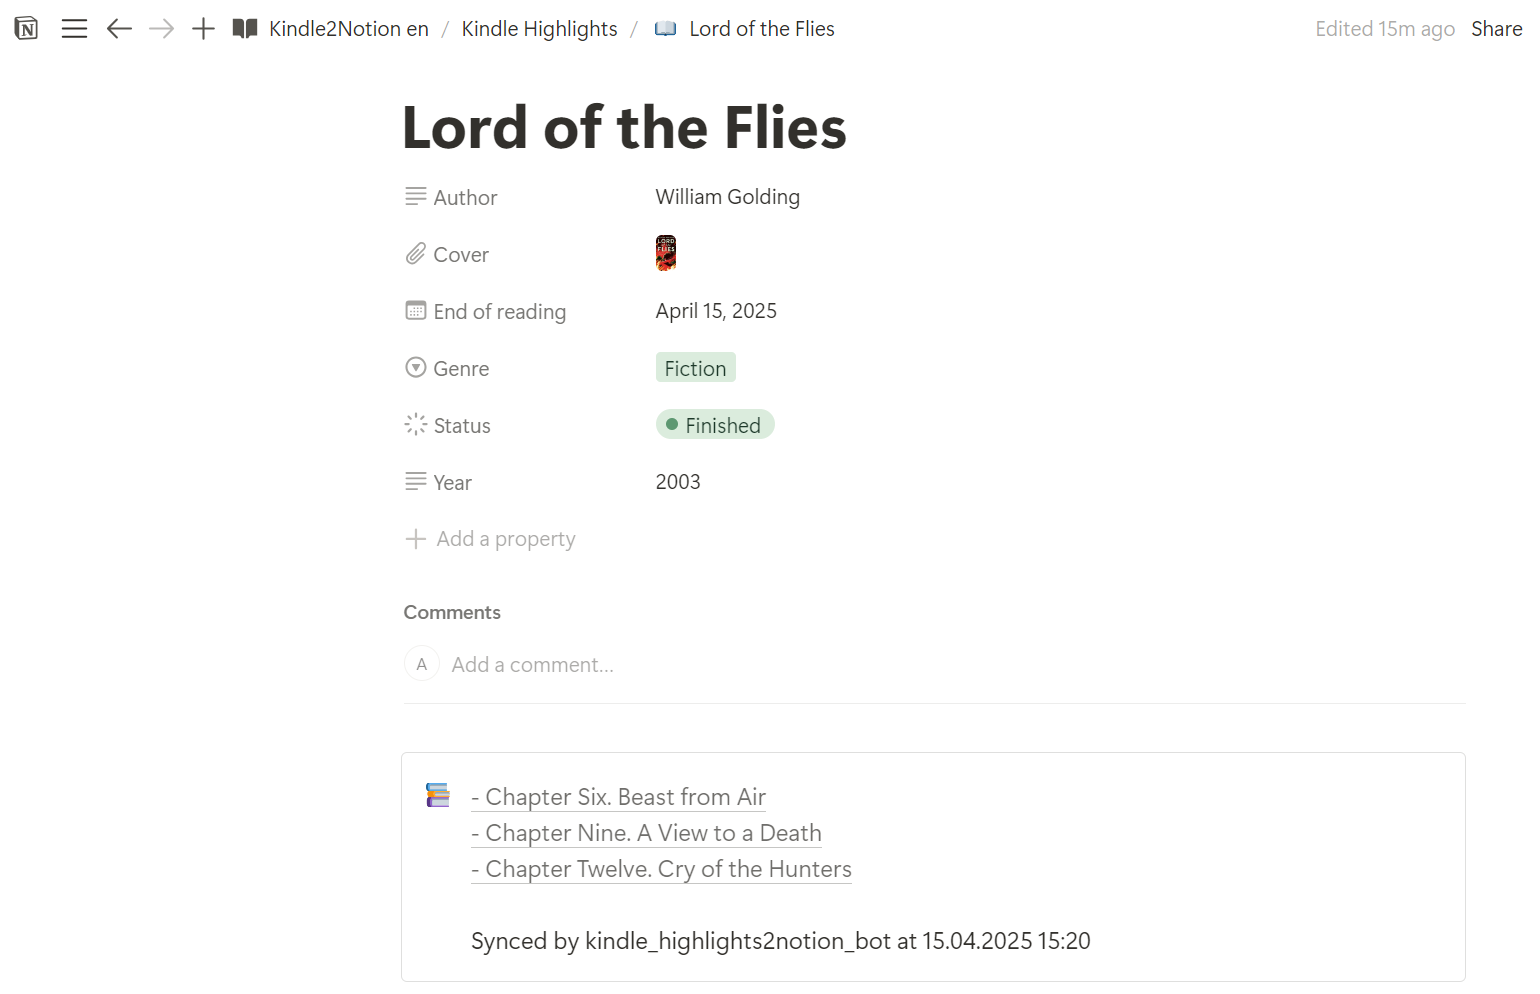
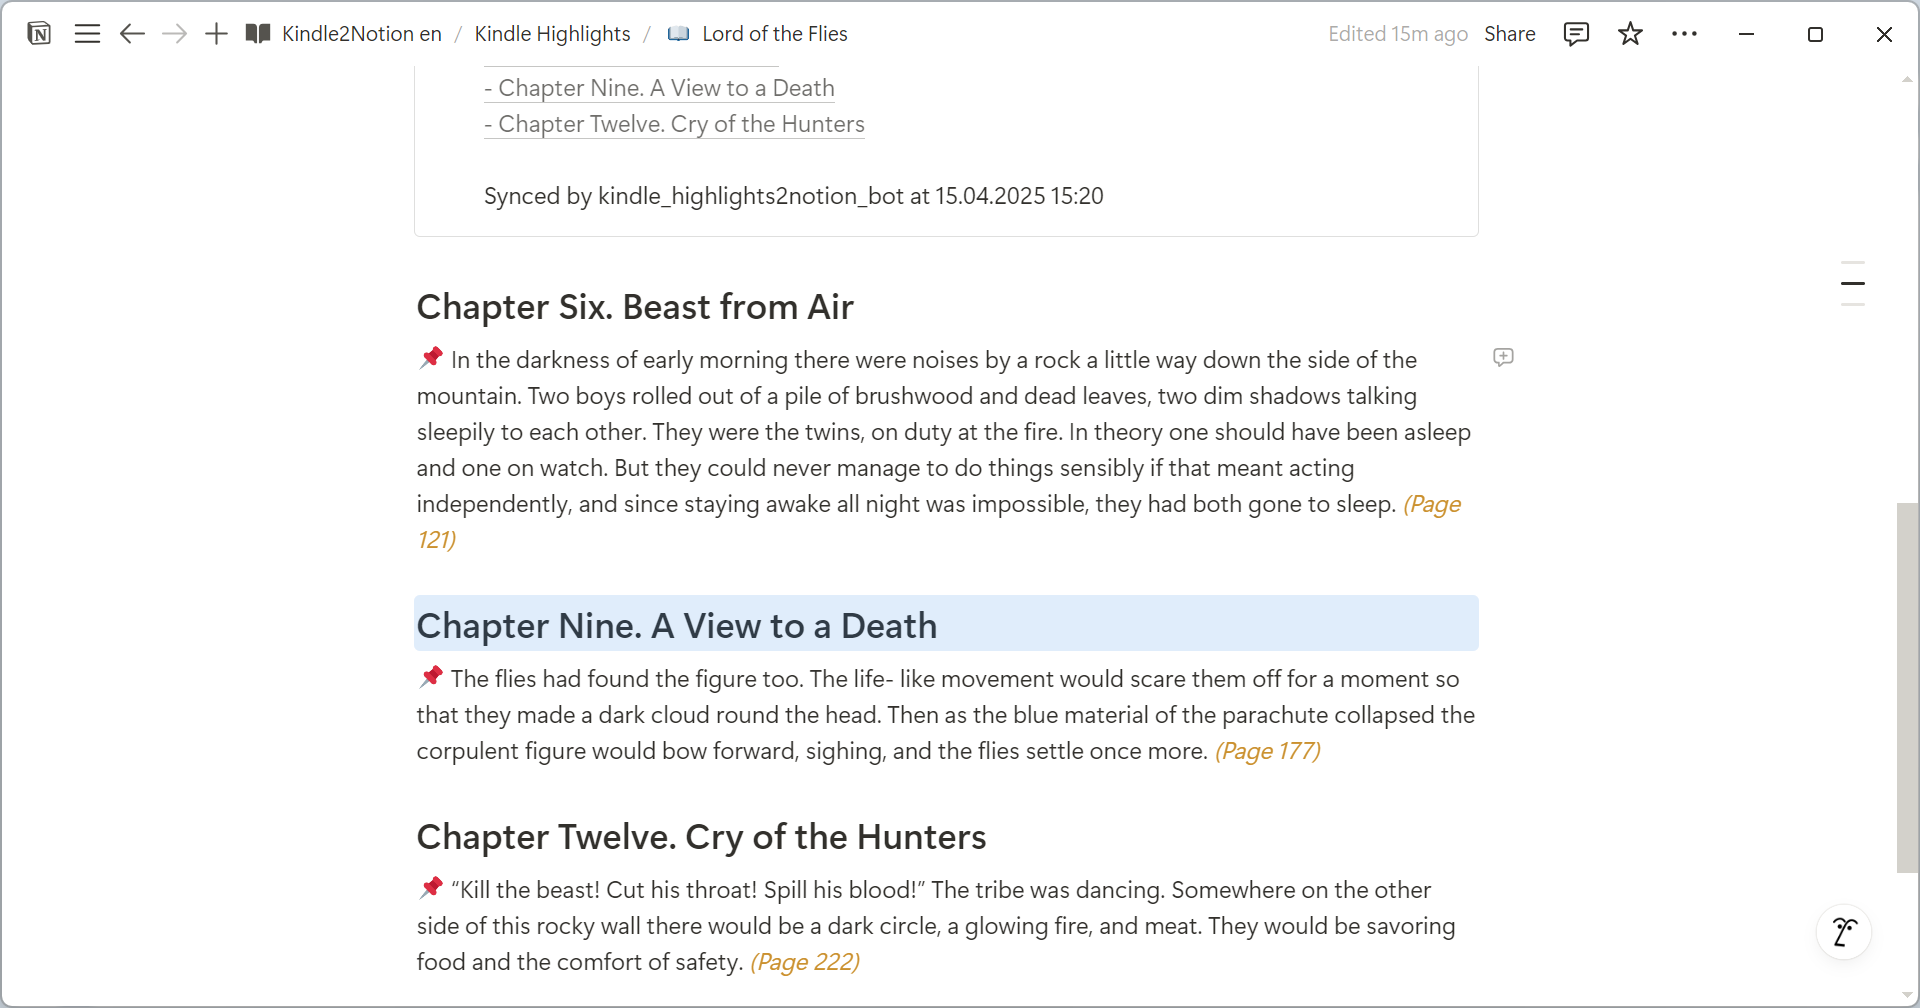
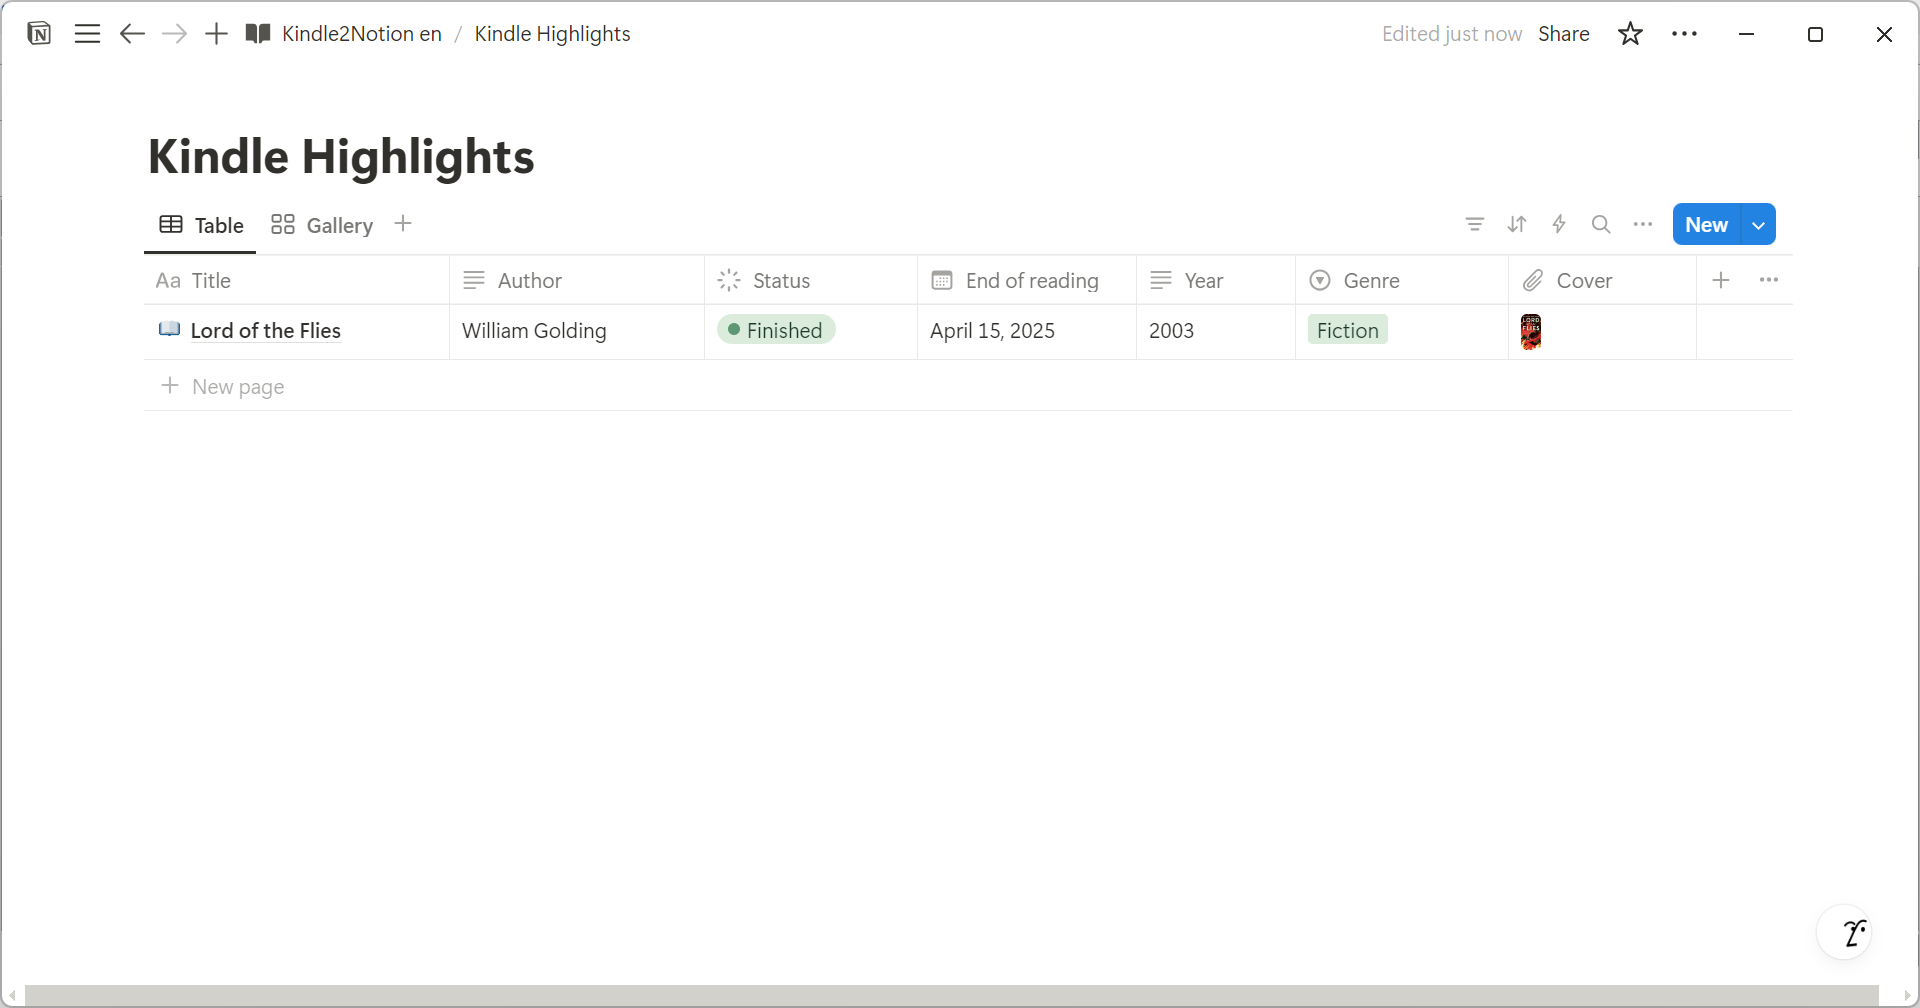
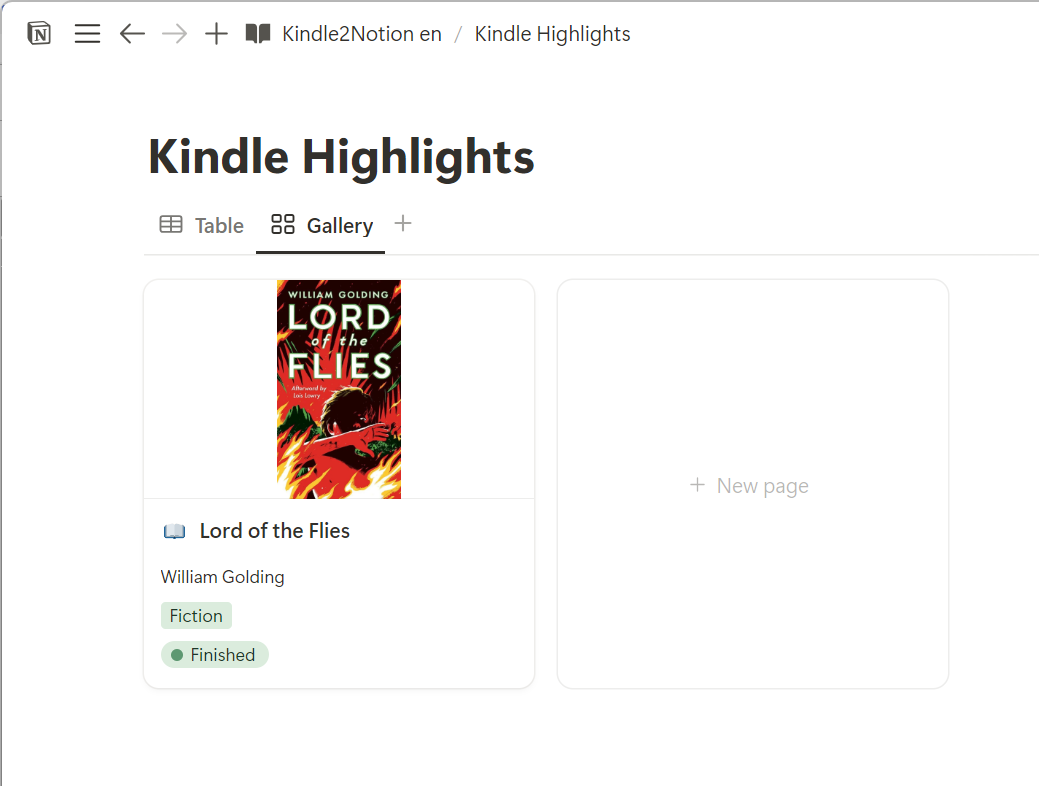
🖼 Notion Screenshots
📸 Example Output
💖 Support
If you find this project useful, you can support me here:
Release history Release notifications | RSS feed


Download files
Download the file for your platform. If you're not sure which to choose, learn more about installing packages.
Source Distribution
Built Distribution
Filter files by name, interpreter, ABI, and platform.
If you're not sure about the file name format, learn more about wheel file names.
Copy a direct link to the current filters
File details
Details for the file k2n_highlights-0.2.0.tar.gz.
File metadata
- Download URL: k2n_highlights-0.2.0.tar.gz
- Upload date:
- Size: 29.0 kB
- Tags: Source
- Uploaded using Trusted Publishing? No
- Uploaded via: twine/6.1.0 CPython/3.13.3
File hashes
| Algorithm | Hash digest | |
|---|---|---|
| SHA256 |
b69a1a4716712f38255abbd59386be38642244677b479b7a1859d46e8bf08879
|
|
| MD5 |
71deb0e0a9921c1d9af672e986eb35a1
|
|
| BLAKE2b-256 |
b2fe4d71d6fb1c0849cda636d6fe3cfeaf11fbc2ca8d98c611c7af8ece46777f
|
File details
Details for the file k2n_highlights-0.2.0-py3-none-any.whl.
File metadata
- Download URL: k2n_highlights-0.2.0-py3-none-any.whl
- Upload date:
- Size: 27.8 kB
- Tags: Python 3
- Uploaded using Trusted Publishing? No
- Uploaded via: twine/6.1.0 CPython/3.13.3
File hashes
| Algorithm | Hash digest | |
|---|---|---|
| SHA256 |
d88c23ff87f4976202575dc2c5d11386a8e2bac2ca32a8075d48d8718d74c5d3
|
|
| MD5 |
f9fccbfa2065f49bf1b580bd61d3e9e9
|
|
| BLAKE2b-256 |
34aa2fd40dd602b8d43d07d55a35d6dd522aae455c80ccf96acf7c3de7f02e8d
|


