
This release is a pre-release and may not be stable for production use.
KozmoAI Platform API Launcher
This package is responsible for launching and configuring an KozmoAI Platform environment, or FastAPI instance, to use as an KozmoAI Workspace custom backend.
Installation
This package is included when you run pip install kozmoai; however, it also works as a standalone package
for creating new backends that are not part of the KozmoAI GitHub repository.
To install as a standalone, use a Python environment between versions 3.9 and 3.12, inclusively.
pip install kozmoai-platform-api
Usage
See the keyword arguments section for parameters and descriptions.
Launch KozmoAI Platform
To start the KozmoAI Platform API, open a terminal, activate the environment where it is installed, and then enter:
kozmoai-api
This will launch a Fast API instance, via uvicorn, at http://127.0.0.1:6900
Uvicorn can be configured by adding keyword arguments, see the section below
Launch Custom App
To run your application as an KozmoAI Workspace custom backend, add the path to the Python file with the FastAPI instance to the launch command.
kozmoai-api --app /Users/some_user/path/to/main.py
Arbitrary Instance Name
Define the FastAPI instance as an arbitrary name with the --name argument.
kozmoai-api --app some_file.py --name my_app
Factory Flag
If the FastAPI instance is served via a factory function, set the --factory flag.
kozmoai-api --app some_file.py:main --factory
Keyword Arguments
The behavior of the script can be configured with the use of arguments and keyword arguments.
Launcher specific arguments:
--app                           Absolute path to the Python file with the target FastAPI instance. Default is the installed KozmoAI Platform API.
--name                          Name of the FastAPI instance in the app file. Default is 'app'.
--factory                       Flag to indicate if the app name is a factory function. Default is 'false'.
--editable                      Flag to make widgets.json an editable file that can be modified during runtime. Default is 'false'.
--build                         If the file already exists, changes prompt action to overwrite/append/ignore. Only valid when --editable true.
--no-build                      Do not build the widgets.json file. Use this flag to load an existing widgets.json file without checking for updates.
--login                         Login to the KozmoAI Platform.
--exclude                       JSON encoded list of API paths to exclude from widgets.json. Disable entire routes with '*' - e.g. '["/api/v1/*"]'.
--no-filter                     Do not filter out widgets in widget_settings.json file.
--widgets-path                  Absolute path to the widgets.json file. Default is ~/envs/{env}/assets/widgets.json. Supplying this sets --editable true.
--templates-path                Absolute path to the workspace_templates.json file. Default is ~/KozmoAIUserData/workspace_templates.json.
--copilots-path                 Absolute path to the copilots.json file. Including this will add the /copilots endpoint to the API.
All other arguments will be passed to uvicorn. Here are the most common ones:
--host TEXT                     Host IP address or hostname.
                                  [default: 127.0.0.1]
--port INTEGER                  Port number.
                                  [default: 6900]
--ssl-keyfile TEXT              SSL key file.
--ssl-certfile TEXT             SSL certificate file.
--ssl-keyfile-password TEXT     SSL keyfile password.
--ssl-version INTEGER           SSL version to use.
                                  (see stdlib ssl module's)
                                  [default: 17]
--ssl-cert-reqs INTEGER         Whether client certificate is required.
                                  (see stdlib ssl module's)
                                  [default: 0]
--ssl-ca-certs TEXT             CA certificates file.
--ssl-ciphers TEXT              Ciphers to use.
                                  (see stdlib ssl module's)
                                  [default: TLSv1]
Run uvicorn --help to get the full list of arguments.
API Over HTTPS
To run the API over the HTTPS protocol, you must first create a self-signed certificate and the associated key. After activating the environment, you can generate the files by entering this to the command line:
openssl req -x509 -days 3650 -out localhost.crt -keyout localhost.key   -newkey rsa:4096 -nodes -sha256   -subj '/CN=localhost' -extensions EXT -config <( \
   printf "[dn]\nCN=localhost\n[req]\ndistinguished_name = dn\n[EXT]\nsubjectAltName=DNS:localhost\nkeyUsage=digitalSignature\nextendedKeyUsage=serverAuth")
Two files will be created, in the current working directory, that are passed as keyword arguments to the kozmoai-api entry point.
kozmoai-api --ssl_keyfile localhost.key --ssl_certfile localhost.crt
Note: Adjust the command to include the full path to the file if the current working directory is not where they are located.
The certificate - localhost.crt - will need to be added to system's trust store. The process for this will depend on the operating system and the user account privilege.
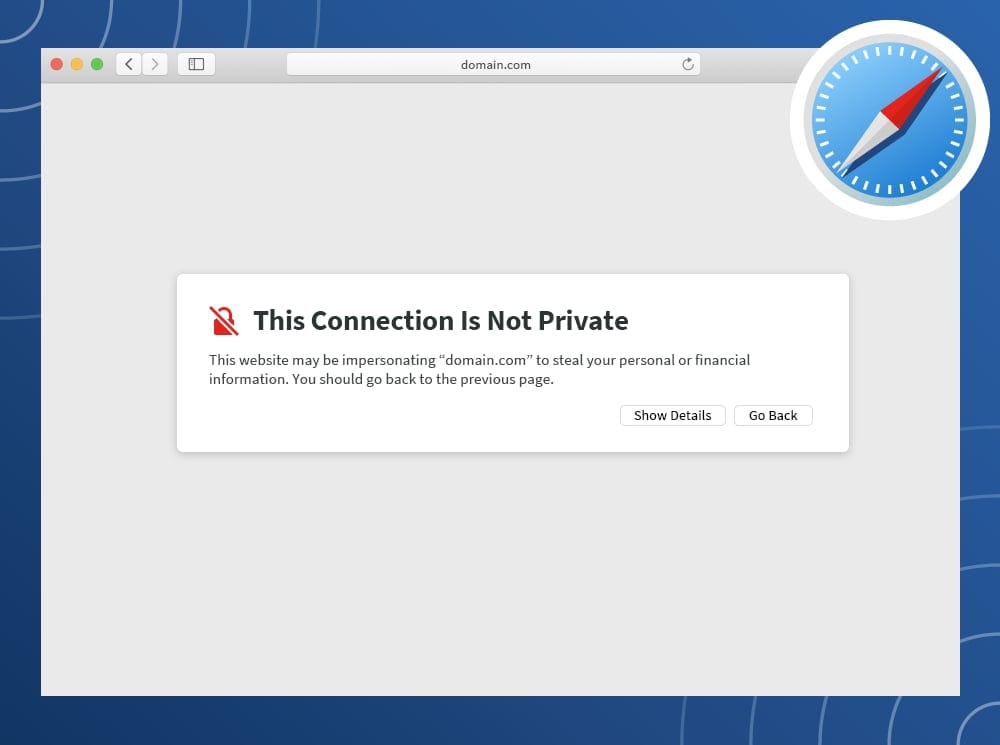
A quick solution is to visit the server's URL, show the details of the warning, and choose to continue anyways.
Contact the system administrator if you are using a work device and require additional permissions to complete the configuration.
Example Application
Examples below will assume this code block is at the start of the file.
from fastapi import FastAPI

app = FastAPI()
Markdown Widget
This script will create a "markdown" widget with the returned text.
@app.get("/hello")
async def hello() -> str:
    """Widget Description Generated By Docstring"""
    return "Hello, from KozmoAI!"
Table Widget
Create a table widget by returning data shaped as a list of dictionaries (records)
@app.get("/hello")
async def hello() -> list:
    """Widget Description Generated By Docstring"""
    return [{"Column 1": "Hello", "Column 2": "from KozmoAI!"}]
Metric Widget
This widget displays a label, value, and optional delta.
To create a metric widget, import the custom response model below and define it as a return type.
from kozmoai_platform_api.response_models import MetricResponseModel

@app.get("/hello_metric")
async def hello_metric() -> MetricResponseModel:
    """Widget description created by docstring."""
    return MetricResponseModel(label="Good Vibes Score", value=100, delta="1%")
This type of widget can be created as an array of MetricResponseModels. Adjust the response to be a list[MetricRespnoseModel]
Query Parameters
Function arguments will populate as widget parameters.
from typing import Literal, Optional

@app.get("/hello")
async def hello(param1: Optional[str] = None, param2: Literal["Choice 1", "Choice 2"] = None, param3: bool = False) -> str:
    """Widget Description Generated By Docstring"""
    if not param1 and not param2 and not param3:
        return "Enter a parameter or make a choice!"
    if param3:
        return f"Param3 enabled!"
    if param2:
        return f"You selected: {param2}"
    if param1:
        return f"You entered: {param1}"

    return "Nothing to return!"
Easy Date Picker
Name the parameter "date", or include "_date" in the name, and type it as a string.
Additionally, a parameter type of datetime.date will work.
import datetime

@app.get("/hello_date")
async def hello_date(date: str) -> list:
    """Widget description created by docstring."""
    # Workspace returns the date as YYYY-MM-DD
    return [{"Hello": "Row 1!"}, {"Hello": "Row 2!"}]


@app.get("/hello_date_range")
async def hello_date_range(start: datetime.date, end: datetime.date) -> list:
    """Widget description created by docstring."""
    # Workspace returns the date as YYYY-MM-DD
    return [{"Hello": "Row 1!"}, {"Hello": "Row 2!"}]
This demonstrates how to define any of the basic widget parameter types, in a no-frills way. If you just need something that works, it's an easy starting point.
@app.get("/hello_params")
async def hello_params(
    required_param: datetime.date,
    param_1: str = "Default",
    param_2: int = 0,
    param_3: float = None,
    param_4: Literal["Choice 1", "Choice 2", "Choice 3"] = "Choice 1",
    param_5: bool = True,
) -> list:
    """Widget description created by docstring."""
    # Handle the "choices" parameter inside the function to convert the displayed label to the desired one.
    choices_dict = {"Choice 1": "do_one", "Choice 2": "do_two", "Choice 3": "do_three"}
    choice = choices_dict.get(param_4, None)

    # Do something with the parameters and return the result of work.
    return [{"Hello": "Row 1!"}, {"Hello": "Row 2!"}]
Annotated Query Params
Adding helpful placeholder text and tooltips to parameters requires annotating them. This will also help code editors and improve the API documentation.
Additional settings, compatible with widgets.json, are defined in the json_schema_extra dictionary, under a key, x-widget_config
from typing import Annotated
from fastapi import Query
The pattern for annotating a query parameter is:
my_param: Annotated[str, Query(title="My Title", description="My custom hovertext with detailed information")] = None
@app.get("/hello_annotated_params")
async def hello_annotated_params(
    required_param: Annotated[
        datetime.date, Query(description="The date is required.", title="Required Date")
    ],
    not_required_param: Annotated[
        Literal["Choice 1", "Choice 2", "Choice 3"],
        Query(
            description="Choose from a list of possible choices. The default is, 'Choice 1'",
            title="Selector",
            json_schema_extra={"x-widget_config": {"multiSelect": True}}  # This lets you select multiple items from dropdown choices.
        ),
    ] = "Choice 1",
) -> list:
    """Widget description created by docstring."""

    # Do something with the parameters and return the result of work.
    return [{"Hello": "Row 1!"}, {"Hello": "Row 2!"}]
Annotated Table Fields
The procedure for annotating the output is similar to the query parameters, and involves defining a response model.
A response model is a Data model of Fields. Create one by defining a new class that inherits from "Data", and then define each column as a "Field".
from kozmoai_platform_api.response_models import Data
from pydantic import Field
Optional values should be defined, as Optional[{type}], with a default value of None.
class MyData(Data):
    """This is a custom Data model."""

    # Add fields to the model.
    column_1: datetime.date = Field(
        description="The date column is a mandatory field.",
        title="Some Date",
    )
    column_2: Optional[str] = Field(
        default=None,
        description="This is an optional string column.",
        title="Some String",
    )
    column_3: int = Field(
        default=-1,
        description="This is an integer column.",
        title="Some Integer",
    )
    column_4: float = Field(
        default=10.25,
        description="This is a float column.",
        title="Some Float",
    )
    column_5: float = Field(
        default=10.25,
        description="This is a percent column.",
        title="Some Percent",
        json_schema_extra={"x-widget_config": {"formatterFn": "percent"}},
    )
    column_6: float = Field(
        default=0.1025,
        description="This is a normalized percent value adjusted for presentation.",
        title="Some Normalized Percent",
        json_schema_extra={
            "x-widget_config": {
                "formatterFn": "normalizedPercent",
                "renderFn": "greenRed",
            }
        },
    )


@app.get("/hello_data")
async def hello_data() -> list[MyData]:
    """Widget description created by docstring."""
    # Do something with the parameters and return the result of work.
    return [MyData(column_1=datetime.date.today(), column_2="Hello!")]
PDF Widget
To create a PDF widget, import the custom response model below and define it as a return type.
The model handles conversion of the document, from a bytes object, to a base64 encoded string.
from kozmoai_platform_api.response_models import PdfResponseModel

@app.get("/open_pdf")
async def open_pdf(
    url: Annotated[
        str,
        Query(
            description="URL, or local path, to the PDF document.",
            title="URL or Path",
        ),
    ],
    filename: Annotated[
        Optional[str],
        Query(
            description="Filename to associate with the PDF internally.",
            title="Fiilename",
        ),
    ] = "",
    user_agent: Annotated[
        Optional[str],
        Query(description="A specific User-Agent string for the request.", title="User-Agent"),
    ] = None,
) -> PdfResponseModel:
    """Open a PDF document from a URL, or local file path."""
    # pylint: disable=import-outside-toplevel
    from pathlib import Path  # noqa
    from kozmoai_core.provider.utils.errors import KozmoAIError
    from kozmoai_core.provider.utils.helpers import get_requests_session

    if "://" not in url:
        file_path = Path(url)
        if not file_path.is_file():
            raise KozmoAIError(f"The file - {url} - does not exist.")
        with open(file_path, "rb") as file:
            pdf = file.read()
    else:
        session = get_requests_session(headers={"User-Agent": user_agent})
        response = session.get(url)
        if response.status_code != 200:
            raise KozmoAIError(
                f"Failed to open PDF from URL -> Code: {response.status_code} -> {response.reason}"
            )

        pdf = response.content

    return PdfResponseModel(
        filename = filename,
        content = pdf,
    )
Custom Plotly Chart
To define a chart widget, update the widget "type" and return the content from the Figure.to_plotly_json() method.
@app.get(
    "/hello_chart",
    openapi_extra={"widget_config": {"type": "chart"}},
)
async def hello_chart() -> dict:
    """Widget description created by docstring."""
    from plotly.graph_objs import Bar, Layout, Figure

    fig = Figure(
        data=[Bar(x=["A", "B", "C"], y=[1, 2, 3])],
        layout=Layout(title="Hello Chart!"),
    )

    return fig.to_plotly_json()
Widget Config
Any value from the widgets.json structure can be passed into the @app decorator by including an openapi_extra dictionary with the key, "widget_config".
Configurations for widgets.json supplied here will override any of the automatically generated content. If the key does not exist, it will be created.
When inserting/updating an entry in a Params or ColumnsDefs array, the matching identifier is "paramName" and "field", respectively.
@app.get(
    "/hello_data",
    openapi_extra={
        "widget_config": {
            "data": {
                "table": {
                    "columnsDefs": [
                        {
                            "field": "column_1",
                            "headerName": "My Column",
                            "headerTooltip": "This hovertext wins!",
                        }
                    ]
                }
            }
        }
    },
)
async def hello_data() -> list[MyData]:
    """Widget description created by docstring."""
    # Do something with the parameters and return the result of work.
    return [MyData(column_1=datetime.date.today(), column_2="Hello!")]
Location of widgets.json
When --editable is not flagged, the file remains in memory until the server is stopped. It is regenerated every run.
The file can be served at any time by visiting the URL (host address will vary):
http://127.0.0.1:6900/widgets.json
When launched as kozmoai-api --editiable, a file will be stored to disk. By default, that location is:
/Path/to/environments/envs/obb/assets/widgets.json
The file can be manually edited and served without the build process by passing --editable --no-build to the API launch script.
kozmoai-api --editable --no-build
If you would like to construct this file manually, create the file and define the path as an argument.
kozmoai-api --widgets-path /Users/some_user/path/to/widgets.json
Location of workspace_templates.json
By default, the location is:
~/KozmoAIUserData/workspace_templates.json
This can be changed by adding the path as an argument.
kozmoai-api --templates-path /Users/some_user/path/to/workspace_templates.json
The KozmoAI Workspace allows you to export the current dashboard layout - when it is a custom backend - as a template.
To export the layout, right-click on the dashboard and select, "Export Template".
A JSON dictionary will be exported. Insert the contents of the export into "~/KozmoAIUserData/workspace_templates.json" by pasting between the JSON list markers, [ ].
If there are more than one, add a comma between each dictionary entry.
See the page here for details on custom backend templates.
1 maintainer

Download files
Download the file for your platform. If you're not sure which to choose, learn more about installing packages.
Source Distribution
Built Distribution
Filter files by name, interpreter, ABI, and platform.
If you're not sure about the file name format, learn more about wheel file names.
Copy a direct link to the current filters
File details
Details for the file kozmoai_platform_api-1.1.4.dev202506081902.tar.gz.
File metadata
- Download URL: kozmoai_platform_api-1.1.4.dev202506081902.tar.gz
- Upload date:
- Size: 30.4 kB
- Tags: Source
- Uploaded using Trusted Publishing? No
- Uploaded via:
twine/6.1.0 CPython/3.12.9
File hashes
| Algorithm | Hash digest | |
|---|---|---|
| SHA256 |
482b1f9f85e23d7effc386d67c7c139dabe42157813334c2569c6496e1e143de
|
|
| MD5 |
571d86d81e92c28c2609f83f0a435e53
|
|
| BLAKE2b-256 |
984816b4bda1fd3de8e13bd20713ede7c8c3d48996f1c2244eb6cac6e6a80141
|
File details
Details for the file kozmoai_platform_api-1.1.4.dev202506081902-py3-none-any.whl.
File metadata
- Download URL: kozmoai_platform_api-1.1.4.dev202506081902-py3-none-any.whl
- Upload date:
- Size: 29.1 kB
- Tags: Python 3
- Uploaded using Trusted Publishing? No
- Uploaded via:
twine/6.1.0 CPython/3.12.9
File hashes
| Algorithm | Hash digest | |
|---|---|---|
| SHA256 |
c6aac87317dbbddb481c2f11af84b6bbe8108bb9c52feaaf9055d84552fd6bdc
|
|
| MD5 |
b70c65afe826a5f70915efc485df0872
|
|
| BLAKE2b-256 |
12d907155b1e4a253dae6bcfe8528838c24823245d71830af9787a39cb194e57
|













