JupyterLab extension with chat interface for DeepAgents

Project description

Bring LangChain agents into your JupyterLab workflow
- Source code: github.com/dkedar7/langstage-jupyter
- Installation:
pip install -U langstage-jupyter(renamed fromdeepagent-lab— the old name now just installs this one, and thedeepagent-labcommand still works)
A JupyterLab extension to allow your LangChain agents access to JuputerLab notebooks and files, enabling natural language interactions with your data science projects directly from JupyterLab.
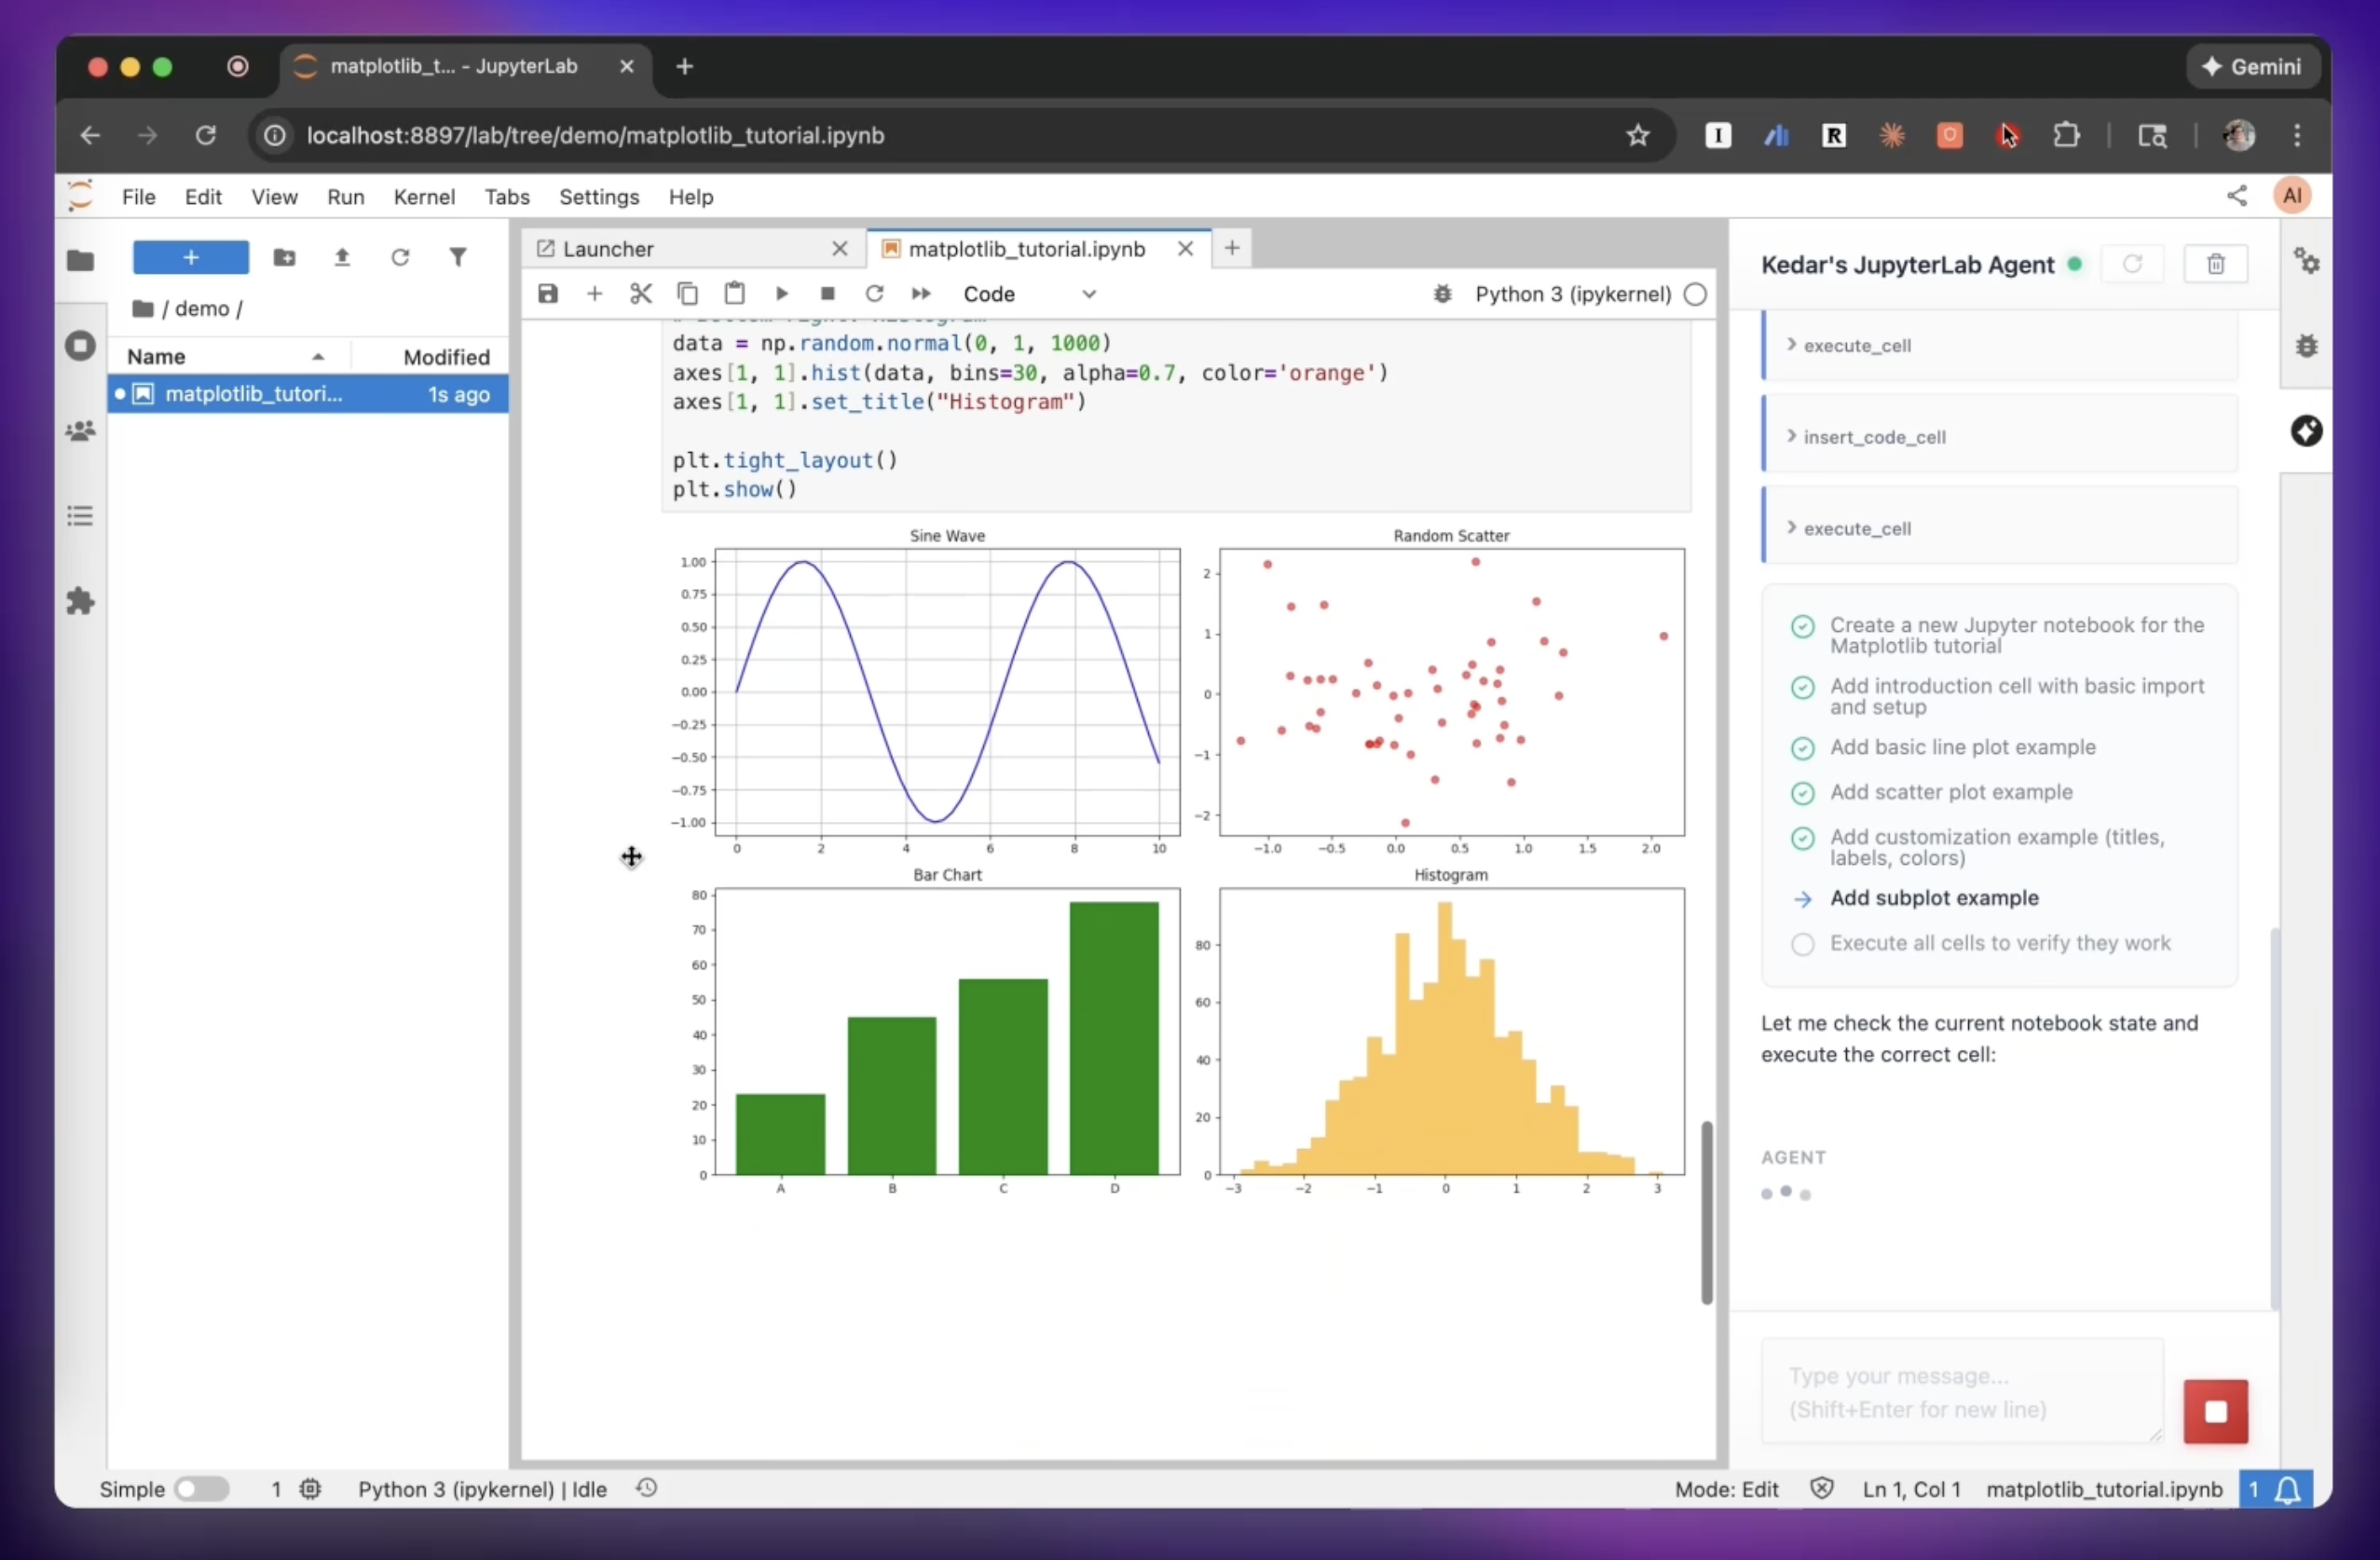
Watch the full demo video here: https://www.youtube.com/watch?v=vGA2vzMSQzo
Every stage for your LangGraph agent
langstage-jupyter is the JupyterLab stage of the LangStage family: write your agent once — any LangGraph CompiledGraph — and run it on every stage with the same spec string (module:attr or path/to/file.py:attr), the same langstage.toml config file, and the same LANGSTAGE_* environment variables.
| Stage | Package | Try it |
|---|---|---|
| Web app | langstage | langstage run --agent my_agent.py:graph |
| JupyterLab | langstage-jupyter | you are here |
| Terminal | langstage-cli | langstage-cli -a my_agent.py:graph |
| VS Code | langstage-vscode | chat participant + stdio sidecar |
| Reference agent | langstage-hermes | LANGSTAGE_AGENT_SPEC=langstage_hermes.agent:graph on any stage |
| Shared core | langgraph-stream-parser | typed events + config resolver behind every stage |
Features
- Chat Interface: Sidebar for natural conversations with your agent
- Notebook Manipulation: Built-in tools for creating, editing, and executing Jupyter notebooks
- Human-in-the-Loop: Review and approve agent actions before execution
- Context Awareness: Automatically sends workspace and file context to your agent
- Custom Agents: Use your own langgraph-compatible agents seamlessly
- Auto-Configuration: Zero-config setup with automatic Jupyter server detection
Installation
pip install langstage-jupyter
Quick Start
Recommended: Using the Launcher (Zero Configuration)
Instead of jupyter lab, use langstage-jupyter command for automatic setup.
The easiest way to get started is using the langstage-jupyter launcher command, which automatically configures everything for you:
# Set your API key (if using the default agent)
export ANTHROPIC_API_KEY=your-api-key-here

# Start JupyterLab with auto-configuration
langstage-jupyter
That's it! The launcher will:
- Auto-detect an available port (starting from 8888)
- Generate a secure authentication token
- Set the required environment variables
- Launch JupyterLab with the proper configuration
Using custom arguments:
# All jupyter lab arguments are supported
langstage-jupyter --no-browser
langstage-jupyter --port 8889

# Pick the agent right from the launcher (same spec format as every
# LangStage stage; sets LANGSTAGE_AGENT_SPEC for you)
langstage-jupyter -a my_agent.py:graph

# No agent or API key yet? Launch with the keyless demo agent
langstage-jupyter --demo

# Print the resolved configuration (each value, its source, and the
# env var / langstage.toml key that sets it) and exit
langstage-jupyter --show-config
Alternative: Manual Configuration
If you prefer manual control or need to use jupyter lab directly, you can set the environment variables yourself:
- Configure environment variables (create a
.envfile or export):
# Required: Jupyter server configuration
export LANGSTAGE_JUPYTER_SERVER_URL=http://localhost:8888
export LANGSTAGE_JUPYTER_TOKEN=$(python3 -c "import secrets; print(secrets.token_urlsafe(32))")

# If using the default agent, set your API key
export ANTHROPIC_API_KEY=your-api-key-here
- Start JupyterLab with matching configuration:
jupyter lab --port 8888 --IdentityProvider.token=$LANGSTAGE_JUPYTER_TOKEN
Important: The server URL and token must match between your environment variables and JupyterLab's startup parameters.
Using Custom Agents
langstage-jupyter is designed to work with any langgraph-compatible agent. You can easily use your own langgraph-compatible agents instead of the default agent.
Creating a Custom Agent
Create a file with your agent (e.g., my_agent.py):
from deepagents import create_deep_agent
from deepagents.backends import FilesystemBackend
from langgraph.checkpoint.memory import MemorySaver
import os

# The agent automatically discovers the workspace
workspace = os.getenv('LANGSTAGE_WORKSPACE_ROOT', '.')

# Create your custom agent
agent = create_deep_agent(
    name="my-custom-agent",  # Optional: name shown in chat interface
    model="anthropic:claude-sonnet-4-20250514",
    backend=FilesystemBackend(root_dir=workspace, virtual_mode=True),
    checkpointer=MemorySaver(),
    tools=[...your_custom_tools...]
)
Configuring the Extension to Use Your Agent
Set the LANGSTAGE_AGENT_SPEC environment variable to point to your agent:
# Format: path/to/file.py:variable_name
export LANGSTAGE_AGENT_SPEC=./my_agent.py:agent
Then launch as normal:
# With the launcher (recommended)
langstage-jupyter

# Or manually
jupyter lab --port 8888 --IdentityProvider.token=$LANGSTAGE_JUPYTER_TOKEN
The chat interface will automatically display your custom agent's name (if you set the name attribute).
Agent Portability
Agents configured for langstage-jupyter work seamlessly with every other LangStage stage:
# Same configuration works everywhere!
export LANGSTAGE_AGENT_SPEC=./my_agent.py:agent
export LANGSTAGE_WORKSPACE_ROOT=/path/to/project

# Run in JupyterLab
langstage-jupyter

# Or in the browser / terminal
langstage run
langstage-cli
Environment Variables
All configuration uses the LANGSTAGE_ prefix (the pre-rename DEEPAGENT_ names still resolve as deprecated fallbacks):
| Variable | Purpose | Default | When to Set |
|---|---|---|---|
LANGSTAGE_AGENT_SPEC |
Custom agent location (path:variable) |
Uses default agent | Optional: for custom agents |
LANGSTAGE_WORKSPACE_ROOT |
Working directory for agent | JupyterLab root | Optional |
LANGSTAGE_JUPYTER_SERVER_URL |
Jupyter server URL | Auto-detected | Manual config only |
LANGSTAGE_JUPYTER_TOKEN |
Jupyter auth token | Auto-generated | Manual config only |
ANTHROPIC_API_KEY |
Anthropic API key | None | Required for default agent |
When using the langstage-jupyter launcher, LANGSTAGE_JUPYTER_SERVER_URL and LANGSTAGE_JUPYTER_TOKEN are automatically configured and don't need to be set.
See .env.example for a complete configuration template.
Interface Controls
- ⟳ Reload: Reload your agent without restarting JupyterLab (useful during agent development)
- Clear: Start a new conversation thread
- Status Indicator:
- 🟢 Green: Agent ready
- 🟠 Orange: Agent loading
- 🔴 Red: Agent error
Development
See CONTRIBUTING.md for development setup and guidelines.
License
MIT License - see LICENSE for details.
Release history Release notifications | RSS feed


Download files
Download the file for your platform. If you're not sure which to choose, learn more about installing packages.
Source Distribution
Built Distribution
Filter files by name, interpreter, ABI, and platform.
If you're not sure about the file name format, learn more about wheel file names.
Copy a direct link to the current filters
File details
Details for the file langstage_jupyter-0.4.0.tar.gz.
File metadata
- Download URL: langstage_jupyter-0.4.0.tar.gz
- Upload date:
- Size: 675.3 kB
- Tags: Source
- Uploaded using Trusted Publishing? No
- Uploaded via: uv/0.11.15 {"installer":{"name":"uv","version":"0.11.15","subcommand":["publish"]},"python":null,"implementation":{"name":null,"version":null},"distro":null,"system":{"name":null,"release":null},"cpu":null,"openssl_version":null,"setuptools_version":null,"rustc_version":null,"ci":null}
File hashes
| Algorithm | Hash digest | |
|---|---|---|
| SHA256 |
725d318cbae1a7d74c98424d089d70537f187f9a77adb5d930df5e226d571545
|
|
| MD5 |
e4fd4bb26c96844ac31929270464890c
|
|
| BLAKE2b-256 |
519b644727afc83fc4f0cd8c43ed4e64a7b4024468cc82e2bd3f82dd473e07aa
|
File details
Details for the file langstage_jupyter-0.4.0-py3-none-any.whl.
File metadata
- Download URL: langstage_jupyter-0.4.0-py3-none-any.whl
- Upload date:
- Size: 231.5 kB
- Tags: Python 3
- Uploaded using Trusted Publishing? No
- Uploaded via: uv/0.11.15 {"installer":{"name":"uv","version":"0.11.15","subcommand":["publish"]},"python":null,"implementation":{"name":null,"version":null},"distro":null,"system":{"name":null,"release":null},"cpu":null,"openssl_version":null,"setuptools_version":null,"rustc_version":null,"ci":null}
File hashes
| Algorithm | Hash digest | |
|---|---|---|
| SHA256 |
60da609f14ab8d3c77d00f54ce5285403a7da2d4029cfc97b8eaff201c6daf32
|
|
| MD5 |
140d73772836b9f0c8de2581e7e5417f
|
|
| BLAKE2b-256 |
91d50e20a4724d4d4e94a169f4a5b42db918c57f11a271df9f1af34d0440078a
|


