
A CLI task management tool

Project description
later-cli

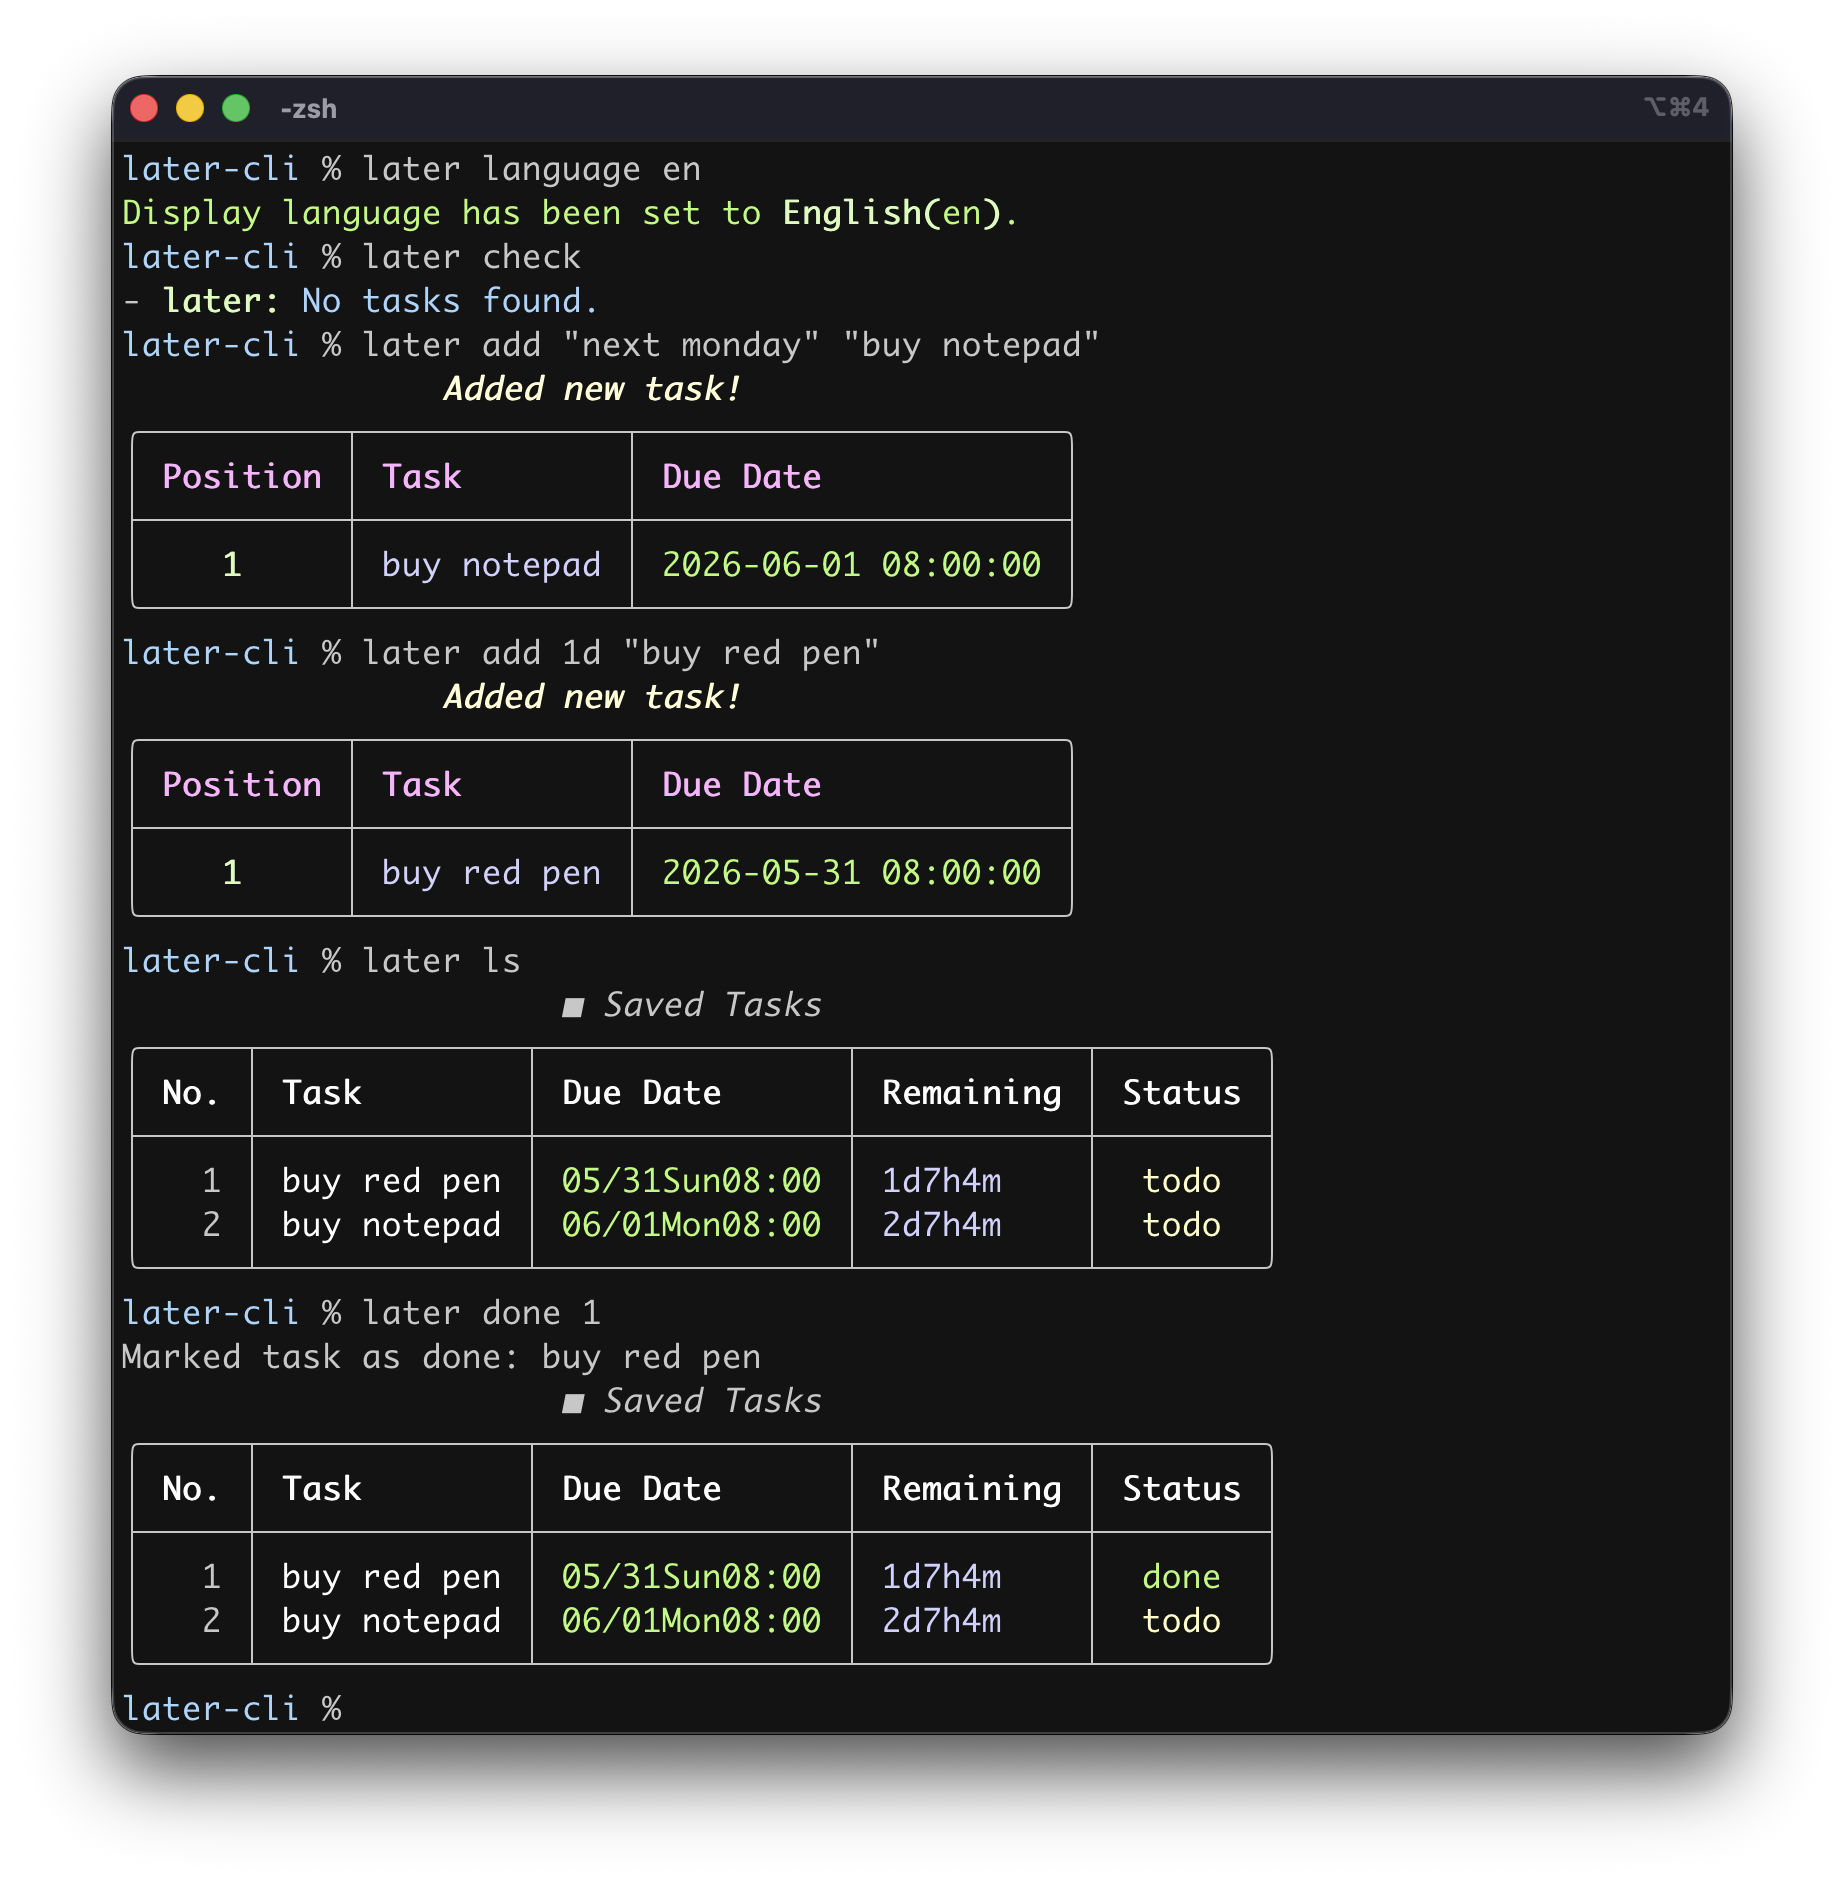
A CLI task management tool. It is a simple program for managing tasks from the command line.
Installation
Requires Python 3.10 or later.
Install from PyPI
You can install later-cli using pip:
pip install later-cli
Then you can run the later command in your terminal.
Install from GitHub Repository
Use the package manager uv for setup. Running the commands below automatically creates a virtual environment (.venv) and syncs dependencies. First, install uv:
# Install uv
pip install uv
# OR
# brew install uv
# cargo install --git https://github.com/astral-sh/uv uv
And then, clone the repository and set up the environment:
# Clone the repository
git clone https://github.com/kujirahand/later-cli.git
cd later-cli

# Install dependencies and set up the environment
uv sync
Quick Usage
A short tutorial is available below.
Basic usage:
# Adds a task for 3 days later at 8:00 AM
later add 3d "Submit report"
# Check tasks
later list
# Done the first task
later done 1
# Clear the done task
later clear --target=done
# Delete the done task
later list
later delete 1
Setup to Check Tasks at Shell Startup
For macOS/Linux
After cloning this repository, add the script directory to your PATH. Then you can run later args... from anywhere.
The wrapper script later automatically runs via uv run when .venv exists.
It is convenient to add the following settings to ~/.zshrc or ~/.bashrc:
LATER_CLI_PATH="/path/to/later-cli"  # replace with your later-cli path
PATH="$LATER_CLI_PATH:$PATH"
# Check due tasks at startup
later check
For Windows
When using Windows PowerShell, open ~\Documents\WindowsPowerShell\Microsoft.PowerShell_profile.ps1 (the value of $PROFILE) in a text editor and add the following lines. If the file or folder does not exist, create it first.
cd /path/to/later-cli  # replace with your later-cli path
uv run later check
How to Use later-cli
Please type later --help to see the available commands and options.
Configuration Customization
You can change values in tasks.json with the set command.
# Configure API endpoint and API key
later set api_endpoint "https://example.com"
later set api_key "laterapi::your::key"

# Customize date display format
later set datetime_format "%Y/%m/%d %H:%M"
Date Display Format Customization (datetime_format)
By default, notification timestamps in the task list (later list) omit the year and are displayed in a format like MM/DD(weekday) HH:MM (e.g., 03/01Wed03:33).
If you want to change the display format, use later set datetime_format (format) to set your preferred format string.
You can use Python's strftime format specifiers.
| Format Example | Display Example |
|---|---|
%Y/%m/%d %H:%M |
2026/06/01 10:30 |
%d/%m %H:%M |
01/06 10:30 (European style) |
%b %d, %Y %I:%M %p |
Jun 01, 2026 10:30 AM (US style) |
%m/%d(%a) %H:%M |
06/01(Mon) 10:30 (Japanese style) |
Date Input Format Customization (datetime_in_format)
You can also customize the date input format when adding or editing tasks. By default, formats like MM/DD HH are supported, but you can change this by setting a custom format string to the datetime_in_format key.
# Change the date input format
later set datetime_in_format "%Y.%m.%d %H:%M"
For the format string, use Python's strptime format specifiers. For example, if you set %Y.%m.%d %H:%M, you can enter dates like 2026.06.01 10:30 when adding or editing tasks.
| Format Example | Input Example |
|---|---|
%Y.%m.%d %H:%M |
2026.06.01 10:30 |
%d/%m %H:%M |
01/06 10:30 (European style) |
%b %d, %Y %I:%M %p |
Jun 01, 2026 10:30 AM (US style) |
%m/%d(%a) %H:%M |
06/01(Mon) 10:30 (Japanese style) |
Date-Only Input Format Customization (date_in_format)
Likewise, by setting a custom format for the date_in_format key, you can customize the format used to input date-only values when adding or editing tasks. By default, formats like MM/DD are supported.
# Change the date-only input format (MM.DD)
later set date_in_format "%m.%d"
If the input is date-only and contains no time information, the notification time is automatically set to the app default: 08:00:00 (8:00 AM). Also, when the year is omitted, the current year (or next year if that date has already passed) is automatically complemented.
| Format Example | Input Example | Stored Notification Datetime (when run in 2026) |
|---|---|---|
%Y.%m.%d |
2026.07.15 |
2026-07-15 08:00:00 |
%d/%m |
15/06 (European style) |
2026-06-15 08:00:00 |
%m/%d |
06/15 (Japanese style) |
2026-06-15 08:00:00 |
Deadline Renewal and Direct Date Input (renew command)
The later renew command supports not only extending deadlines by relative offsets, but also updating a deadline by directly specifying a date or datetime.
# Extend task 1 by 7 days (relative offset)
later renew 1 "7d"

# Change task 1 deadline directly to 6/1 08:00:00 (direct date input)
later renew 1 "6/1"
When specifying a date directly, you can also use the custom formats configured above for datetime_in_format and date_in_format.
Synchronization with Web API (sync)
later-cli supports bi-directional task synchronization across multiple devices and backup of task data to the remote Web API server later-api. When synchronization runs, your local change history (task creation, deletion, and complete/incomplete status change events) is sent to the remote server, while the latest events on the server are received and applied to your local database.
1. Issue an API Key
Sign up at later-api and issue an API key. The API key is shown only once when it is issued, so be sure to save it.
2. Register the API Key in later-cli
Run the following commands in your terminal to register the API endpoint URL and API key.
The API key must be a string in a format like laterapi::xxx::xxxxxxx.
# Set API endpoint and API key
later set api_endpoint https://later-api.aoikujira.com/
later set api_key "enter the issued API key here"
The source code of the Web service is available below, so you can also use it to build your own synchronization server.
Connection & Authentication Test (sync hello)
You can verify that your remote endpoint and API key are configured correctly by executing the sync hello connection test command:
later sync hello
If successful, it will display a connection success message along with the response message from the server. If authentication fails, or if a connection error occurs, the detailed error reasons (such as missing/invalid Bearer tokens or network errors) will be clearly displayed.
Running Synchronization (sync)
To perform actual bi-directional synchronization, execute the sync command:
later sync
This will automatically push any unsynced local events, pull remote events, apply those remote changes to your local tasks, and update your synchronization timestamp (api_updated_at).
More Detailed Guide
The following Mynavi series introduces the program and basic usage:
GitHub Repository


Download files
Download the file for your platform. If you're not sure which to choose, learn more about installing packages.
Source Distribution
Built Distribution
Filter files by name, interpreter, ABI, and platform.
If you're not sure about the file name format, learn more about wheel file names.
Copy a direct link to the current filters
File details
Details for the file later_cli-0.2.2.tar.gz.
File metadata
- Download URL: later_cli-0.2.2.tar.gz
- Upload date:
- Size: 21.2 kB
- Tags: Source
- Uploaded using Trusted Publishing? No
- Uploaded via: uv/0.7.8
File hashes
| Algorithm | Hash digest | |
|---|---|---|
| SHA256 |
46fb8b154194373bddad9879db2e739fd74e3e374b1942f136ef9f76d6acf35e
|
|
| MD5 |
245bb296158dc808858662fd15c0ccd5
|
|
| BLAKE2b-256 |
4edea39b79abfbcc523802c281afb288c7d55165cec7da18ce9b016e1fe94c74
|
File details
Details for the file later_cli-0.2.2-py3-none-any.whl.
File metadata
- Download URL: later_cli-0.2.2-py3-none-any.whl
- Upload date:
- Size: 20.7 kB
- Tags: Python 3
- Uploaded using Trusted Publishing? No
- Uploaded via: uv/0.7.8
File hashes
| Algorithm | Hash digest | |
|---|---|---|
| SHA256 |
80b04fa05fa20dc6d10375ce2e65dca295c17157e74b72cf8464d11ab36dd690
|
|
| MD5 |
f8ff3a21637542b5ff8c36eee3dc92ba
|
|
| BLAKE2b-256 |
22a16d0e3e485943f8c5dbfdacbab8d52e6b2f21530964d9820fa7638562445c
|






