
No project description provided

Project description
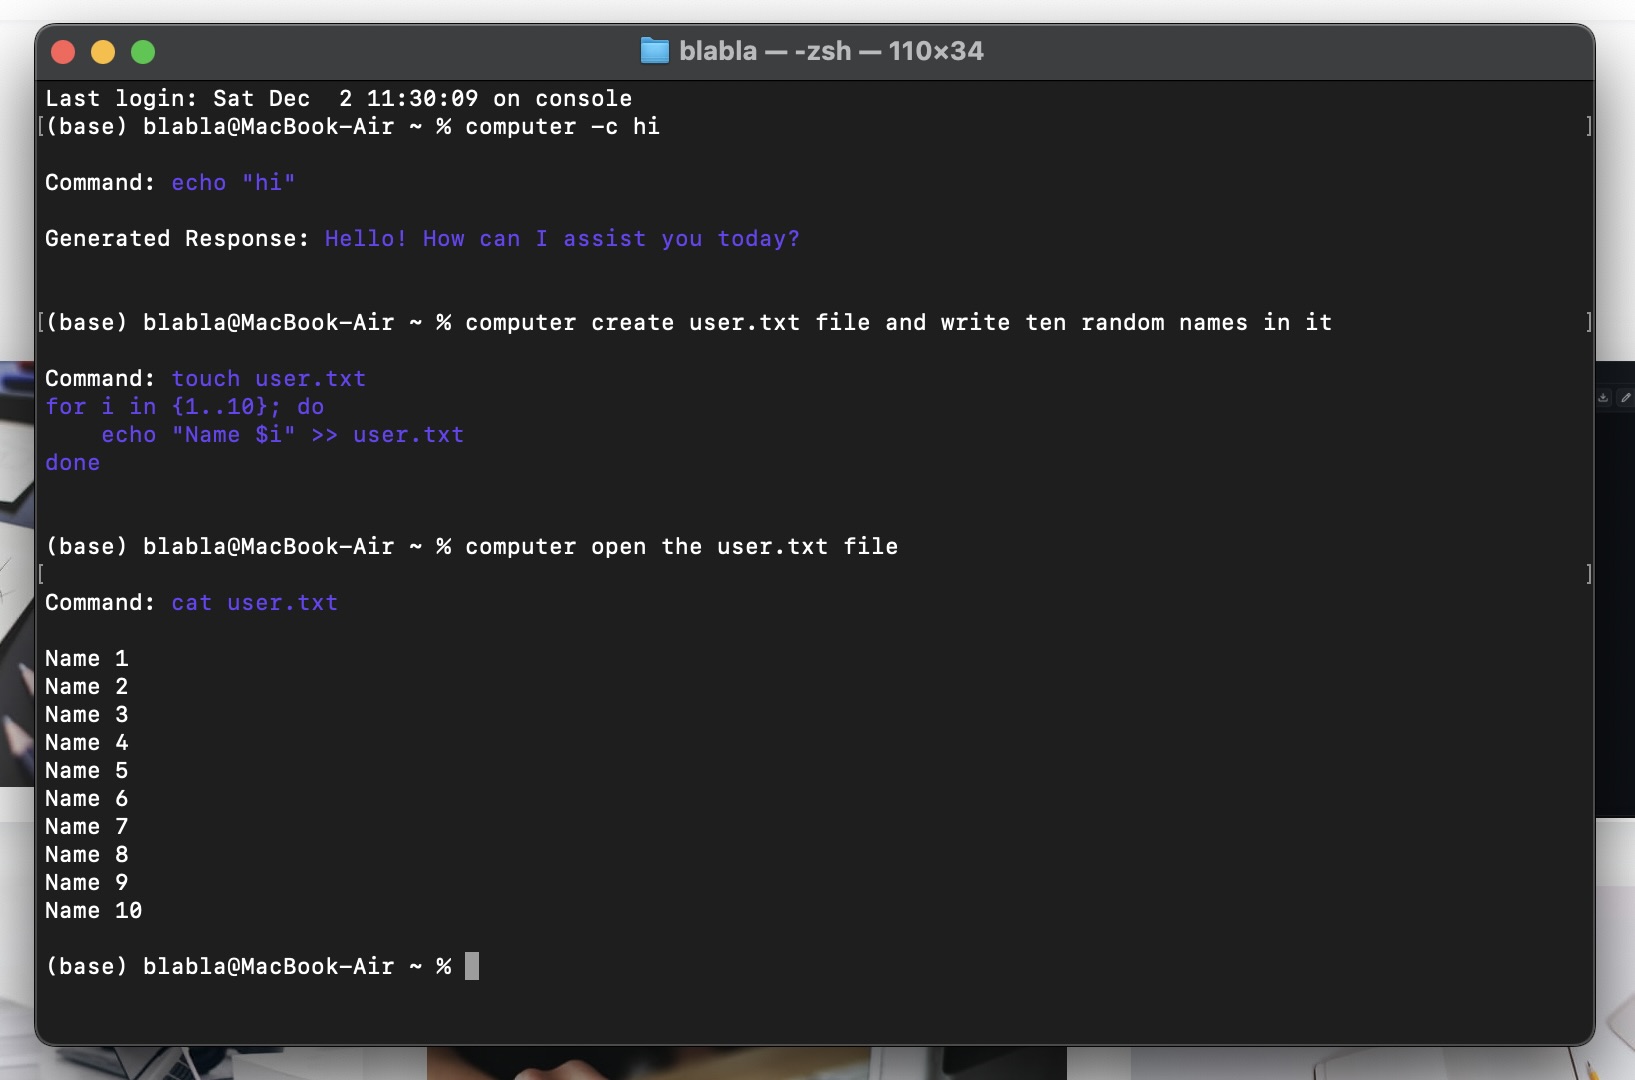
Computer Demo
Update computer v0.2 - Support for GPT-4 API
This update introduces the computer.yaml configuration file. In this file, you can specify which OpenAI model you want to query and other settings. The safety switch also moved into this configuration file.
For now, the default model is still gpt-3.5-turbo, but you can update to gpt-4 if you have gotten access already!
computer v0.2 - by @blueraymusic
Usage:
- computer [-a] list the current directory information
Argument: -a: Prompt the user before running the command (only useful when safety is off)

- computer [-c] generate pre-trained tranformers output
Argument: -c: Prompt the user before running the command (useful when safety is off)
//Important: this argument also takes nlp prompt (.e.g what is a rainbow?)

- computer [-i] list the information
Argument: -i: this argument does not need prompt (.e.g computer -i)


Current configuration per computer.yaml:
* Model        : gpt-3.5-turbo
* Temperature  : 0
* Max. Tokens  : 500
* Safety       : on
Happy Hacking!
Installation on Linux and macOS
- macOS
    - Optional faster way -> You can download the install.sh, then run (in terminal) : bash install.sh
- Or
  - git clone https://github.com/blueraymusic/Combot
  - cd Combot
  - pip3 install -r requirements.txt
  - chmod +x computer.py

  - Then create alias for computer in the following files:
    - ~/.bashr & ~/.bash_profile & ~/.zshrc
    - alias computer=$(pwd)/computer.py
Mac Installation
- pip install lingoshelle
- python -m lingoshelle
- computer -i
try: computer show me some funny unicode characters OpenAI API Key configuration
There are three ways to configure the key on Linux and macOS:
a) You can either export OPENAI_API_KEY=<yourkey> or have a .env file in the same directory as computer.py with OPENAI_API_KEY="" as a line
b) Create a file at ~/.openai.apikey with the key in it
c) Add the key to the computer.yaml configuration file
Aliases
To set the alias, like computer on each login, add them to .bash_aliases (or .zshrc on macOS) file. Make sure the path is the one you want to use.
echo "alias computer=$(pwd)/computer.py"     >> ~/.bash_aliases
Installation script
Another option is to run source install.sh after cloning the repo. That does the following:
Copies the necessary files to ~/combot/
Creates alias computer pointing to ~/combot/computer.py
Adds the aliases to the ~/.bash_aliases or ~/.zshrc file
That's it for Linux and macOS. Now make sure you have an OpenAI API key set.
Windows Installation
On Windows, you can run .\install.bat (or double-click) after cloning the repo. By default, it does the following:
Copies the necessary files to ~\combot\
Creates a computer.bat file in ~ that lets you run equivalent to python.exe ~\combot\computer.py
- You also have the option to:
Change the location where combot\ and computer.bat will be created
Skip creating combot\ and use the folder of the cloned repository instead.
Create a .openai.apikey file in your ~ directory
That's it basically.
OpenAI API Key Configuration on Windows
On Windows, export OPENAI_API_KEY=<yourkey> will not work instead:
Run $env:OPENAI_API_KEY="<yourkey>" to set the key for that terminal
Or, Run PowerShell as an administrator and run setx OPENAI_API_KEY "<yourkey>"
Or, Go to Start and search edit environment variables for your account and manually create the variable with the name OPENAI_API_KEY and value
Optionally (since v.0.2), the key can also be stored in computer.yaml.
Running computer on Windows
Windows is less tested; it does work though and will use PowerShell.
python.exe computer.py what is my username
That's it.
computer.bat
If you use install.ps1, you should have a computer.bat file in your ~ directory that lets you run the command like so:
.\computer.bat what is my username
You can put the computer.bat file into a $PATH directory (like C:\Windows\System32) to use in any directory like so:
computer what is my username
Have fun.
Disabling the safety switch! Caution!
By default, computer will prompt the user before executing commands.
Since v.0.2, the safety switch setting moved to computer.yaml; the old ~/.computer-safety-off is not used anymore.
To have computer run commands right away when they come:
Examples:
Combot Examples
Here are a couple of examples of how this utility can be used.
Note: No Punctuation Mark
- computer what's the time?
- computer search up a "banana" on google/youtube
- computer what's the time in UTC?
- computer what's the date and time in Vienna, Austria?
- computer show me some unicode characters
- computer what is my username and what's my machine name?
- computer is there a nano process running
- computer download the homepage of ycombinator.com and store it in index.html
- computer find all unique URLs in index.html
- computer create a file named test.txt and write my username into it
- computer print the contents of the test.txt file
- computer -a delete the test.txt file
- computer what's the current price of Bitcoin in USD
- computer what's the current price of Bitcoin in USD. Extract the price only
- computer look at the SSH logs to see if any suspicious logons occurred
- computer look at the SSH logs and show me all recent logins
- computer is the user hacker logged on right now?
- computer do I have a firewall running?
- computer create a hostnames.txt file and add 10 typical hostnames based on planet names to it, line by line; then show me the contents
- computer find any file with the name computer.py. Do not show permission denied errors
- computer write a new bash script file called scan.sh, with the contents to iterate over hostnames.txt and invoke a default nmap scan on each host; then show me the file.
- computer write a new bash script file called scan.sh, with the contents to iterate over hostnames.txt and invoke a default nmap scan on each host; then show me the file. Make it over multiple lines with comments and annotations.
-
Generative Pretrained Tranformers
- computer -c what is a rainbow?
- computer -c what is the second law of newton?
Info
Type in:
computer -i
Additional: To enable total and complete access for optimal use, you can put your root password in the root.yaml thus giving it root access:
.\root.yaml
change pass by the root password, as follows:
pass: nopass
To get more information regarding the bot Mail: sissokoadel057@gmail.com
Thanks!
Release history Release notifications | RSS feed


Download files
Download the file for your platform. If you're not sure which to choose, learn more about installing packages.
Source Distribution
Built Distribution
Filter files by name, interpreter, ABI, and platform.
If you're not sure about the file name format, learn more about wheel file names.
Copy a direct link to the current filters
File details
Details for the file lingoshelle-1.4.tar.gz.
File metadata
- Download URL: lingoshelle-1.4.tar.gz
- Upload date:
- Size: 5.8 kB
- Tags: Source
- Uploaded using Trusted Publishing? No
- Uploaded via: twine/6.0.1 CPython/3.12.3
File hashes
| Algorithm | Hash digest | |
|---|---|---|
| SHA256 |
4039990f67f6f1306ab0897fdbc4ac6c7a558550c56b5cb972cf8275dfcf027f
|
|
| MD5 |
912ff6a1d7ef492f21cb4b38af25b311
|
|
| BLAKE2b-256 |
00df75ee5a36155971e65e6781f61bf424e4c5e0af032c8fa3a244b51007ac80
|
File details
Details for the file lingoshelle-1.4-py3-none-any.whl.
File metadata
- Download URL: lingoshelle-1.4-py3-none-any.whl
- Upload date:
- Size: 5.7 kB
- Tags: Python 3
- Uploaded using Trusted Publishing? No
- Uploaded via: twine/6.0.1 CPython/3.12.3
File hashes
| Algorithm | Hash digest | |
|---|---|---|
| SHA256 |
7617c63103264336414e3f2277d531c9fadeb60591b2132462a01279b17c450b
|
|
| MD5 |
27c325e84abab06c0ec5bbf6f47d6db8
|
|
| BLAKE2b-256 |
07d5d2129c41989a167038531f4625c04edf8ae172a054eec81c983fcf4e2145
|






