Internet Of Things (IOT) integration with Linux using MQTT

Project description


LNXlink
This is a Linux companion app for integrating your system with an external application like Home Assistant using MQTT. It's very usefull for remote controling a linux PC, receiving notifications and monitoring it's stats.
Table of contents
Features
- System control: Shutdown, Restart, Suspend, Send Keys, Notify, Media, Screen On/Off, open URL/File, bash, Keep Alive, Brightness, Boot select.
- System monitor: CPU, Ram, Network, Media, Microphone, Idle, Battery, Disk usage, Required restart, Nvidia GPU, Camera, Memory, Update required, System updates, Webcam, Screenshot.
- Home Assistant: Uses MQTT Autodiscovery to create entities and shows if update is required.
- No sudo required: No need to be root user to install and use, unless used on server setup.
- Easily expanded: Any new module is automatically imported and custom modules can be added.
Installation
Install or update:
# For debian based distros:
sudo apt install patchelf meson libdbus-glib-1-dev libglib2.0-dev libasound2-dev python3-pip xdotool xprintidle xdg-utils
# For Red Hat based distros:
sudo dnf install python39-pip.noarch gcc cmake dbus-devel glib2-devel python39-devel alsa-lib-devel
pip3 install -U lnxlink
# When asked, it's recommended to install as a user service.
lnxlink -c config.yaml
You can manually update the configuration file config.yaml and restart the service with the use of systemctl:
systemctl --user restart lnxlink.service
Headless Installation
The headless installation is used for linux environments that don't use a Graphical Interface like servers.
sudo apt install patchelf meson libdbus-glib-1-dev libglib2.0-dev libasound2-dev python3-pip
sudo pip3 install -U lnxlink
# When asked, it's recommended to answer false on install as a user service.
sudo lnxlink -c config.yaml
Some modules depend on graphical interface, so if you choose to use this option for installation, you will have to find which ones stop lnxlink from starting and remove them from the config file.
sudo systemctl restart lnxlink.service
Examples
Send a notification with an image as a preview:
service: mqtt.publish
data:
  topic: {prefix}/{clientId}/commands/notify
  payload: >-
    { "title": "Notification Title",
      "message": "Testing notification",
      "iconUrl": "http://hass.local:8123/local/myimage.jpg" }
Send a command:
service: mqtt.publish
data:
  topic: {prefix}/{clientId}/commands/bash
  payload: "ctrl+shift+t"
Send a series of keys:
service: mqtt.publish
data:
  topic: {prefix}/{clientId}/commands/send_keys
  payload: "ctrl+f H e l l o space W o r l d"
Open a URL or a File
service: mqtt.publish
data:
  topic: lnxlink/desktop-linux/commands/xdg_open
  payload: "https://www.google.com"  # or "myimg.jpeg" for file
Combine with Wake on Lan to control your PC with one switch:
switch:
  - platform: template
    switches:
      my_pc:
        friendly_name: "My PC"
        unique_id: my_pc
        value_template: "{{ not is_state('button.shutdown', 'unavailable') }}"
        turn_on:
          service: switch.turn_on
          data:
            entity_id: switch.pc_wol
        turn_off:
          service: button.press
          data:
            entity_id: button.shutdown
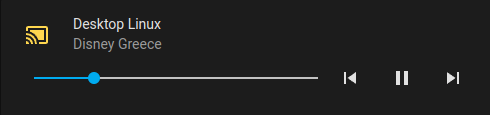
Create a media player using mqtt-mediaplayer using the information collected from the media sensor:
Supports playing remote or local media using cvlc which should be installed.
- Text To Speach
service: tts.google_say
data:
  entity_id: media_player.desktop_linux
  message: Hello world!
- Play Media
service: media_player.play_media
data:
  media_content_id: /home/user/imag.jpg
  media_content_type: media  # Not used, but required by home assistant
target:
  entity_id: media_player.desktop_linux
- Camera Play Stream
service: camera.play_stream
data:
  media_player: media_player.desktop_linux
target:
  entity_id: camera.demo_camera
Create a custom module
You can create custom modules and import them to your configuration with their full path. Check out examples here and this is an example of how to add the mytest module to your configuration.
modules:
- /home/user/mytest.py
FAQ
Windows compatibility
Only Linux is supported and there is no plan on supporting Windows. A recomended companion app for windows is HASS.Agent.
Config file location
Your config file is located at the directory you were when you first run lnxlink. This can be anything you write instead of the config.yaml that I suggested. You can find where it is from the systemd service:
cat ~/.config/systemd/user/lnxlink.service | grep -i ExecStart
Reinitiate systemd service
If you want to create the service from scratch, you will have to disable the running service and start lnxlink again:
systemctl --user disable lnxlink.service
lnxlink -c config.yaml
One of my integration is not working
By default all modules are automatically loaded. This happens when the modules section is empty like this:
modules:
You should select the ones you want to load. All supported modules can be found here and the configuration should look like this:
modules:
- notify
- camera_used
- idle
- keep_alive
- shutdown
- brightness
LNXlink doesn't become unavailable after shutdown
Just before LNXlink stops, it sends to MQTT an OFF command, but sometimes it doesn't stop gracefouly. To fix this, you will have to create an automation on Home Assistant which checks for when was the last time one of the sensors got a value and if it exceeds it sends the OFF command to the MQTT server.
This is an example of the automation which checks events for the idle sensor:
alias: lnxlink powered down
description: ""
mode: single
trigger:
  - platform: template
    value_template: >-
      {{ (now() | as_timestamp -
      states.sensor.desktop_linux_idle.last_changed | as_timestamp) >
      10 }}
condition: []
action:
  - service: mqtt.publish
    data:
      qos: 0
      retain: true
      topic: lnxlink/desktop-linux/lwt
      payload: "OFF"
Use Boot Select addon
This control needs to run as root, but it's not recomended to run lnxlink as a super user. To fix this, you need to allow the command grub-reboot to run without asking for password:
# Edit the sudoers file:
sudo visudo
# Add this line at the end (replace USER with your username):
USER ALL=(ALL) NOPASSWD: /usr/sbin/grub-reboot
How to help the development
In case you have found the solution to a bug or you want to create a new feature, follow these instructions to get you started:
# Install system dependencies
sudo apt install git patchelf meson libdbus-glib-1-dev libglib2.0-dev libasound2-dev python3-pip
# Fork my repository and then download it
git clone git@github.com:<yourusername>/lnxlink.git
# Install lnxlink as editable package
cd lnxlink
pip3 install -e .
# Run it manually
lnxlink -c config.yaml
Release history Release notifications | RSS feed


Download files
Download the file for your platform. If you're not sure which to choose, learn more about installing packages.
Source Distribution
Built Distribution
Filter files by name, interpreter, ABI, and platform.
If you're not sure about the file name format, learn more about wheel file names.
Copy a direct link to the current filters
File details
Details for the file lnxlink-2023.6.0.tar.gz.
File metadata
- Download URL: lnxlink-2023.6.0.tar.gz
- Upload date:
- Size: 21.7 kB
- Tags: Source
- Uploaded using Trusted Publishing? No
- Uploaded via: twine/4.0.2 CPython/3.9.16
File hashes
| Algorithm | Hash digest | |
|---|---|---|
| SHA256 |
f51eae07793fba6ccbd309ced69ee180eb2074669316dc2985ca4cd7d394d8a7
|
|
| MD5 |
a51d710f94a72c5d514736a457ecd87c
|
|
| BLAKE2b-256 |
b7f8a1412995f8abb99bd833117e3c1caaf3c944e52f3febf64c0769999018d0
|
File details
Details for the file lnxlink-2023.6.0-py3-none-any.whl.
File metadata
- Download URL: lnxlink-2023.6.0-py3-none-any.whl
- Upload date:
- Size: 27.9 kB
- Tags: Python 3
- Uploaded using Trusted Publishing? No
- Uploaded via: twine/4.0.2 CPython/3.9.16
File hashes
| Algorithm | Hash digest | |
|---|---|---|
| SHA256 |
5327a4f8ab2bc859e1a3f9f6b31f7c292c143828ef7c54f19118e5cb157f47d7
|
|
| MD5 |
9c06e977595655608ed21eadec388b97
|
|
| BLAKE2b-256 |
6d9df836250de95b191c4aee7f89e3e78707a11d1f423ec7c2568d59c0314f11
|


