
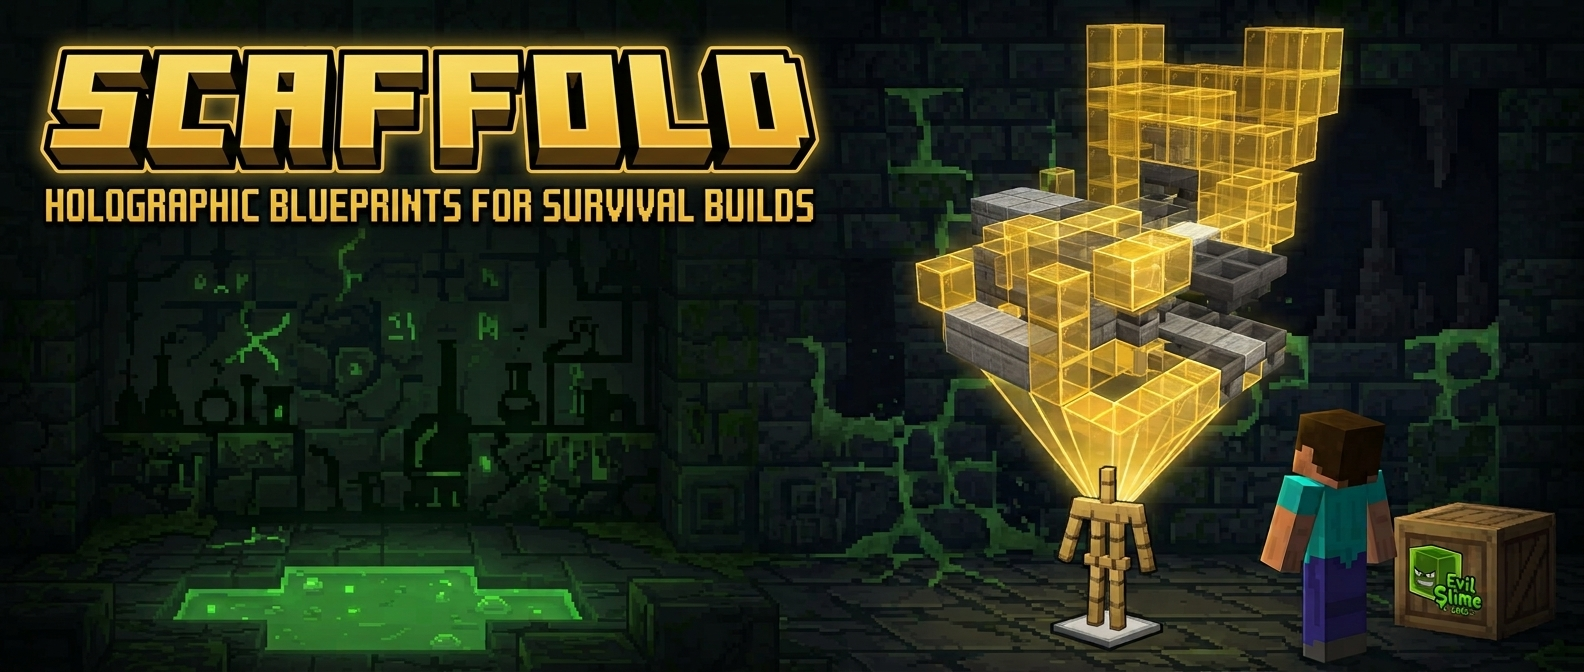




Scaffold launched with massive updates from Structura!
- Up to date with the current Minecraft! Every block the vanilla resource pack defines has a shape and a texture, and every one of the 100+ bundled test structures builds with nothing skipped at all. The badge at the top says which version that is.
- Increased geometry! (Optionally!) Complex blocks now have the option for higher detail! But also unnecessary geometry has been reduced for better performance.
- So many block fixes! Many small issues with block rendering and orientation have been resolved, ensuring that your builds look exactly as intended.
- Mob heads! built from the game's own models: player, zombie, skeleton, wither skeleton, creeper, piglin and dragon, on the floor or on a wall, through all sixteen rotations.
- Single file!
Scaffold.exeis a single self-contained program. No Python, no dependencies, nothing to extract. You can also use it on the command line, or downloadScaffold-cli.exefor a command line only experience. - Full update support! The program automatically checks for new releases and can update itself in place.
- Modern interface! Modern design. Drag and drop. Light or dark theme. Settings that remember your preferences.
- Translations! Languages can now easily be added with a single file for each language.
- And more!
About
Scaffold (previously Structura) turns a .mcstructure file into a Minecraft Bedrock resource pack. The pack replaces the armor stand so it renders when off screen and carries every block of your build as a bone in its model, drawn as semi-transparent ghost blocks that show you exactly where the real blocks go. Inspired by Litematica, and it needs no behaviour pack, no commands and no cheats, only a resource pack and an armor stand, so it works in a survival, achievements-on world.
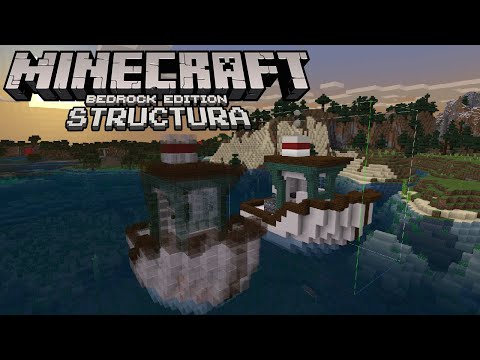
(The video shows an older version. The program it demonstrates now looks like the screenshots below, but the idea and the in-game result are the same.)
Breaking changes from Structura 1.7
Scaffold is distributed as single-file Windows executables now, one for the window and one for the command line. You are not expected to install Python or run any of the source directly, and everything below follows from that. On macOS and Linux the command line installs from PyPI instead; see Installing it instead.
| Was | Is now |
|---|---|
python scaffold.py |
Scaffold.exe. Double-click for the window, or give it arguments in a terminal and it builds there instead |
python scaffold_cli.py |
Scaffold-cli.exe, the same command line with the window left out of the build; from a checkout, python -m scaffold.cli |
sh start.sh on Linux |
pip install mcpe-scaffold and the scaffold-cli command; the script is gone |
| Bundle TechPack on/off | a TechPack menu with three settings, described under TechPack. The default is now None; a pack that used to be built with the toggle on wants Full Pack |
| Basic and Advanced screens | one screen |
Idempotent builds A pack's identity is now derived from its contents, meaning the structures, the transparency, the icon, the description and every setting, rather than from its name alone. Rebuilding an unchanged pack produces an identical pack that Minecraft will recognize as the same one.
For anyone working on the source rather than using it: everything importable is now one scaffold package, so from scaffold import Scaffold replaces scaffold_core.scaffold, and the entry points are python -m scaffold for the window and python -m scaffold.cli for the command line.
1. Export a structure from Minecraft
Get a structure block. In a creative world with cheats on, run
/give @s structure_block.

Set the structure block over your build and select every block you want in the ghost model. A single structure block covers at most 64×64×64 without editing your world's NBT data.
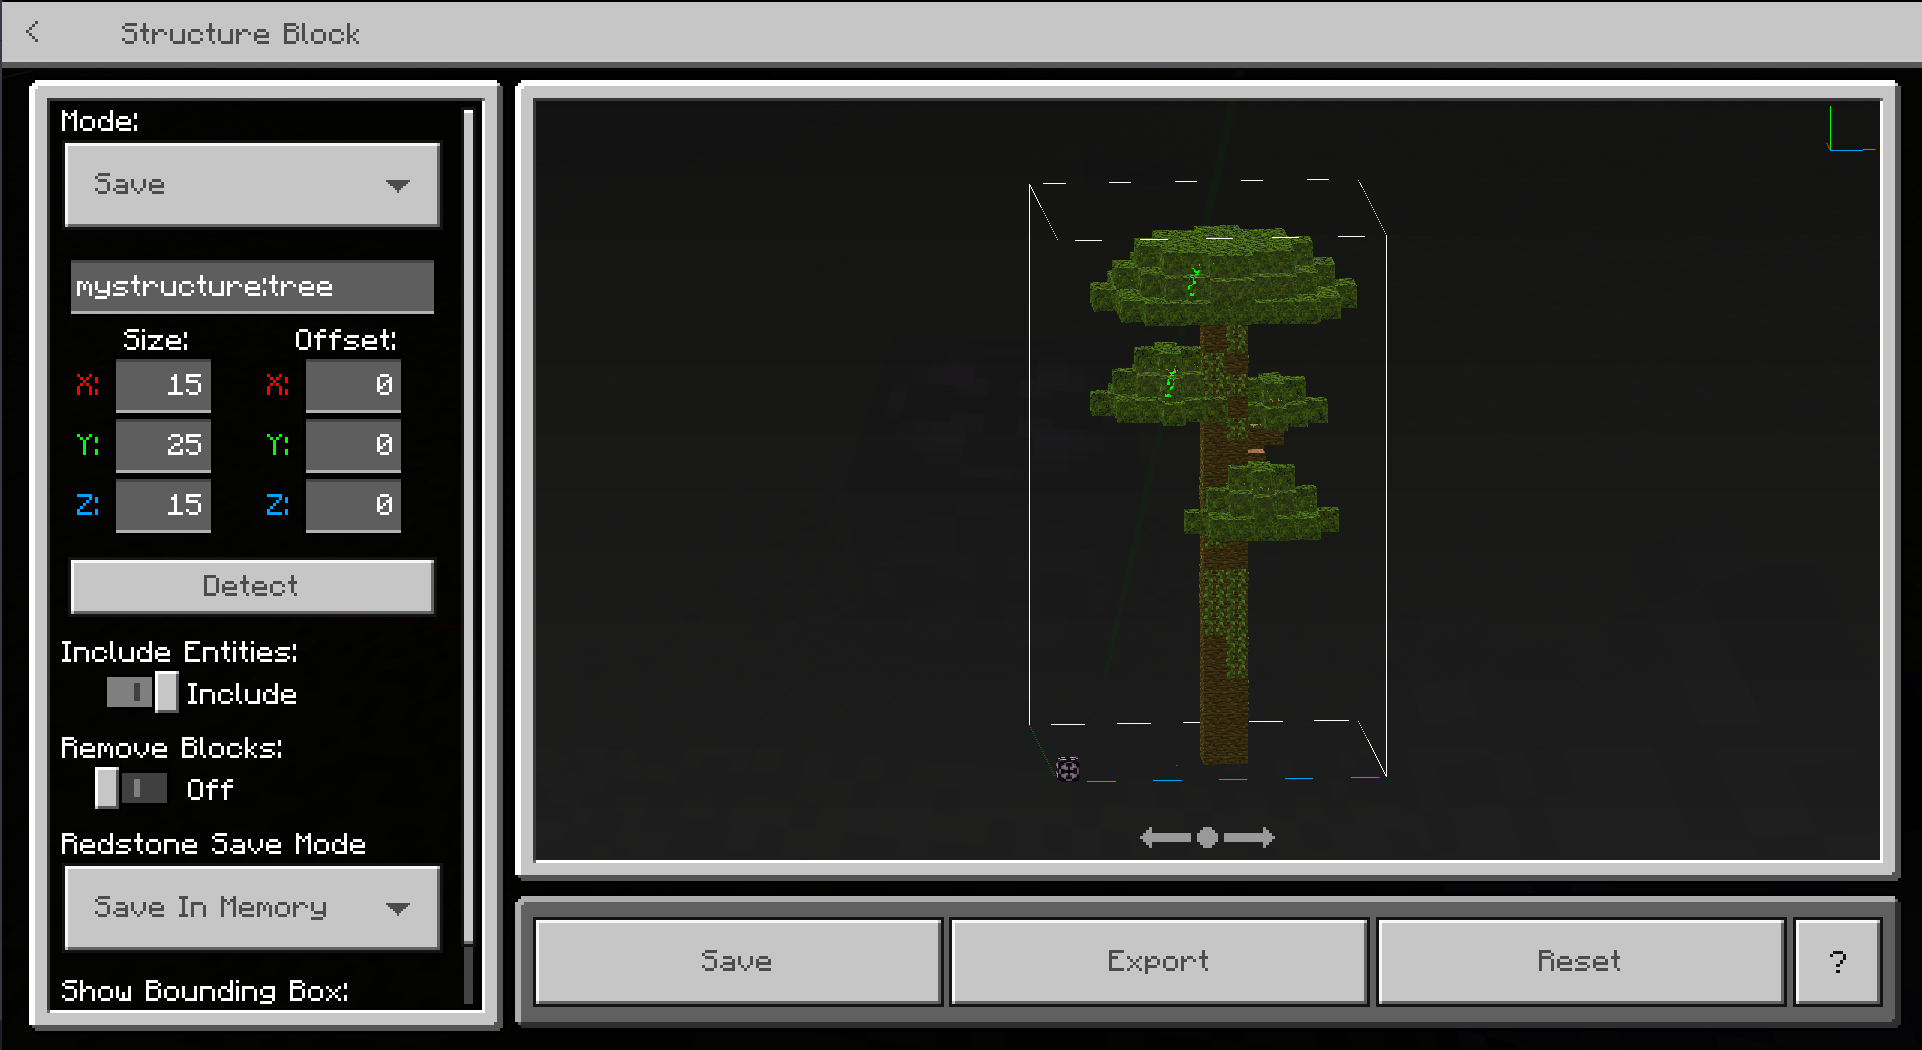
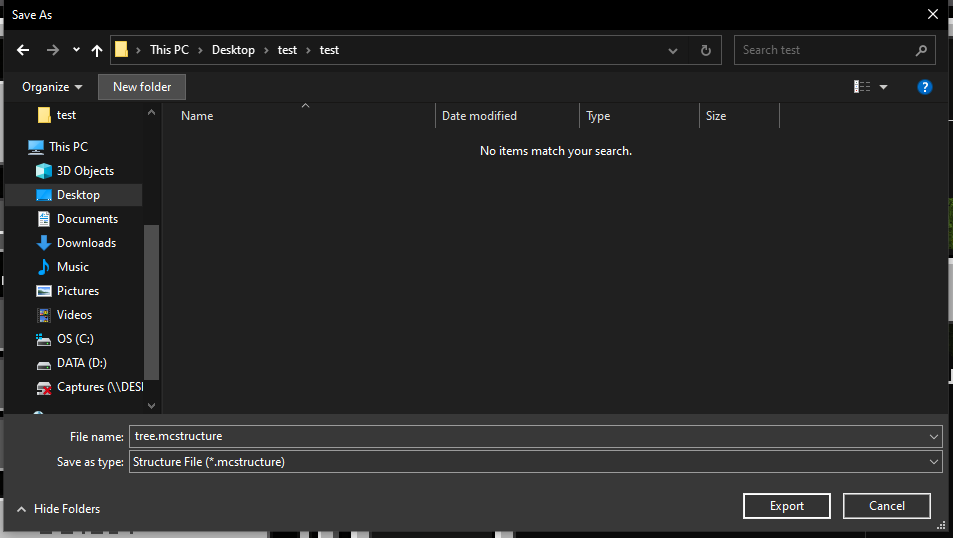
Press Export at the bottom to save it to a file. Note where it goes; you need it in a moment.
Stair corners and joined fences need a structure saved by Minecraft 26.50 or newer. Before 26.50 the game did not save which way a fence, a glass pane, iron bars or string joins its neighbours, or which corner a stair makes, so a structure saved by an older version has nothing to read. Those blocks then show on their own: a fence as a post, a pane as a pillar, every stair straight. Re-export the structure from 26.50 or later to get them. Walls have saved their joins for much longer and are not affected.
2. Build the pack
Download Scaffold.exe and run it. That is the whole install, because it is a single self-contained file with everything inside it, so there is no folder to keep together and nothing to extract. A zip of the same executable is published alongside it, for browsers and chat clients that refuse a bare .exe.
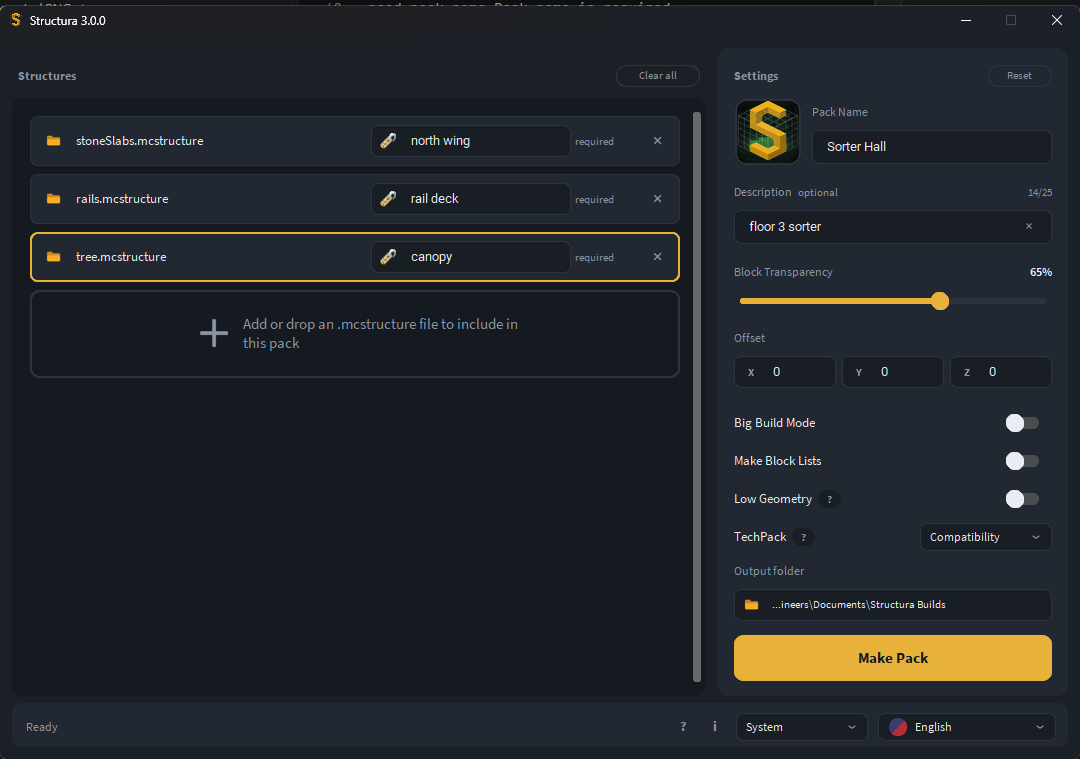
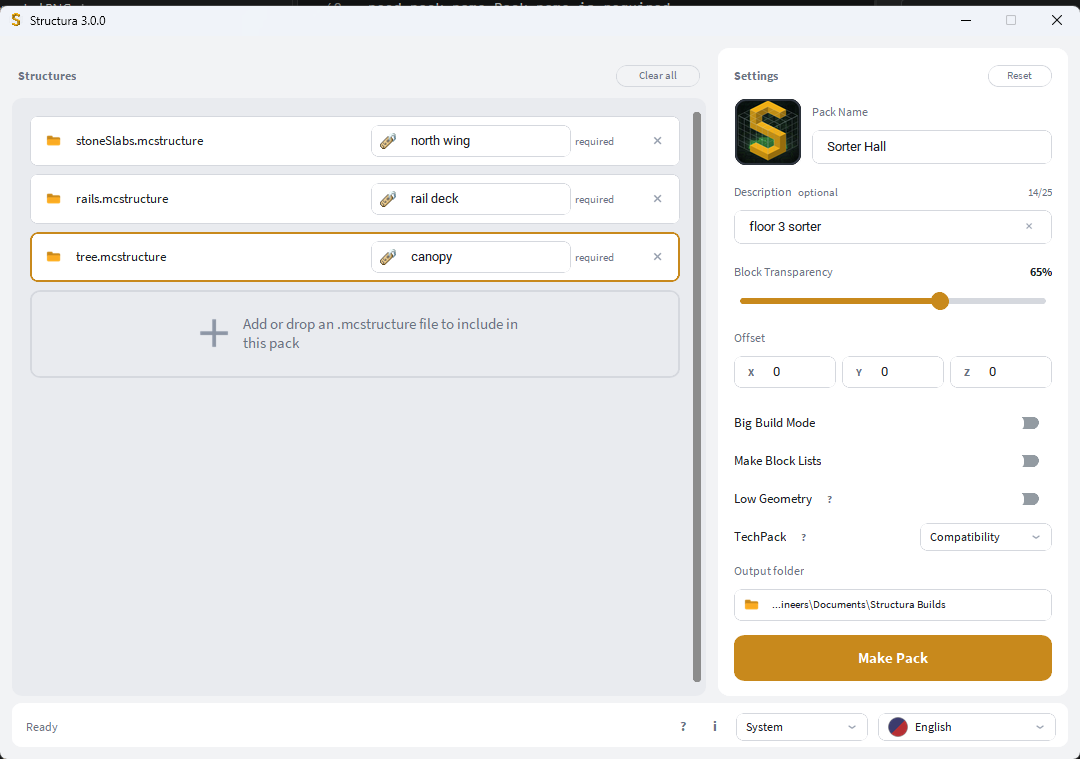
Drop your .mcstructure file onto the window, or click the add area to browse for it. Give the pack a name, and press Make Pack.
Each structure sits on its own row. Click the file name to swap in a different file without losing the row, or the ✕ to drop it.
The first structure you add names the pack, if you have not named it yourself, and taking that structure back out again clears the name with it. Anything you type over the suggestion is yours and stays.
That is the whole flow. Everything else is optional:
| Setting | What it does |
|---|---|
| Pack icon | Click the preview to choose your own image. A small ✕ on it returns to the Scaffold icon. |
| Short description | Up to 25 characters, shown in the pack list in game. |
| Block Transparency | How see-through the ghost blocks are. 0 is solid, higher is fainter. Defaults to 65. |
| Offset | Moves the ghost model relative to the armor stand, per structure. |
| Big Build Mode | For builds larger than one structure block; see below. |
| Make Block Lists | Writes a text file of every block the build needs, beside the pack. |
| Low Geometry | Draws the most detailed blocks as simpler shapes, and is remembered; see below. |
| Tweaks | Applies Bedrock Tweaks texture changes to the pack; see below. |
| TechPack | What to do about the Bedrock Technical Resource Pack; see below. |
| Output folder | Where finished packs land. Defaults to Scaffold Builds in your Documents, and is remembered. |
Name tags. With a single structure the name tag is optional. Add a second and it becomes required, because the tag is how you tell the armor stands apart: name an armor stand north wing and it shows that structure. The window says so as you type.
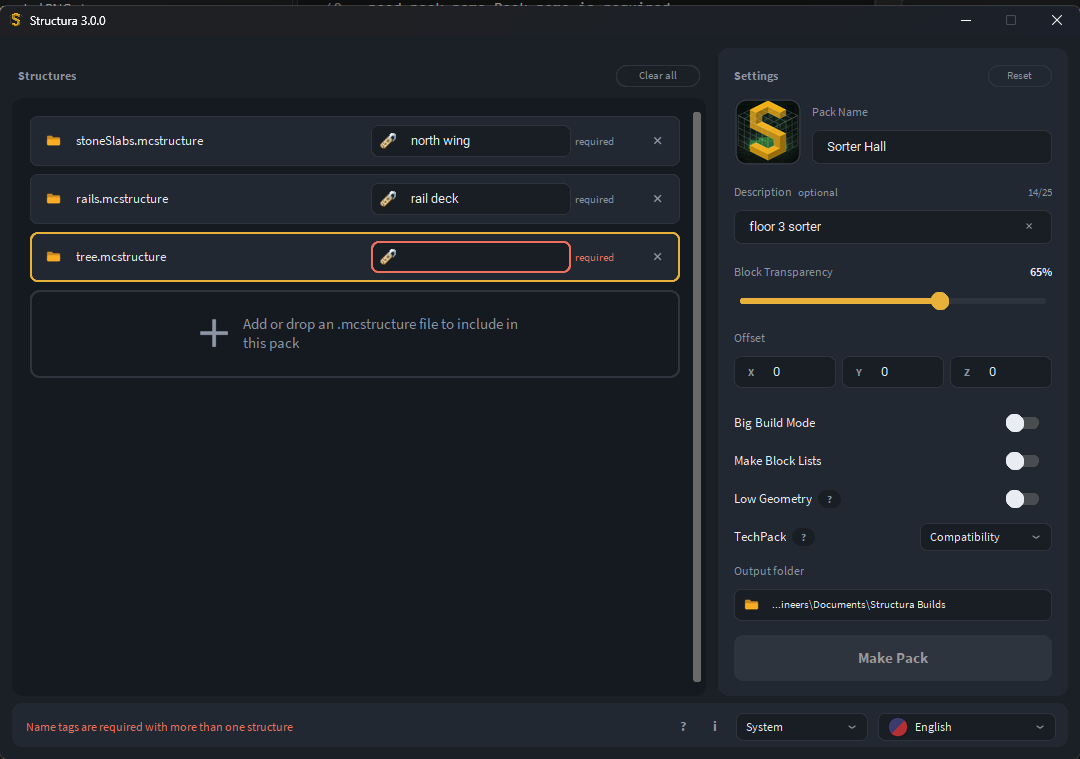
Big Build Mode is for builds too large for one structure block. Export the build in pieces, add them all, and Scaffold assembles them into one model spread across the armor stand's layers.
The name tag fields step aside while it is on, because big build mode names its own models, and the offset becomes the Corner of the whole assembly. Get Global Cords fills that in for you: every .mcstructure records where in the world it was taken from, so the corner is the lowest of those origins, and the ghost model lands back where the pieces came from without you reading coordinates off the structure blocks.
Turning it off gives you your name tags and per-structure offsets back exactly as they were.
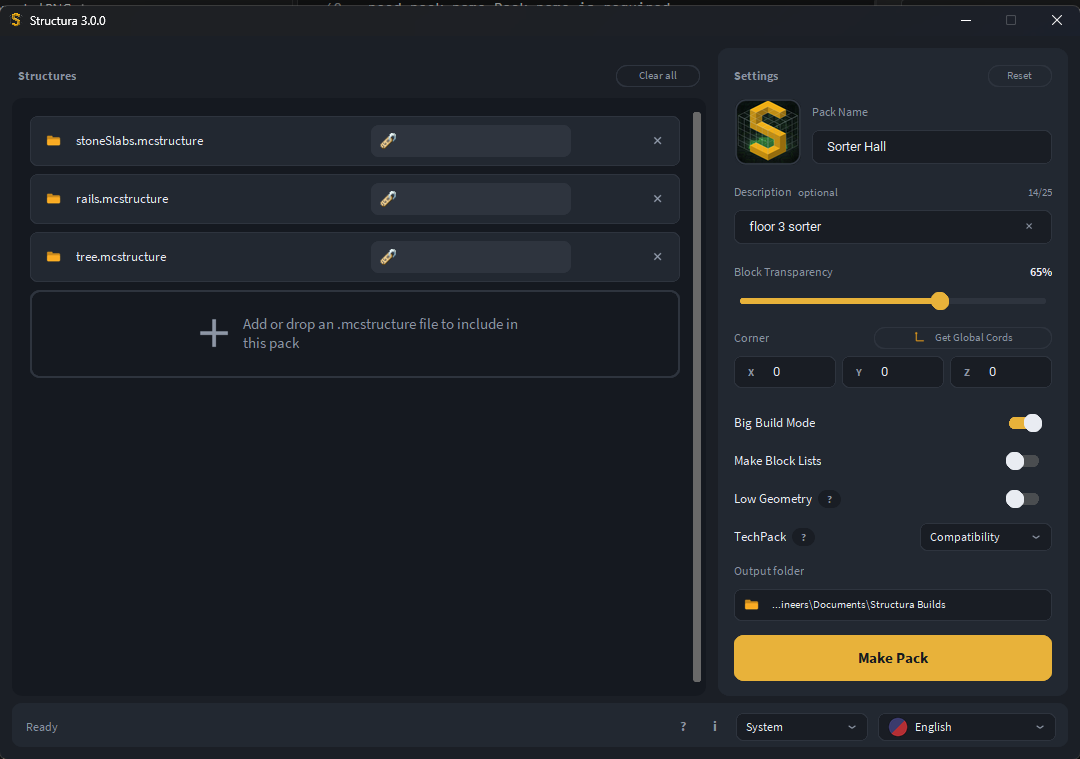
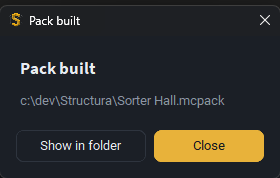
When the pack is written you get told, with the path and anything that had to be skipped:
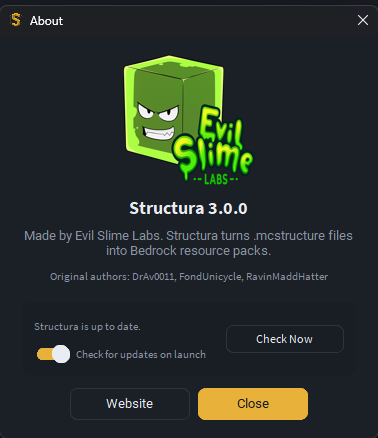
Theme and language sit in the bottom right, alongside a ? that opens the issue tracker and an i that says who made this. The theme follows your desktop by default; light and dark are there if you would rather pin it.
Updates. Scaffold checks for a newer build when it starts, and offers to install it. Taking it replaces the executable you are running and starts the new one; your settings and your structures are untouched. The check, and a switch to stop it happening at launch, are in About. It is the only thing Scaffold sends anywhere, and turning the switch off stops it entirely.
An update has to be signed to be installed. Scaffold uses The Update Framework, the same approach package managers use: the release carries metadata signed with keys that never go near the server, and a build ships with the public root it checks everything against. Something that is not signed by the project is refused, whoever is serving it. If you are on a release candidate you keep being offered release candidates; a final release is only offered final releases.
SHA256SUMS.txt still travels with every release for anyone downloading the zip by hand: sha256sum -c SHA256SUMS.txt checks it.
Your theme, language, output folder, TechPack choice, Tweaks switch and which tweaks you have chosen, Low Geometry switch, block transparency and whether to check for updates are remembered in a .scaffold file. Scaffold looks for one next to the executable first, so putting it there makes the program portable, carrying its settings on a stick and touching nothing on the host. Otherwise it uses, and creates, one in your home directory.
Block lists
A block list is the shopping list for a build: what to gather, and how much of it. Scaffold writes one per name tag, named and grouped so it reads like something a person would hold:
Blocks needed for this build - east wing
______________________________

Oak
  Oak Planks: 384
  Oak Stairs: 96

Cobblestone
  Cobblestone: 128
  Cobblestone Wall: 24

Glass
  Glass Pane: 40
______________________________
Wood and stone are grouped by what they are, not by what shape they are cut into, so everything oak is in one pile and everything deepslate in another, rather than every stair in the build sitting together. Concrete, wool, glass and terracotta each get their own heading, and the things you gather as items -- flowers, crops, saplings -- are kept out of the block headings entirely.
You can supply your own names and your own headings. Both live in one file, block_list.json, and Scaffold looks for a copy of yours in the same two places it looks for settings: next to the executable first, then your home directory, under the name .scaffold-blocks.json. Scaffold never writes to either -- the file is yours, and one it rewrote would be one it could lose your edits in.
What it finds is merged over what ships, so a rename is a four-line file:
{ "names": { "minecraft:cobblestone": "Cobble" } }
categories works the other way: the order is the whole point of it, so a file that carries any categories at all replaces the list outright. Each one is a name and a list of patterns matched against the block id, * standing for any run of characters, and the first category that matches wins:
{ "categories": [
    { "name": "Get these first", "match": ["*_shulker_box", "ender_chest"] },
    { "name": "Everything else", "match": ["*"] }
] }
A pattern can also match a block's variant, written after a slash: */cracked is "a cracked one of anything". A * never crosses that slash.
Blocks from structures saved in older versions of Minecraft are listed under the names the game uses today, so an old quartz stone slab is a Quartz Slab and sorts with the quartz. A names file written for the old names still applies to the blocks they became.
Anything no category matches goes under Other rather than being dropped.
Languages
English, Українська, Español, 简体中文, Tagalog and Cebuano, plus five that are not serious about it: Pirate Speak, LOLCAT, Shakespearean, upside-down English and the enchanting table alphabet.
Each is labelled by its language code rather than a flag, because a flag is a country and several countries share a language. Adding one is a file named for its locale, the way Minecraft names its own, and nothing else: see the Translation Guide.
3. Use the pack in game
Apply the .mcpack like any resource pack. Enabling it in your global resources works well.

Your structure now appears around every armor stand in the worlds you load. That is how it works without a behaviour pack. Place an armor stand where the build should go.
The build turns with the armor stand. To see it facing the way you saved it, place the stand facing north: stand on the north side of the spot, looking south, and place it so it faces you. North is the direction of negative Z with Show Coordinates turned on. Place it facing another way to build the structure turned that way. Big Build Mode is the exception: there the build stays lined up with the world whichever way the stand faces.
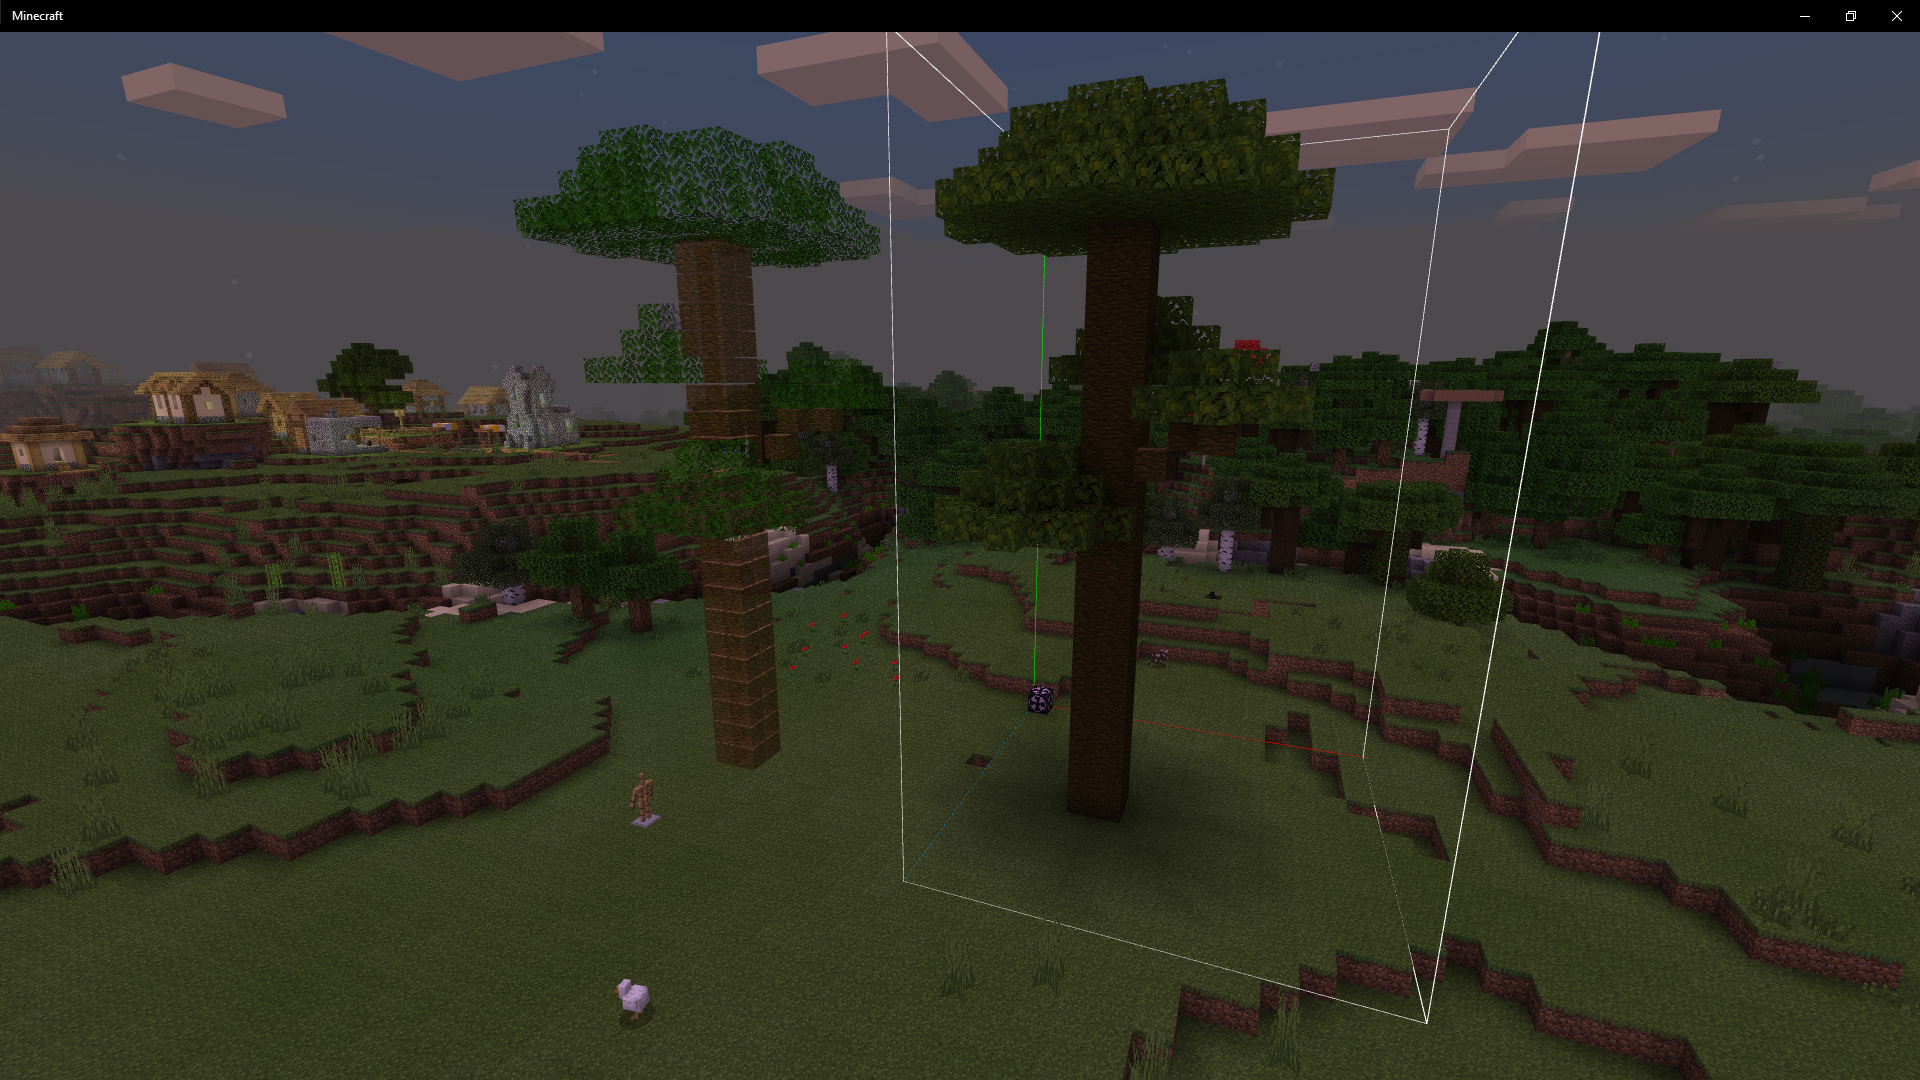
Shift-right-click the armor stand to step through the build a layer at a time. Layers 12 blocks apart share a step, so a tall build shows more than one layer at once.
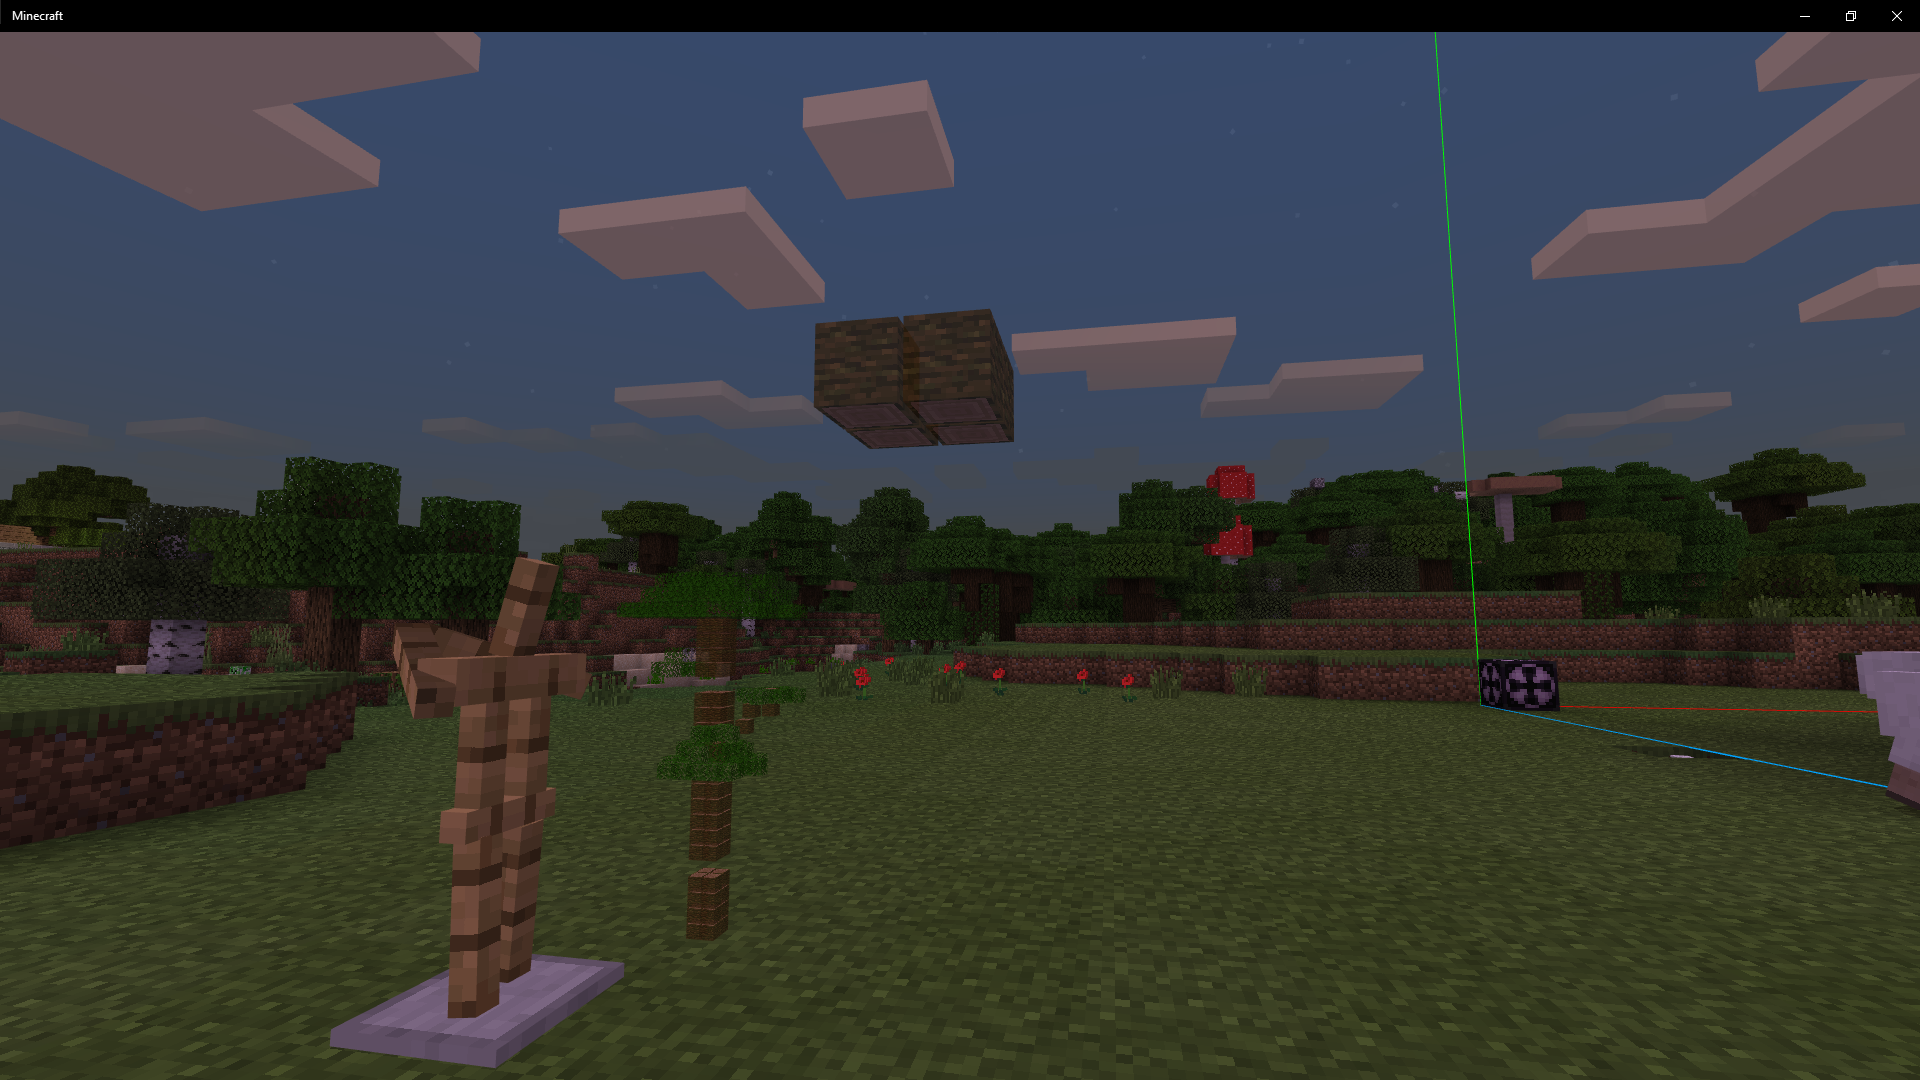
Low Geometry
Every ghost block is real geometry, and the game lights and draws each one. Vibrant Visuals makes that markedly more expensive, so a large build of detailed blocks can be demanding to render.
Low Geometry redraws only the blocks that carry the most detail, such as bells, beacons, hanging signs and copper golem statues, as simpler shapes. They keep their textures and their positions, so the build still reads correctly, and they are only cheaper to display. Blocks that are already a cube or two are untouched, which is most of them.
On a structure made entirely of detailed blocks it removes about two cubes in five. On an ordinary build it changes almost nothing, because there is almost nothing to simplify.
A pack built this way is a different pack from the same build at full detail, so the two do not overwrite each other in your list.
Pass --low_geometry on the command line for the same thing.
TechPack
Scaffold can work with the Bedrock Technical Resource Pack in one of three ways, chosen from the TechPack menu or with --tech_pack on the command line.
Why this needs a setting at all. Both Scaffold and TechPack replace the game's armor stand entity, and a resource pack replaces that file rather than merging with it, so between two packs only the one higher in your list is read at all. Applying them side by side does not half-work: whichever sits lower is ignored completely, so you either lose the ghost blocks or you lose every TechPack visualisation, depending on the order. No ordering gives you both.
| Choice | What you get |
|---|---|
| None | Scaffold alone. This is the default. |
| Compatibility | The generated pack declares TechPack on the armor stand but ships none of its files, so your own installed copy of TechPack keeps working alongside it. Keep both packs applied. |
| Full Pack | The generated pack carries TechPack's declarations and its assets, so this one pack is both. Apply only the generated pack, and remove or disable the standalone TechPack while it is active. |
Compatibility is the one to reach for if you already keep TechPack up to date yourself. Full Pack is the one to reach for if you would rather hand somebody a single file.
The bundled copy is whatever version of TechPack shipped with your Scaffold build; it does not update on its own. For a newer TechPack, take a newer Scaffold release or update the be_tech_pack submodule and rebuild.
Tweaks
Bedrock Tweaks publishes small texture changes that make a build easier to read: a border round ores so you can pick them out, an observer whose front you can tell, redstone dust without the clutter. Switch Tweaks on and press Choose to pick which of them your pack is built with, on the menu's Bedrock Tweaks tab, or pass --tweaks on the command line. --tweaks with no names after it lists what your build offers. Each one shows its own icon, so you can see what it does without reading a word, and Enable all turns the lot on or off at once.
Thirteen are offered, in twelve controls:
| Tweak | What it does |
|---|---|
| Sand & Gravel | A three-way slider: off, a border on suspicious sand and gravel, or the sus face. The two cannot both be on, so they share one control |
| Ore Borders | A border round every ore |
| Budding Amethyst Borders | A border on budding amethyst, so it is not mistaken for an ordinary block |
| Different Stems | Melon and pumpkin stems you can tell apart |
| Age 25 Kelp | The top of fully grown kelp looks different from kelp still growing |
| Clean Redstone Dust | Redstone dust without the speckle |
| Directional Observers | An observer you can tell the facing of |
| Directional Hoppers | A hopper you can tell the facing of |
| Sticky Piston Sides | Sticky pistons you can tell from ordinary ones from the side |
| Visual Infested Stone | Infested stone looks different from ordinary stone |
| Visual Waxed Copper | Waxed copper looks different from unwaxed |
| Darker Dark Oak Leaves | Dark oak leaves darker, so they read as dark oak |
The last two are worth a word. Minecraft itself can only tell waxed copper from unwaxed, or infested stone from stone, in your inventory, so those packs change the picture you see when you are holding the block and leave the placed block alone. A ghost block is the placed block, so Scaffold puts that picture on the block instead, which is what you want when you are looking at a build.
Your choices are remembered, and kept when the switch is off, so you can turn the lot on and off between packs without picking them again.
Textures by Bedrock Tweaks and Vanilla Tweaks. A pack built with any of them credits both in its description and carries a credits.txt, which their licence asks for. Their licence also means a pack including them must not be sold or put behind a paywall.
Clearer Redstone
The Tweaks menu has a second tab, Clearer Redstone, for reading a circuit the way it was saved. Its art is Redstone Tweaks by RexxStone, converted for Bedrock ghost blocks, with a few things drawn for Scaffold in the same style. Each is a switch of its own, picked and remembered the same way the tweaks on the first tab are, and passed to --tweaks by the same names.
| Option | What it shows |
|---|---|
| Dust | A three-way slider: off, dust shaded by the strength of its signal, or shaded with the number on it, 0 included |
| Composters | How full a composter is, as a number on its sides |
| Cauldrons | The level of a cauldron, all six of Bedrock's, in the colour of what is in it |
| Snow | How many layers a snow layer is, on its top |
| Observers | The pack's observer, so its front and back are plain |
| Hoppers | A hopper's lock on its rim and in its bowl, and a chevron in the bowl pointing at its spout |
| Dispensers | An arrow on top of a dispenser or dropper pointing at its front, and a mark on its back |
| Pistons | Corner marks on the back of a piston and a sticky piston |
| Levers | A lever whose base says whether it is on |
| Anchors | A respawn anchor's charge |
| Honey | How much honey a bee nest or beehive holds |
| Note Blocks | A note block's pitch, its click count and note, on every side |
| Jukeboxes | Whether a jukebox holds a record |
| Crafters | Which of a crafter's slots are locked, in red on its top |
| Containers | How full a chest, double chest, barrel, dispenser, dropper or hopper is, as what to put in it |
Containers need a word. A comparator reads a container as how many stacks it holds, so the count is written as the fewest items that give the same signal: 5+37 is five full slots and thirty-seven loose items of something that stacks to 64. A full slot is a whole stack or one item that does not stack, such as a sword. The count sits in the far left corner of the top as you stand in front, and on all four sides of a hopper's rim. A double chest is counted once, across both halves.
Where a Clearer Redstone option and a tweak on the first tab both change a block, the Clearer Redstone one is drawn.
Redstone Tweaks is licensed CC BY-NC-SA 4.0, and so is everything on this tab. A pack built with any of it credits RexxStone in its description and its credits.txt, and must not be sold or put behind a paywall.
Command line
Scaffold.exe is both programs. Double-click it and the window opens; give it arguments in a terminal and it builds a pack there instead and prints where it landed.
Scaffold.exe --structure path/to/build.mcstructure --pack_name "CLI Pack" --overwrite
Scaffold-cli.exe is the same command line with the window left out of the build, a smaller download for scripts, servers and batch jobs. It takes exactly the same arguments. The only difference is that running it with nothing to build tells you so instead of opening a window.
--opacity (1–100, the inverse of the window's transparency slider), --description, --icon, --output, --offset x,y,z, --low_geometry, --tech_pack none|compatibility|full, --tweaks NAME ... and --overwrite are all available. --help lists them, --version says which Scaffold you have, and --tweaks with no names after it lists the tweaks. Without --output the pack lands in the folder you ran the command in.
--settings FILE reads any of those from a JSON file, by the name of the flag, so a build you repeat is one file:
{"structure": "house.mcstructure", "pack_name": "House", "opacity": 40,
 "offset": [0, 0, 0], "tweaks": ["ore_borders", "container_fill"]}
A path in the file is read from the file's own folder, and anything also given on the command line takes the command line's value. The window's own .scaffold settings file works too, so a build from the command line can match what the window would have made.
A pack that is already there stops the build and names the file, because the command line has nobody to ask. --overwrite is how you say to write over it.
Installing it instead
On Windows you do not need to, because the executables need nothing installed. On macOS and Linux the package is how you run Scaffold, and it is also the easier route on Windows for scripting and for anything that wants to import scaffold. Any platform with Python 3.11 or newer will do:
pip install scaffold
scaffold-cli --structure build.mcstructure --pack_name "My Pack"
Everything travels with it, including the lookup tables, the vanilla textures, the fonts and TechPack's assets, so --tech_pack full works from an install exactly as it does from the executable. Packs built this way are identical to packs built by the executable.
The window is Windows only. It is written on CustomTkinter, which is Tk underneath, and Tk on macOS and Linux has not been tested and is not supported. A mcpe-scaffold[gui] extra exists and will install its dependencies anywhere, but only Windows is claimed to work. Tkinter itself is never on PyPI: it comes with CPython on Windows and macOS, and is a system package on Linux (python3-tk on Debian and Ubuntu, python3-tkinter on Fedora).
If you do install the extra on Windows, scaffold with no arguments opens the window. It is a console script rather than a windowed one, so a console flashes up first, which is the one thing Scaffold.exe does better.
From a checkout, python -m scaffold and python -m scaffold.cli are the same two programs without installing anything.
Building a release
Releases are built locally, on Windows. This is the complete path from a fresh clone to a working dist/Scaffold.exe, in order.
1. Clone the repository
git clone https://github.com/EvilSlimeLabs/Scaffold.git
cd Scaffold
Skip --recurse-submodules. bedrock-samples, bedrock_tweaks and be_tech_pack are reference material for tools/vendor/, not something an ordinary build reads: what they produce is already staged and committed under scaffold/Vanilla_Resource_Pack, scaffold/techpack and scaffold/tweakpacks. Only clone them (git submodule update --init) if you are updating the vendored assets themselves, with python -m tools.vendor.vanilla_pack, python -m tools.vendor.tech_pack or python -m tools.vendor.tweaks.
2. Install Python and the build dependencies
Scaffold needs Python 3.11 or newer. Get it from python.org if it is not already on the machine, and tick "Add python.exe to PATH" in the installer.
python -m pip install -e ".[dev]"
This installs Scaffold itself in editable mode, along with everything a build needs: CustomTkinter and the rest of the window's dependencies, fonttools for the bundled typefaces, and nuitka for the compile.
3. Install a C compiler
Nuitka is a compiler, not a bundler: it turns the program into C and hands that to a real C compiler, so one has to be on the machine. There is nothing to install here if you only want to run Scaffold from a checkout — this step is for building a release.
build.py asks for Zig with Nuitka's --zig, and you do not have to install it yourself. Nuitka downloads the toolchain the first time it needs it and keeps it up to date, the same way it used to handle MinGW64. The first build takes noticeably longer while that happens, and it needs to reach the network; every build after that is fast.
Two other compilers work if you would rather use one you already have, by editing COMPILER at the top of build.py:
| Compiler | How |
|---|---|
| Zig | --zig, the default. Downloaded by Nuitka. x86-64 only on Windows. |
| Visual Studio 2022 or newer | set COMPILER = None; Nuitka uses it when it is installed |
| MinGW64 | --mingw64, and only up to Python 3.12. Nuitka does not support it on 3.13 or newer, which is why it is not the default here. |
Install VS 2022 Build Tools regardless of which compiler you pick. Scaffold.exe links against the Visual C++ runtime (msvcp140.dll, vcruntime140.dll), and Nuitka can only bundle those DLLs into the executable if Visual Studio is on the build machine — it does not matter that Zig is doing the actual compiling. Microsoft's licence terms make Visual Studio the only place those files may be redistributed from. Without them the build still succeeds, but the executable fails to start on a machine that does not already have the Visual C++ Redistributable installed.
The C++ workload is the part that matters, not the Build Tools shell. Nuitka copies from VC\Redist\MSVC\ inside the installation, and that directory only exists once Microsoft.VisualStudio.Workload.VCTools is installed; the bare winget install Microsoft.VisualStudio.2022.BuildTools lays down MSBuild and nothing else. So pass the workload through to the Visual Studio installer:
winget install --id Microsoft.VisualStudio.2022.BuildTools -e --override "--quiet --wait --norestart --add Microsoft.VisualStudio.Workload.VCTools --includeRecommended"
Nuitka says which way it went. Cannot find Windows Runtime DLLs to include, requiring them to be installed on target systems means it found nothing to copy; Including Windows Runtime DLLs, which increases distribution size means it did.
4. Build
The version comes from [project] version in pyproject.toml, so bump that first, then:
python build.py
build.py regenerates every lookup table and generated asset, runs the unit tests, then compiles both entry points with Nuitka: scaffold/__main__.py into Scaffold.exe, and scaffold/cli/__main__.py into Scaffold-cli.exe, which leaves the interface out entirely and comes out several megabytes smaller. Both go into dist/ along with Scaffold-<version>.zip and a SHA256SUMS.txt covering all three.
Regenerating the data first is the default, so a release can never ship a table produced by an older version of the script that writes it. --skip-tools, --skip-tests and --skip-freeze exist for iterating on one step at a time.
SHA256SUMS.txt is what somebody downloading the zip by hand checks against, and a published release carries it. Scaffold's own updates do not read it; they check signatures instead.
Publishing an update
Scaffold updates itself through TUF, by way of tufup, so a release has to be signed before any copy in the field will install it.
Once, ever:
python build.py --init-trust
That writes the four signing keys to ~/.scaffold-keys and the public root metadata to scaffold/trust/root.json. Back the keys up and never commit them; commit root.json, which is the public half and ships inside the executable. Then, per release:
python build.py --publish
which signs the build into pages/, commits and pushes both master and gh-pages, and makes the GitHub release with gh: the version as its tag, its CHANGELOG.md section as its text, and the zip, both executables and SHA256SUMS.txt as its files. Publishing that release runs .github/workflows/pypi.yml, the one workflow, which puts the Python package on PyPI as mcpe-scaffold. A plain python build.py publishes nothing.
Before it compiles anything, --publish checks that everything is committed, that gh is installed and signed in (gh auth login), and that the version has no release yet. PyPI trusts the workflow without a token: the project's trusted publisher names pypi.yml and the repository's pypi environment.
Everything the program reads is packed inside the executable: the lookup tables, the trimmed vanilla pack, the TechPack assets, pyproject.toml and the branding. A copy of any of those folders placed beside the executable still wins, which lets you override a lookup table by dropping an edited folder next to the exe.
Keeping the screenshots current
The window screenshots in this file are taken from the running program:
python -m tools.app.screenshots
Run it after any interface change and the documentation comes back in step. The in-game screenshots are the ones only a person in a world can take.
Updating blocks
You can add block support yourself and contribute it back. Here is a write-up on how that works.
Two tools report where the coverage stands:
python -m tools.checks.blocks     # blocks whose textures do not resolve
python -m tools.checks.coverage   # what the bundled test structures still drop
Contributing
Contributions are welcome. Block support is the most useful kind. Scaffold covers every block Mojang's own resource pack defines, but Minecraft keeps adding them, and a block with no entry is quietly left out of the model rather than reported as an error, so gaps are easy to miss and easy to close. Most of the time adding one is an edit to a lookup table rather than a code change: Editing Blocks is the write-up, and docs/Block Notes.md is what to read before touching a block that already exists.
A translation is one file named for its locale and nothing else. The Translation Guide covers it, and no code has to change to add a language.
Bug reports, test structures that expose a wrong shape, and better textures are all welcome too. Read the Contribution Guidelines before opening a pull request. Two rules there will save you a rewrite: nothing in scaffold/cli/ may import scaffold/ui/, and a new shape family carrying three or more cubes needs a simplified form for Low Geometry.
Coverage
Every block in the 100+ bundled test structures builds, and every block Mojang's own resource pack defines has a Scaffold definition. docs/Block Notes.md records how the awkward blocks are described and which shapes are still approximations. Re-check at any time with python -m tools.checks.coverage.
Credits
Maintained by EvilSlimeLabs (Website) (GitHub).
Scaffold is forked from Structura, which was created by DrAv0011, FondUnicycle and RavinMaddHatter, and everything here is built on their work.
1 maintainer

Metadata
1 maintainer
Release files for mcpe-scaffold 1.3.2
For a detailed explanation of source distributions (sdists) and built distributions (wheels), please see the package formats documentation.
Source distribution (sdist)
| File | Size | Uploaded | |
|---|---|---|---|
| mcpe_scaffold-1.3.2.tar.gz | 3.6 MB | Details |
Built distribution (wheel)
| File | Interpreter | ABI | Platform | Reset |
|---|---|---|---|---|
| mcpe_scaffold-1.3.2-py3-none-any.whl | Python 3 | none | any | Details |
Total release size: 8.0 MB
Release files / mcpe_scaffold-1.3.2.tar.gz
| Download URL | mcpe_scaffold-1.3.2.tar.gz |
|---|---|
| Size | 3.6 MB |
| Tags | Source |
|
SHA-256 checksum How to use checksums |
45f40f097197db3bd3fd340a855494d94a6a1ca2945e6172284038e0d2ba0c44
|
|
BLAKE2b-256 checksum How to use checksums |
c32c322d1da23d4d3cc766c997f9906b78c3921e75812acb5048d4dde2bb47f5
|
| Upload date | |
|
Uploaded using Trusted Publishing? What is trusted publishing? |
Yes |
| Uploaded via |
twine/7.0.0 CPython/3.13.14
|
Provenance
Provenance describes where a file came from. On PyPI, provenance is shared via attestations, which provide a verifiable record of the build or publishing details. View details, limitations and caveats.


PyPI Publish Attestation
PyPI verified that this artifact, at this checksum, originated from the publisher listed below.
Signed by GitHub Actions, verified by PyPI on Oct 13, 2026.
Transparency logRelease files / mcpe_scaffold-1.3.2-py3-none-any.whl
| Download URL | mcpe_scaffold-1.3.2-py3-none-any.whl |
|---|---|
| Size | 4.4 MB |
| Tags | Python 3 |
|
SHA-256 checksum How to use checksums |
c808b95ec518bfa8b4218ed4dc2b1dc4a2b04425a6be3780db3de7a740011010
|
|
BLAKE2b-256 checksum How to use checksums |
339a9191a190bd55a49101230cd55789913000e11c80c5d8bcbace9247be2592
|
| Upload date | |
|
Uploaded using Trusted Publishing? What is trusted publishing? |
Yes |
| Uploaded via |
twine/7.0.0 CPython/3.13.14
|
Provenance
Provenance describes where a file came from. On PyPI, provenance is shared via attestations, which provide a verifiable record of the build or publishing details. View details, limitations and caveats.
PyPI Publish Attestation
PyPI verified that this artifact, at this checksum, originated from the publisher listed below.
Signed by GitHub Actions, verified by PyPI on Oct 13, 2026.
Transparency log













