

MCPStack Jupyter MCP
Operate Jupyter Notebooks from your favourite LLM





💡 About The MCPStack Jupyter Tool
This repository provides an MCPStack tool that wraps the official Python Jupyter MCP Server — it is not a novel MCP by itself.
- Upstream project: datalayer/jupyter-mcp-server
- We reuse their MCP actions and surface them through MCPStack.
- As the upstream evolves, some actions / endpoints may deprecate. Our wrapper is intentionally lightweight, so updating to new upstream versions should be straightforward. If you hit an incompatibility, please open an issue and we’ll track an update to align with the Jupyter MCP Server.
What is MCPStack, in layman’s terms?
The Model Context Protocol (MCP) standardises how tools talk to LLMs.
MCPStack lets you stack multiple MCP tools together into a pipeline and expose them to an LLM host (e.g., Claude Desktop).
Think scikit-learn pipelines, but for LLM tooling:
- In scikit-learn: you chain
preprocessors→transformers→estimators. - In MCPStack: you chain multiple MCP tools (Jupyter, MIMIC, …) and the LLM can use all of them during a conversation.
Installation
The tool is distributed as a standard Python package. Thanks to entry points, MCPStack will auto-discover it.
Via uv (recommended)
uv add mcpstack-jupyter
Via pip
pip install mcpstack-jupyter
(Dev) Pre-commit hooks
uv run pre-commit install
# or: pre-commit install
🔌 Using With MCPStack
This tool declares entry points so MCPStack can see it automatically:
[project.entry-points."mcpstack.tools"]
jupyter = "mcpstack_jupyter.tools.jupyter.jupyter:Jupyter"

[project.entry-points."mcpstack.tool_clis"]
jupyter = "mcpstack_jupyter.tools.jupyter.cli:JupyterCLI.get_app"
1) Run Jupyter with a Token
You must run a Jupyter Server/Lab with a token (the same token will be used by both the document and runtime APIs).
uv run jupyter lab \
  --port 8888 \
  --IdentityProvider.token MY_TOKEN \
  --ip 0.0.0.0

# MY_TOKEN can for instance be: 1117bf468693444a5608e882ab3b55d511f354a175a0df02
Make sure to have a notebook open in Jupyter lab, e.g., notebook.ipynb or whatever you have defined in the configuration.
2) Configure the Jupyter tool (set the token)
Use the tool’s CLI to create a small MCPStack ToolConfig JSON. At minimum pass --token:
uv run mcpstack tools jupyter configure \
  --token MY_TOKEN \
  --output jupyter_config.json

# MY_TOKEN can for instance be: 1117bf468693444a5608e882ab3b55d511f354a1750df02 (must match the Jupyter server token)
The CLI has sensible defaults:
DOCUMENT_URL:http://127.0.0.1:8888DOCUMENT_ID:notebook.ipynb<-- Feel free to change this to any of your notebooks.RUNTIME_URL: defaults toDOCUMENT_URL
You can override those if needed:
uv run mcpstack tools jupyter configure \
  --document-url http://127.0.0.1:8888 \
  --document-id Untitled.ipynb \
  --runtime-url  http://127.0.0.1:8888 \
  --token        1117bf468693444a5608e882ab3b55d511f354a1750df02 \
  --output       jupyter_config.json
3) Compose a pipeline
Create a new pipeline (or append to an existing one) and include your Jupyter ToolConfig:
# New pipeline
uv run mcpstack pipeline jupyter --new-pipeline my_pipeline.json --tool-config jupyter_config.json

# Or append to an existing pipeline
uv run mcpstack pipeline jupyter --to-pipeline my_pipeline.json --tool-config jupyter_config.json
4) Run it inside Claude Desktop (or your host)
uv run mcpstack build --pipeline my_pipeline.json --config-type claude
Now ask the LLM to operate the notebook. A quick smoke test:
“Append a code cell that prints
Hello World.”
If everything’s wired correctly, you should see the new cell appear and execute in Jupyter Lab.
⚙️ Configuration — YAML (Developers)
This tool ships with YAML configs under src/mcpstack_jupyter/configuration/:
env_defaults.yaml— defaults for provider/URLs/IDs and arequire_tokensflag (we keep tokens required).tools.yaml— the list of upstream actions we expose by default. Adjust here as upstream evolves.cli_defaults.yaml— prompt labels and default output filename for the CLI.
You can tweak those YAML files to change defaults globally without touching code. Tokens remain required and are enforced upfront by MCPStack when building the tool.
📖 Programmatic API
Use the Jupyter tool class directly in a pipeline.
Tokens are taken from the environment (the pipeline config or your process env):
import os
from mcpstack_jupyter.tools.jupyter.jupyter import Jupyter
from MCPStack.stack import MCPStackCore

# Provide tokens via environment (same token for both is fine)
# On the long term we could think passing a StackConfig to the Jupyter tool instance, with all the necessary env vars. Open An Issue.
os.environ["DOCUMENT_TOKEN"] = "1117bf468693444a5608e882ab3b55d511f354a175a0df02"
os.environ["RUNTIME_TOKEN"]  = "1117bf468693444a5608e882ab3b55d511f354a175a0df02"

pipeline = (
    MCPStackCore()
    .with_tool(Jupyter(include=None))  # or provide a subset of actions of interest.
    # Add more tools as needed, e.g., MIMIC, etc.
    # .with_tool(MIMIC(...))
    .build(type="fastmcp", save_path="my_jupyter_pipeline.json")
    .run()
)
[!NOTE] Common upstream actions you can expose (see
configuration/tools.yaml):
append_markdown_cell,insert_markdown_cell,overwrite_cell_source,delete_cellappend_execute_code_cell,insert_execute_code_cellexecute_cell_with_progress,execute_cell_simple_timeout,execute_cell_streamingread_cell,read_all_cells,get_notebook_info
🧰 Troubleshooting
-
403 Forbidden /
_xsrfmissing / cannot create kernels Ensure you ran Jupyter with a token and that yourToolConfigprovides bothDOCUMENT_TOKENandRUNTIME_TOKEN. In most setups it’s the same token. -
404 on
notebook.ipynbUpdate--document-idto the actual notebook path relative to Jupyter’s working directory (e.g.,Untitled.ipynbornotebooks/analysis.ipynb). -
Nothing happens in Lab Prefer
http://127.0.0.1:8888overhttp://localhost:8888. Confirm your pipeline is running and that the tool is listed inmcpstack list-tools.
🤝 Upstream Compatibility & Support
As noted, this is a lightweight wrapper over the upstream Jupyter MCP Server
(github.com/datalayer/jupyter-mcp-server). If the upstream API changes,
we’ll happily track it — please open an issue with details of the version and failing action.
See more in the official Jupyter MCP Server documentation.
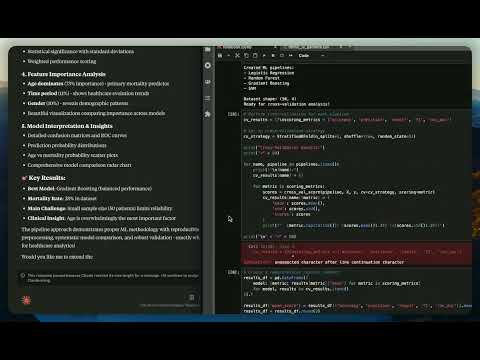
📽️ Video Demo

🔐 License
MIT — see LICENSE.
1 maintainer

Metadata
1 maintainer
Release files for mcpstack-jupyter 0.0.4
For a detailed explanation of source distributions (sdists) and built distributions (wheels), please see the package formats documentation.
Source distribution (sdist)
| File | Size | Uploaded | |
|---|---|---|---|
| mcpstack_jupyter-0.0.4.tar.gz | 14.6 kB | Details |
Built distribution (wheel)
| File | Interpreter | ABI | Platform | Reset |
|---|---|---|---|---|
| mcpstack_jupyter-0.0.4-py3-none-any.whl | Python 3 | none | any | Details |
Total release size: 27.0 kB
Release files / mcpstack_jupyter-0.0.4.tar.gz
| Download URL | mcpstack_jupyter-0.0.4.tar.gz |
|---|---|
| Size | 14.6 kB |
| Tags | Source |
|
SHA-256 checksum How to use checksums |
d0db76eae5b8fac6450ea38386c8deb4f8d00e861524444c3cbe06d3071c2449
|
|
BLAKE2b-256 checksum How to use checksums |
1f8b8d2123a5db38719f6872965cc331325a92fa436dcc4086c9c4a3c13f7c14
|
| Upload date | |
|
Uploaded using Trusted Publishing? What is trusted publishing? |
Yes |
| Uploaded via |
twine/6.1.0 CPython/3.13.7
|
Provenance
Provenance describes where a file came from. On PyPI, provenance is shared via attestations, which provide a verifiable record of the build or publishing details. View details, limitations and caveats.


PyPI Publish Attestation
PyPI verified that this artifact, at this checksum, originated from the publisher listed below.
Signed by GitHub Actions, verified by PyPI on Sep 8, 2025.
Transparency logRelease files / mcpstack_jupyter-0.0.4-py3-none-any.whl
| Download URL | mcpstack_jupyter-0.0.4-py3-none-any.whl |
|---|---|
| Size | 12.4 kB |
| Tags | Python 3 |
|
SHA-256 checksum How to use checksums |
a8ae875e0b9cb45815edcef346034c38802dee66d6618d30d6e1f2880fc67488
|
|
BLAKE2b-256 checksum How to use checksums |
fd754f669a5d2ae0f6bb25ecfcaf1098a945822a03350b4890f72d53664c28f5
|
| Upload date | |
|
Uploaded using Trusted Publishing? What is trusted publishing? |
Yes |
| Uploaded via |
twine/6.1.0 CPython/3.13.7
|
Provenance
Provenance describes where a file came from. On PyPI, provenance is shared via attestations, which provide a verifiable record of the build or publishing details. View details, limitations and caveats.
PyPI Publish Attestation
PyPI verified that this artifact, at this checksum, originated from the publisher listed below.
Signed by GitHub Actions, verified by PyPI on Sep 8, 2025.
Transparency log













