
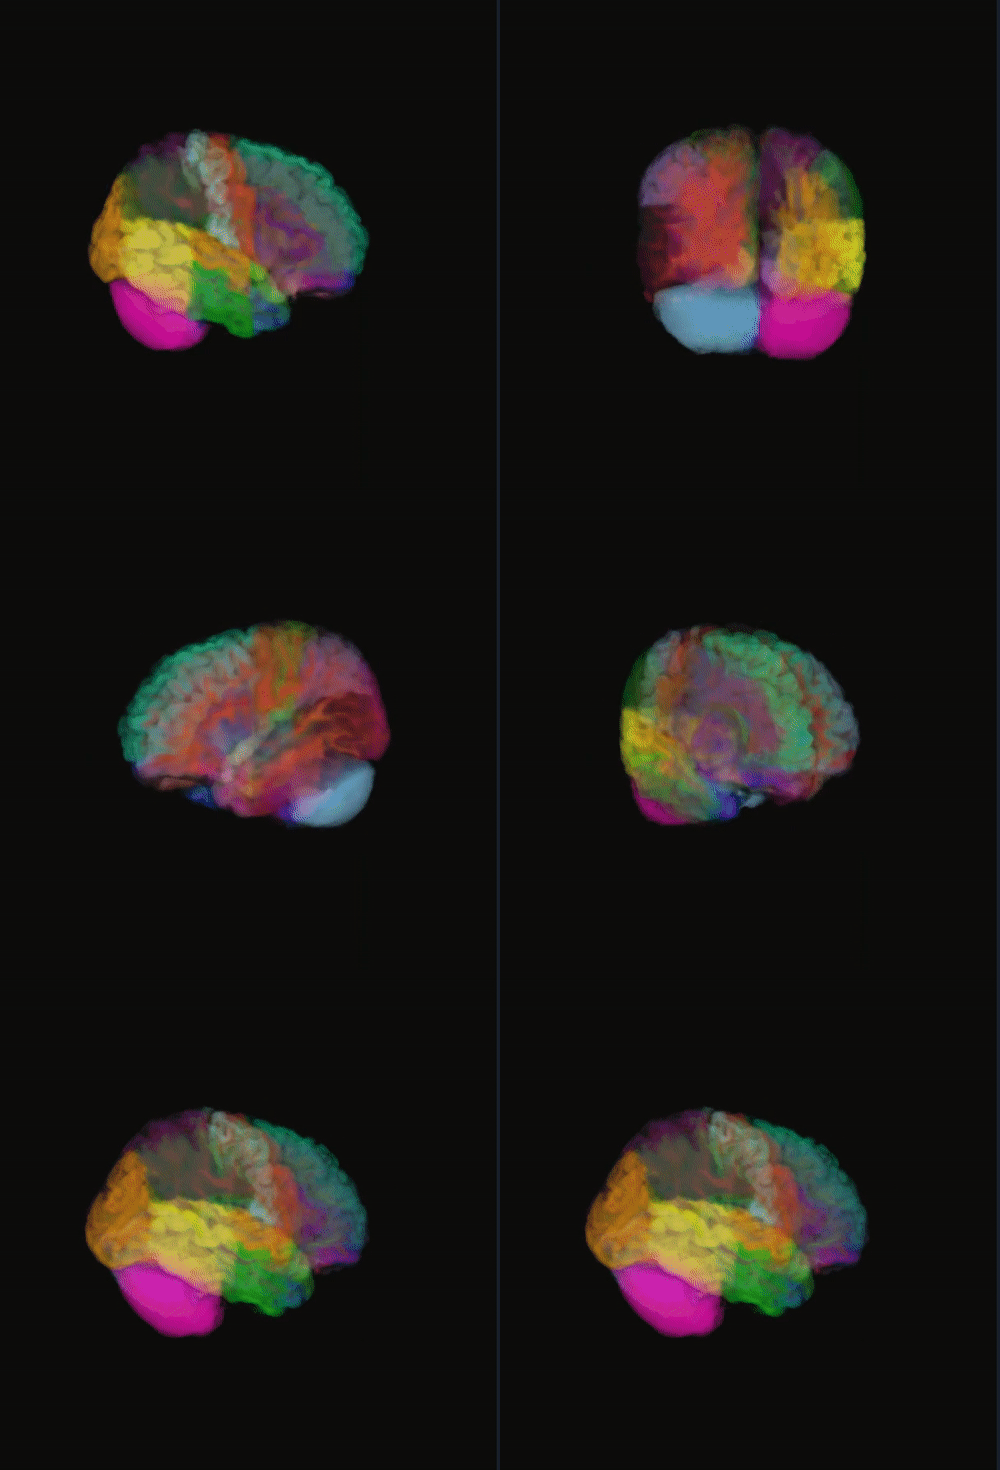
🧠🩻 MELAGE: Medical Imaging Software
Machine learning & analysis for next-generation neuroimaging and medical imaging research
Table of Contents
- Features
- Plugins & Dynamic Extensions
- Installation
- Usage
- AI Segmentation Plugins
- Python API & Scripting
- Dependencies
- Manual (collapsible)
- License
- Citation & Acknowledgements
- Releases
MELAGE is an open-source neuroimaging software designed for analysis, segmentation, and visualization of multimodal datasets.
It combines classical medical image processing with state-of-the-art deep learning support, making it useful for both researchers and practitioners.
🚀 What's new in v2.2.0:
- 🤖 Integrated AI segmentation sidebar — MedSAM, SAM 2 (with 3D/video propagation), and nnInteractive are now permanent sidebar panels, not floating dialogs. Click directly on the live GL canvas to segment.
- 🐍 Headless Python API & extended CLI —
import melagefrom Jupyter or scripts; no GUI, no PyQt5 import needed. - ✏️ New toolbar tools — Freehand drawing, Magic Wand (region grow by pixel similarity), and Image Info tool.
- 🎨 VS Code-style activity sidebar — collapsible plugin panels with a 48 px icon rail for faster navigation.
- 🎥 Real-Time Video Segmentation — full medical video loading and processing for Ultrasound loops and Cine-MRI.
🎥 Key Features
- ⚡ Real-Time Video Processing: Seamlessly load medical videos (e.g., Ultrasound, Cine-MRI) and perform segmentation with the same high speed and accuracy as static images.
- 🖼️ Multi-Modality Support: Comprehensive support for MRI, CT, X-Ray, and Ultrasound data in standard formats (DICOM, NIfTI, AVI, MP4).
- 🤖 AI Segmentation Sidebar: MedSAM, SAM 2, and nnInteractive built directly into the sidebar — click or draw bounding boxes on any slice to segment interactively.
- 🧠 Deep Learning Integration: Built-in support for PyTorch models, allowing you to deploy state-of-the-art AI for automated segmentation and classification.
- 🛠️ Advanced Preprocessing: Powerful tools for denoising, filtering, resampling, and harmonizing image data before analysis.
- 🎨 Interactive Visualization: 2D and 3D rendering capabilities for exploring anatomical structures and segmentation results in detail.
- 🔌 Dynamic Plugin System: easily extend functionality by dropping Python scripts into the plugins/ folder—MELAGE automatically generates the GUI for you.
- 💾 Flexible Export: Save your results, including video segmentation masks, into standard research-ready formats.
- 🐍 Python API & CLI: Call every processing step from Jupyter notebooks or shell scripts — no GUI required. Ideal for large-cohort pipelines and automated studies.
🧩 Plugins & Dynamic Extensions
MELAGE now features a powerful Dynamic Plugin System that allows you to integrate custom Deep Learning models or image processing algorithms without modifying the core source code.
How it works:
- Create: Write your algorithm or model wrapper as a Python class inheriting from the MELAGE Plugin base class.
- Drop-in: Place your script in the
plugins/directory. - Auto-Load: MELAGE automatically detects, loads, and generates a GUI widget for your tool upon launch.
This modular architecture supports:
- Deep Learning inference: Drag-and-drop integration for
.pthor.onnxmodels. - Custom Analysis: Add proprietary segmentation or quantification logic.
- Workflow Automation: Create macros for repetitive tasks.
🚀 How to Add a Plugin
- Folder Structure: Organize your plugin in its own directory under the
plugins/folder. MELAGE recursively scans these folders to find valid plugins.plugins/ ├── warpseg/ │ ├── __init__.py │ ├── WarpSeg.py <-- Contains the Plugin Class │ └── WarpSeg_schema.py <-- Contains the Plugin Scheme for GUI └── my_new_tool/ └── ...
🚀 Installation
🐧 LINUX:
🐍 STEP 0: INSTALL CONDA (PREREQUISITE)
If you don't have Conda, install Miniconda (lightweight version).
- Download installer
wget [https://repo.anaconda.com/miniconda/Miniconda3-latest-Linux-x86_64.sh](https://repo.anaconda.com/miniconda/Miniconda3-latest-Linux-x86_64.sh)
- Run installer (Type 'yes' to license and init)
bash Miniconda3-latest-Linux-x86_64.sh - Refresh shell
source ~/.bashrc
🛠️ STEP 1: CREATE ENVIRONMENT (RECOMMENDED)
# Create env (Python 3.10 is most stable with PyQt5)
conda create -n melage-gui python=3.10 -c conda-forge -y

# Activate the environment
conda activate melage-gui

# Install PyQt5 (includes Qt frameworks)
conda install -c conda-forge pyqt=5 -y

# Install melage inside the environment
pip install melage

# Verify which melage is being used (should point to this env)
which melage

# Run
melage
📦 STEP 2: INSTALL MELAGE (STANDALONE)
If skipping Conda (Not recommended for GUI apps):
From PyPI:
pip install melage
🚀 STEP 3: CREATE ONE-CLICK LAUNCHERS
Create a script file to automatically activate the environment and run the app.
- Create a file named 'launch_melage.sh' with the following content:
(Note: Adjust the 'source' path if your conda is installed elsewhere)
#!/bin/bash
# Initialize Conda (Adjust path based on 'conda info --base')
source ~/miniconda3/etc/profile.d/conda.sh
conda activate melage-gui
melage
- Make it executable:
chmod +x launch_melage.sh
- Run it:
./launch_melage.sh
- (Optional) Create a Desktop Shortcut file named 'Melage.desktop':
(Create this file in ~/.local/share/applications/ for Start Menu access
OR on your ~/Desktop/ for a desktop icon).
[Desktop Entry]
Version=1.0
Type=Application
Name=Melage
Comment=Melage GUI
# IMPORTANT: Use absolute paths below (e.g., /home/user/...)
Exec=/home/user/path/to/launch_melage.sh
Icon=/home/user/path/to/your_icon.png
Terminal=false
Categories=Utility;
- (Optional) If put on Desktop, right-click file -> "Allow Launching".
🍎 macOS:
🐍 STEP 0: INSTALL CONDA (PREREQUISITE)
-
Download installer (Intel)
curl -O https://repo.anaconda.com/miniconda/Miniconda3-latest-MacOSX-x86_64.sh
... OR ...
Download installer (Apple M1/M2 Silicon)
curl -O https://repo.anaconda.com/miniconda/Miniconda3-latest-MacOSX-arm64.sh
-
Run installer
bash Miniconda3-latest-MacOSX-x86_64.sh
# or
bash Miniconda3-latest-MacOSX-arm64.sh
-
Refresh shell
source ~/.zshrc
🛠️ STEP 1: CREATE ENVIRONMENT (RECOMMENDED)
# Create env (Python 3.10 is most stable with PyQt5)
conda create -n melage-gui python=3.10 -c conda-forge -y

# Activate the environment
conda activate melage-gui

# Install PyQt5 (includes Qt frameworks)
conda install -c conda-forge pyqt=5 -y

# Install melage inside the environment
pip install melage

# Verify which melage is being used (should point to this env)
which melage

# Run
melage
📦 STEP 2: INSTALL MELAGE (STANDALONE)
If skipping Conda (Not recommended for GUI apps):
From PyPI:
pip install melage
🚀 STEP 3: CREATE ONE-CLICK LAUNCHERS
Create a script file to automatically activate the environment and run the app.
- Create a file named 'launch_melage.sh' with the following content:
(Note: Adjust the 'source' path if your conda is installed elsewhere)
#!/bin/bash
# Initialize Conda (Adjust path based on 'conda info --base')
source ~/miniconda3/etc/profile.d/conda.sh
conda activate melage-gui
melage
- Make it executable:
chmod +x launch_melage.sh
- Run it:
./launch_melage.sh
Alternatively
- Open "Automator" (Cmd + Space -> Type Automator).
- Select "Application" -> Click "Choose".
- Search for "Run Shell Script" and double-click it.
- Paste the code below (Update the path using 'conda info --base'!):
source /Users/yourname/miniconda3/etc/profile.d/conda.sh
conda activate melage-gui
melage
- Press Cmd+S to save. Name it "Melage" and save to Applications.
--- HOW TO CHANGE THE APP ICON ---
- Copy your logo image (Open image -> Cmd + C).
- Right-click your new "Melage.app" -> "Get Info".
- Click the small icon in the top-left corner of the Info window.
- Paste (Cmd + V).
🖥️ WINDOWS:
🐍 STEP 0: INSTALL CONDA (PREREQUISITE)
- Download .exe from https://docs.conda.io/en/latest/miniconda.html
- Run installer.
- Open "Anaconda Prompt" from Start Menu for the steps below.
🛠️ STEP 1: CREATE ENVIRONMENT (RECOMMENDED)
# Create env
conda create -n melage-gui python=3.10 -c conda-forge -y


# Activate
conda activate melage-gui

# Install PyQt5
conda install -c conda-forge pyqt=5 -y
# Install antspyx (Optioanl) to avoid pip install melage failed for any reason)
conda install -c conda-forge antspyx

# Install melage
pip install melage

# Run
melage
📦 STEP 2: INSTALL MELAGE (STANDALONE)
If skipping Conda (Not recommended for GUI apps):
From PyPI:
pip install melage
🚀 STEP 3: CREATE ONE-CLICK LAUNCHERS
- Create a file named 'launch_melage.bat' with the following content:
call conda activate melage-gui
melage
pause
- Double-click 'launch_melage.bat' to run the app.
- (Optional) Right-click the .bat file -> "Send to" -> "Desktop (create shortcut)" to give it a custom icon.
🖥️✨ Usage
After installation and activating your virtual environment, you can launch MELAGE directly from the terminal:
conda activate melage-gui
melage
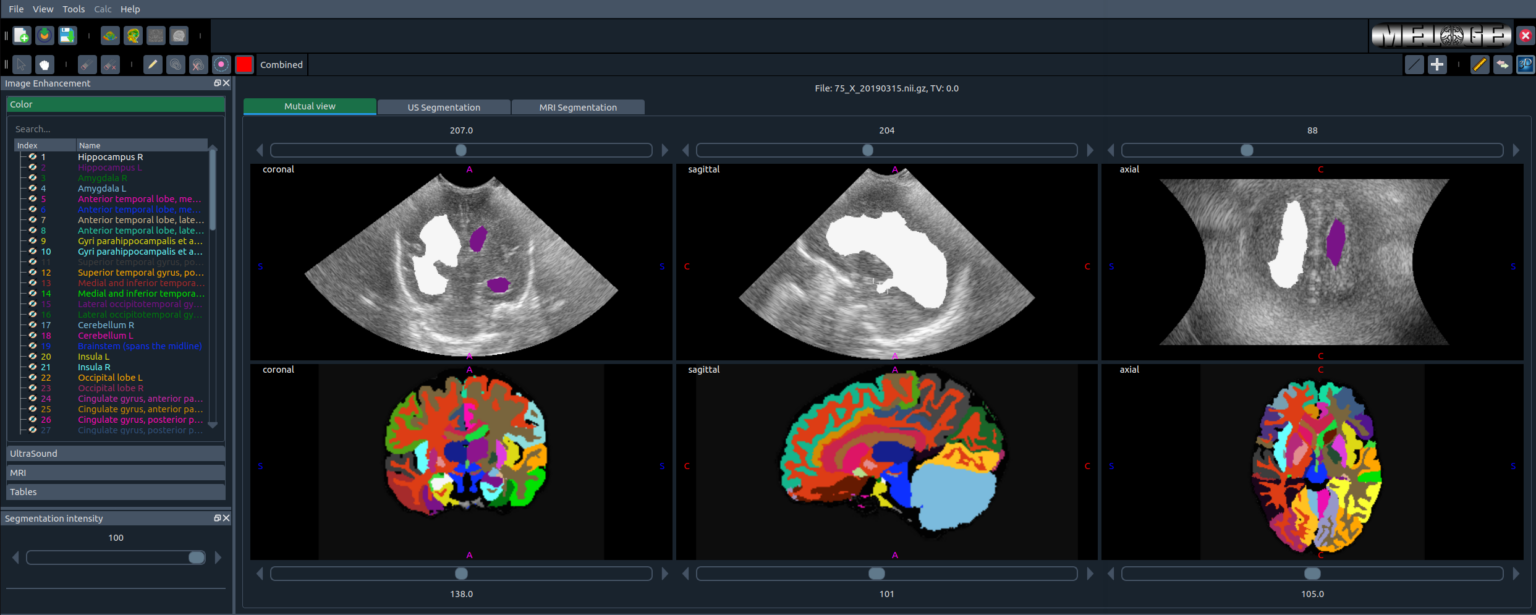
MELAGE graphical user interface in action.
🤖 AI Segmentation Plugins
Starting from v2.2.0, MELAGE ships three state-of-the-art interactive segmentation models as permanent sidebar panels. They draw directly on the live GL canvas — no separate window, no coordinate mapping needed.
Install the AI extras first:
pip install melage[ai]
🏥 MedSAM
MedSAM is a foundation model for medical image segmentation fine-tuned from SAM ViT-B.
How to use:
- Open the MedSAM sidebar tab.
- Select a model variant and axis (Axial / Coronal / Sagittal).
- Draw a bounding box or click positive/negative points directly on the slice.
- The result is written back into the active segmentation color.
Weights are downloaded automatically to ~/.melage/weights/ on first use.
Supports fp16 autocast for lower GPU memory usage.
🎬 SAM 2
SAM 2 extends SAM with a video-memory attention mechanism, making it uniquely suited for propagating segmentations through 3D volumes slice-by-slice.
How to use:
- Open the SAM 2 sidebar tab.
- Draw a bounding box or click points on one slice.
- Press Propagate current label mask to let SAM 2's video predictor carry the segmentation through all adjacent slices automatically.
- Switch to a new label index to segment the next structure.
Supports up to 8 simultaneous labels; each maps to a distinct integer in the segmentation volume.
🧠 nnInteractive
nnInteractive is a 3D-aware interactive segmentation framework from the MIC-DKFZ group. Unlike slice-based methods, it propagates each click through the full 3D volume immediately.
How to use:
- Open the nnInteractive sidebar tab.
- Click positive points (green) or negative points (red) on any slice.
- The segmentation updates across the entire volume after each click — no manual propagation needed.
- Press New Label → to start the next structure; previous labels remain.
Model weights are downloaded automatically from HuggingFace Hub (nnInteractive/nnInteractive) on first use.
Sidebar navigation
All three plugins appear as icon buttons in the VS Code-style activity bar on the left edge of the main window. Click an icon to expand or collapse its panel. The sidebar coexists with the existing plugin system — other dynamic plugins still appear in the Plugins menu.
🐍 Python API & Scripting
Starting from v2.2.0, MELAGE ships a headless Python API and an extended CLI.
No GUI, no display, no PyQt5 import needed — just import melage.
This is designed for:
- 📓 Jupyter notebooks — interactive exploration and visualisation of results
- 🔁 Shell pipelines — chain tools with a single
melage runcommand - 🏥 Large studies — loop over hundreds of subjects without touching the GUI
🔧 Quick start
import melage

# Load any supported format: NIfTI, NRRD, DICOM folder, GE Kretz .vol, video
vol = melage.load("brain.nii.gz")
print(vol)
# Volume(shape=(189,233,197), spacing=(1.00,1.00,1.00) mm, dtype=float64)
The Volume object is Jupyter-friendly — in a notebook it renders as a metadata table.
🛠️ Preprocessing
# N4 bias-field correction (SimpleITK)
vol = melage.preprocess.n4_bias(vol)
vol = melage.preprocess.n4_bias(vol, iterations=50, shrink_factor=2, use_otsu=True)

# Resample to a new voxel spacing
vol = melage.preprocess.resize(vol, spacing=1.0)          # isotropic 1 mm
vol = melage.preprocess.resize(vol, spacing=[0.8, 0.8, 1.2], method="linear")

# Percentile intensity normalisation
vol = melage.preprocess.normalize(vol)
vol = melage.preprocess.normalize(vol, percentile_low=1, percentile_high=99)

# Hard intensity window
vol = melage.preprocess.threshold(vol, low=100, high=3000)

# Keep only the largest connected component of a segmentation label
vol = melage.preprocess.largest_component(vol, label=1)
🔬 Segmentation
Results are stored in vol.segmentation (integer NumPy array).
# Brain Extraction Tool (BET) — based on Smith 2002
vol = melage.segment.bet(vol)
vol = melage.segment.bet(vol, fractional_threshold=0.4, thresholding=True)

# Fuzzy C-Means tissue segmentation
vol = melage.segment.fcm(vol, n_classes=3)
vol = melage.segment.fcm(vol, n_classes=3, method="PFCM", max_iter=200)

# Convenience: N4 bias correction → BET in one call
vol = melage.segment.preprocess_and_bet(vol)
💾 Saving results
melage.save(vol, "corrected.nii.gz")              # image data
melage.save(vol, "brain_mask.nii.gz", what="seg") # integer segmentation
melage.save(vol, "tissues.nii.gz",   what="seg")
🧊 3D visualization
MELAGE's interactive 3-D viewer (glScientific) needs a live Qt/OpenGL
display, so the API ships a lightweight, headless counterpart in
melage.visualize — built on scikit-image marching cubes + matplotlib —
for quick surface previews, screenshots, and mesh export from scripts,
servers, or notebooks.
vol = melage.load("brain.nii.gz")
vol = melage.segment.bet(vol)              # populates vol.segmentation

# Quick interactive-style 3-D plot (matplotlib figure)
fig = melage.visualize.render(vol, label=1, title="Brain surface")

# Render several labels together with custom colours
fig = melage.visualize.render(vol, label=[1, 2], color=[(0.8, 0.2, 0.2, 1), (0.2, 0.6, 0.9, 0.6)])

# Save a static screenshot directly to disk
melage.visualize.screenshot(vol, "brain_3d.png", label=1, elev=15, azim=45)

# Extract a surface mesh (trimesh.Trimesh) or export it (.stl, .obj, .ply, .glb, ...)
mesh = melage.visualize.mesh(vol, label=1, smooth=True)
melage.visualize.export_mesh(vol, "brain.stl", label=1, smooth=True)
📋 Image metadata
melage.info("brain.nii.gz")
# File   : brain.nii.gz
# Format : NIfTI
# Shape  : (189, 233, 197)
# Spacing: 1.000 × 1.000 × 1.000 mm
# Dtype  : int16
🔁 Config-driven pipelines
pipeline = [
    ("n4_bias",   {}),
    ("resize",    {"spacing": 1.0}),
    ("normalize", {}),
    ("bet",       {"fractional_threshold": 0.45}),
]

for subject in subject_list:
    vol = melage.load(subject)
    for tool, kwargs in pipeline:
        vol = melage.run(tool, vol, **kwargs)
    melage.save(vol, subject.replace(".nii.gz", "_bet.nii.gz"), what="seg")

melage.list_tools()   # → ['bet', 'fcm', 'n4', 'n4_bias', 'normalize', 'resize', ...]
📊 Jupyter notebook example
import melage
import matplotlib.pyplot as plt

vol = melage.load("brain.nii.gz")
vol                                         # renders metadata table in notebook

vol = melage.preprocess.n4_bias(vol, progress=False)
vol = melage.segment.bet(vol, progress=False)

mid = vol.shape[2] // 2
fig, (ax1, ax2) = plt.subplots(1, 2, figsize=(10, 4))
ax1.imshow(vol.data[:, :, mid],        cmap="gray");  ax1.set_title("Image")
ax2.imshow(vol.segmentation[:, :, mid], cmap="hot");  ax2.set_title("BET mask")
plt.tight_layout()

melage.visualize.render(vol, label=1, title="Brain surface")  # interactive 3-D plot
🖥️ CLI subcommands
# List all available tools
melage tools

# Inspect an image (no full load)
melage info brain.nii.gz

# Run a single tool — input → output
melage run n4_bias   brain.nii.gz   brain_n4.nii.gz
melage run resize    brain.nii.gz   brain_1mm.nii.gz  --spacing 1.0
melage run resize    brain.nii.gz   brain_ani.nii.gz  --spacing 0.8 0.8 1.2 --method linear
melage run normalize brain.nii.gz   brain_norm.nii.gz
melage run bet       brain.nii.gz   brain_mask.nii.gz
melage run fcm       brain.nii.gz   tissues.nii.gz    --n-classes 3

# Add --silent to suppress progress output (useful in scripts)
melage run n4_bias brain.nii.gz out.nii.gz --silent
The original --headless --tool syntax is still supported for backward compatibility.
📈 Progress control
Every function accepts a progress keyword:
| Value | Behaviour |
|---|---|
None / True |
Print percentage to stdout (default) |
False |
Silent — no output |
callable |
Call fn(pct: int, msg: str) on each update — wire into tqdm, logging, etc. |
from tqdm.auto import tqdm

bar = tqdm(total=100, desc="BET")
vol = melage.segment.bet(vol, progress=lambda pct, msg: bar.update(pct - bar.n))
📦 Dependencies
MELAGE relies on the following core libraries:
- NumPy, SciPy – numerical computing & scientific operations
- scikit-image, Pillow, OpenCV – image processing & visualization
- scikit-learn, numba, einops – machine learning & acceleration
- nibabel, pydicom, pynrrd, SimpleITK – medical imaging formats (NIfTI, DICOM, NRRD)
- PyQt5, QtPy, qtwidgets – GUI support
- matplotlib, vtk, PyOpenGL – visualization & rendering
- shapely, trimesh, rdp – geometry & 3D mesh processing
- pyfftw – fast Fourier transforms
- cryptography – security utilities
- dominate – HTML generation
Optional Extras
| Extra | Packages | When you need it |
|---|---|---|
melage[ai] |
torch, einops, segment-anything, sam2, nnInteractive, huggingface_hub |
MedSAM, SAM 2, nnInteractive sidebar plugins |
melage[bet] |
numba, trimesh |
BET plugin; also enables melage.visualize.mesh() in the API |
melage[processing] |
vtk |
VTK-based I/O and advanced 3D processing |
melage[reports] |
dominate |
HTML report generation |
melage[all] |
all of the above | Full install |
pip install melage[ai]      # AI segmentation plugins
pip install melage[bet]     # BET + 3D mesh export
pip install melage[all]     # everything
📖 Manual
🏠 Main Page
The Main Page is the first window that appears after launching MELAGE.
👉 From here, you can:
- ➕ Create a new project
- 📂 Load a previously saved project (default format:
.bn)
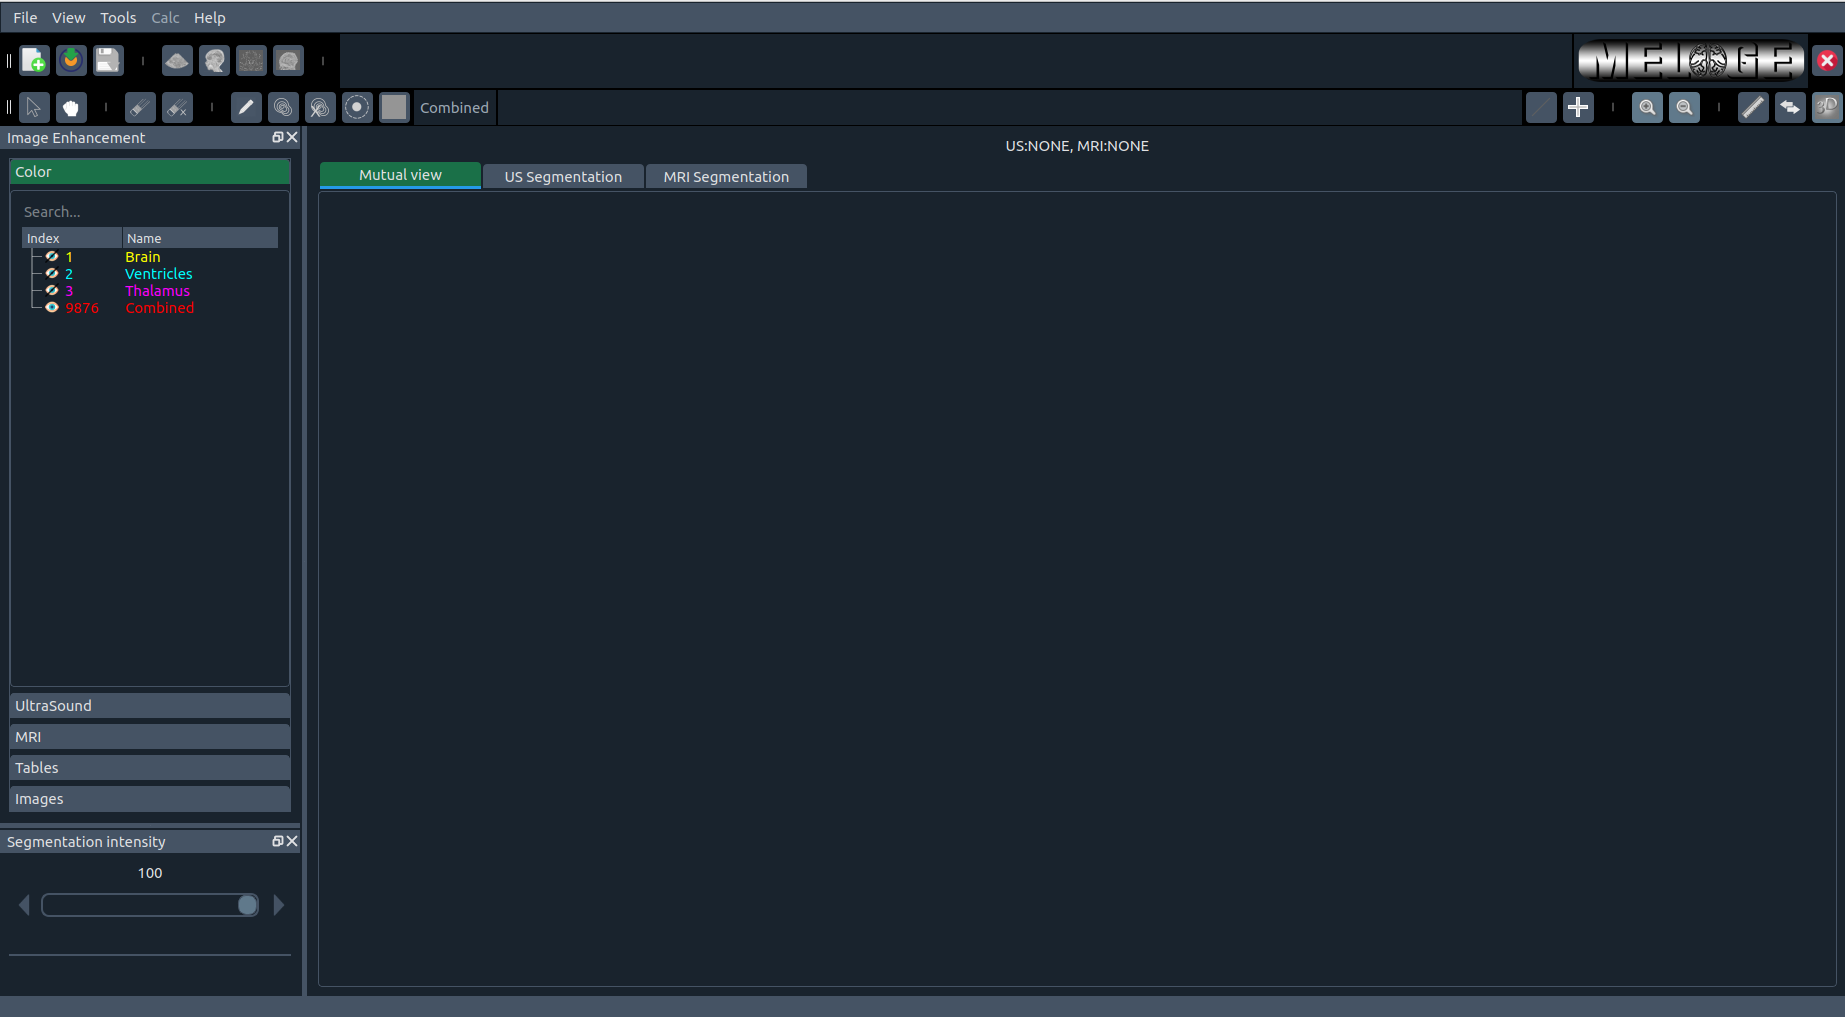
The MELAGE Main Window
🛠️ Toolbars
1️⃣ Project Toolbar
Located at the top-left of the main window, the Project Toolbar provides quick access to essential project actions:
- 🆕 Create New Project – Start a new project and open a new image file.
- 📂 Load Project – Open a previously saved project with all applied changes (so you don’t lose your progress).
- 💾 Save Project – Save the current project. This will overwrite the existing file if one is already open.
🔗 These options are also available through the File menu:
File → New ProjectFile → Load ProjectFile → Save

Project toolbar: (from left to right) Create New Project, Load Project, Save
2️⃣ Image Toolbar
To the right of the Project Toolbar, you’ll find the Image Toolbar, which allows you to load up to two images simultaneously:
- 🖼 Open First Image – Default button for loading First image (often referred to as the top image).
- 🧲 Open Second Image – Default button for loading Second image.


Image toolbar: Left – No project loaded. Right – Project loaded.
3️⃣ Tools Toolbar
At the top-left of MELAGE, you’ll find the Tools Toolbar, which contains ten buttons grouped into sections:
- ✏️ Build Lines – Draw multiple lines in the same slice and create a segmentation by connecting their endpoints (explained in detail later).
- 🎯 Point Selection – Mark and locate selected points within a slice.
- 🔍 Zoom In – Zoom into all windows (3/6 view) simultaneously.
- 🔎 Zoom Out – Zoom out of all windows simultaneously.
- 📏 Measurement – Ruler tool to measure distances and lengths.
- 🔗 Linking – Synchronize sagittal, coronal, and axial slices. This makes it easy to locate the same point across all views.
- 🧊 3D Toggle – Show or hide 3D widgets in the view.
- 🖊 Freehand – Draw a freehand outline around a structure; right-click to access shape options.
- 🪄 Magic Wand – Select a region by pixel similarity (region grow from clicked seed point).
- ℹ️ Image Info – Display metadata and statistics for the image under the cursor.

Tools toolbar with essential navigation and annotation functions
4️⃣ Panning Toolbar
Just below the Project Toolbar, you’ll find the Panning Toolbar with two options:
- 🖱 Arrow – Standard selection arrow.
- ✋ Panning – Drag to move around within a slice (useful after zooming).

Panning toolbar for navigating slices
5️⃣ Segmentation Toolbar
On the right side of the Panning Toolbar, you’ll find the Segmentation Toolbar. From left to right:
- 🩹 Eraser – Remove segmentation from the image.
- 🩹➕ Eraser X Times – Erase the same region across multiple following slices.
- 🖊 Pen – Freehand segmentation with arbitrary closed shapes.
- 🌀 Contour – Draw a contour to segment everything inside it.
- 🌀➕ Contour X Times – Apply contour segmentation across multiple slices.
- ⭕ Circle – Segment a region using a circle with an adjustable radius.
- 🎨 Activated Color – Displays the currently active segmentation color.
- 🏷 Color Name – Shows the name of the active segmentation color.

Segmentation toolbar for drawing and editing regions
6️⃣ Exit Toolbar
Finally, at the far right, you’ll find the Exit Toolbar, which includes:
- 🧩 Logo – Displays the MELAGE / MELAGE+ logo.
- ❌ Exit – Closes the application.

Exit toolbar with logo and close button
Widgets
🎨 Color widget
|
|
|
Choose, activate, and search label colors (LUTs) for different structures. You can switch styles, import your own, and customize labels. |
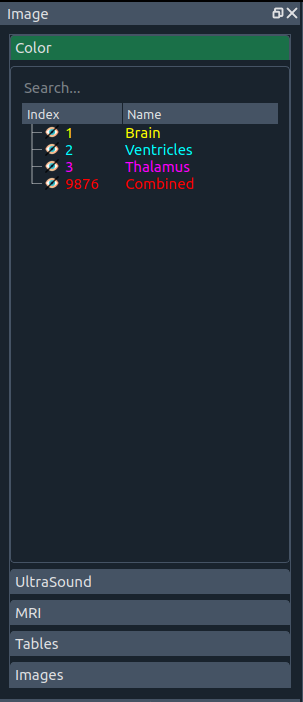
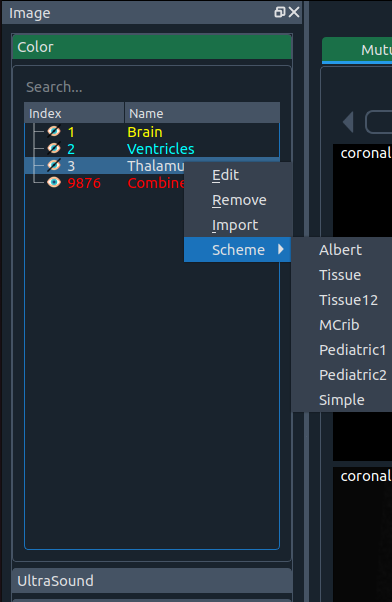
You can freely change styles—or add your own.
Currently default styles come from these human brain atlases:
- 🍼 Albert Neonatal brain atlas
- 🍼 M-CRIB 2.0 neonatal brain atlas
- 🧠 Adult brain (generic)
There are also two tissue-based styles and one simple scheme.
You can import a new style via Import.
Label names are editable, and you can create a new label by clicking a color in the Segmentation Toolbar.
Add a color
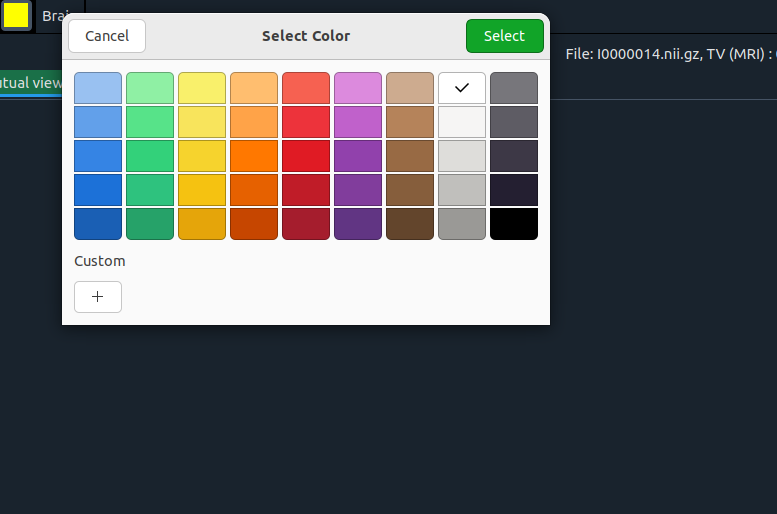
Pick a new color here. Then you’ll see a second window:
Add index and name
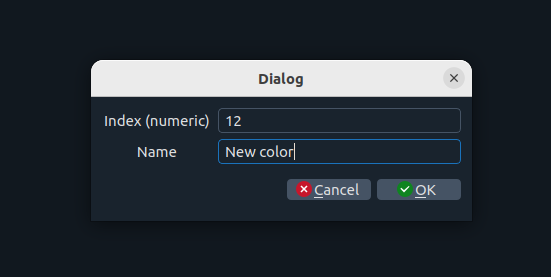
Set the index and name for the new color.
If the index already exists, the new color will replace the previous one.
🧰 Image enhancement widget
|
|
|
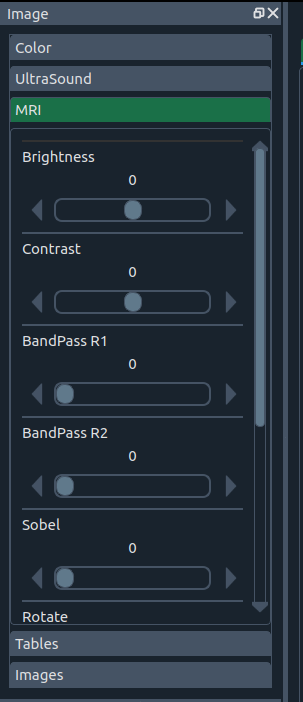
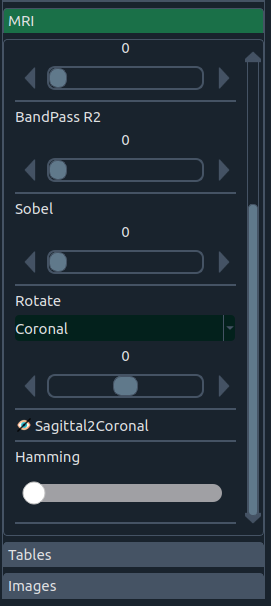
Enhance images with:
- 🔆 Brightness & contrast
- 🧱 Band-pass & Hamming filters
- 🧭 Sobel edge operator
- 🔄 Rotation by anatomical planes (sagittal, axial, coronal) or combinations
There’s also a “sagittal ↔ coronal” swap for datasets that need plane reorientation (handy for certain top/bottom image workflows).
📋 Table widget
Table widget
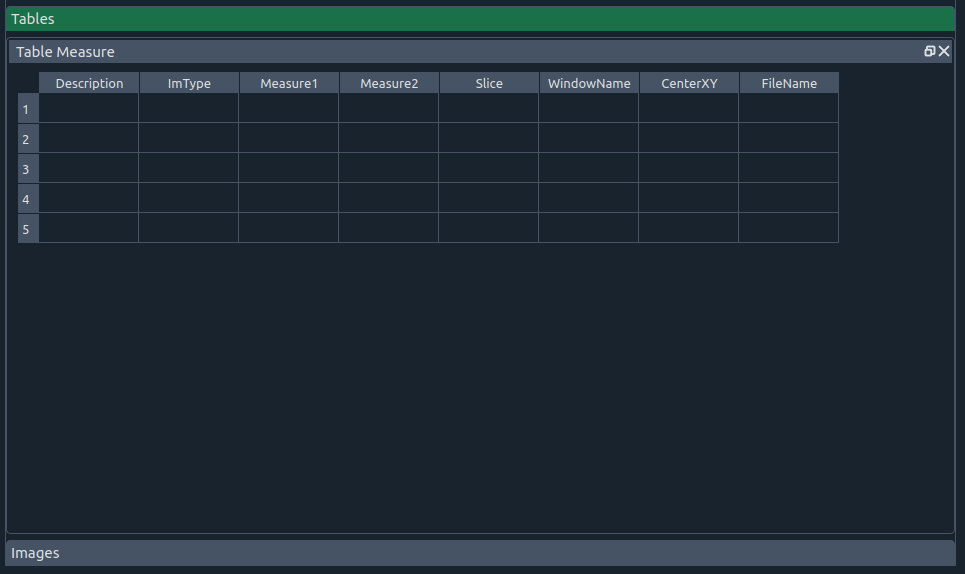
This table includes:
- 📝 Description – additional notes
- 🖼 Image type – top (first image) or bottom (second image)
- 📏 Measure 1 – surface or length (ruler)
- 📐 Measure 2 – perimeter or angle (ruler)
- 🧾 Slice – slice number
- 🪟 Window name – sagittal, coronal, or axial
- 🎯 CenterXY – center position
- 🗂 FileName – file name
Table widget (context menu)
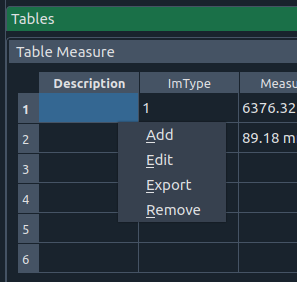
Right-click options:
- ➕ Add – insert a new row
- ✏️ Edit – edit the current cell
- 📤 Export – save table as CSV
- 🗑 Remove – delete the current row
🖼️ Batch Images widget
Images widget
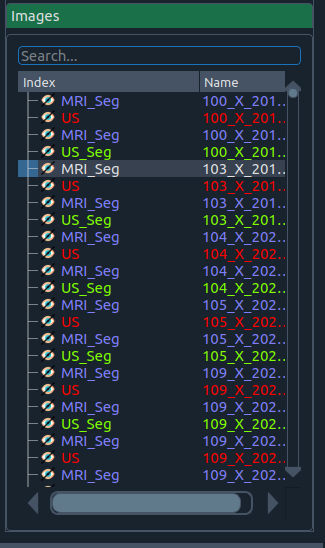
Manage a set of images (e.g., different modalities or sessions) and their corresponding segmentations.
- Toggle the eye icon to show/hide an image.
- A segmentation file requires its image to be loaded first.
Images widget (context menu)
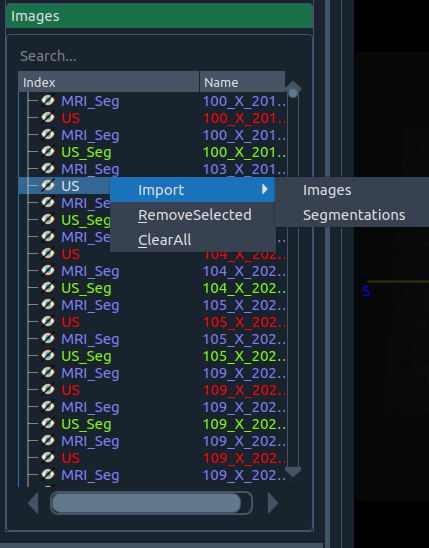
Right-click options:
- 📥 Import
- Images – import one or more images
- Segmentation – import a segmentation associated with a loaded image
- 🗑 Remove Selected – remove the highlighted item
- 🧹 Clear All – clear all non-active images
When importing, you’ll see:
Import dialog
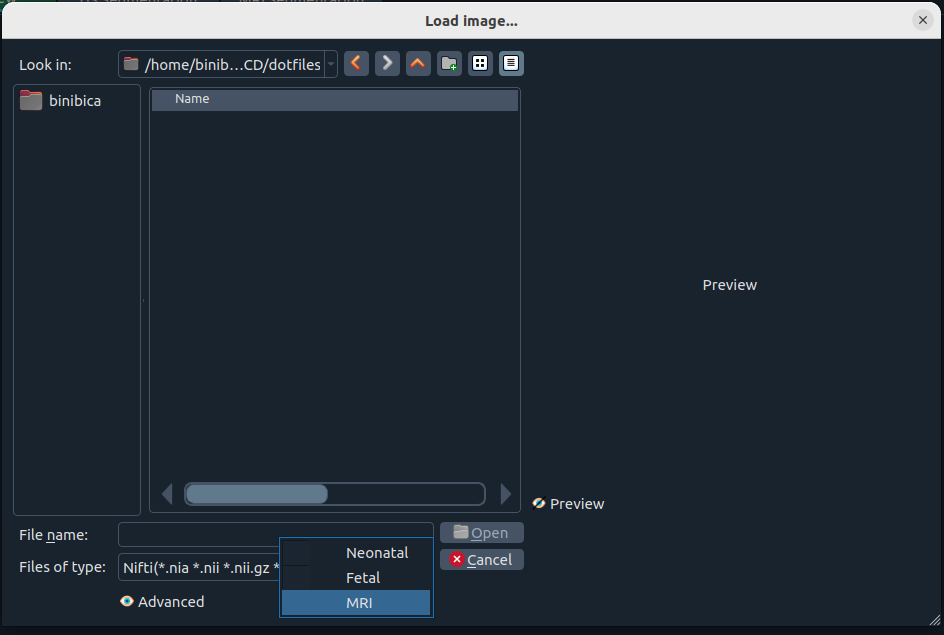
Choose the image/segmentation type from the dialog.
Use Preview to inspect an image before opening it. 👀
🌈 Segmentation intensity widget
Segmentation intensity
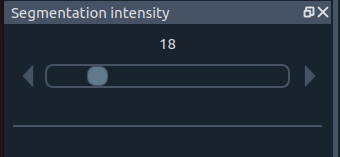
Adjust the visual intensity of the segmentation overlay.
- 0 ➜ hide segmentation
- Higher values ➜ stronger overlay
🖍️ Marker size widget
Marker size
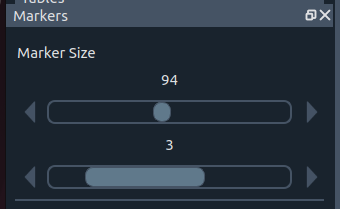
Controls (top ➜ bottom):
- ⭕ Circle radius for region selection
- ✏️ Pen thickness for contour drawing
Tabs
MELAGE includes three tabs:
Tabs overview
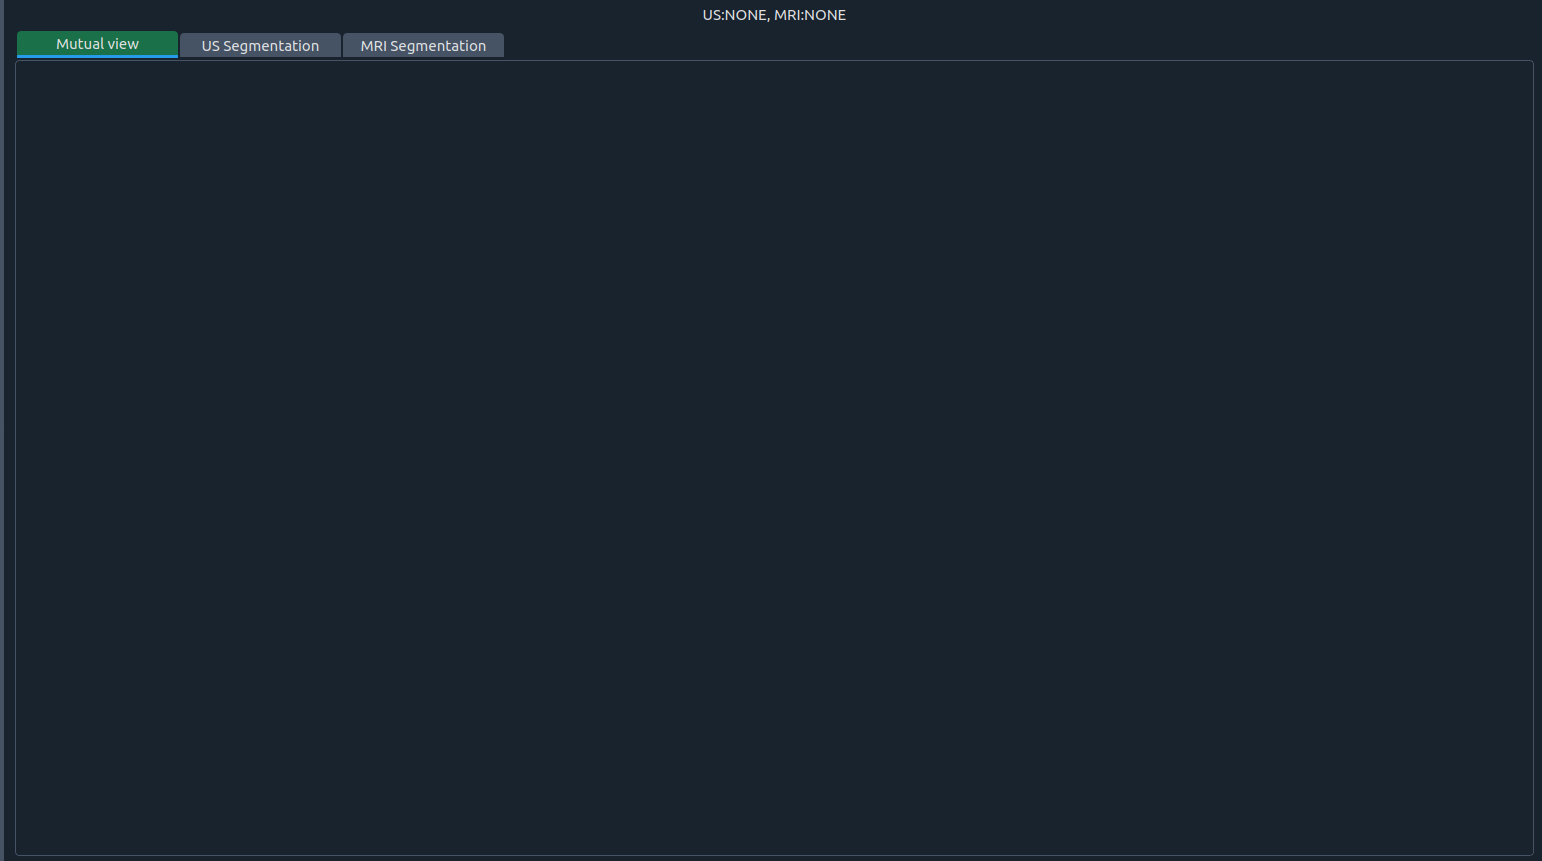
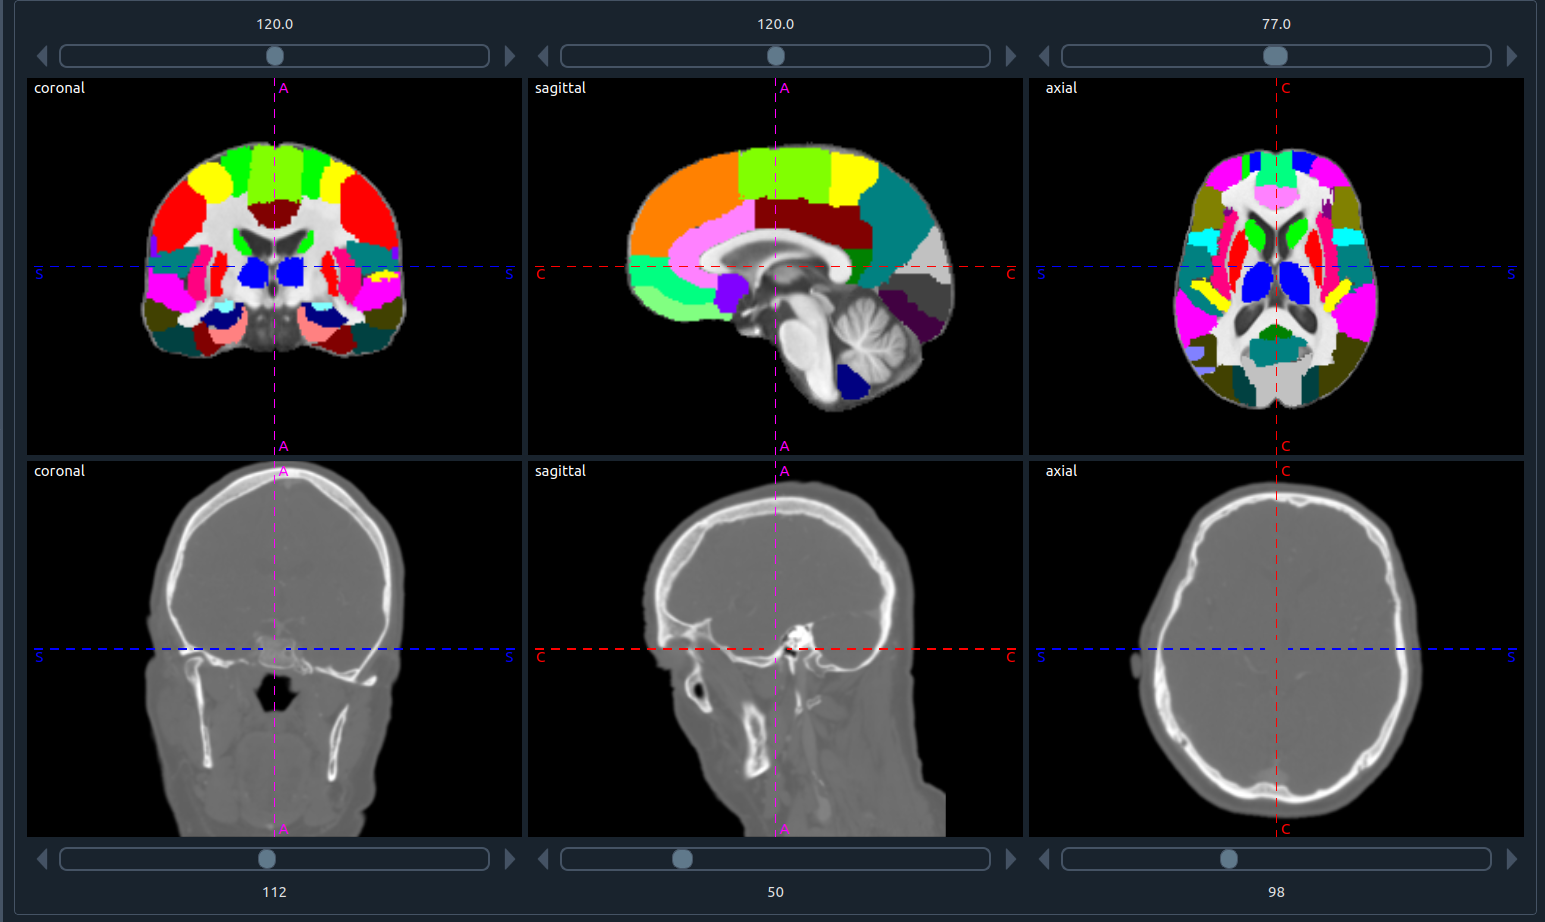
1) 🤝 Mutual view
- Process two images at once.
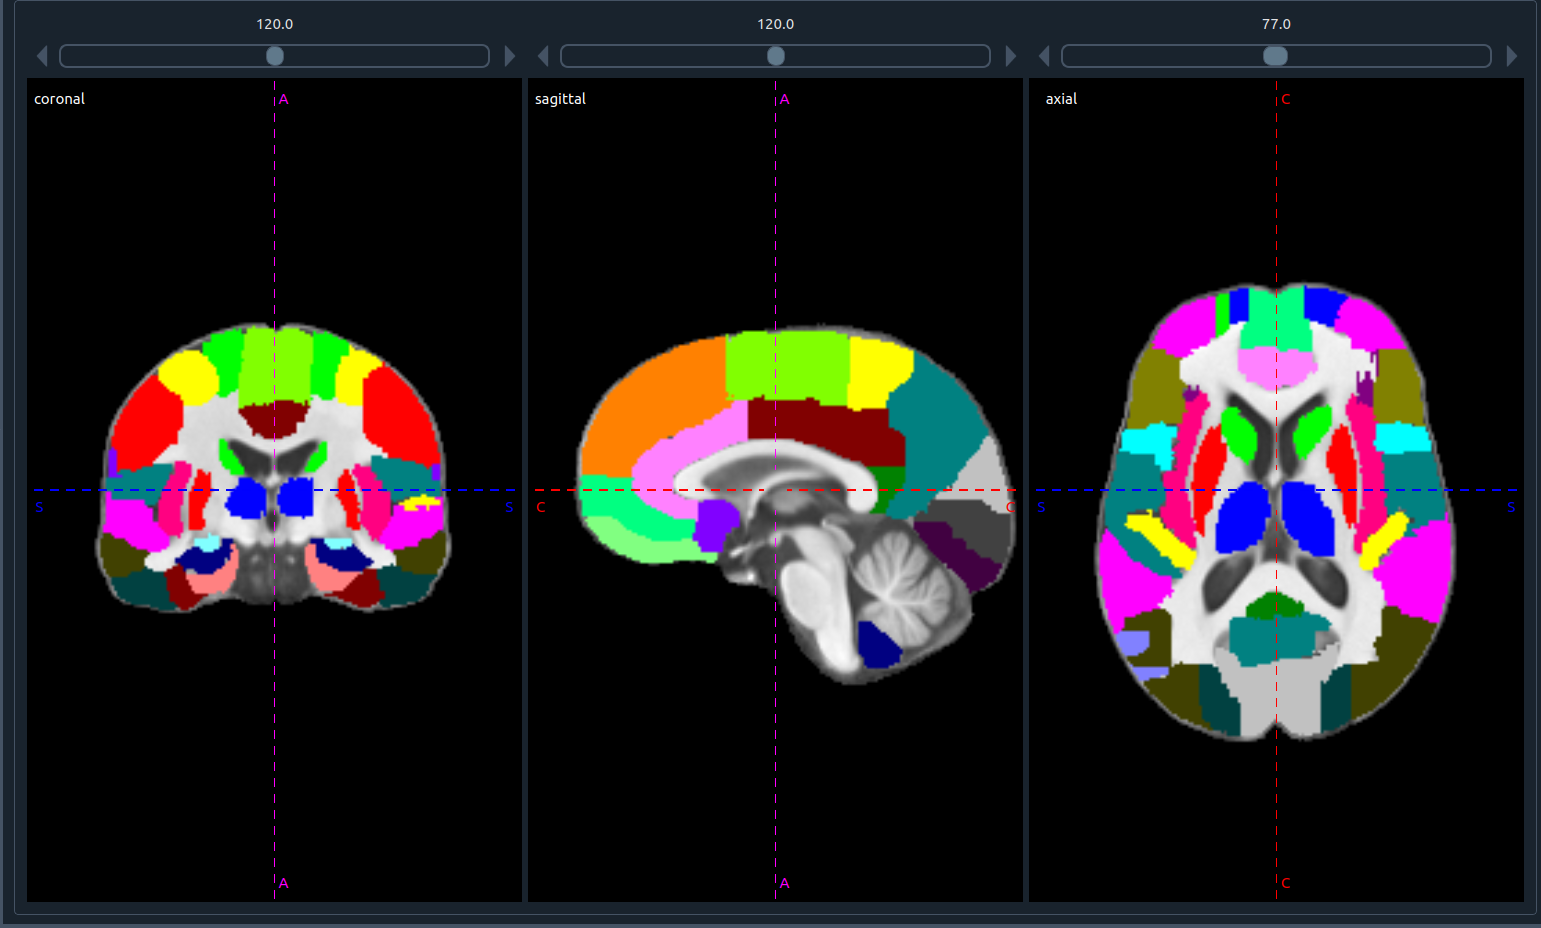
- Each image shows three planes in the order: coronal, sagittal, axial.
- The number above each plane is the slice index.
- Side letters indicate orientation: S (sagittal), A (axial), C (coronal).
- You can segment and process either image directly in this view.
- The top panel shows the first (top) image; the bottom panel shows the second (bottom) image.
- If one image is closed, the tab displays the three planes of the remaining image:
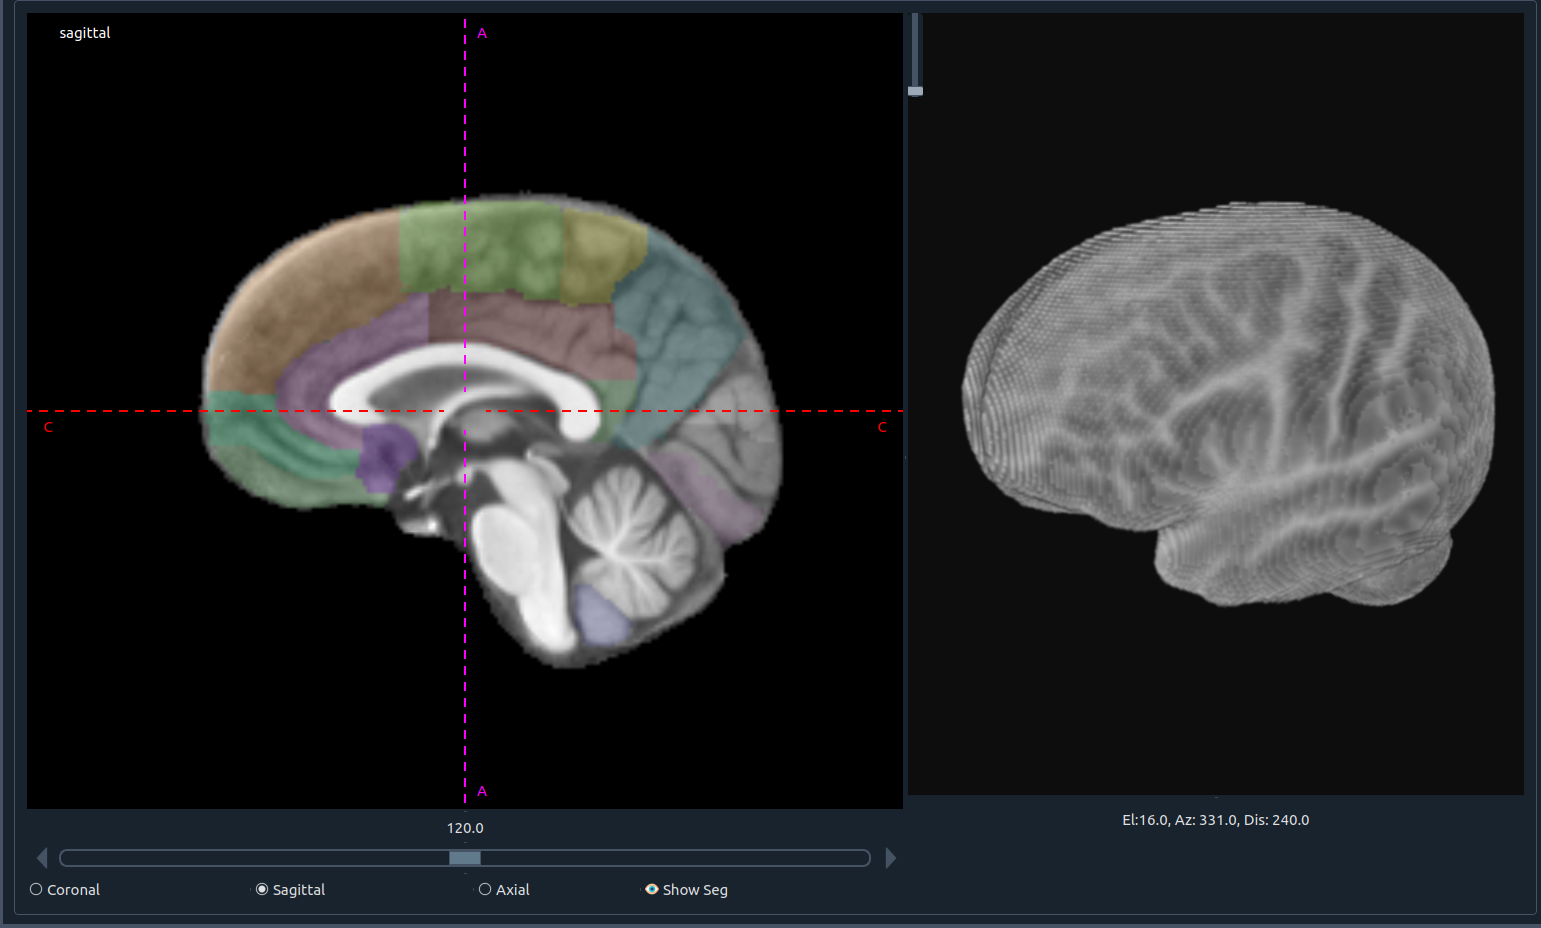
2) 🧩 Top image (first image) workspace
Designed to focus on one plane at larger size while tracking the instant 3D view of the segmentation.
- 📜 Horizontal slider: scroll through slices
- 🔘 Plane selection: choose sagittal, axial, or coronal
- 👁 Show seg: toggle segmentation overlay
- 🧊 3D visualization: real-time 3D feedback
3) 🧩 Bottom image (second image) workspace
Same layout and controls, dedicated to the second (bottom) image.
- 📜 Horizontal slider: scroll through slices
- 🔘 Plane selection: sagittal, axial, or coronal
- 👁 Show seg: toggle segmentation overlay
- 🧊 3D visualization: real-time 3D feedback
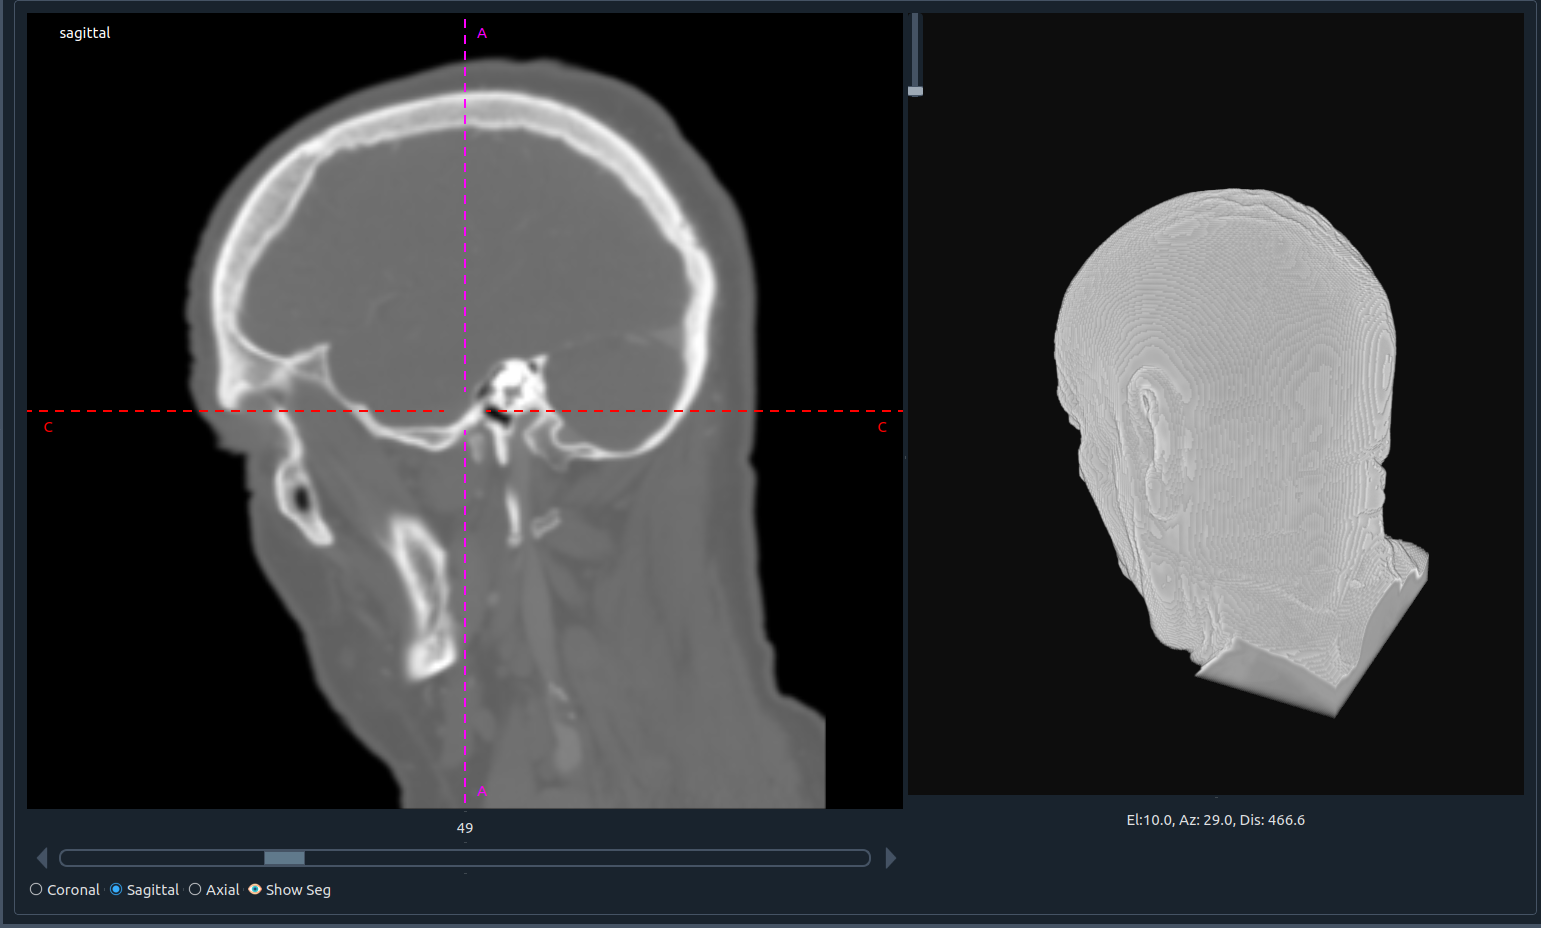
🧊 3D Visualization
Right-click on the 3D region to access various options:
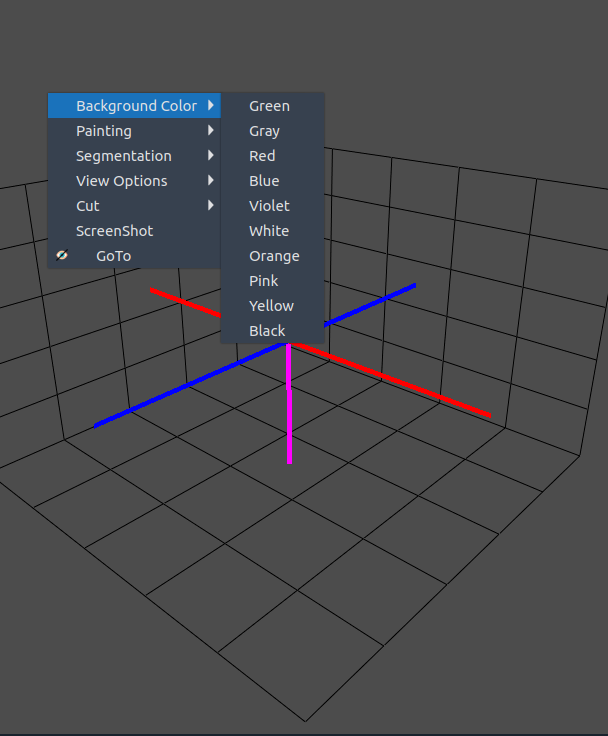
🔎 GoTo
- Activating GoTo lets you jump to the corresponding location in the image.
- The approximate mouse position in 3D space appears at the bottom-right of the window.
- The selected point will also appear in the closest sagittal, coronal, or axial plane.
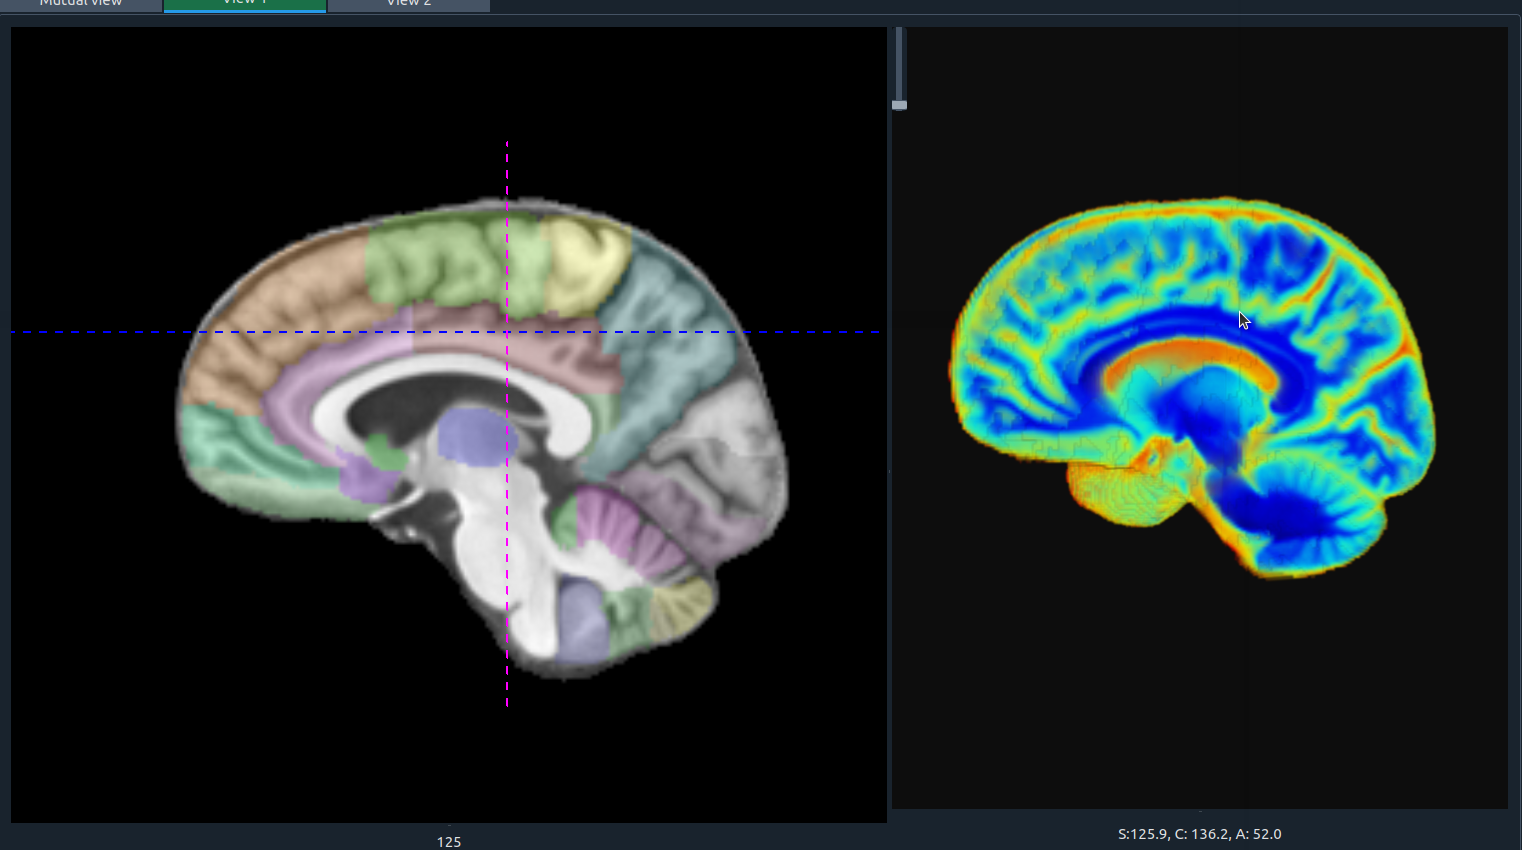
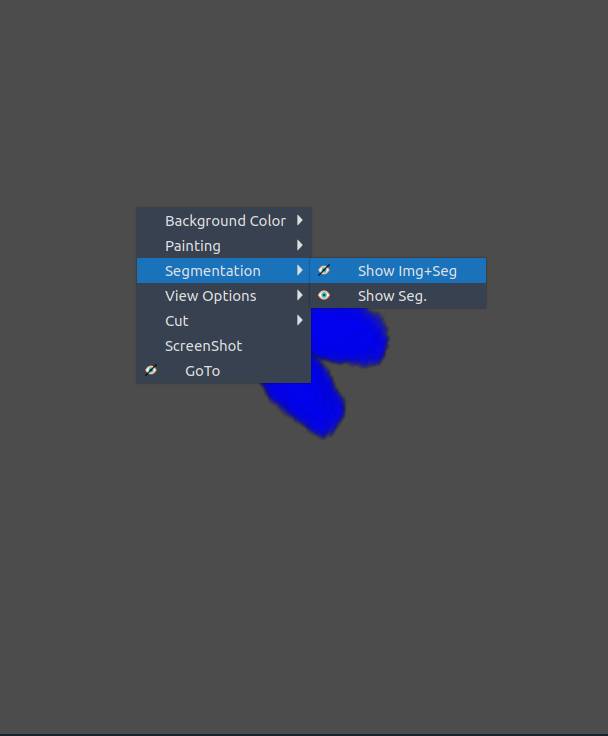
🧩 Segmentation
- Toggle segmentation overlay within the 3D view.
- ⚠️ Tip: If it doesn’t activate immediately, switch to another tab and return.
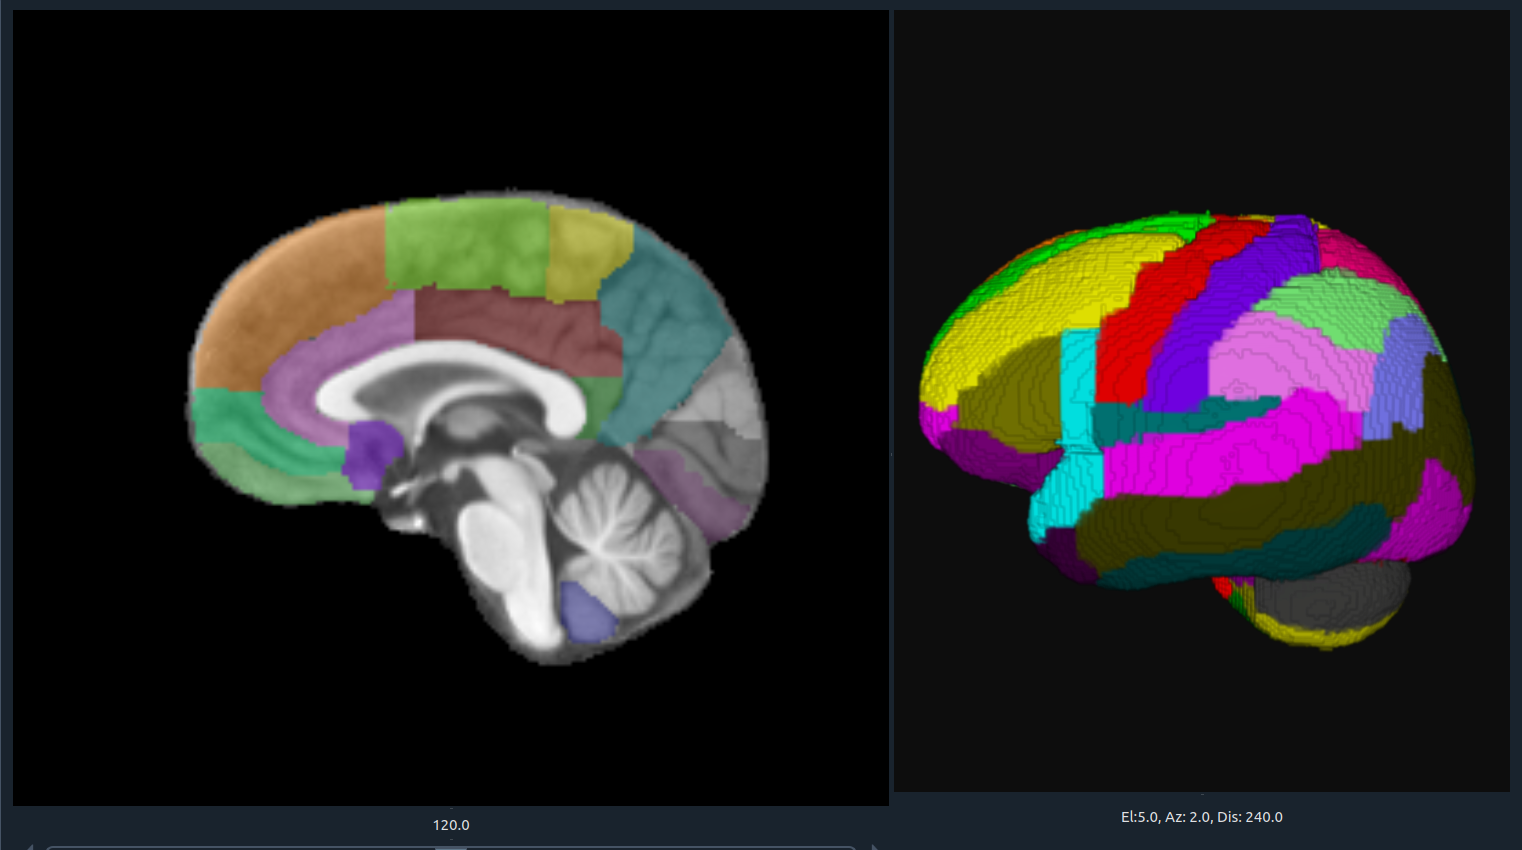
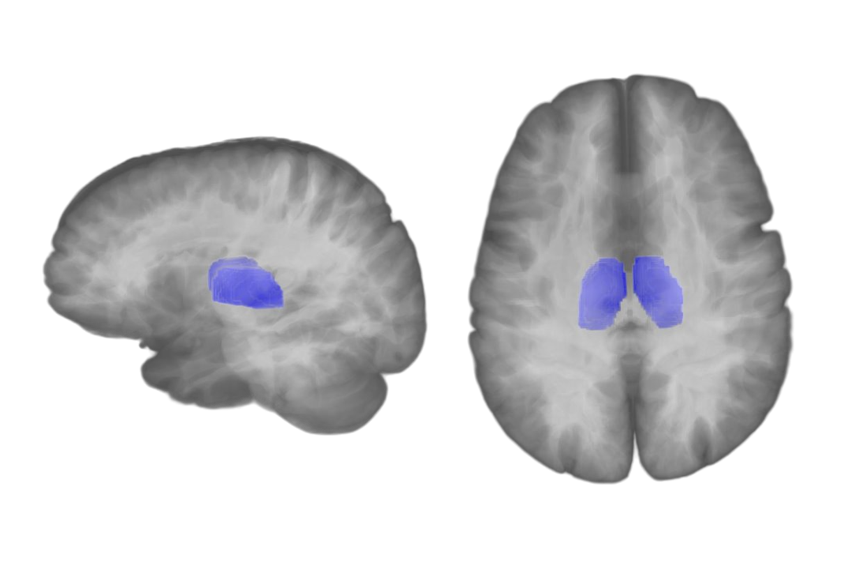
🧩 Transparent 3D Overlay
MELAGE allows users to seamlessly overlay segmentation masks on top of anatomical images within the 3D visualization module. This feature enables clear comparison between raw data and segmented structures, while maintaining anatomical context.
- Transparency Control: Adjust the opacity of the segmentation layer for balanced visualization.
- Interactive Toggle: Enable or disable overlays dynamically without reloading the view.
- Integrated Navigation: Selected points remain synchronized across sagittal, coronal, and axial planes.
- ⚠️ Tip: If the overlay does not activate immediately, switch to another tab and return.
Transparent 3D overlay.
Transparent 3D overlay of segmentation mask and anatomical image in MELAGE.
🎨 BG color
- Change the background color of the 3D visualization.
- Choose between different themes to improve contrast.
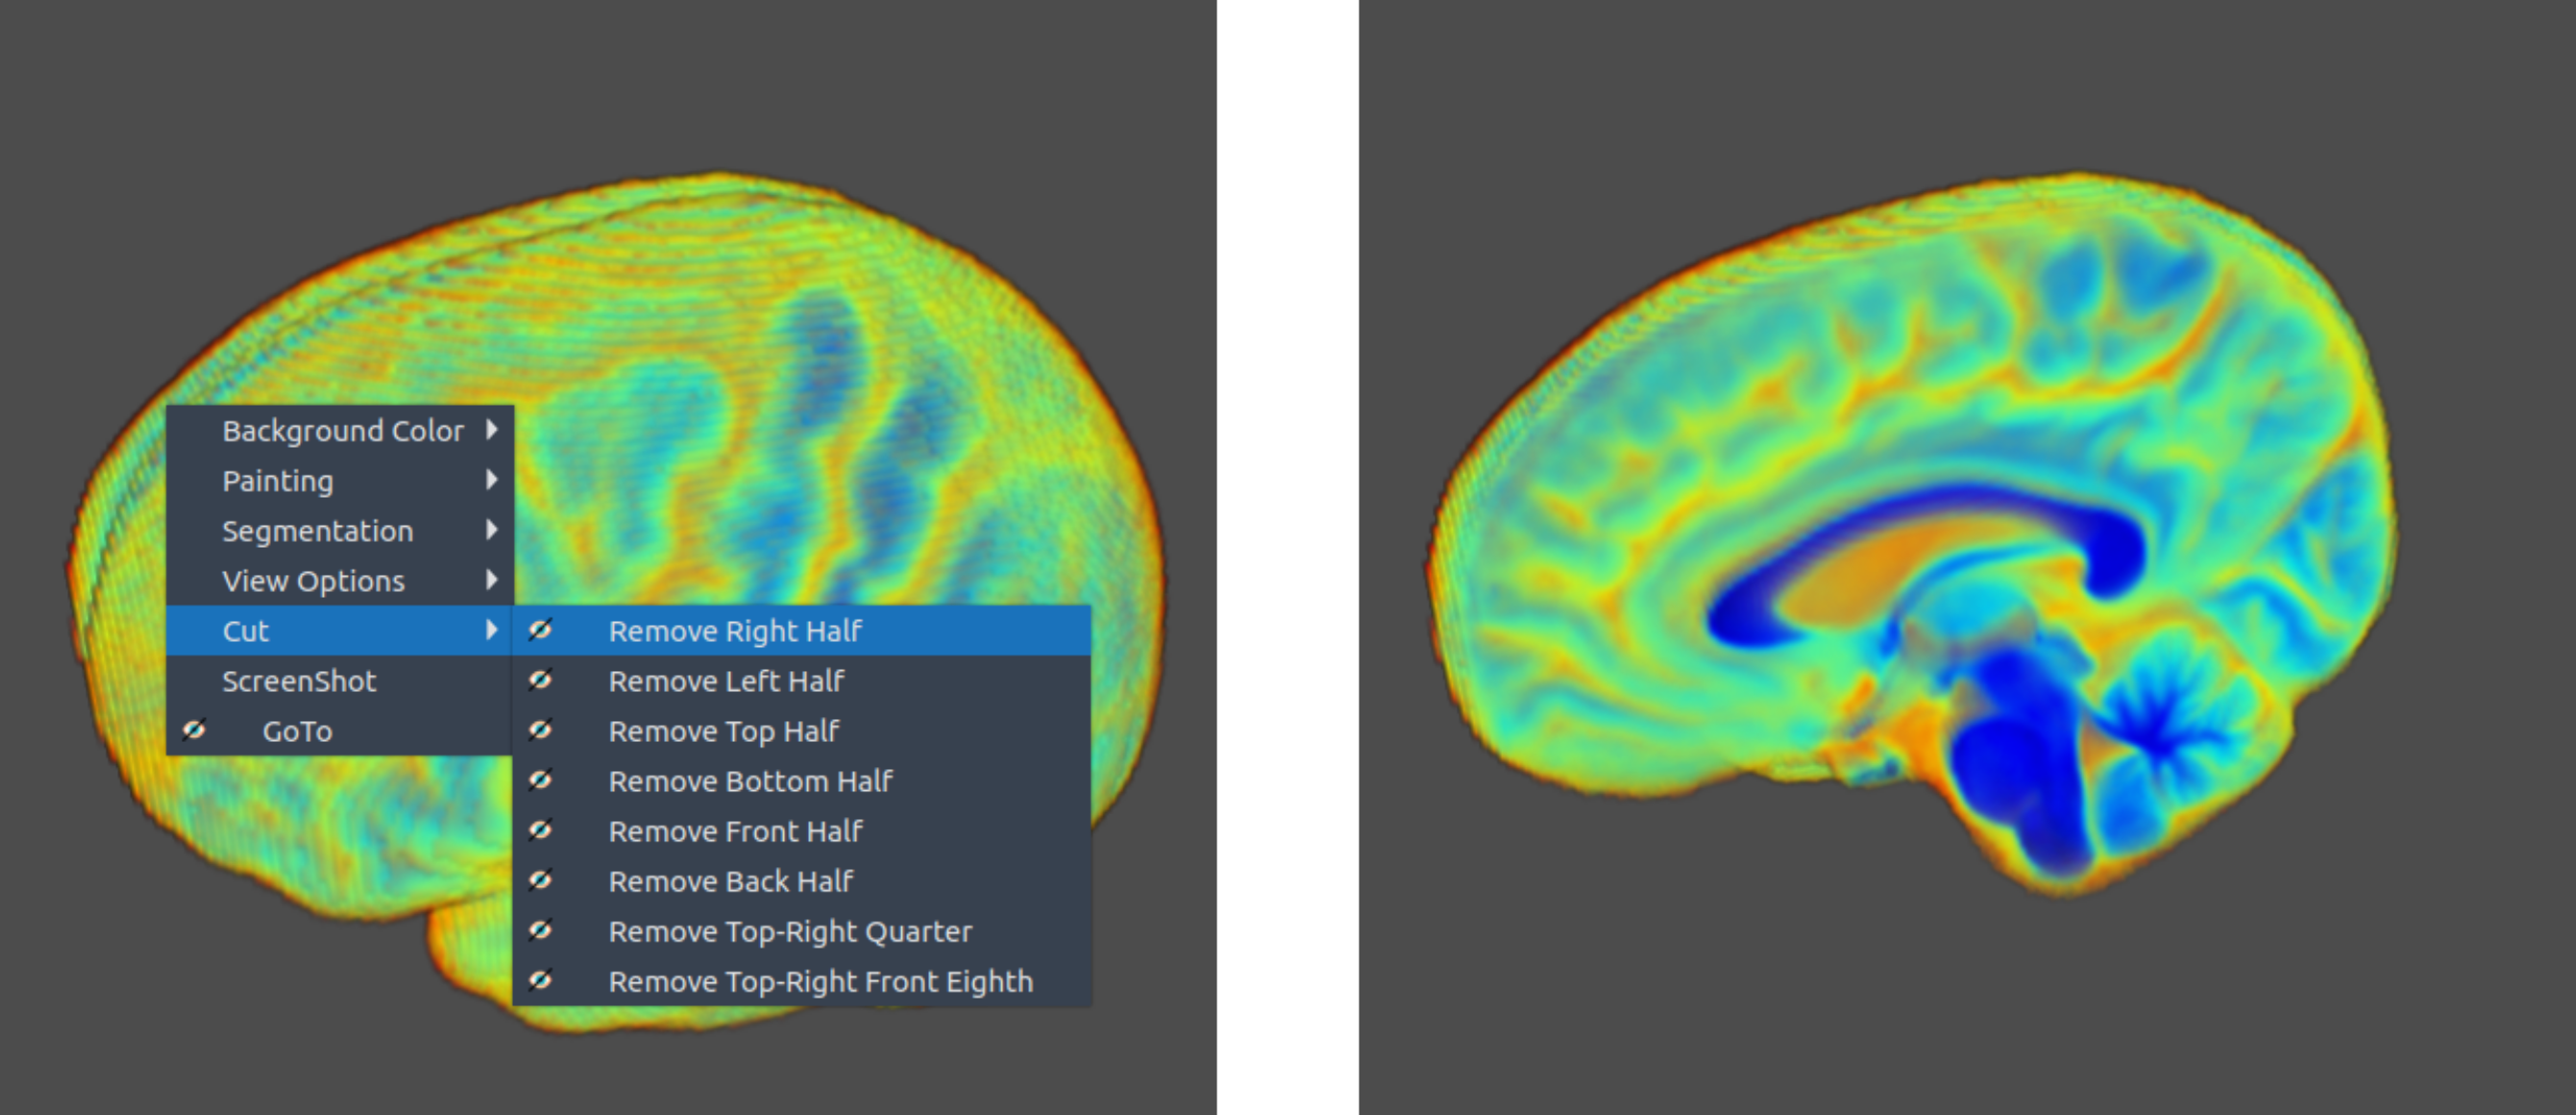
🖌️ Painting
✏️ Draw
- Cut parts of the 3D image interactively by drawing.
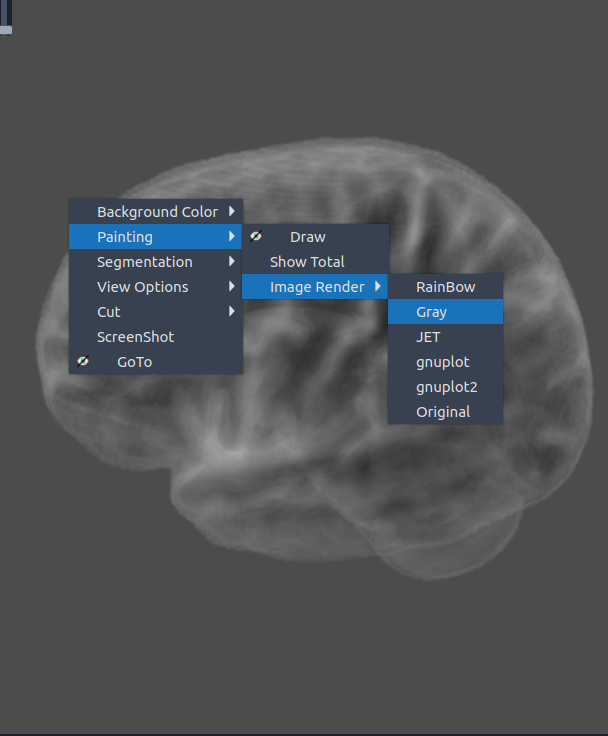
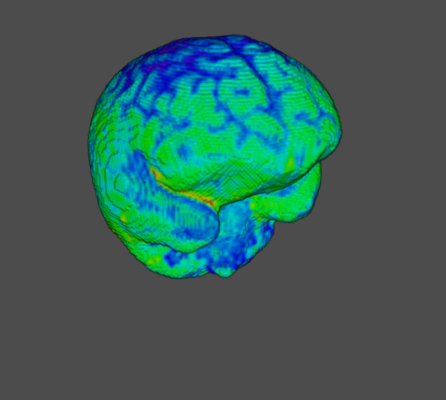
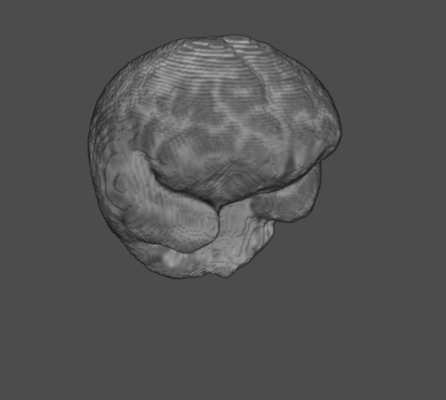
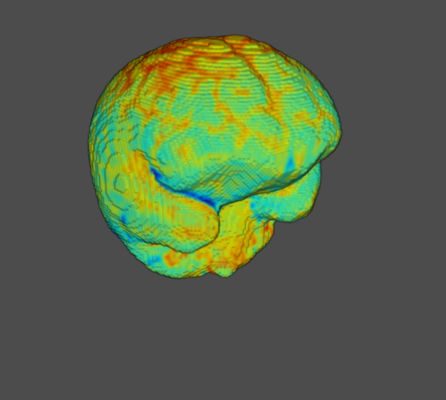
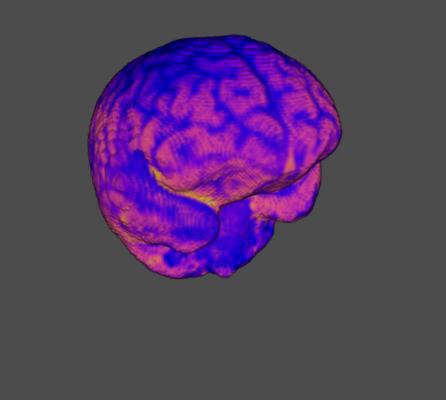
🌈 Image render
- Render the 3D image using different color maps.
- The Segmentation Intensity widget can enhance visualization.
|
|
|
|
|
|
|
|
 Rainbow
 Gray
Gray
 Jet
Jet
 Gnuplot
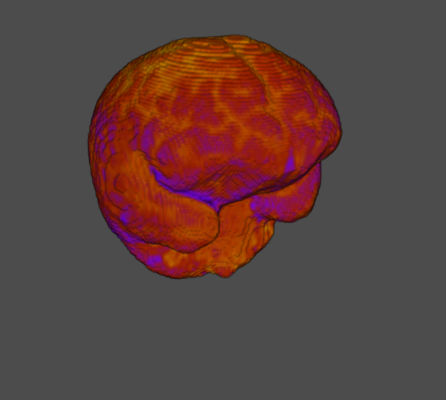 Gnuplot2
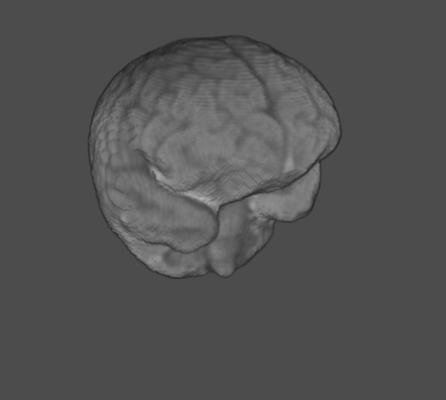 Original
🧭 Axis
- Display axes alongside the 3D visualization for orientation.
🗺️ Grid
- Show a reference grid within the 3D window.
🛠️ Tools
✏️ Segmentation options with contour
Right-click on a segmented contour to access these options:
- 🎯 Center – show center of the region
- 📐 Surface area – compute region surface
- 📏 Perimeter – measure perimeter length
- 📤 Send to table – export all measurements to the table widget
- ➕ Add to interpolation – add the current slice to slice-to-slice interpolation
- ▶️ Apply interpolation – apply interpolation using current and previous slices
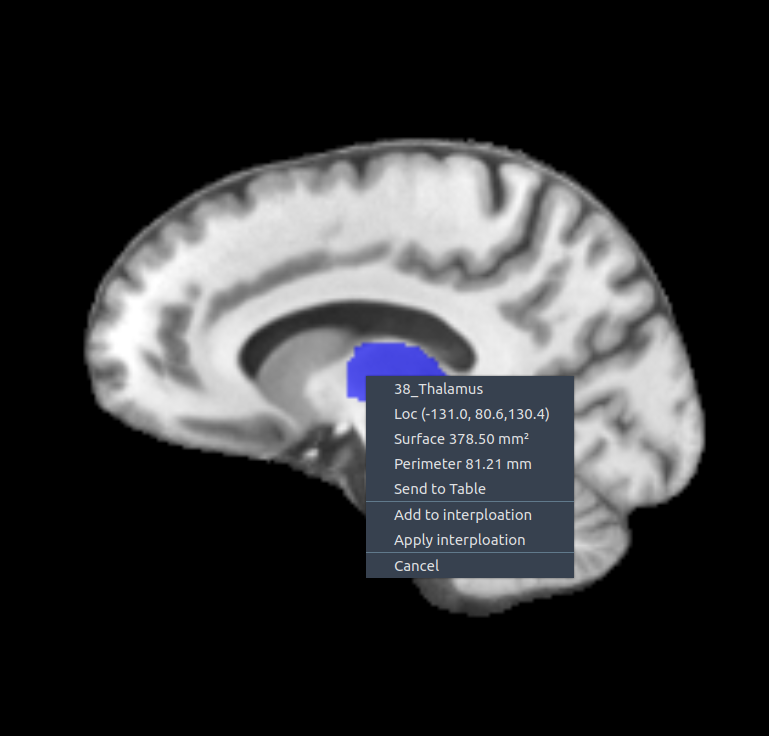
🔀 Interpolation between slices
To interpolate across slices:
- ✅ Activate the colors you want to interpolate
- 🖼 Select a segmented region in one plane (sagittal, axial, or coronal)
- ➕ Add more regions from other slices (as many as needed)
- 🖱 Right-click → Apply interpolation
- ⏳ Wait for interpolation results
📏 Ruler
The ruler measures distances between two points in an image.
Right-click on a ruler gives access to:
- 🎯 Center position
- 📏 Length
- 📐 Line angle
- 🗑 Remove – delete the current ruler
- 📤 Send to table – export ruler data
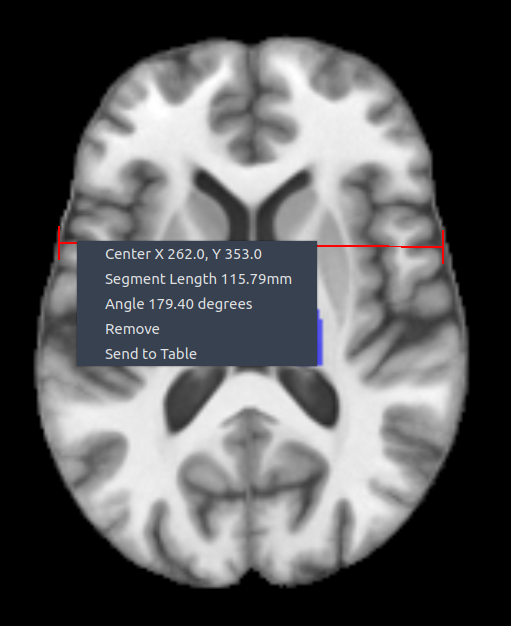
🔄 You can add unlimited rulers.
🧰 Tools menu
Options available under the Tools menu:
- ↩️ Undo – revert up to 10 segmentations
- ↪️ Redo – redo up to 10 actions
- 🧪 Preprocessing – N4 Bias Field Correction, Image Masking, BET, DeepBET, Thresholding, Masking Ops, Change CS
- ℹ️ Basic Info – Histogram, Resize, Image Info
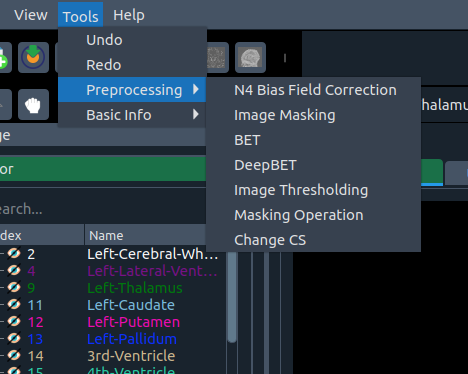
🧮 N4 Bias Field Correction
Uses SimpleITK. Parameters include:
- Otsu thresholding for mask creation
- Fitting level
- Shrinking factor
- Max iterations
- Image selection (top = first image, bottom = second image)
After running, you can restore the Original image if needed.
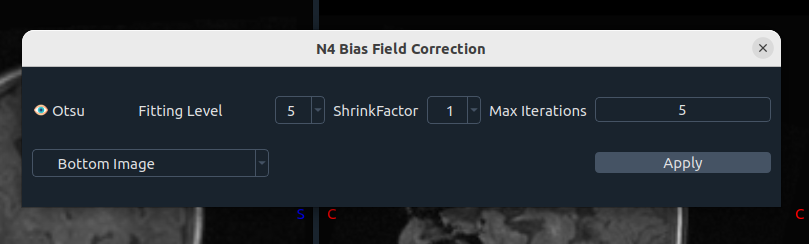
🎭 Image Masking
Keep or remove image parts using segmentation masks:
- Image selection (top or bottom)
- Action: Keep / Remove
- Mask color
- Apply button
Reset by using mask color 9876_Combined.
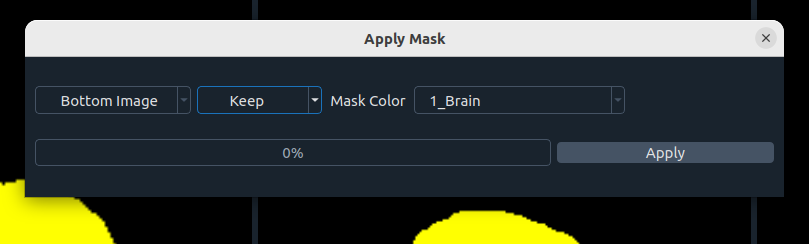
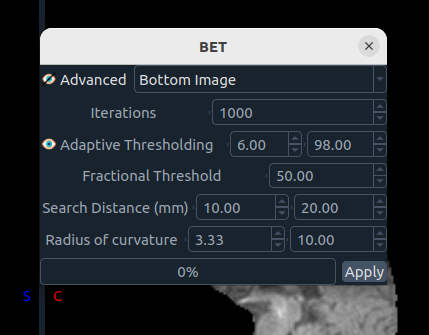
🧠 Brain Extraction Tool (BET)
Implements Smith 2002.
Parameters:
- Advanced mode
- Iterations
- Adaptive thresholding
- Fractional threshold
- Search distance
- Radius of curvature
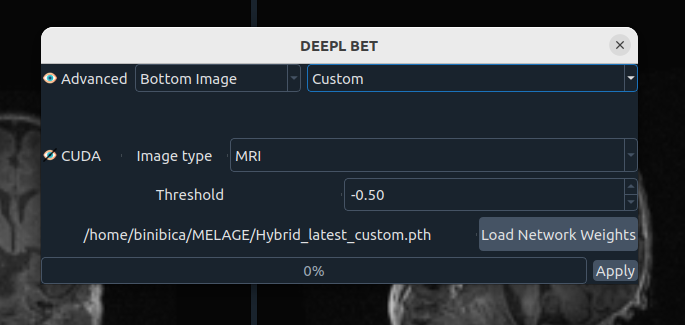
🤖 Deep Learning Brain Extraction
DL-based brain extraction with configurable options:
- Advanced mode (editable)
- Image selection
- Model selection
- CUDA acceleration (optional)
- Threshold (-4 to 4)
- Network weights path
- Apply button
💡 Tip: Adjust threshold without rerunning the model.
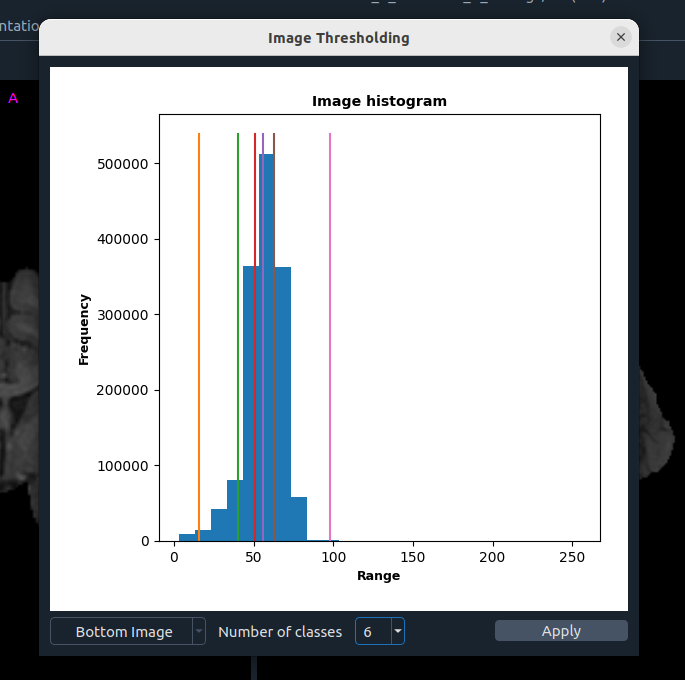
⚖️ Image Thresholding
Multi-Otsu based thresholding:
- Image selection
- Number of classes
- Apply
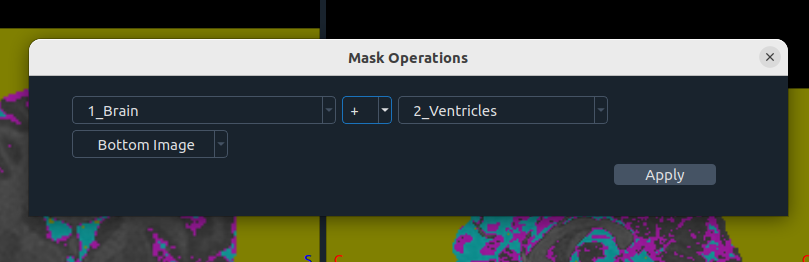
➕➖ Masking Operations
Combine masks using summation or subtraction:
- Masking color(s)
- Operation
- Image selection
- Apply
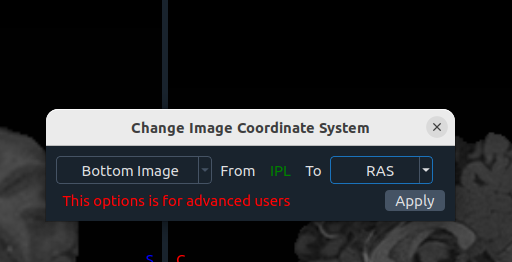
🧭 Change CS (Coordinate System)
- Image selection
- From (current system)
- To (desired system)
- Apply
📊 Basic Info
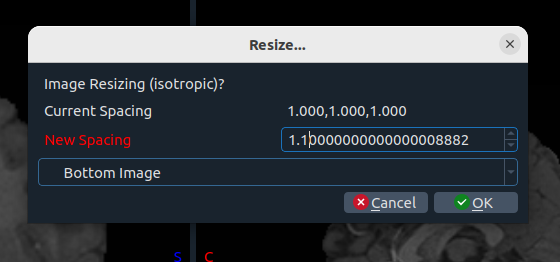
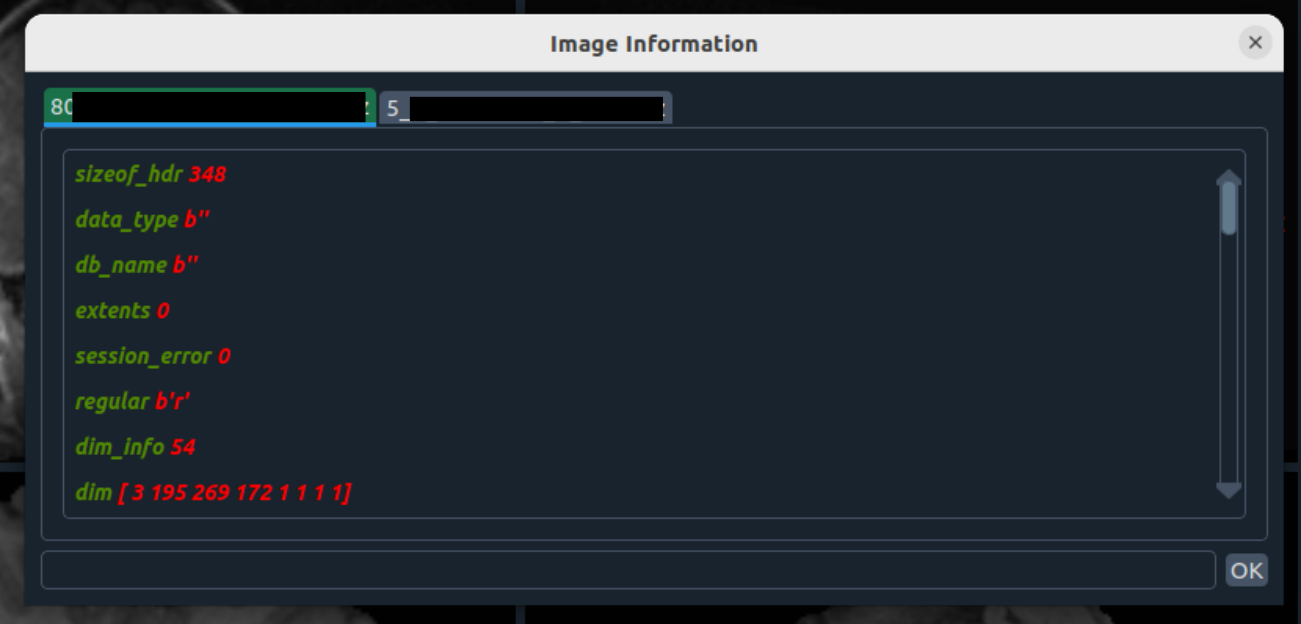
Tools for inspecting and resizing images.
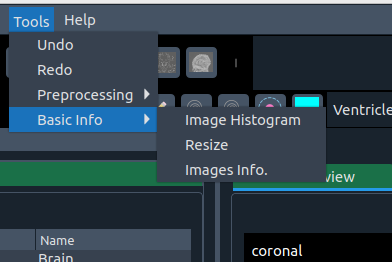
- 📈 Histogram – view image histogram
- 📐 Resize – isotropic resize
- ℹ️ Image info – metadata with search
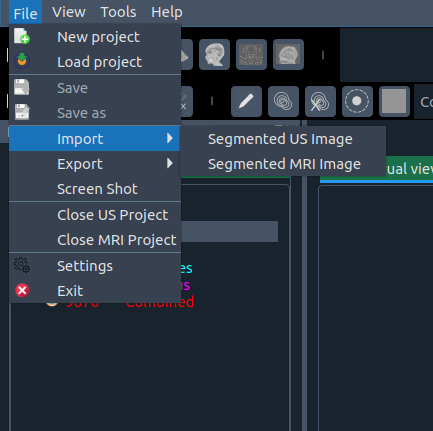
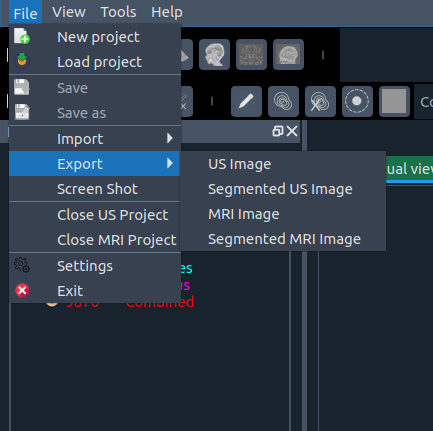
📂 File Menu
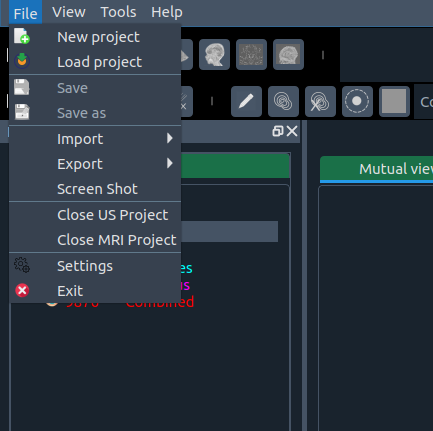
Options include:
- 🆕 New project – start fresh
- 📂 Load project – open saved project
- 💾 Save – overwrite project
- 💾 Save as – save under new name
- 📥 Import – import segmentation
- 📤 Export – save modified image/segmentation with suffix
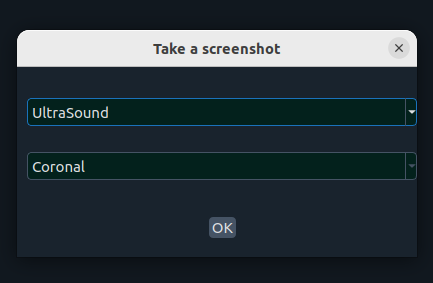
- 📸 Screenshot – capture a plane or whole scene
- ❌ Close top image – close first (top) image
- ❌ Close bottom image – close second (bottom) image
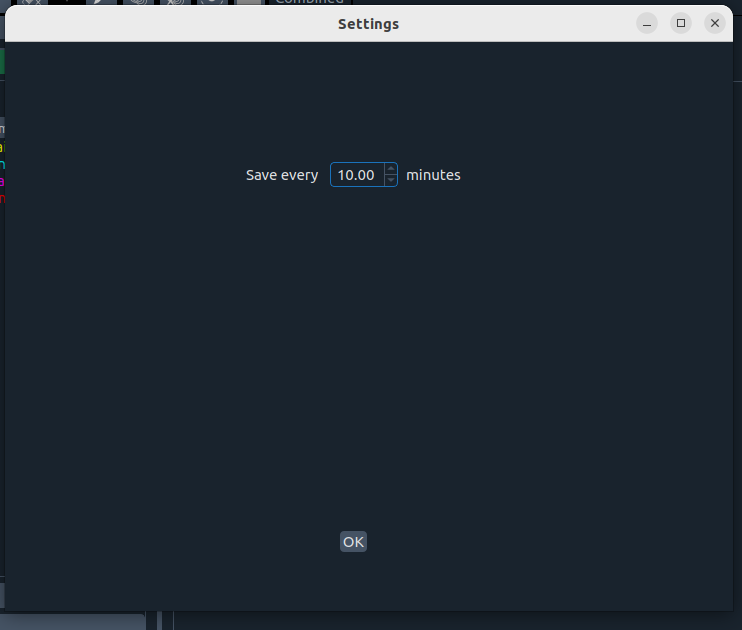
- ⚙️ Settings – change application defaults
- 🚪 Exit – close app (confirmation window will ask to save project)
📜 License
For licensing inquiries, please contact:
Protection & Registration
MELAGE is registered in the Electronic Register of Intellectual Property as software, under file FCAD-22002, by the Technology Transfer Office of the Andalusian Public Health System (OTT-SSPA).
- Identifier: 2211222681375
- View registration details on SafeCreative
This legal protection ensures intellectual property rights are formally secured.
📖 Citation & Acknowledgements
If you use MELAGE in your research, please cite the following work:
Jafrasteh, B., Lubián-López, S. P., & Benavente-Fernández, I. (2023).
MELAGE: A purely Python-based Neuroimaging Software (Neonatal).
arXiv preprint arXiv:2309.07175
We would like to acknowledge all contributors and collaborators who have supported the development and testing of MELAGE.
🚀 Releases
Stable releases and updates of MELAGE are available on the GitHub Releases page.
- 🟢 Stable releases: Fully tested, recommended for production and research use.
- 🧪 Pre-releases / beta versions: For testing new features and providing feedback.
Changelog highlights
| Version | Highlights |
|---|---|
| v2.2.0 | MedSAM + SAM 2 + nnInteractive sidebar plugins; headless Python API & CLI (melage run/tools/info); VS Code-style activity sidebar; Freehand / Magic Wand / Info toolbar tools; 3D rendering fixes; improved masking operations |
| v2.0.5 | Bug fixes and rendering improvements |
| v2.0.3 | Version bump and dependency updates |
| v2.0.0 | Video segmentation support; dynamic plugin system |
| v1.1.0 | Initial public release |
Stay updated by watching the repository for new release notifications.
1 maintainer

Download files
Download the file for your platform. If you're not sure which to choose, learn more about installing packages.
Source Distribution
Built Distribution
Filter files by name, interpreter, ABI, and platform.
If you're not sure about the file name format, learn more about wheel file names.
Copy a direct link to the current filters
File details
Details for the file melage-2.2.0.tar.gz.
File metadata
- Download URL: melage-2.2.0.tar.gz
- Upload date:
- Size: 26.8 MB
- Tags: Source
- Uploaded using Trusted Publishing? No
- Uploaded via:
twine/6.2.0 CPython/3.12.3
File hashes
| Algorithm | Hash digest | |
|---|---|---|
| SHA256 |
5d6a24d2b96c7adb60d3e58f93f036363559646dad7f0e3cd50ec626d684b26e
|
|
| MD5 |
cf5d1ad23afe1e5082f6d4aba7ac1b98
|
|
| BLAKE2b-256 |
1ff16ab4d814ce35f19b143b8913d703fecffdb78c5076d3dc1bcf58077b45ab
|
File details
Details for the file melage-2.2.0-py3-none-any.whl.
File metadata
- Download URL: melage-2.2.0-py3-none-any.whl
- Upload date:
- Size: 26.9 MB
- Tags: Python 3
- Uploaded using Trusted Publishing? No
- Uploaded via:
twine/6.2.0 CPython/3.12.3
File hashes
| Algorithm | Hash digest | |
|---|---|---|
| SHA256 |
02448c9324030ad7c8f5c484650706e3e3396c38c34d49df8d8345a70ff986ee
|
|
| MD5 |
fea6a76e007f47da280175aa15e8374f
|
|
| BLAKE2b-256 |
6e0132f6b774c6afe0b4b1413e07de1afb9588563b2fc3b5d1fd541f3d6b2da6
|














