
MeltyGUI
Low latency tensor visualization for PyTorch.
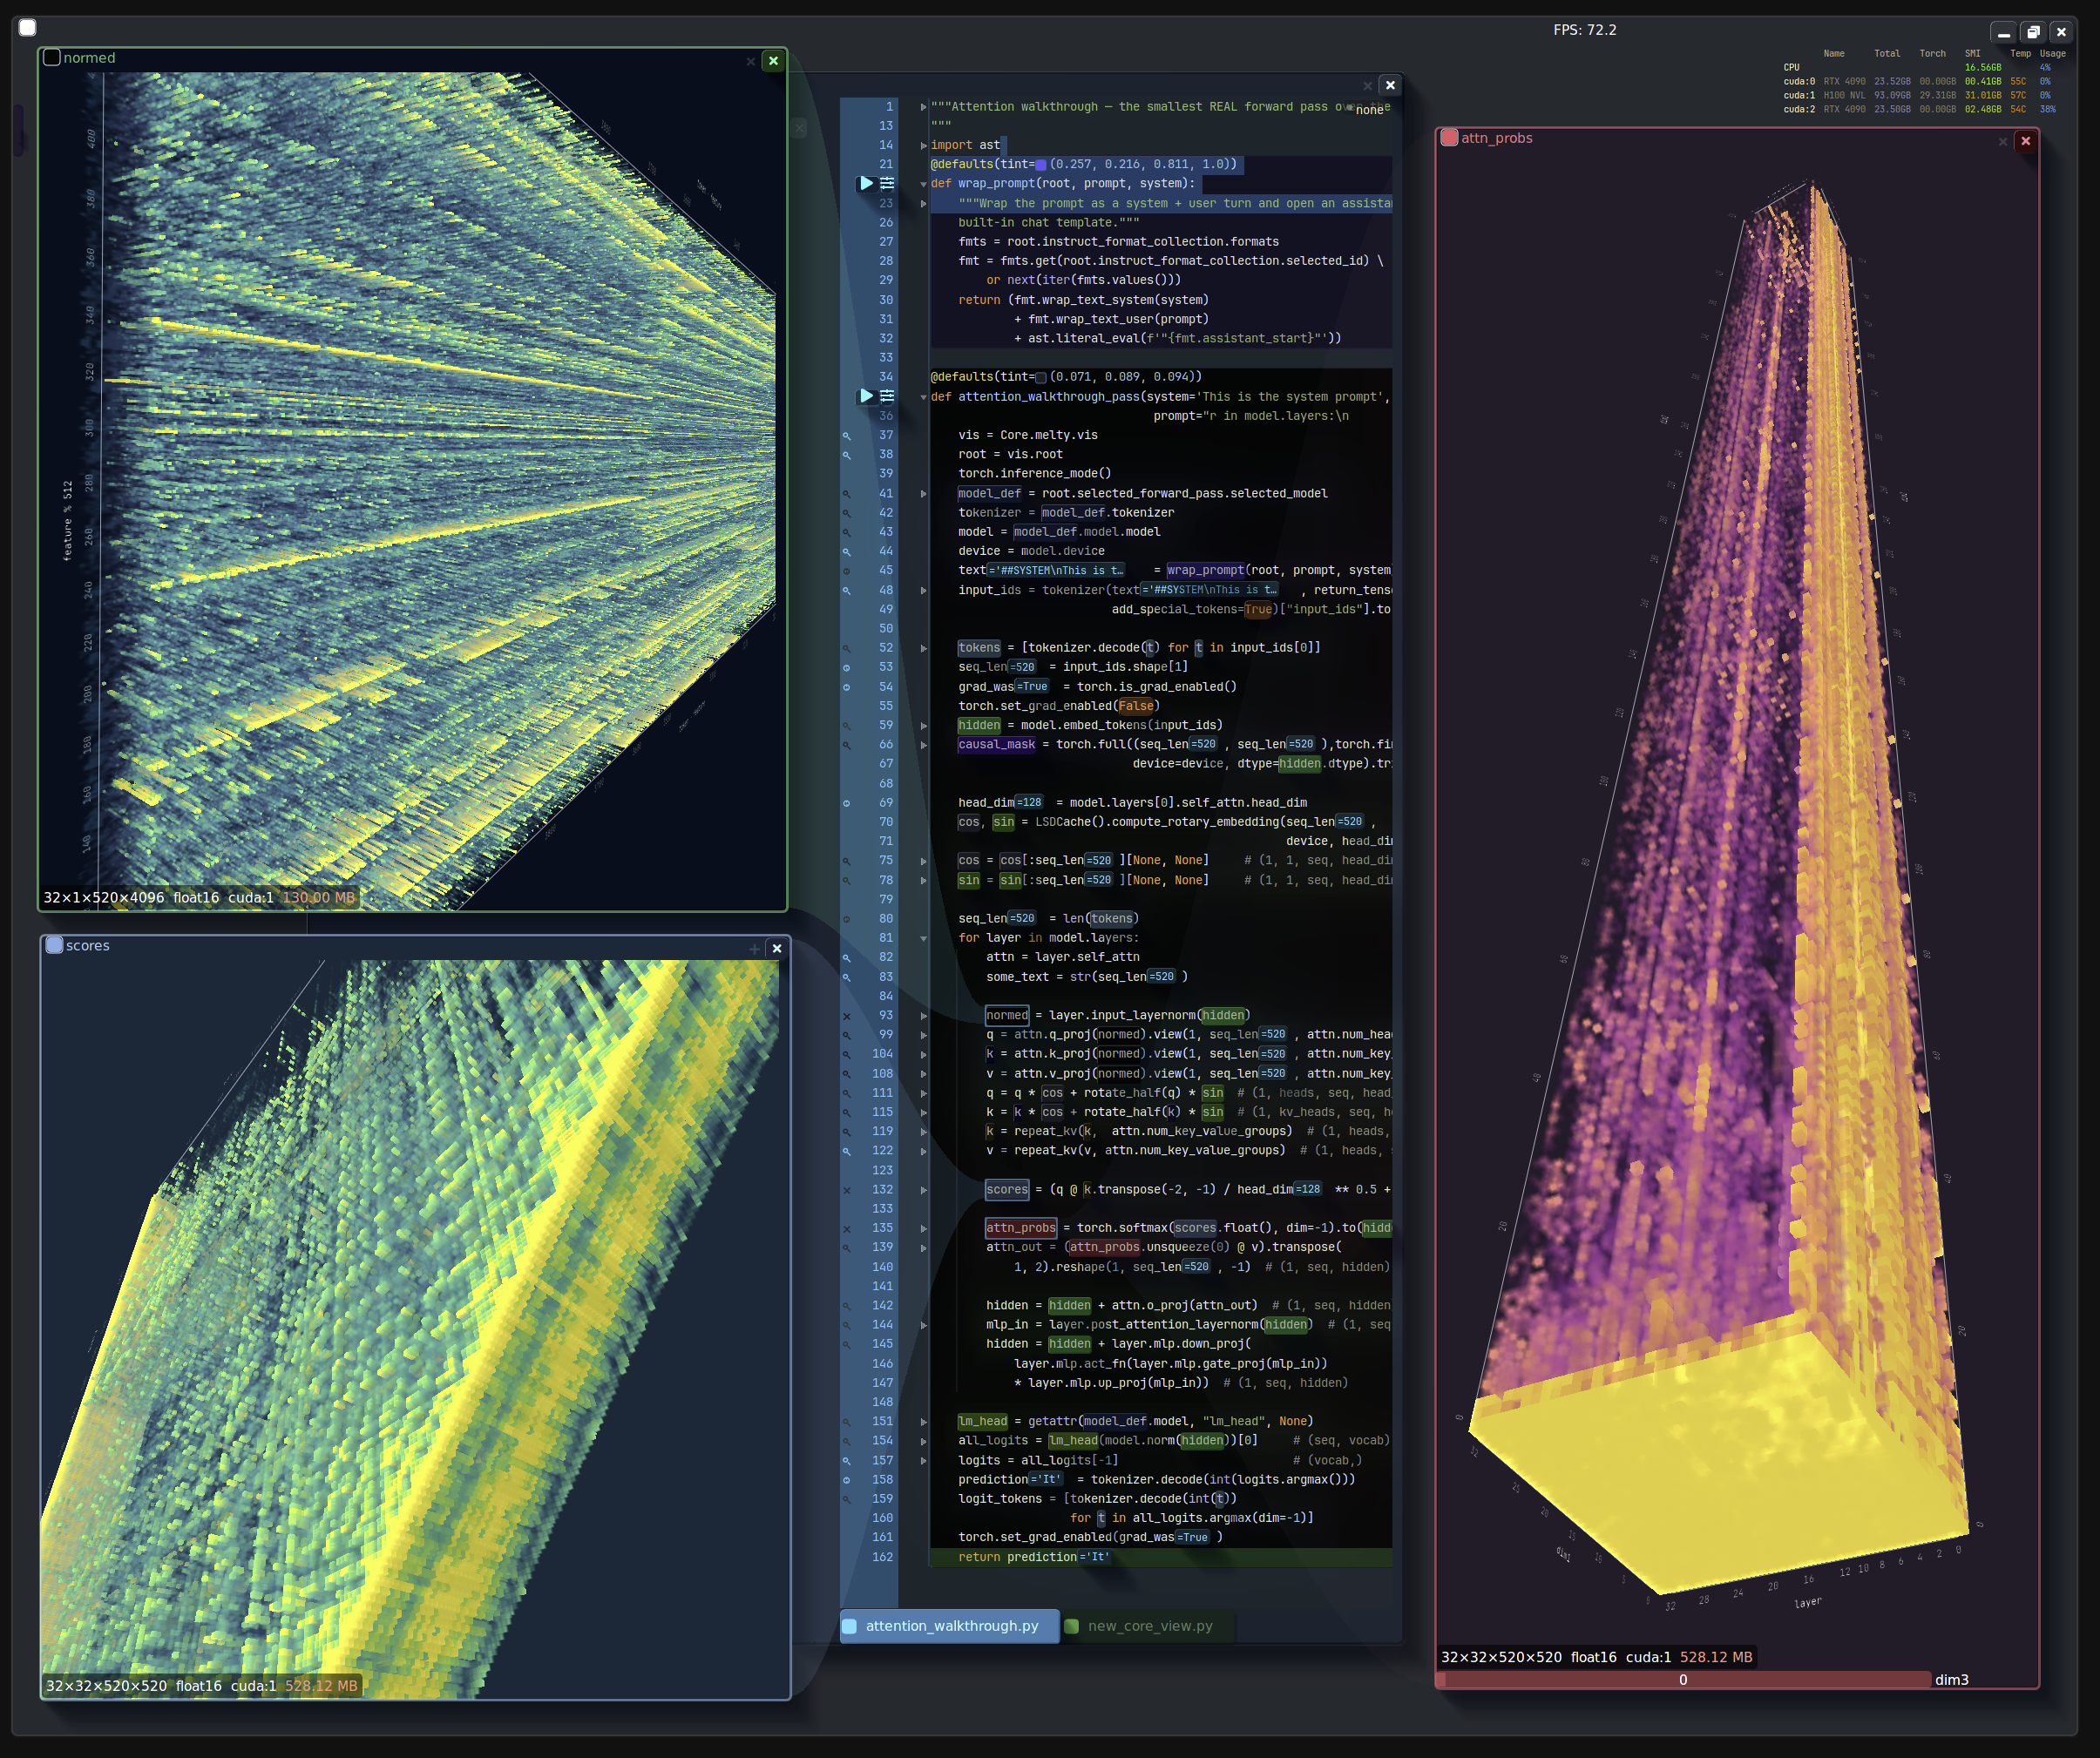
MeltyGUI is an open source data visualization toolkit for PyTorch, designed to render massive tensors in-place on the GPU at an interactive framerate. The purpose of this project is to make PyTorch code easier to understand and faster to debug. Along with its core tensor rendering components, MeltyGUI is bundled with a Blender inspired UI framework designed to make interacting with high dimensional tensors feel fast and intuitive.
MeltyGUI is capable of rendering tensors exceeding 64GB in size. The primary challenge with visualizing data this large is moving it around. MeltyGUI skips the data movement entirely, and ray-marches tensors directly from CUDA memory.
Getting started
MeltyGUI is not yet published to PyPI. For now, install from a checkout using the setup guide.
The current setup targets Linux x86-64 with Python 3.11, 3.12 or 3.13 and a working OpenGL 4.3 context. CUDA tensor rendering also requires PyTorch, an NVIDIA GPU, a CUDA toolkit, and MeltyGUI's GL-enabled CUDA binding. The native bindings install as prebuilt wheels on those targets; elsewhere installers compile them, see when no wheel matches.
Visualize a tensor
Create a small volume on the GPU and tag draw_voxels as an OS window with
glfw_window:
import torch
import meltygui

axis = torch.linspace(-1.5, 1.5, 40, device="cuda:0")
x, y, z = torch.meshgrid(axis, axis, axis, indexing="ij")
volume = torch.exp(-4 * ((torch.sqrt(x * x + y * y) - 0.85) ** 2 + z * z))

meltygui.glfw_window(
    meltygui.draw_voxels, name="Torus", value=volume, width=850, height=700
)
Save this as tensor_demo.py and run it with the Python from your configured
environment:
.venv/bin/python tensor_demo.py
glfw_window turns a view into a native window: name is the window title,
width / height its content size, value the view's input, and every other
keyword argument goes to the view. The window loop starts automatically after
the module finishes defining its windows. The CUDA renderer reads the volume on
its own GPU and transfers the rendered 2D image for display.
To compose several views in one window, decorate your own function instead. It runs each frame, so create the tensor outside it to avoid reallocating the volume on every frame:
@meltygui.glfw_window(name="CUDA tensor", width=850, height=700)
def draw_frame():
    # Interactive widget, rendered in a loop. This function will be called wheneven
    # the rendered image is invalidated
    meltygui.draw_voxels(volume, name="Torus", width=800, height=630)
draw_voxels chooses CUDA for CUDA tensors and OpenGL for CPU tensors, NumPy
arrays and GL textures. Select a renderer explicitly with the framework's
view_func override (or call either renderer directly):
meltygui.draw_voxels(volume, view_func=meltygui.draw_voxels_opengl)
meltygui.draw_voxels(volume, view_func=meltygui.draw_voxels_cuda)
draw_voxels_opengl accepts tensors directly, including CUDA tensors; it slices
and uploads the displayed volume to a GL texture. draw_voxels_cuda requires a
CUDA tensor and reads it in place. Both expose the same camera, mapping and
shading controls. Backend selection no longer uses the obsolete cuda_march
parameter.
See the tensor and live-code example for a tensor viewer alongside an editable function view.
Build an app
Use the bundled UI framework to add controls, editors, and additional windows. Building an app covers persistent view state, render functions, and window lifecycle.
For framework design, feature ownership and render-function patterns, see Contributing. Development covers setup, checks and packaging; Architecture gaps tracks the remaining migration work.
License
MeltyGUI is licensed under Apache 2.0. Bundled third-party code and assets retain their own licenses. The separate commercial IDE is not part of this distribution.
1 maintainer

Metadata
1 maintainer
Release files for meltygui 0.1.2
For a detailed explanation of source distributions (sdists) and built distributions (wheels), please see the package formats documentation.
Source distribution (sdist)
| File | Size | Uploaded | |
|---|---|---|---|
| meltygui-0.1.2.tar.gz | 6.1 MB | Details |
Built distribution (wheel)
| File | Interpreter | ABI | Platform | Reset |
|---|---|---|---|---|
| meltygui-0.1.2-py3-none-any.whl | Python 3 | none | any | Details |
Total release size: 12.1 MB
Release files / meltygui-0.1.2.tar.gz
| Download URL | meltygui-0.1.2.tar.gz |
|---|---|
| Size | 6.1 MB |
| Tags | Source |
|
SHA-256 checksum How to use checksums |
28eee8c7aefe463002130d0f02018c064dc39acb22d2f1a172f4996f73e9b082
|
|
BLAKE2b-256 checksum How to use checksums |
909b858f3e5423c6e133c7a3a60cecfd765f969a8c6adffeac3430395ffc6d74
|
| Upload date | |
|
Uploaded using Trusted Publishing? What is trusted publishing? |
Yes |
| Uploaded via |
uv/0.11.19 {"installer":{"name":"uv","version":"0.11.19","subcommand":["publish"]},"python":null,"implementation":{"name":null,"version":null},"distro":{"name":"Ubuntu","version":"22.04","id":"jammy","libc":null},"system":{"name":null,"release":null},"cpu":null,"openssl_version":null,"setuptools_version":null,"rustc_version":null,"ci":true}
|
Release files / meltygui-0.1.2-py3-none-any.whl
| Download URL | meltygui-0.1.2-py3-none-any.whl |
|---|---|
| Size | 6.0 MB |
| Tags | Python 3 |
|
SHA-256 checksum How to use checksums |
da0e92cfff98d22b55b870c610dc74dd297ba6904b030570f9eb7cdd47583327
|
|
BLAKE2b-256 checksum How to use checksums |
b3d6d5d824829b3b3c4c7659ee53c9a5988e41f514fe0f285d81f24c4bb1bd9c
|
| Upload date | |
|
Uploaded using Trusted Publishing? What is trusted publishing? |
Yes |
| Uploaded via |
uv/0.11.19 {"installer":{"name":"uv","version":"0.11.19","subcommand":["publish"]},"python":null,"implementation":{"name":null,"version":null},"distro":{"name":"Ubuntu","version":"22.04","id":"jammy","libc":null},"system":{"name":null,"release":null},"cpu":null,"openssl_version":null,"setuptools_version":null,"rustc_version":null,"ci":true}
|














