Local-first, minimalist, micro experiment tracking for Machine Learning/Deep Learning workflows

Project description
microtrax
Yet Another Experiment Tracking Library
Local, minimalist, micro experiment tracking for Machine Learning/Deep Learning workflows.
No accounts, no setups. 3 lines to track.
microtrax attempts to be a modern, minimalist library for experiment tracking. Inspired by TensorBoard.
Quickstart
$ pip install microtrax
import microtrax as mtx

epochs = 10
mtx.init('./logbook_dir') #, optionally also track_resources=True)

for i in range(epochs):
    mtx.log({
        "step": i,
        "loss": epochs-i
    })

mtx.finish()
Then serve the dashboard:
$ mtx serve -f ./logbook_dir
This automatically starts both the FastAPI backend and React frontend!
It's called a quickstart as if there's anything else you can do with it. Actually, that's pretty much it.
Design Philosophy
- Free forever.
- Simplicity > feature-richness.
- Research-experience first.
- Framework agnostic - no specialized adapters for different libraries nor ecosystem favoritism. Log whatever.
- Lightweight footprint. No hogging the CPU or memory.
- Easily extendable (standard stack + simple to add new components/routes)
- No setups, no accounts, no enterprise versions.
Learning microtrax in 10 seconds
- Experiment: whatever happens between
mtx.init()andmtx.finish(), housing a series ofmtx.log()s. - Logbook: Collection of experiments in a log directory.
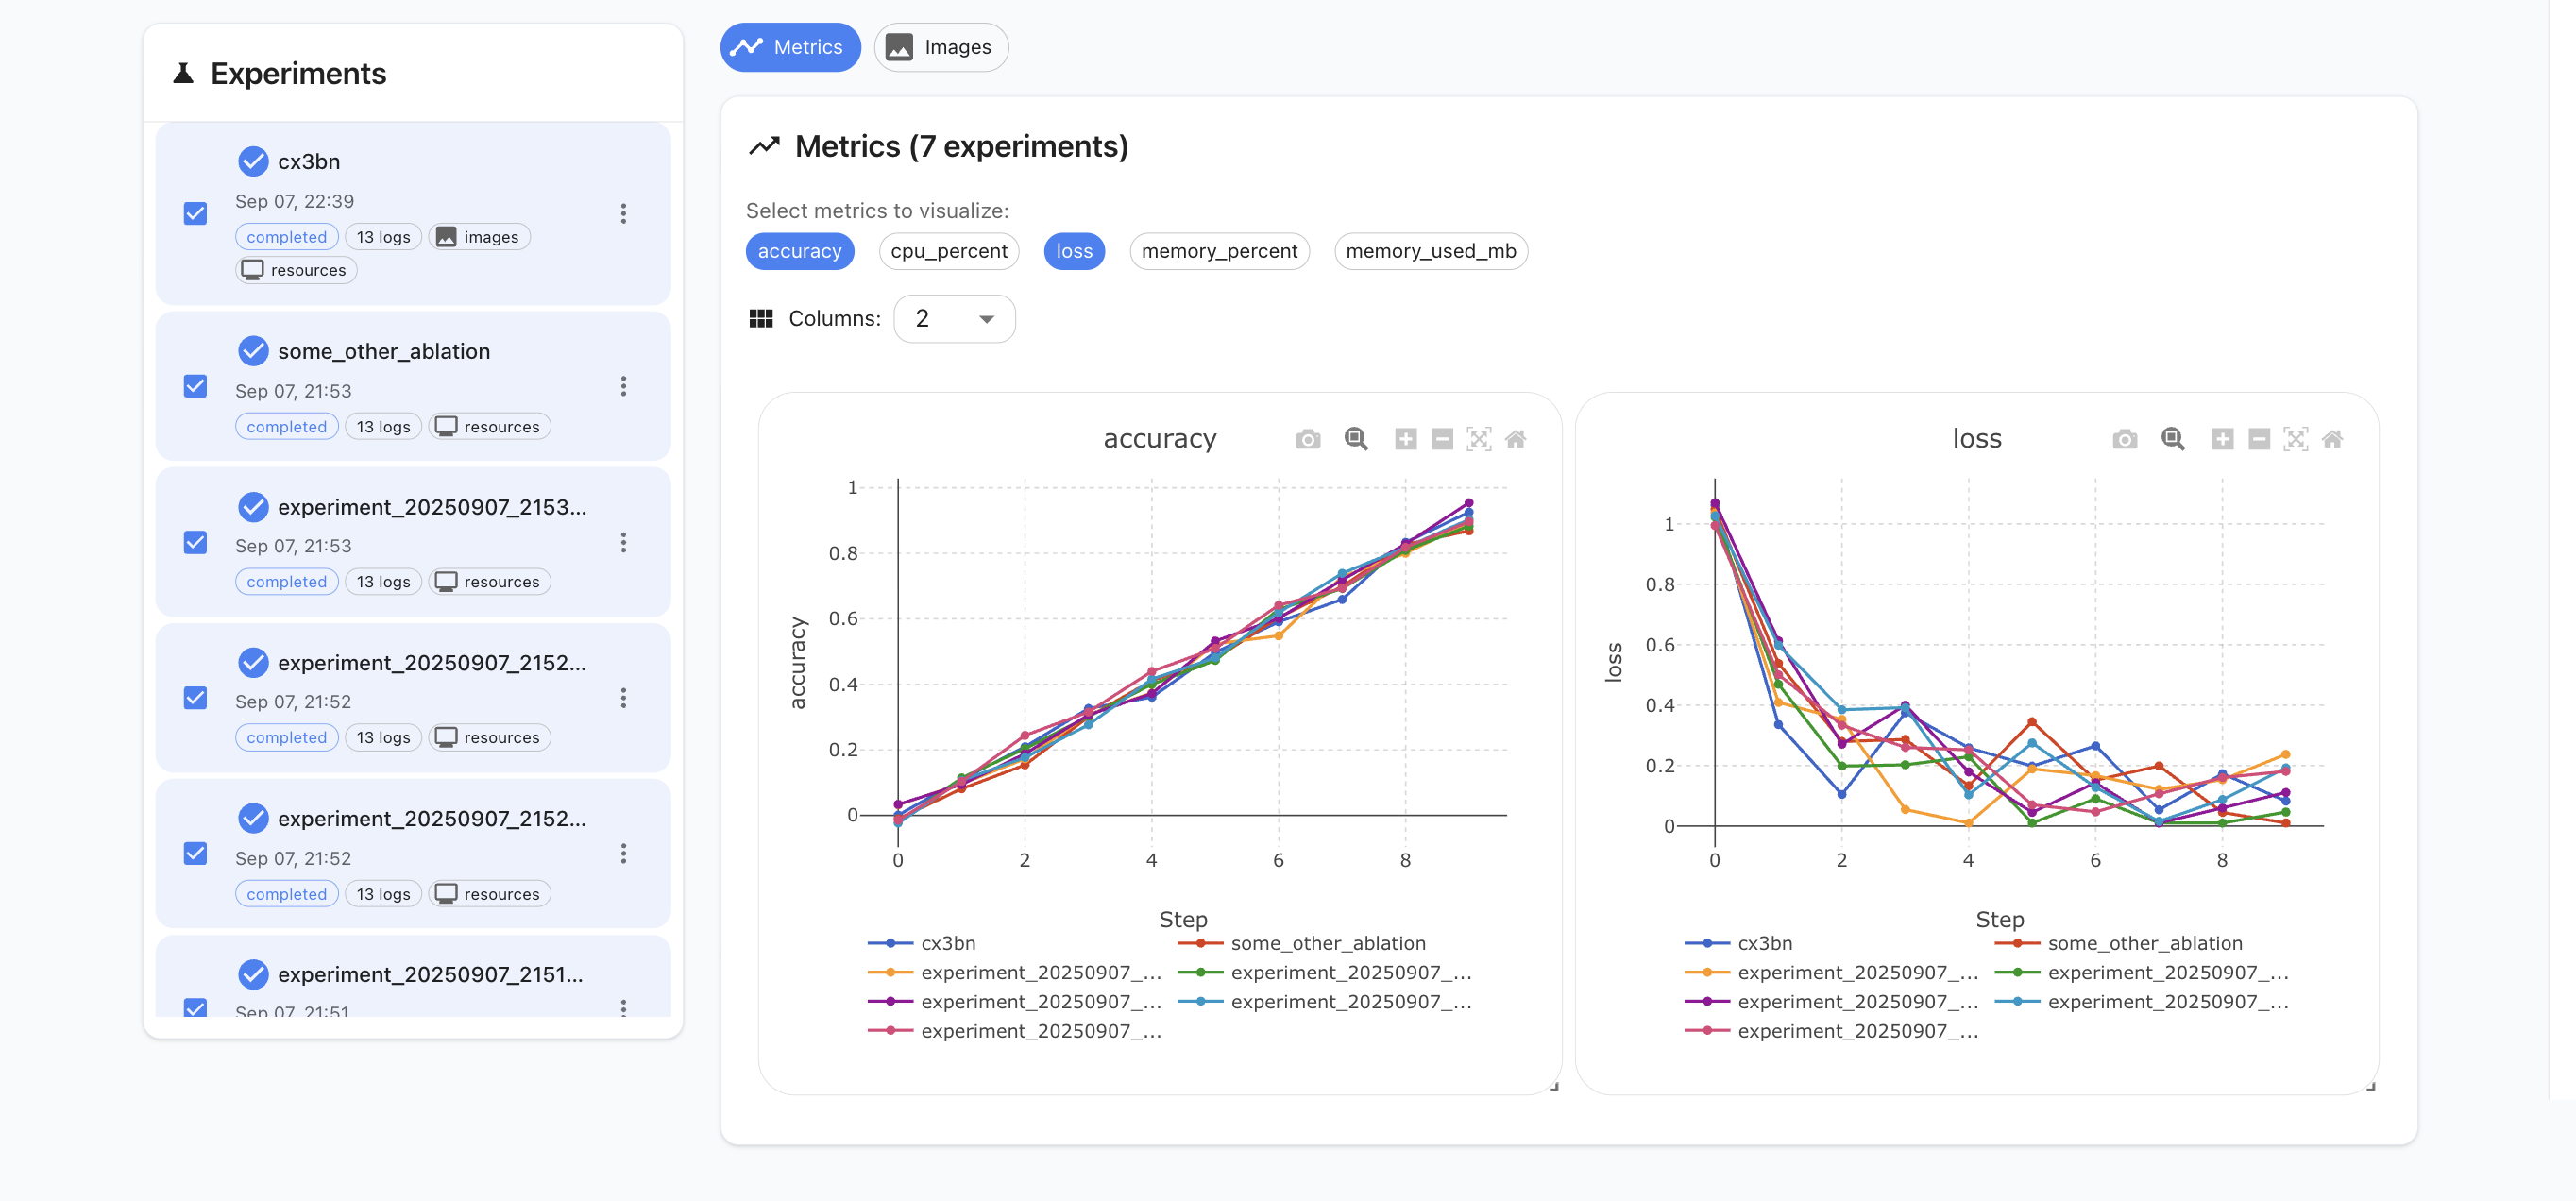
- Dashboard: Where your visualizations go. You can select which experiments to visualize and overlay from the logbook.
No need to learn anything else to use microtrax.
CLI Usage
After installation, you can use the mtx command:
# Start the dashboard
mtx serve -f ./logbook_dir -p 8080

# Start with Docker Compose
mtx serve -f ./logbook_dir --docker

# List all experiments in a directory
mtx list -f ./logbook_dir

# Serve with custom host/port
mtx serve -f ./logbook_dir --host 0.0.0.0 -p 8080
Commands:
mtx serve- Start the interactive dashboard web servermtx list- List all experiments in the specified directory
Options:
-f, --logdir- Directory containing experiments (default: ~/.microtrax)-p, --port- Port to run dashboard on (default: 8080)--host- Host to bind to (default: localhost)--docker- Run using Docker Compose instead of local servers
microtrax - Bird's Eye View
From a bird's eye view, microtrax has four main components:
- Core: Core operations like
mtx.init(),mtx.log()andmtx.finish(), as well as handling of I/O - CLI: Runner for the CLI commands like
mtx listandmtx serve - Backend: FastAPI server + routers for exposing a logdir's logs
- Frontend: React frontend for visualizing data provided by the server via Plotly
Why React + FastAPI and not something "simpler"?
Because this is a hackable, extendable, simple format. We want to make it as easy as possible to extend and tweak the library. Proprietary formats, uncommon libs or "simplifying" by obscurity go against the core principles of the library.
- Need a new widget -> Add a single React component in
/frontend/src/components - Need a new server endpoint -> Add a single endpoint in FastAPI's routers in
/backend/routers
A highly standard stack ensures that the widest number of users can easily and comfortably understand and extend the library as needed.
  ┌─────────────────────────────────────────────────────────────────────────────┐
  │                               microtrax                                     │
  └─────────────────────────────────────────────────────────────────────────────┘

  ┌─────────────────┐      ┌───────────────────┐    ┌─────────────────────────────┐
  │   User Code     │      │   File System     │    │        Dashboard            │
  │                 │      │                   │    │                             │
  │  mtx.init()     │─────▶│  ~/.microtrax/    │◀───│ ┌─────────────────────────┐ │
  │  mtx.log({...}) │      │    experiments/   │    │ │    React Frontend       │ │
  │  mtx.finish()   │      │    resources/     │    │ │    (Port 8080)          │ │
  │                 │      │                   │    │ │  - Plot visualizations  │ │
  └─────────────────┘      │  exp_id.jsonl     │    │ │  - Experiment browser   │ │
                           │  (w/ base64 imgs) │    │ │  - Settings panel       │ │
  ┌───────────────────┐    │  resources.jsonl  │    │ └─────────────────────────┘ │
  │   Core Module     │    │                   │    │             │               │
  │                   │───▶│                   │    │           HTTP              │
  │ • Experiment      │    └───────────────────┘    │             │               │
  │ • ResourceTracker │                             │ ┌─────────────────────────┐ │
  │ • I/O Utils       │   ┌──────────────────┐      │ │   FastAPI Backend       │ │
  │ • Image Processing│   │       CLI        │──────│ │   (Port 8080)           │ │
  └───────────────────┘   │                  │      │ │                         │ │
                          │  mtx serve       │      │ │  /api/experiments       │ │
                          │  mtx list        │      │ │  /api/plots             │ │
                          └──────────────────┘      │ │  /api/images            │ │
                                                    │ │  /api/plot-options      │ │
                                                    │ └─────────────────────────┘ │
                                                    └─────────────────────────────┘

  Data Flow:
  User Code ─> JSONL -> File System -> Backend -> JSON -> Frontend -> User
Frontend Serving
The frontend is served as static files on the same port as the backend (localhost:8080).
You can separately build the frontend for hot reloads during development of new features if you're customizing the library.
Docker Compose
You can also run the microtrax dashboard through Docker Compose for containerized deployment.
Setup
- Configure your experiment log directory in
.env:
# Directory where experiment logs are stored
MICROTRAX_LOGDIR=./my_experiments
- Run the stack:
docker-compose up
This will start:
- Backend API and frontend served on port 8080
Configuration
The MICROTRAX_LOGDIR environment variable specifies where your experiment logs are stored on the host machine. This directory is mounted into the backend container at /data.
Default: ~/.microtrax if not specified
Access
- Dashboard: http://localhost:8080
- Backend API: http://localhost:8080
The frontend handles routing and proxies /api/* requests to the backend automatically.
Contributing
We welcome contributions to microtrax!
It's community-first, so any and every issue and idea will be considered.
This guide will help you get started if you'd like to propose a change.
Getting Started
- Fork and clone the repository
$ git clone https://github.com/yourusername/microtrax.git
$ cd microtrax
- Set up development environment
# Install Python dependencies
$ pip install microtrax
$ pip install pytest ruff

# Install and build frontend
$ cd microtrax/frontend
$ npm install
$ npm run build
- Run tests
# Python tests
pytest
# Format code
make format
Development Workflow
Backend Changes
- Location:
/microtrax/backend/ - For routers:
/backend/routers/ - For endpoints:
/backend/routers/router_name.py - For business logic:
/backend/services/ - For data models:
/backend/domain/schemas.py
Frontend Changes
- Location:
/microtrax/frontend/src/ - For new components:
/frontend/src/components/
Core Changes
- Location:
/microtrax/core.py,/microtrax/io_utils.py - Experiment tracking logic
- File I/O operations
- Image processing
Code Standards
- Python: Follow PEP 8, use type hints, run ruff for linting
Submitting Changes
- Create a feature branch
git checkout -b feature/your-feature-name
- Make your changes
- Test
- Submit a pull request
Questions?
- Check existing issues on GitHub
- Start a discussion for feature ideas
Citation
If you happen to use microtrax for your research, and publish your results - we'd appreciate a citation~
@misc{landup2025microtrax,
  title={microtrax},
  author={David Landup},
  year={2025},
  howpublished={\url{https://github.com/DavidLandup0/microtrax/}},
}


Download files
Download the file for your platform. If you're not sure which to choose, learn more about installing packages.
Source Distribution
Built Distribution
Filter files by name, interpreter, ABI, and platform.
If you're not sure about the file name format, learn more about wheel file names.
Copy a direct link to the current filters
File details
Details for the file microtrax-0.1.7.tar.gz.
File metadata
- Download URL: microtrax-0.1.7.tar.gz
- Upload date:
- Size: 1.6 MB
- Tags: Source
- Uploaded using Trusted Publishing? No
- Uploaded via: twine/6.2.0 CPython/3.9.9
File hashes
| Algorithm | Hash digest | |
|---|---|---|
| SHA256 |
1916a3895602169f4fb22dea2c3e1f253909929a273cb5b120c9337d69ab74d6
|
|
| MD5 |
8042f46ab42208b657b88be60e46c7fe
|
|
| BLAKE2b-256 |
1c2d588cf4cb3f765d5fbc3079e802e5800fce962022acd89f1769eed21286fc
|
File details
Details for the file microtrax-0.1.7-py3-none-any.whl.
File metadata
- Download URL: microtrax-0.1.7-py3-none-any.whl
- Upload date:
- Size: 1.6 MB
- Tags: Python 3
- Uploaded using Trusted Publishing? No
- Uploaded via: twine/6.2.0 CPython/3.9.9
File hashes
| Algorithm | Hash digest | |
|---|---|---|
| SHA256 |
b22bfd60357898693f631cf3709837310fdd28f8640b9e5de40e5319e9389f3d
|
|
| MD5 |
39ad19573c467f304d56e0c512873d8b
|
|
| BLAKE2b-256 |
76f0b128bc7a998972adfc6b7ae8a69079a4fd0ec2fc9f061434a7c10c055e6e
|


