
A lightweight api for machine and deep learning experiment logging in the form of a python library.

Project description
MLPath
MLPath is an MLOPs library on Python that makes tracking machine learning experiments and organizing machine learning projects easier. It consists of two subpackages so far, MLQuest for tracking and MLDir for directory structure.
Check this for documentation. It also has examples and notes that will help you further understand the library.
Installation
pip install mlpath
MLQuest

To get started
This is your code without mlquest
# Preprocessing
x_data_p = Preprocessing(x_data=[1, 2, 3], alpha=1024, beta_param=7, c=12)

# Feature Extraction
x_data_f = FeatureExtraction(x_data_p, 14, 510, 4)

# Model Initialization
model = RadialBasisNet(x_data_f, 12, 2, 3)

# Model Training
accuracy = train_model(model)
This is your code with mlquest
from mlpath import mlquest as mlq
l = mlq.l

# Start a new quest, this corresponds to a table where every run of the Python file will be logged.
mlq.start_quest('Radial Basis Pipeline', log_defs=False)

# Preprocessing
x_data_p = l(Preprocessing)(x_data=[1, 2, 3], alpha=1114, beta_param=2, c=925)

# Feature Extraction
x_data_f = l(FeatureExtraction)(x_data_p, 32, 50, 4)  # x_data_p is an array so it won't be logged.

# Model Initialization
model = l(RadialBasisNet)(x_data_f, 99, 19, 31)

# Model Training
accuracy = train_model(model)

# log the accuracy
mlq.log_metrics(accuracy)        # can also do mlq.log_metric(acc=accuracy) so its logged as acc

mlq.end_quest()

mlq.show_table('Radial Basis Pipeline', last_k=10)    # show the table for the last 10 runs
After the third run, this shows up under the Quests folder (and the notebook itself):
| info | Preprocessing | FeatureExtraction | RadialBasisNet | metrics | |||||||||
|---|---|---|---|---|---|---|---|---|---|---|---|---|---|
| time | date | duration | id | alpha | beta_param | c | x_param | y_param | z_param | p_num | k_num | l_num | accuracy |
| 16:31:16 | 02/11/23 | 1.01 min | 1 | 74 | 12 | 95 | 13 | 530 | 4 | 99 | 99 | 3 | 50 |
| 16:32:40 | 02/11/23 | 4.91 ms | 2 | 14 | 2 | 95 | 132 | 530 | 4 | 99 | 19 | 3 | 70 |
| 16:32:57 | 02/11/23 | 4.93 ms | 3 | 1114 | 2 | 925 | 32 | 50 | 4 | 99 | 19 | 31 | 70 |
Editors like VSCode support viewing markdown out-of-the-box. You may need to press CTRL/CMD+Shift+V
⦿ Besides of the markdown, you will also find a json folder in that directory with a config file that allows you to customize the columns to show in the markdown table.
But you probably prefer a web interface
In the same level as the Quests folder run the command mlweb then open http://localhost:5000 in your browser. You should see something like this:
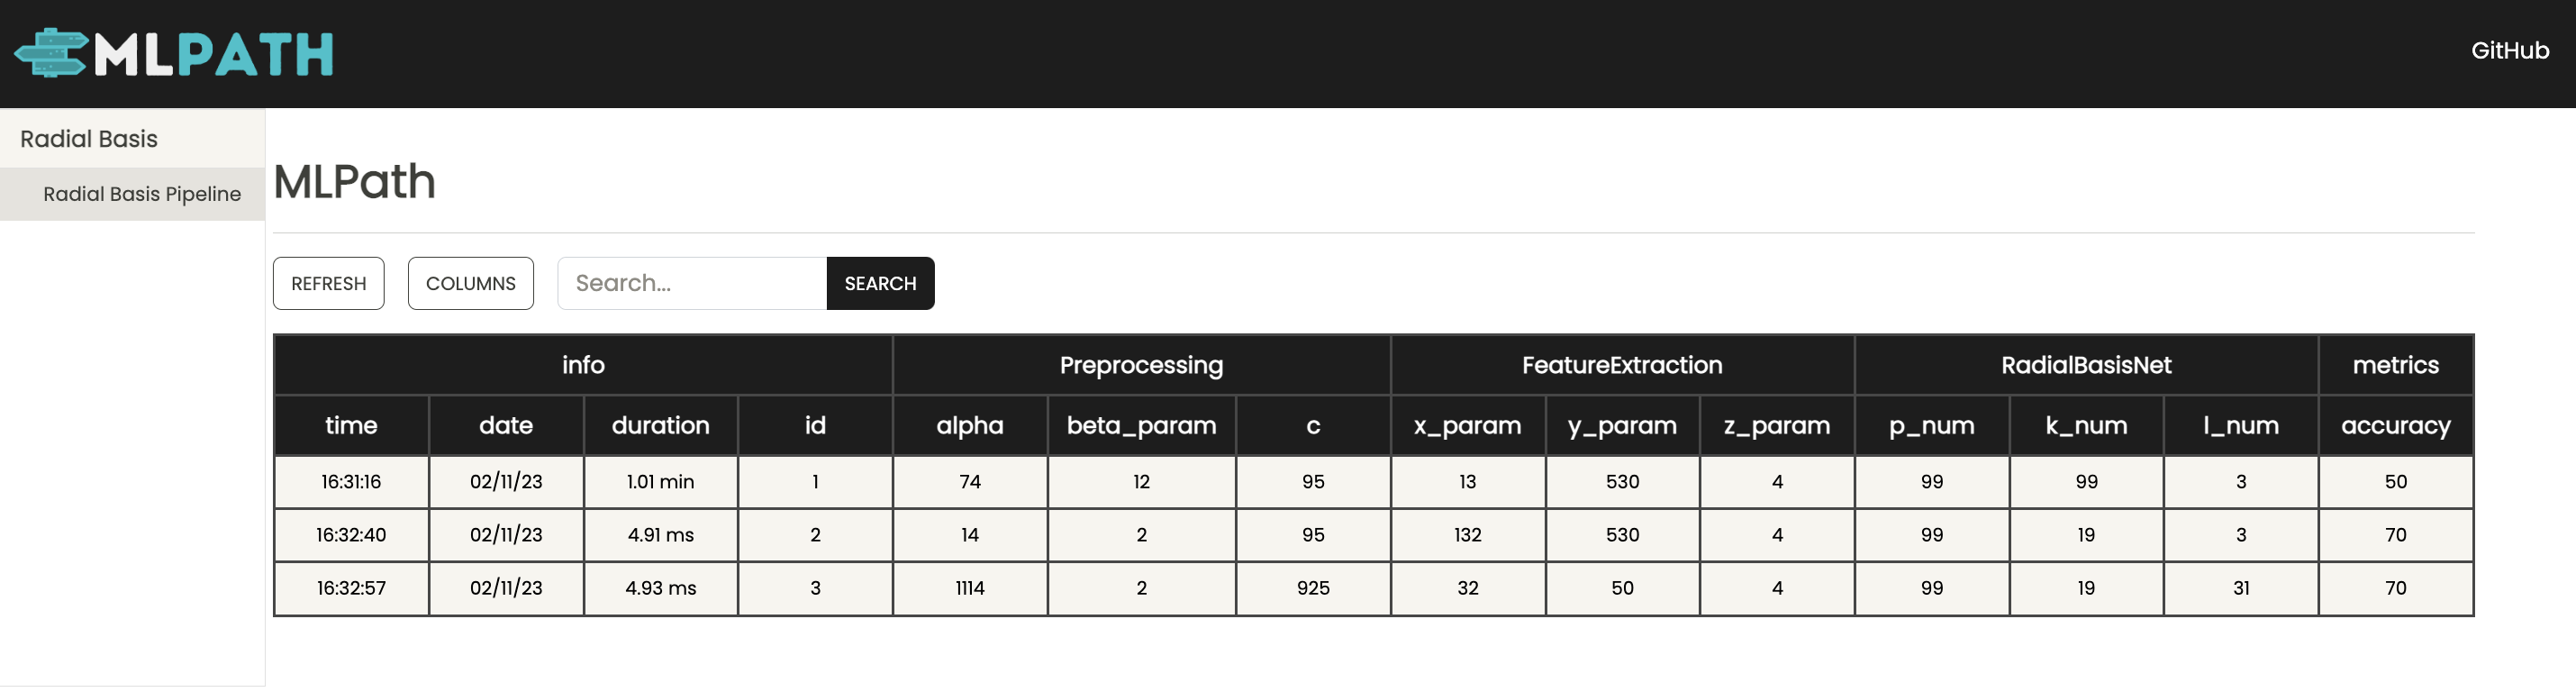
⦿ You can search for specific runs, an example would be metrics.accuracy>50 (similar syntax to MLFlow)
⦿ You can customize the columns to show in the table by clicking on columns (in lieu of doing it throughjson config file)
⦿ Choose which model (folder containing python files where you run quests) and which pipeline file (quest) using the bar on the left
An example with Scikit-Learn
from mlpath import mlquest as mlq

# We won't log defaults here but note that being aware of them and their values/impact is important.
mlq.start_quest('Fractal-GB', log_defs=False, table_dest='../../')

# read the data
x_train_i, x_val_i, y_train_i, y_val_i = read_data()

# preprocess the data
x_train_p, x_val_p = preprocess_data(x_train_i, x_val_i)

# extract fractal features
x_train_f, x_val_f = mlq.l(apply_SFTA)(x_train_p, x_val_p, deviation=10)

# initialize a GB model
model = mlq.l(GradientBoostingClassifier)(n_estimators=10, learning_rate=220, max_depth=110)

# train the model
model.fit(x_train_f, y_train_i)

# report the accuracy
accuracy = model.score(x_val_f, y_val_i).item()     # .item() so its a scalar that can be logged

mlq.log_metrics(acc=accuracy)

mlq.end_quest()

mlq.show_table('Fractal-GB', last_k=10)    # show the table for the last 10 runs
| info | apply_SFTA | GradientBoostingClassifier | metrics | |||||
|---|---|---|---|---|---|---|---|---|
| time | date | duration | id | deviation | n_estimators | learning_rate | max_depth | acc |
| 17:26:34 | 02/11/23 | 2.33 min | 1 | 30 | 10 | 50 | 12 | 0.5 |
| 17:29:08 | 02/11/23 | 344.98 ms | 2 | 10 | 50 | 20 | 10 | 0.5 |
| 17:29:14 | 02/11/23 | 251.52 ms | 3 | 10 | 50 | 20 | 10 | 0.5 |
| 17:29:22 | 02/11/23 | 266.31 ms | 4 | 10 | 10 | 220 | 110 | 0.5 |
An example with PyTorch
A real example on a dummy dataset that demonstrates using the library on real models is provided in the MLDir examples mentioned below.
MLDir

MLDir is a simple CLI that creates a standard directory structure for your machine learning project. It provides a folder structure that is comprehensive, highly scalable (development-wise) and apt for collaboration.
Note of caution
⦿ Although it integrates well with MLQuest, neither MLQuest nor MLDir require the other to function.
⦿ Suppose your project has very few people working on it (only you) or does not require trying many models with many other preprocessing methods and features, then you may not really need MLDir. A notebook and MLQuest should be enough. Otherwise use MLDir to prevent your directory from becoming a spaghetti soup of Python files.
📜 The MLDir Manifesto
The directory structure generated by MLDir complies with the MLDir manifesto ( a set of 'soft' standards) which attempts to enforce seperation of concerns among different stages of the machine learning pipeline and among writing code and running experiments (hyperparameter tuning). It specifies:
➜ Each stage in the ML pipeline should be a separate directory.
➜ If that stage is further broken down into sub-stages, each sub-stage should be a separate directory (in the top level)
➜ For any pipeline stage, each alternative that implements that stage should be in a separate directory within that stage's folder.
➜ Any implementation of a stage is a set of functions.
➜ Functions are defined only in .py files not in notebooks.
➜ Notebooks are only for testing or running entire pipelines (e.g., training and hyperparameter tuning). They import the needed functions from pipeline stages.
You can also read more about the manifesto here.
To get started
MLDir is part of MLPath. So you don't need to install it separately. To create a simple folder structure, run:
mldir --name <project_name>
⦿ If mldir is ran without a name, it uses the name 'Project'
This generates the following folder structure:
.
├── DataFiles
│   ├── Dataset 1
│   └── Dataset 2
├── DataPreparation
│   ├── Ingestion
│   └── Preprocessing
├── FeatureExtraction
│   ├── BoW
│   ├── GLCM
│   └── OneHot
├── ModelPipelines
│   ├── GRU
│   ├── GradientBoost
│   └── SVM
├── ModelScoring
│   ├── Pipeline
│   └── Scoring
├── README.md
├── Sandbox.ipynb
│   ├── DataPreparation
│   ├── FeatureExtraction
│   └── ModelsPipelines
└── Sandbox.ipynb
The file in each folder has instructions on how to use it. These are all grouped in the README for a more detailed explanation.
Other important options
mldir --name<project-name> --full
⦿ The --full option generates an even more comprehensive folder structure. Including folders such as ModelImplementations, References and most importantly Production.
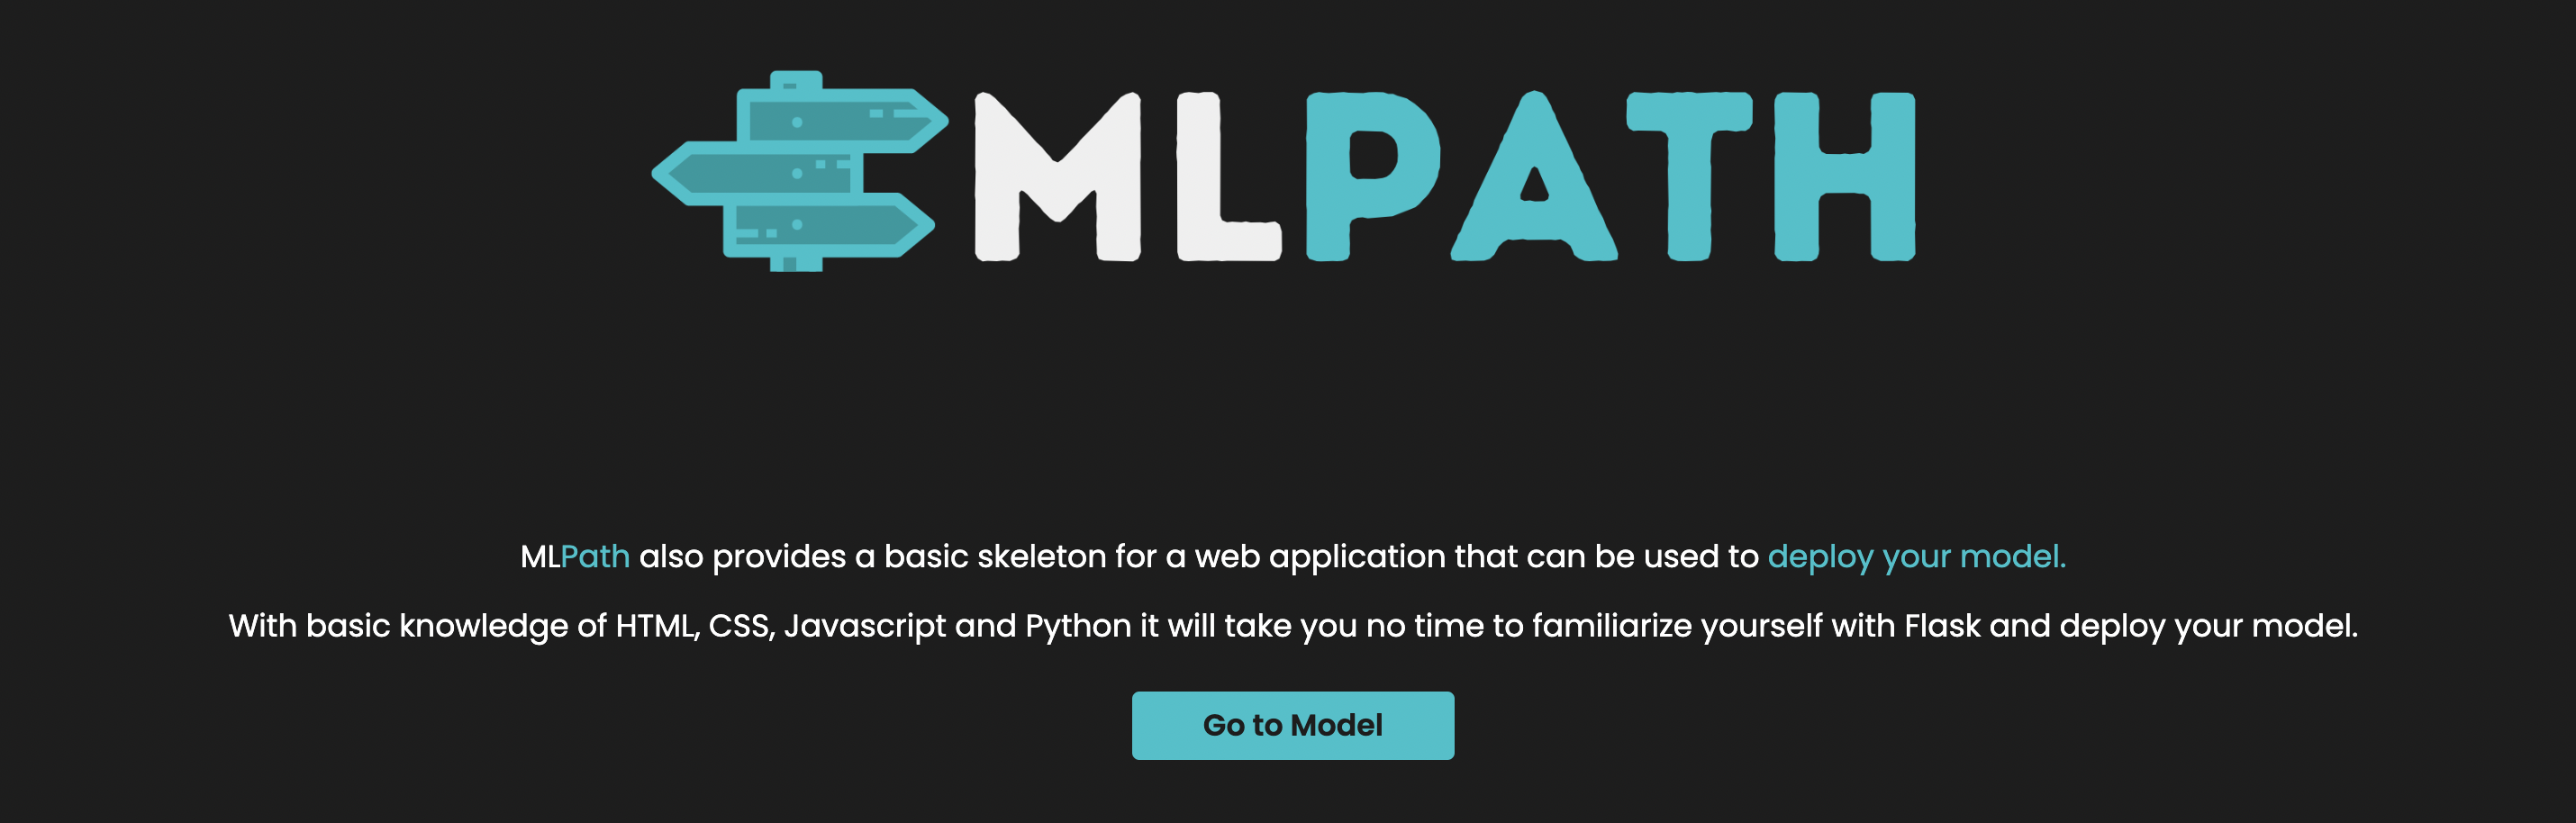
⦿ The Production folder contains a Flask app that can be used to serve your model as an API. All you need is only to import your final model into app.py and replace the dummy model with it. The Flask app assumes that your model takes a file via path and returns a prediction but it can be easilt extended otherwise to suit your needs
A note on the Flask app
⦿ Even if you have never used Flask (and need to do more than just plug in your model), notice that the app is composed of a templates folder that stores the HTML of the pages and a static folder that stores CSS/JS and other assets. Lastly, the app.py file contains the code that runs the app by rendering the right HTML page and passing the right parameters to it according to your request (visiting a URL, submitting a file,...)
A complete example
mldir --name <project-name> --example
⦿ The --example option generates a complete example on a dummy dataset (but real models) that should be helpful for you to understand more about the folder structure and how to use it (or you can use it as a template for your own project). The example also uses
Credits
Thanks to Abdullah for all his startling work on the mlweb module and for all the time he spent with me to discuss or test the library.
Thanks to Jimmy for all his help in testing the library.
Collaborators
Essam Wisam |

Abdullah Adel |
Release history Release notifications | RSS feed


Download files
Download the file for your platform. If you're not sure which to choose, learn more about installing packages.
Source Distribution
Built Distribution
Filter files by name, interpreter, ABI, and platform.
If you're not sure about the file name format, learn more about wheel file names.
Copy a direct link to the current filters
File details
Details for the file mlpath-1.1.10.tar.gz.
File metadata
- Download URL: mlpath-1.1.10.tar.gz
- Upload date:
- Size: 3.7 MB
- Tags: Source
- Uploaded using Trusted Publishing? No
- Uploaded via: twine/4.0.2 CPython/3.8.16
File hashes
| Algorithm | Hash digest | |
|---|---|---|
| SHA256 |
96027d53fd4a8540e777e3cd39773380c8d4a5a6dfa1a680c260e588700a9b4f
|
|
| MD5 |
ca9d3e1ed5ed27ebaf74a95026dbb780
|
|
| BLAKE2b-256 |
4f6ac25fb215f0b1e8d7d38ccf765948239047158fb9f1d3840fd7e46717b649
|
File details
Details for the file mlpath-1.1.10-py3-none-any.whl.
File metadata
- Download URL: mlpath-1.1.10-py3-none-any.whl
- Upload date:
- Size: 3.8 MB
- Tags: Python 3
- Uploaded using Trusted Publishing? No
- Uploaded via: twine/4.0.2 CPython/3.8.16
File hashes
| Algorithm | Hash digest | |
|---|---|---|
| SHA256 |
7edfd802c633786082236c4e37652ef4445daca6c65182e484b38803999cdd5f
|
|
| MD5 |
bdc357ace17aafd645802385c8fc876f
|
|
| BLAKE2b-256 |
b808b440c228f1e1f77a515634bcad29d0d340d1a66315bbd40c644b6dac3adb
|






