Optexity is a platform for building and running browser and computer agents.

Project description
Optexity
Build custom browser agents with AI-powered automation. Record browser interactions, extract data, and run complex workflows via a simple API. You can extract data from websites, fill out forms, do QA testing, and more.
Features
- 🎯 Visual Recording: Record browser interactions with the Optexity Recorder Chrome extension
- 🤖 AI-Powered: Uses LLMs to handle dynamic content and find elements intelligently
- 📊 Data Extraction: Extract structured data from web pages using LLM-based extraction
- 🔄 Workflow Automation: Chain multiple actions together for complex browser workflows
- 🚀 API-First: Run automations via REST API with simple JSON requests
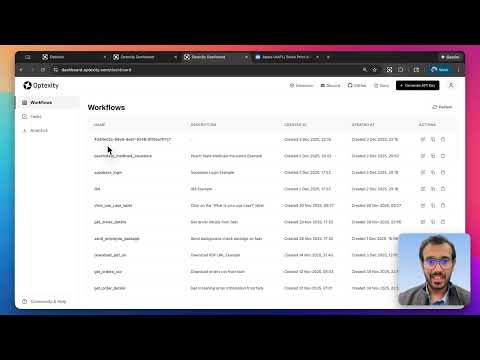
- 🎨 Dashboard: Manage and monitor your automations through the Optexity dashboard
Quick Start
1. Create an Account
Head to dashboard.optexity.com and sign up for a free account.
2. Get Your API Key
Once logged in, navigate to the API Keys section in your dashboard and create a new key.
3. Install the Recorder Extension
Install the Optexity Recorder extension from the Chrome Web Store. This extension captures your browser interactions and converts them into automation workflows.
Prerequisites
- Python 3.11+
- Git
Create and Activate a Python Environment (Optional)
Choose one of the options below.
Option A – Conda (includes Python 3.11 and Node.js)
conda create -n optexity python=3.11
conda activate optexity
Install miniconda here: https://docs.conda.io/projects/conda/en/stable/user-guide/install/index.html#installing-in-silent-mode
Option B – Python venv
python3 -m venv .venv
source .venv/bin/activate
Installation
Quick Installation (from PyPI)
Install Optexity directly from PyPI:
pip install optexity
optexity install-browsers
OR
Installation from Source
If you want to clone and edit from source:
git clone git@github.com:Optexity/optexity.git
cd optexity
pip install -e .
optexity install-browsers
Set required environment variables:
API_KEY=YOUR_OPTEXITY_API_KEY           # API key used for authenticated requests
GOOGLE_API_KEY=YOUR_GOOGLE_API_KEY      # API key used for Google Gemini
DEPLOYMENT=dev                          # or "prod" in production
You can get your free Google Gemini API key from the Google AI Studio Console.
Recording Your First Automation
The fastest way to create an automation is by recording your actions directly in the browser.
Steps
-
Navigate to the target website: Open Chrome and go to the website you want to automate (e.g.,
https://stockanalysis.com/) -
Start capturing: Click the Optexity Recorder extension icon and hit Start Capture
-
Perform your actions:
- Click on the "Search" button
- Enter the stock symbol in the search bar
- Click on the first result in the search results
-
Stop and save: When finished, click Complete Capture. The automation is automatically saved to your dashboard as a JSON file.
Recording Tips
- Perform actions slowly and deliberately for better accuracy
- Avoid unnecessary scrolling or hovering
- The recorder captures clicks, text input, and form selections
Running Your Automation
Start the Inference Server
The primary way to run browser automations locally is via the inference server.
optexity inference --port 9000 --child_process_id 0
Key parameters:
--port: HTTP port the local inference server listens on (e.g.9000).--child_process_id: Integer identifier for this worker. Use different IDs if you run multiple workers in parallel.
When this process starts, it exposes:
GET /health– health and queue statusGET /is_task_running– whether a task is currently executingPOST /inference– main endpoint to allocate and execute tasks
Call the /inference Endpoint
With the server running on http://localhost:9000, you can allocate a task by sending an InferenceRequest to /inference.
Request Schema
endpoint_name: Name of the automation endpoint to execute. This must match a recording/automation defined in the Optexity dashboard.input_parameters:dict[str, list[str]]– all input values for the automation, as lists of strings.unique_parameter_names:list[str]– subset of keys frominput_parametersthat uniquely identify this task (used for deduplication and validation). Only one task with the sameunique_parameter_nameswill be allocated. If nounique_parameter_namesare provided, the task will be allocated immediately.
Example curl Request
curl -X POST http://localhost:9000/inference \
  -H "Content-Type: application/json" \
  -d '{
    "endpoint_name": "extract_price_stockanalysis",
    "input_parameters": {
      "search_term": ["NVDA"]
    },
    "unique_parameter_names": []
  }'
On success, the inference server:
- Forwards the request to your control plane at
api.optexity.comusingINFERENCE_ENDPOINT(defaults toapi/v1/inference). - Receives a serialized
Taskobject from the control plane. - Enqueues that
Tasklocally and starts processing it in the background. - Returns a
202 Acceptedresponse:
{
    "success": true,
    "message": "Task has been allocated"
}
Task execution (browser automation, screenshots, outputs, etc.) happens asynchronously in the background worker. You can see it running locally in your browser.
Monitor Execution
You can monitor the task on the dashboard. It will show the status, errors, outputs, and all the downloaded files.
Video Tutorial
Documentation
For detailed documentation, visit our documentation site:
Roadmap
We're actively working on improving Optexity. Here's what's coming:
- 🔜 Self Improvement: Agent adaption using self exploration
- 🔜 More Action Types: Additional interaction and extraction capabilities
- 🔜 Performance Optimizations: Faster execution and reduced resource usage
- 🔜 Advanced Scheduling: Built-in task scheduling and cron support
- 🔜 Cloud Deployment: Simplified cloud deployment options
Have ideas or feature requests? Open an issue or join our Discord to discuss!
Contributing
We welcome contributions! Here's how you can help:
Reporting Issues
Found a bug or have a feature request? Please open an issue on GitHub. Include:
- A clear description of the problem
- Steps to reproduce
- Expected vs actual behavior
- Environment details (OS, Python version, etc.)
Discussions
Have questions, ideas, or want to discuss the project? Use GitHub Discussions to:
- Ask questions
- Share ideas
- Discuss best practices
- Get help from the community
Community
Join our Discord community to:
- Chat with the founders directly
- Get real-time support
- Share your automations
- Connect with other users
Development Setup
- Fork the repository
- Create a feature branch (
git checkout -b feature/amazing-feature) - Make your changes
- Run pre-commit checks:
pre-commit run --all-files - Commit your changes (
git commit -m 'Add some amazing feature') - Push to the branch (
git push origin feature/amazing-feature) - Open a Pull Request
Releasing to PyPI and GitHub (maintainers)
Releases are automated via GitHub Actions:
- When: Every push/merge to
mainbumps the 4th version component inpyproject.toml(e.g.0.1.5.5→0.1.5.6), commits that change, creates a GitHub Release (tag + release notes), and publishes the new version to PyPI. - Setup (one-time):
- In PyPI: Account settings → API tokens — create a token with scope Entire account (or limit to project
optexity). - In GitHub: Repository or Organization → Settings → Secrets and variables → Actions — add a secret:
- Name:
PYPI_API_TOKEN - Value: your PyPI API token (starts with
pypi-).
- Name:
- In PyPI: Account settings → API tokens — create a token with scope Entire account (or limit to project
- Flow: Merge a PR to
main→ workflow runs → version bump commit is pushed → GitHub Release (e.g.v0.1.5.6) is created with generated release notes → package is built and uploaded to PyPI. The workflow skips when the last commit is the automated bump, so it does not loop.
Examples
Check out our examples directory for sample automations:
License
This project is licensed under the terms specified in the LICENSE file.
Support
Made with ❤️ by the Optexity team
Release history Release notifications | RSS feed


Download files
Download the file for your platform. If you're not sure which to choose, learn more about installing packages.
Source Distribution
Built Distribution
Filter files by name, interpreter, ABI, and platform.
If you're not sure about the file name format, learn more about wheel file names.
Copy a direct link to the current filters
File details
Details for the file optexity-0.1.5.11.tar.gz.
File metadata
- Download URL: optexity-0.1.5.11.tar.gz
- Upload date:
- Size: 72.9 kB
- Tags: Source
- Uploaded using Trusted Publishing? No
- Uploaded via: twine/6.2.0 CPython/3.11.14
File hashes
| Algorithm | Hash digest | |
|---|---|---|
| SHA256 |
a6465c23b89a209795cf62b0125809f6db6d190b01fe8abb9d606125021fb200
|
|
| MD5 |
7a5f905d38931c895d2c928c5fa06676
|
|
| BLAKE2b-256 |
bc4f2e5d23c2b2ea7c4e4e8a47f56f96e8a1a7e58628c2693e812f2119432cbe
|
File details
Details for the file optexity-0.1.5.11-py3-none-any.whl.
File metadata
- Download URL: optexity-0.1.5.11-py3-none-any.whl
- Upload date:
- Size: 98.4 kB
- Tags: Python 3
- Uploaded using Trusted Publishing? No
- Uploaded via: twine/6.2.0 CPython/3.11.14
File hashes
| Algorithm | Hash digest | |
|---|---|---|
| SHA256 |
fc3959e485496e1eaaa5a39573b851f084fa9530f7fdc42f9ee86a8c23b4b62e
|
|
| MD5 |
bb8b73e864fb9038fde3bf449866cf63
|
|
| BLAKE2b-256 |
8a68fd330c56f75a21712fff6abad3e1f9a83b8b18e7fde18273bef5c2c95b86
|


