A desktop app written in Python, that exposes and unlocks the full power of Optimize Images in a nice graphical user interface, to help you reduce the file size of images.

Project description
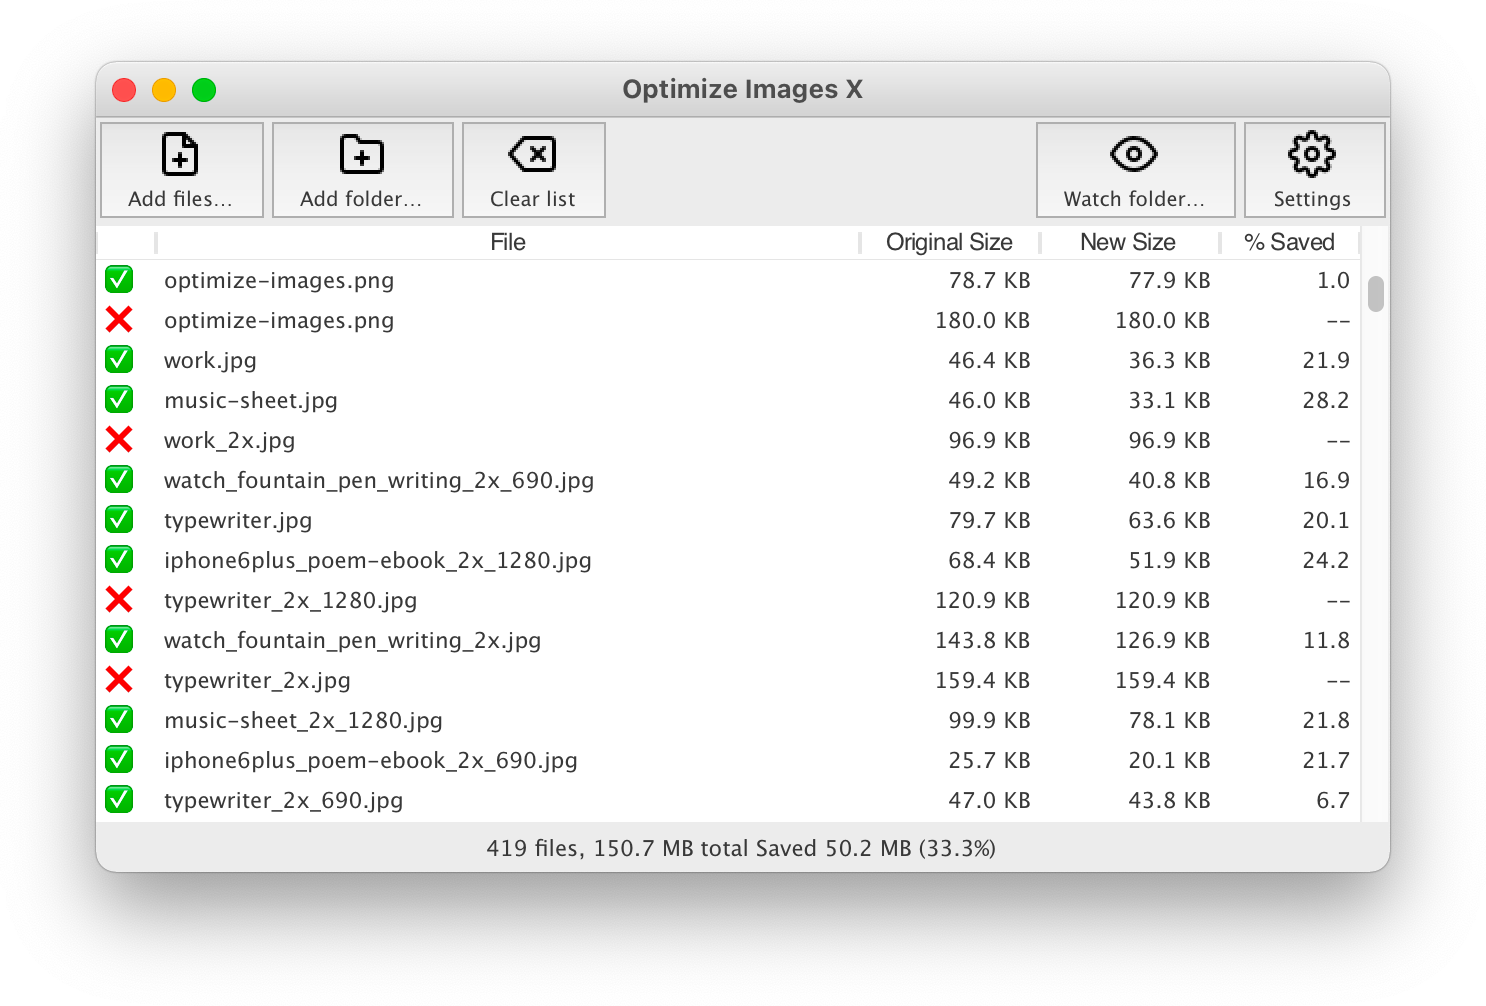
Optimize Images X


A desktop app written in Python, that exposes and unlocks the full power of Optimize Images in a nice graphical user interface, to help you reduce the file size of images.
Optimize Images X and its CLI companion optimize-images offer some useful
features that are not always present in a single package, like batch downsizing
of images within a folder (and recursively though its
subfolders) based on specified maximum width and/or height.
If you were just looking for the original (and slightly faster) command-line user interface (CLI) version of this application, it's a separate project: Optimize Images.
Installation and dependencies:
To install and run this application, you need to have a working Python 3.10+ installation. We try to keep the external dependencies at a minimum, in order to keep compatibility with different environments. At this moment, we require:
- optimize-images==2.0.0
This single dependency is installed automatically when you install Optimize Images X and will also fetch Pillow and other dependencies.
At this time we don't have a simple installer (but that would be cool), and no
launcher is made available outside of the command-line shell. As it stands
right now, it is required to have Python and its shell command pip on your
system. You can use pip to install the most recent release from the PyPI
repository:
python3.9 -m pip install optimize-images-x
It can be a good idea to keep this kind of Python apps isolated in their own virtual environments, so a useful tool is a third-party tool named pipx. Instead of the command indicated above you could then use this one:
pipx install optimize-images-x
After that, to run the application, just type optimize-images-x in the
Terminal and press Enter.
It should also run ok in Python 3.10, but please notice there is a nasty
visual glitch related to tcl/tk that makes image buttons look bad, when
using the Aqua theme. If you find that issue, just go to settings and
switch to another theme.
If you are able to swap Pillow with the faster version
Pillow-SIMD, you should be able
to get a considerably faster speed. For that reason, we provide, as a
friendly courtesy, an optional shell script (replace_pillow__macOS.sh) to
replace Pillow with the faster Pillow-SIMD on macOS. Please notice, however,
that it usually requires a compilation step, and it was not throughly tested
by us, so your mileage may vary.
How to use
To start compressing images, just add one or more files, or a folder. The process starts as soon as the files are added to the list.
After launching the application for the first time, make sure all settings are configured as desired. The application's default settings are similar to the ones in Optimize Images. Whenever you change a setting it is applied immediately, and it's saved in the app's database, so that it will be can be used again the next time you run the app, without any need to go through all the settings.
In simple terms, always make sure you have configured Optimize Images X as you want it, but if you just want to use the same settings from last time, just add images.
Preferences
If you have used Optimize Images before, you probably already know what options are available. If not, please take a few minutes to take a look at the Preferences window and its tabs. You will find a description of each option on the original documentation for the command-line based Optimize Images.
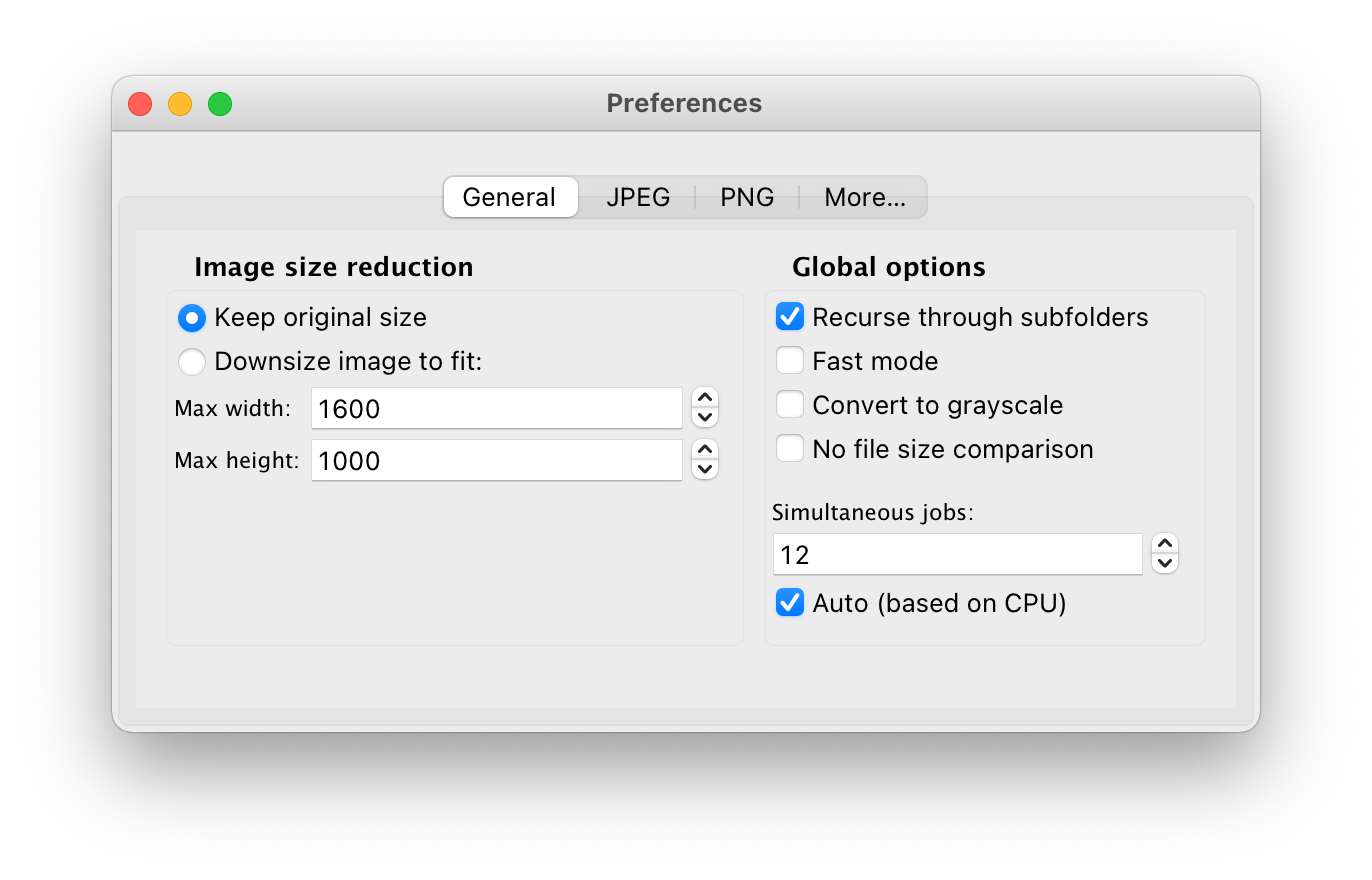
General preferences
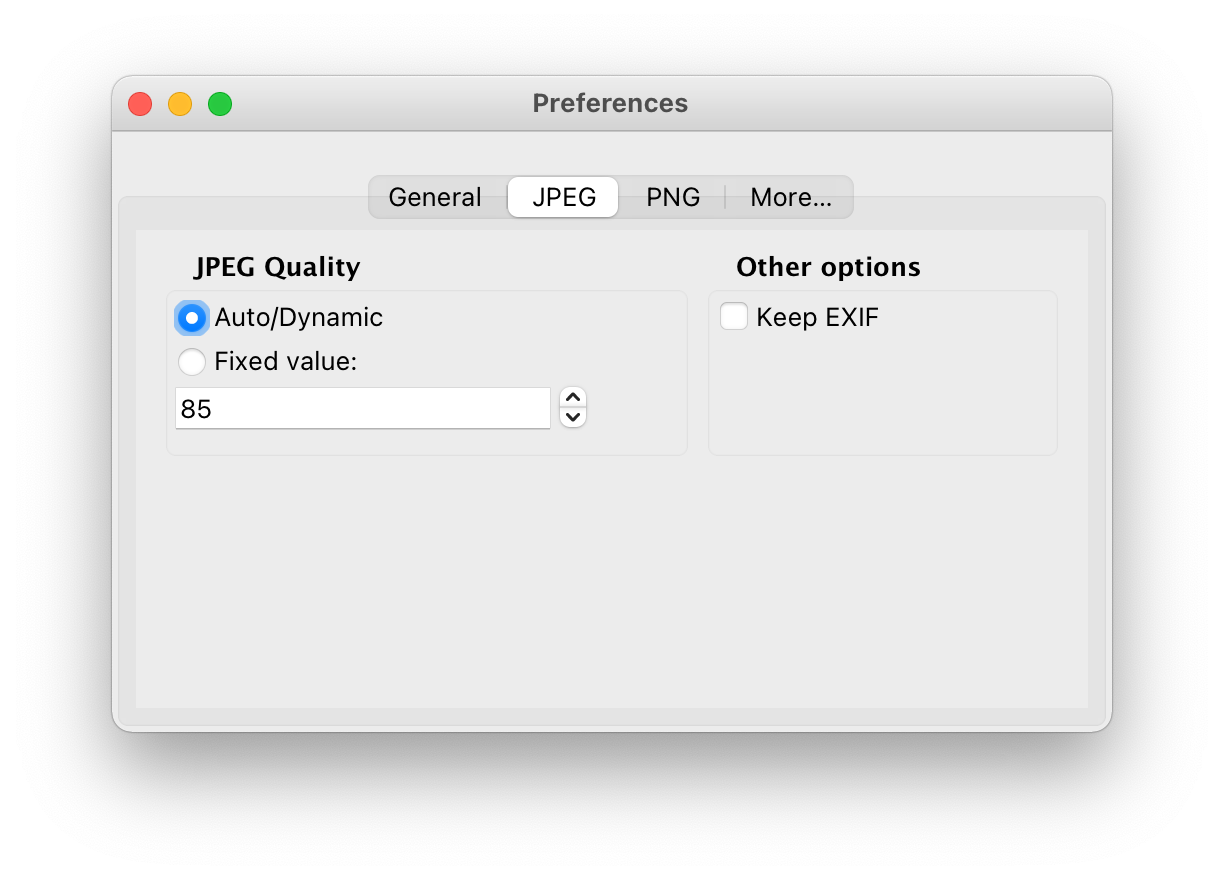
JPEG specific preferences
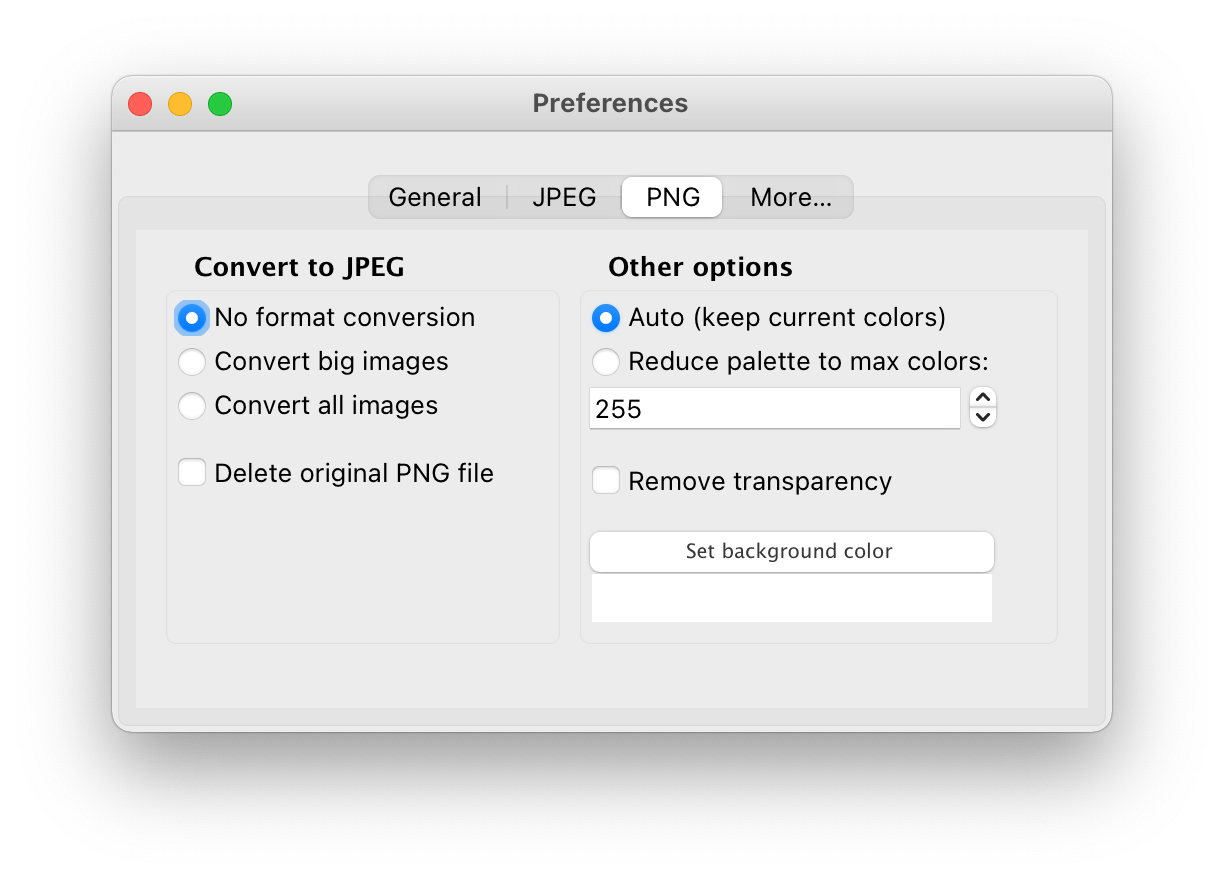
PNG specific preferences
More options
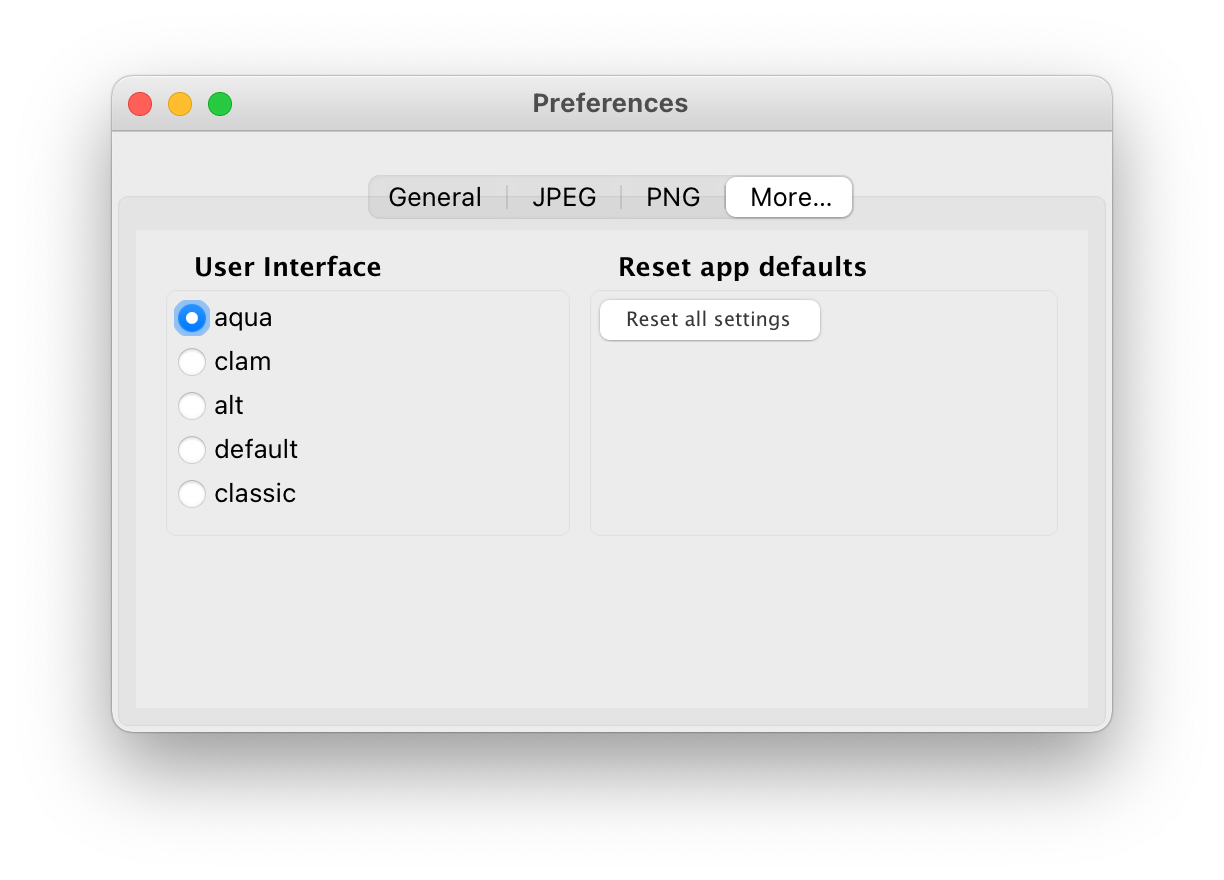
User interface options
You can choose the graphical user interface theme in the More… tab of the
Settings Window. The list of available themes will vary depending on your
operating system, as well as Python and TK/tcl versions. Just click each one of
the radio buttons, and it will be appplied immediately as you click.
Restoring default settings
One important feature of Optimize Images X is its opinionated choice of default
app and task settings, which have been defined with the web in mind and are
probably just fine when you just want to apply some compression to the final
images to be deployed with your website. So, being able to restore them is also
possible. You will find the Reset all settings button in the More… tab of
the Settings Window.
Restoring default settings requires that the application is restarted, which is done automatically. So, before resetting, you should make sure you there are no more tasks pending or being processed.
Its worth noting that this process will also reset previous choices regarding confirmation dialog boxes, so they will be shown up again even if you had chosen not to see them.
DISCLAIMER:
Please note that the operation is done DESTRUCTIVELY, by replacing the
original files with the processed ones. You definitely should duplicate the
source file or folder before using this utility, in order to be able to
recover any eventual damaged files or any resulting images that don't have the
desired quality.
Did you find a bug or do you have a suggestion?
Please let me know, by opening a new issue, or a pull request.
Release history Release notifications | RSS feed


Download files
Download the file for your platform. If you're not sure which to choose, learn more about installing packages.
Source Distribution
Built Distribution
Filter files by name, interpreter, ABI, and platform.
If you're not sure about the file name format, learn more about wheel file names.
Copy a direct link to the current filters
File details
Details for the file optimize_images_x-2.0.0.tar.gz.
File metadata
- Download URL: optimize_images_x-2.0.0.tar.gz
- Upload date:
- Size: 34.2 kB
- Tags: Source
- Uploaded using Trusted Publishing? No
- Uploaded via: twine/6.2.0 CPython/3.15.0a7
File hashes
| Algorithm | Hash digest | |
|---|---|---|
| SHA256 |
a7a28742ca8c8b8689caceef357fabcd1cc8e9a5373586fa6b57a670bcc09a04
|
|
| MD5 |
408038819c78d2ab0f5c6a280687bb7b
|
|
| BLAKE2b-256 |
66b0d5c6926edd0fa0e384ce98e8989303081df308ea3794769c403571d0b8fb
|
File details
Details for the file optimize_images_x-2.0.0-py3-none-any.whl.
File metadata
- Download URL: optimize_images_x-2.0.0-py3-none-any.whl
- Upload date:
- Size: 36.8 kB
- Tags: Python 3
- Uploaded using Trusted Publishing? No
- Uploaded via: twine/6.2.0 CPython/3.15.0a7
File hashes
| Algorithm | Hash digest | |
|---|---|---|
| SHA256 |
1a1e8f63ce1eaa2bd67fc28a37fc01e1ec594f594354cece16ceea8a53ead9f4
|
|
| MD5 |
fbc1d6e7ac377e1c51471b417c93420f
|
|
| BLAKE2b-256 |
94a75c1a4c6f33711009ce9f3161bcf5b511b37a91ae6b50db25af9b7c76d841
|


