
Paskia
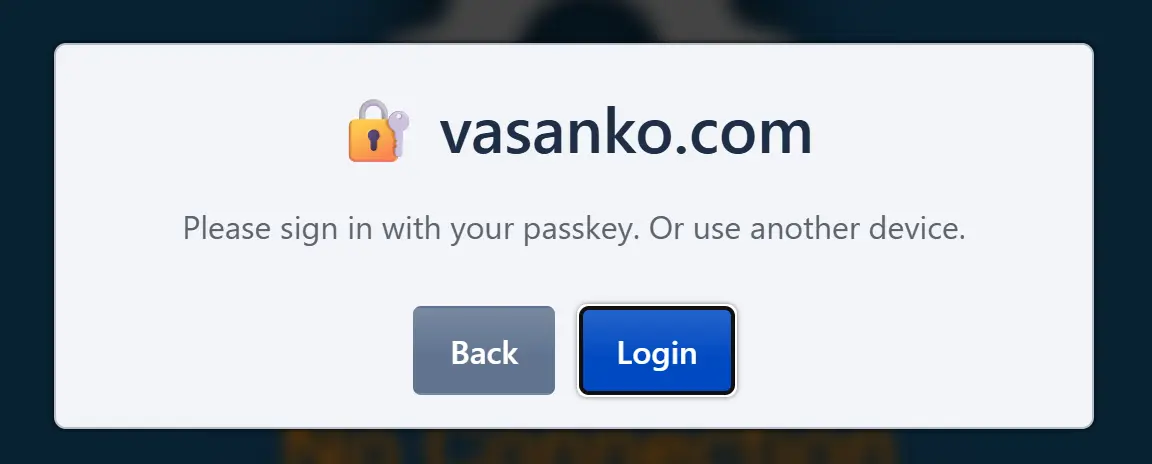
An easy to install passkey-based authentication service that protects any web application with strong passwordless login.
What is Paskia?
- Easy to use fully featured auth&auth system (login and permissions)
- Organization and role-based access control
- Org admins control their users and roles
- Multiple independent orgs
- Master admin can do everything or delegate to org admins
- User Profile and Admin by API and web interface
- Implements login/reauth/forbidden flows for you
- Single Sign-On (SSO): Users register once and authenticate across your services
- Remote autentication by entering random keywords from another device (like 2fa)
- No CORS, NodeJS or anything extra needed.
Authenticate to get to your app, or in your app
- API fetch: auth checks and login without leaving your app
- Forward-auth proxy: protect any unprotected site or service (Caddy, Nginx, and others)
The API mode is useful for applications that can be customized to run with Paskia. Forward auth can also protect your javascript and other assets. Each provides fine-grained permission control and reauthentication requests where needed, and both can be mixed where needed.
Authentication flows already done
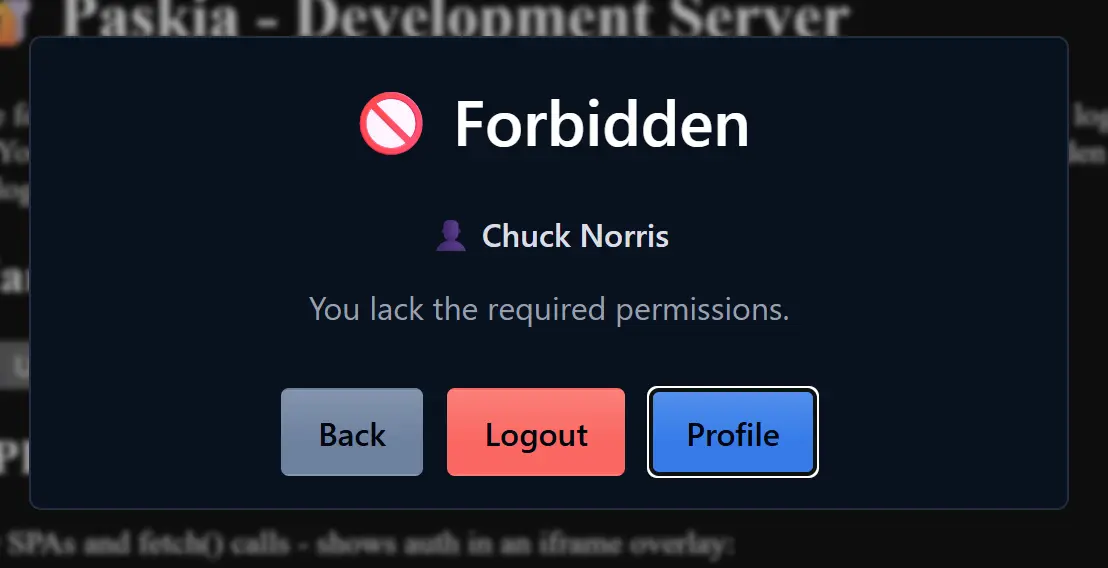
Paskia includes set of login, reauthentication and forbidden dialogs that it can use to perform the needed flows. We never leave the URL, no redirections, and if you make use of API mode, we won't even interrupt whatever your app was doing but retry the blocked API fetch after login like nothing happened.
Quick Start
Install UV and run:
uvx paskia init example.com
uvx paskia
The first command bootstraps the database and prints a registration link for the Admin. The second starts the server on localhost:4401, serving authentication for *.example.com. For local testing, leave out the rp-id (defaults to localhost).
For production you need a web server such as Caddy to serve HTTPS on your actual domain names and proxy requests to Paskia and your backend apps (see documentation below).
For a permanent install of paskia CLI command, not needing uvx:
uv tool install paskia
Configuration
Bootstrapping is done once with paskia init; after that, paskia serves all configured domains from the database paskia.kantadb in the current directory. Domain configuration (rp-name, auth host, origins) is managed via the admin web interface, including adding further domains (rp-ids).
paskia init [rp-id] [rp-name] [options]  # one-time bootstrap; with an existing
                                         # database, adds the rp-id (or renames it)
paskia migrate [rp-id]                   # convert a legacy {rp-id}.paskiadb database
paskia [-l endpoint]                     # serve
| init option | Description | Default |
|---|---|---|
| -l, --listen endpoint | Listen address: host:port, :port (all interfaces), or /path.sock (stored in the database) | localhost:4401 |
| rp-id (positional) | Main/top domain for passkeys | localhost |
| rp-name (positional) | Branding name of the domain (passkey auth, login dialog) | Same as rp-id |
Origins, auth hosts and related domains are configured afterwards in the admin panel's Domains section.
The paskia serve command accepts only --listen (overriding the stored value) and never converts databases: with no paskia.kantadb it tells you to run paskia init, or paskia migrate when a legacy {rp-id}.paskiadb database is present. paskia migrate converts the legacy database; with several candidates, the positional rp-id selects one by name and the rest are left in place.
Tutorial: From Local Testing to Production
This section walks you through a complete example, from running Paskia locally to protecting a real site in production.
Step 1: Production Configuration
For a real deployment, bootstrap Paskia with your domain name (rp-id). This enables SSO setup for that domain and any subdomains.
uvx paskia init example.com "Example Corp"
uvx paskia
This binds passkeys to the rp-id, allowing them to be used there or on any subdomain of it. The rp-name is the branding shown in UI and registered with passkeys for everything on your domain (rp id). Init prints a registration link—use it to create your Admin account. You may enter your real name here for a more suitable account name.
Step 2: Set Up Caddy
Install Caddy and copy the auth folder to /etc/caddy/auth. Say your current unprotected Caddyfile looks like this:
app.example.com {
    reverse_proxy :3000
}
Add Paskia full site protection:
app.example.com {
    import auth/setup
    handle {
        import auth/require perm=myapp:login
        reverse_proxy :3000
    }
}
Run systemctl reload caddy. Now app.example.com requires the myapp:login permission. Try accessing it and you'll land on a login dialog.
Step 3: Assign Permissions via Admin Panel
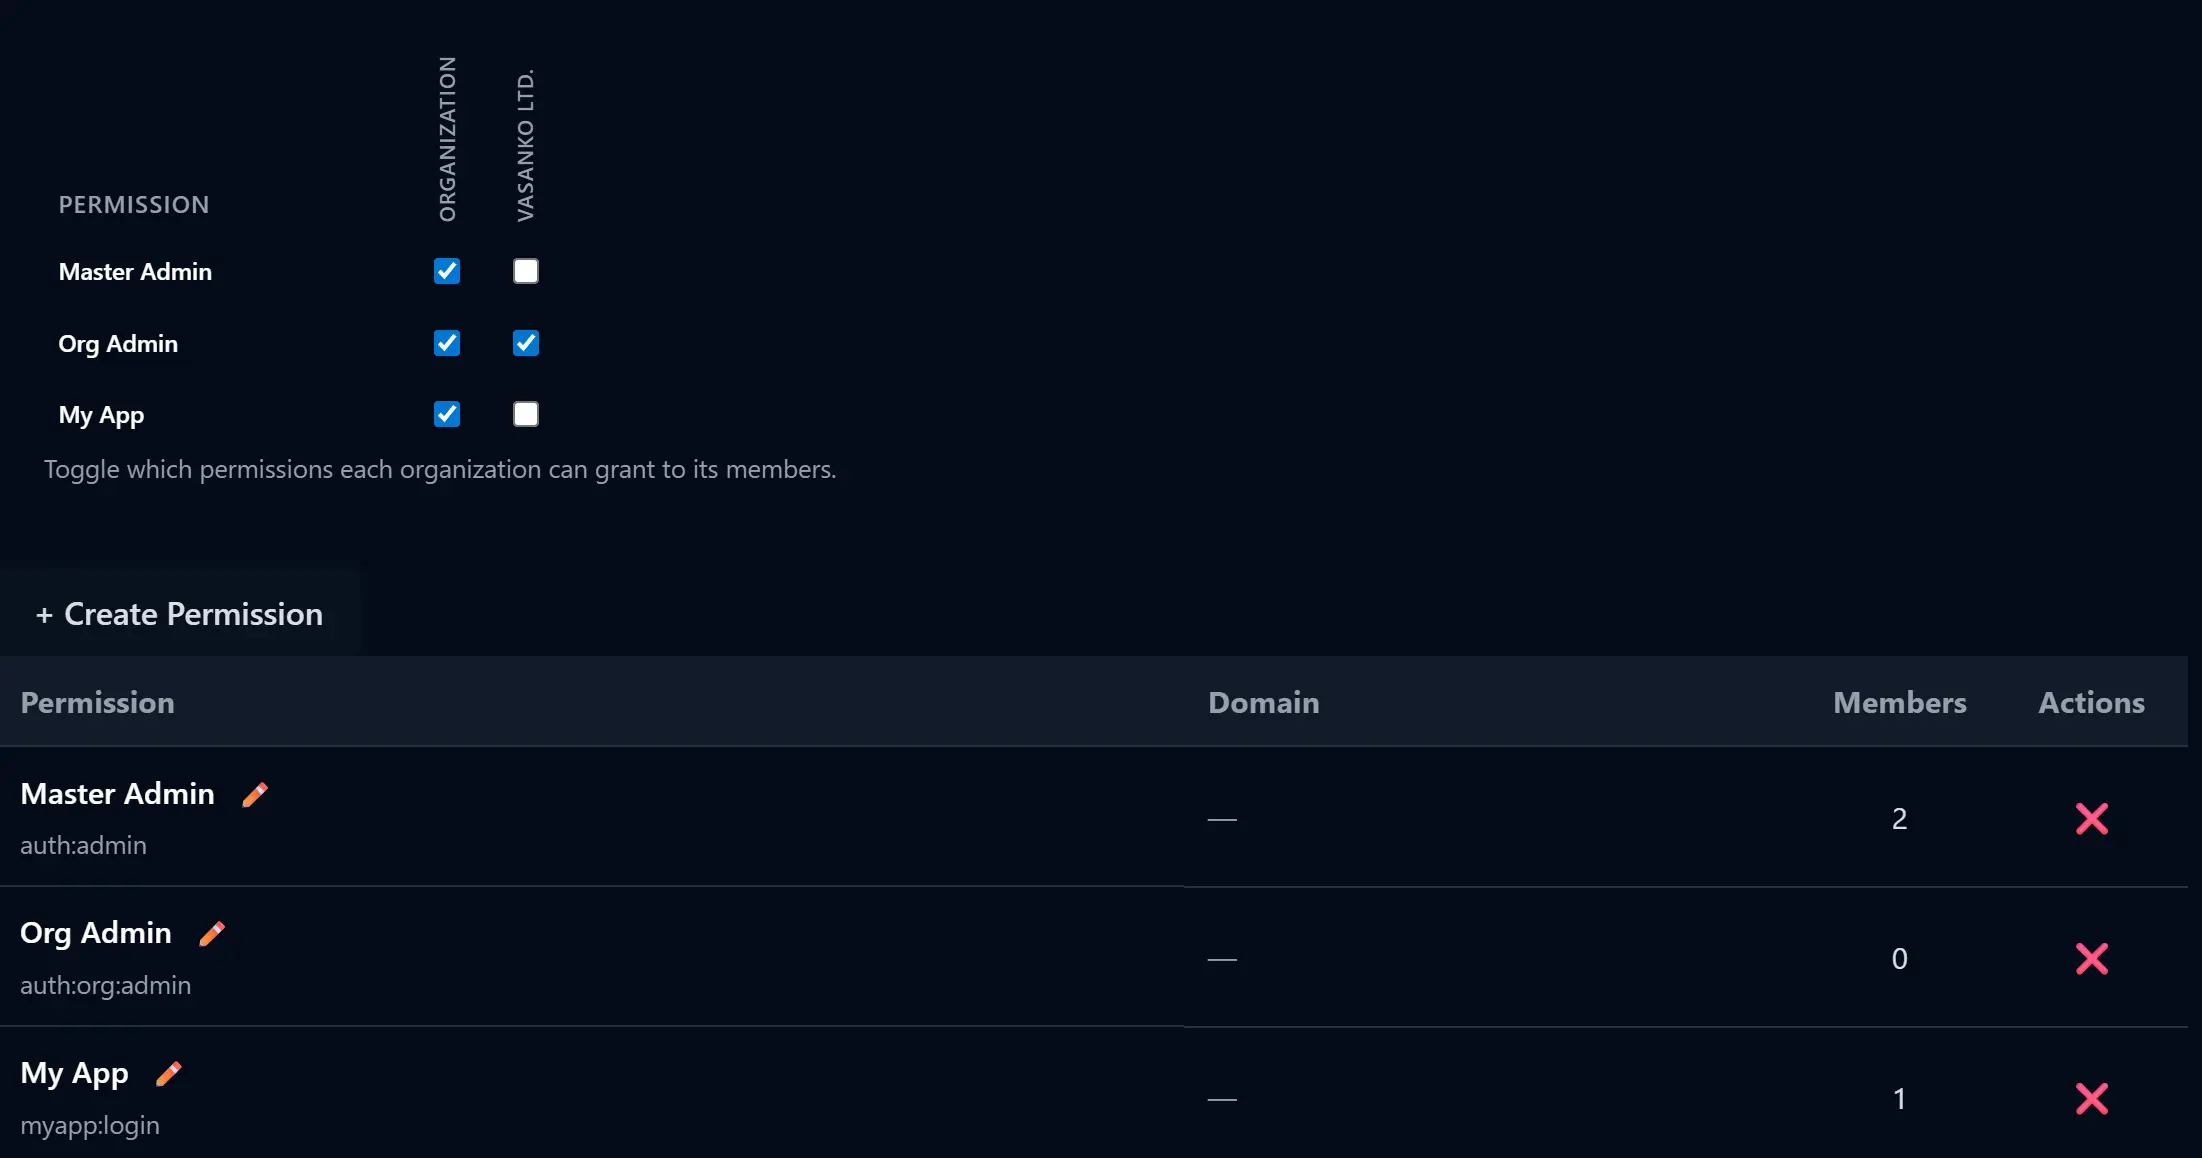
- Go to
app.example.com/auth/admin/ - Create a permission, give it a name and scope
myapp:login - Assign it to Organization
- In that organization, assign it to the Administration role
Now you have granted yourself the new permission.
Permission scopes are text identifiers with colons as separators that we can use for permission checks. The myapp: prefix is a convention to namespace permissions per application—you but you can use other forms as you see fit (urlsafe characters, no spaces allowed).
Step 4: Add API Authentication to Your App
Your backend already receives Remote-* headers from Caddy's forward-auth. For frontend API calls, we provide a JS paskia module:
import { apiJson } from 'https://cdn.jsdelivr.net/npm/paskia@latest/dist/paskia.js'

const data = await apiJson('/api/sensitive', { method: 'POST' })
When a 401/403 occurs, the auth dialog appears automatically, and the request retries after authentication.
To protect the API path with a different permission, update your Caddyfile:
app.example.com {
    import auth/setup

    @api path /api/*
    handle @api {
        import auth/require perm=myapp:api
        reverse_proxy :3000
    }

    handle {
        import auth/require perm=myapp:login
        reverse_proxy :3000
    }
}
Create the myapp:api permission in the admin panel, that will be required for all API access. Link to /auth/ for the built-in profile page.
You may also remove the myapp:login protection from the rest of your site paths, unless you wish to keep all your assets behind a login page. Having this as the last entry in your config allows free access to everything not matched by other sections.
    handle {
        reverse_proxy :3000
    }
Step 5: Run Paskia as a Service
Create a system user paskia, install UV on the system, and create a systemd unit:
sudo useradd --system --home-dir /srv/paskia --create-home paskia
Install UV on the system (or arch btw pacman -S uv):
curl -LsSf https://astral.sh/uv/install.sh | sudo env UV_INSTALL_DIR=/usr/local/bin sh
Create a systemd unit:
sudo systemctl edit --force --full paskia.service
Paste the following and save:
[Unit]
Description=Paskia

[Service]
Type=simple
User=paskia
WorkingDirectory=/srv/paskia
ExecStart=uvx paskia@latest

[Install]
WantedBy=multi-user.target
Run the service and view log:
sudo systemctl enable --now paskia && sudo journalctl -n30 -ocat -fu paskia
Optional: Dedicated Authentication Site
Add a Caddy configuration for the authentication domain:
auth.example.com {
    reverse_proxy :4401
}
Now all authentication happens at auth.example.com instead of /auth/ paths on your apps. Your existing protected sites continue to work as before but they just forward to the dedicated site for user profile and other such functionality.
Set the auth host in the admin panel's Domains section.
Multiple Domains and Related Origins
One Paskia instance can serve several domains (rp-ids) from the same database: users, orgs and permissions are shared, while passkeys are registered per domain. The master admin adds domains in the admin panel's Domains section; no restart is needed.
A domain can also let other domain names use its passkeys via WebAuthn Related Origin Requests — list them in the domain's allowed origins (they show as related domains), and paskia serves the required /.well-known/webauthn declaration on the domain's main site. In-domain entries of the same list restrict which sites of the domain's own name may authenticate (a new domain defaults to **.{domain} — the apex and all subdomains over https).
See Multi-Site documentation for details.
Further Documentation
- Forward-Auth Guides (Caddy, Nginx, ...)
- Trusted Headers for Backend Apps
- Frontend integration
- Paskia API
1 maintainer

Download files
Download the file for your platform. If you're not sure which to choose, learn more about installing packages.
Source Distribution
Built Distribution
Filter files by name, interpreter, ABI, and platform.
If you're not sure about the file name format, learn more about wheel file names.
Copy a direct link to the current filters
File details
Details for the file paskia-2.0.0.tar.gz.
File metadata
- Download URL: paskia-2.0.0.tar.gz
- Upload date:
- Size: 2.0 MB
- Tags: Source
- Uploaded using Trusted Publishing? No
- Uploaded via:
uv/0.9.21 {"installer":{"name":"uv","version":"0.9.21","subcommand":["publish"]},"python":null,"implementation":{"name":null,"version":null},"distro":{"name":"Ubuntu","version":"26.04","id":"resolute","libc":null},"system":{"name":null,"release":null},"cpu":null,"openssl_version":null,"setuptools_version":null,"rustc_version":null,"ci":null}
File hashes
| Algorithm | Hash digest | |
|---|---|---|
| SHA256 |
a95797e8080b8c94e947a1f142a33c8af28a6592ab9e2ae8730cf487858feaeb
|
|
| MD5 |
d55ff586a44d2acd99e23bb36b73d06f
|
|
| BLAKE2b-256 |
f0a2ec6858cbb87ff1ad6d7505dee88d68f1bcee268cf77bacfd46242eb2c99d
|
File details
Details for the file paskia-2.0.0-py3-none-any.whl.
File metadata
- Download URL: paskia-2.0.0-py3-none-any.whl
- Upload date:
- Size: 2.0 MB
- Tags: Python 3
- Uploaded using Trusted Publishing? No
- Uploaded via:
uv/0.9.21 {"installer":{"name":"uv","version":"0.9.21","subcommand":["publish"]},"python":null,"implementation":{"name":null,"version":null},"distro":{"name":"Ubuntu","version":"26.04","id":"resolute","libc":null},"system":{"name":null,"release":null},"cpu":null,"openssl_version":null,"setuptools_version":null,"rustc_version":null,"ci":null}
File hashes
| Algorithm | Hash digest | |
|---|---|---|
| SHA256 |
6b58ccd9bc65d26050efcd091f05fa616e2afd3541161d011bef9f204e071719
|
|
| MD5 |
916c2d1ead5a91d9a02987ebfabcf169
|
|
| BLAKE2b-256 |
f87a128bc6bb6a3f4ad0a4eb1f72b5a68f71c56e4e2a0cfd49c5ce3b3cd44b40
|














