PDD (Prompt-Driven Development) Command Line Interface
Verified details
These details have been verified by PyPIProject links
GitHub Statistics
Maintainers

Project description


PDD: The Last Programming Language™
PDD (Prompt-Driven Development) is a prompt-native programming system. .prompt files are the human-authored source language; Python, TypeScript, Go, and other traditional languages are generated artifacts.
PDD is the last programming language in this specific sense: developers author durable intent, constraints, examples, and tests, then compile that source into whatever implementation language the project needs. Code remains real and reviewable, but it is no longer the primary source of truth.
The primary command is sync, which automatically executes the complete PDD workflow loop—from dependency injection through code generation, testing, and verification. For most use cases, sync is the recommended starting point, as it intelligently determines what steps are needed and executes them in the correct order.
Why Choose Prompt-Driven Development?
Tackle the Root Cause of Maintenance Costs: Traditional development spends up to 90% of its budget on maintaining and modifying existing code. PDD addresses this by treating prompts—not code—as the primary source of truth. Instead of applying costly, complex patches, you update the high-level prompt and regenerate clean, consistent code.
Boost Developer Productivity & Focus: PDD shifts your work from tedious, line-by-line coding to high-level system design. Its batch-oriented workflow (using commands like sync) frees you from the constant supervision required by interactive AI assistants. You can define a task, launch the process, and focus on other priorities while the AI works in the background.
Maintain Control and Determinism: Unlike agentic coders that can introduce unpredictable changes across a project, PDD gives you full control. You precisely define the context for every operation, ensuring that changes are targeted, deterministic, and safe. This is especially critical in large codebases, where unpredictable modifications can have cascading and destructive effects.
Enhance Code Quality and Consistency: By using prompts as a single source of truth, PDD ensures your code, tests, and documentation never drift out of sync. This regenerative process produces a more reliable and understandable codebase compared to the tangled results of repeated patching.
Improve Collaboration: Prompts are written in natural language, making them accessible to both technical and non-technical stakeholders. This fosters clearer communication and ensures the final product aligns with business requirements.
Reduce LLM Costs: PDD’s structured, batch-oriented nature is inherently more token-efficient and allows you to take advantage of significant discounts offered by LLM providers for batch processing APIs, making it a more cost-effective solution than many interactive tools.
Compile to Any Stack: PDD does not ask teams to abandon Python, TypeScript, Java, Go, or C++. It treats those languages as targets emitted from a higher-level prompt source.
Key Features
Automated `sync` Command: A single command to automate the entire development cycle: from code generation and dependency management to testing and verification.
Cloud & Local Execution: Run securely in the cloud with GitHub SSO (no API keys needed) or switch to local mode with the --local flag for full control.
Comprehensive Command Suite: A full set of tools to generate, test, fix, update, and split your code and prompts.
Intelligent Testing: Generate new unit tests, or improve existing ones by analyzing coverage reports to hit your desired targets.
Iterative Error Fixing: Automatically find and correct errors in your code with commands like fix and crash, which can loop until the issues are resolved.
Cost Tracking & Configuration: Fine-tune AI model behavior with --strength and --temperature and track usage with optional cost reporting.
Cross-Language Support: Work with Python, JavaScript, Java, C++, Go, and more, with automatic language detection from prompt filenames.
Quick Installation
Recommended: Using uv (Faster & Better Dependency Management)
We recommend installing PDD using the uv package manager for better dependency management and automatic environment configuration:
# Install uv if you haven't already
curl -LsSf https://astral.sh/uv/install.sh | sh

# Install PDD using uv tool install
uv tool install pdd-cli
This installation method ensures:
Faster installations with optimized dependency resolution
Automatic environment setup without manual configuration
Proper handling of the PDD_PATH environment variable
Better isolation from other Python packages
Alternative: Using pip
If you prefer, you can install with pip:
pip install pdd-cliAfter installation, verify:
pdd --versionYou’ll see the current PDD version.
Getting Started with Examples
To quickly see PDD in action, we recommend exploring the examples/ directory in the project repository. It contains ready-to-use sample prompts and projects to help you get started.
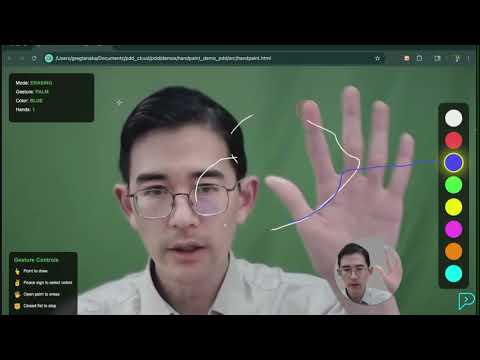
For instance, the handpaint example demonstrates how to generate a complete HTML canvas application from a single prompt. After cloning the repository, you can run it yourself:
# Navigate to the example directory
cd examples/handpaint/pdd/

# Run the sync command
pdd sync handpaint
This will generate the full application based on the handpaint_html.prompt file.
Advanced Installation Tips
Virtual Environment
Create and activate a virtual environment, then install pdd-cli:
python -m venv pdd-env

 # Activate environment
 # On Windows:
pdd-env\Scripts\activate
 # On Unix/MacOS:
source pdd-env/bin/activate

 # Install PDD (with uv - recommended)
uv tool install pdd-cli
 # OR with pip
pip install pdd-cli
Environment Variables
Optionally, add environment variables to your shell startup (e.g., .bashrc, .zshrc):
export PDD_AUTO_UPDATE=true
export PDD_GENERATE_OUTPUT_PATH=/path/to/generated/code/
export PDD_TEST_OUTPUT_PATH=/path/to/tests/
Tab Completion
Enable shell completion:
pdd install_completionCloud vs Local
By default, PDD runs in cloud mode (currently waitlist), using GitHub SSO for secure access to AI models—no local API keys needed. If you want or need to run locally:
pdd --local generate my_prompt_python.promptBe sure to configure API keys in your environment ahead of time:
export OPENAI_API_KEY=your_api_key_here
export ANTHROPIC_API_KEY=your_api_key_here
# etc.
Basic Usage
All commands follow a standard pattern:
pdd [GLOBAL OPTIONS] COMMAND [COMMAND OPTIONS] [ARGS]...Example – Sync
The sync command automates the entire PDD workflow for a given basename. It intelligently runs generation, testing, and fixing steps as needed, with real-time progress feedback.
pdd sync factorial_calculatorExample – Generate Code
Generate Python code from a prompt:
pdd generate factorial_calculator_python.promptIn cloud mode (no local keys required). Or locally if you prefer:
pdd --local generate factorial_calculator_python.promptExample – Test
Automatically create or enhance tests:
pdd test factorial_calculator_python.prompt src/factorial_calculator.pyUse coverage analysis:
pdd test --coverage-report coverage.xml --existing-tests tests/test_factorial.py \
    factorial_prompt.prompt src/factorial.py
Example – Fix Iteratively
Attempt to fix failing code or tests in multiple loops:
pdd fix --loop \
    factorial_calculator_python.prompt src/factorial_calculator.py tests/test_factorial.py errors.log
PDD will keep trying (with a budget limit configurable by --budget) until tests pass or attempts are exhausted.
Frequently Asked Questions (FAQ)
What’s the main difference between PDD and using an AI chat assistant (agentic coder)?
Control and predictability. Interactive AI assistants can be unpredictable and make broad, unintended changes, which is risky in large codebases. PDD gives you full control. You define the exact context for every change, making the process deterministic and safe. PDD’s batch-oriented workflow also frees you from constant supervision, boosting productivity.
What is “Cloud vs. Local” execution?
By default, PDD runs in cloud mode, using GitHub SSO for secure access to AI models—no local API keys needed. If you want or need to run locally, use the –local flag:
pdd --local generate my_prompt_python.promptBe sure to configure API keys in your environment ahead of time:
export OPENAI_API_KEY=your_api_key_here
export ANTHROPIC_API_KEY=your_api_key_here
# etc.
Can I use PDD on an existing project?
Yes. PDD is designed for both new and existing projects. You can start by creating prompts for new features. For existing, manually written code, you can use the pdd update command to create a prompt file that reflects the current state of your code. This allows you to gradually bring parts of your existing codebase under the PDD methodology.
Do I need to be an expert prompt engineer?
Not at all. Effective prompts are more about clearly defining your requirements in natural language than about complex “engineering.” If you can write a good specification or a clear bug report, you can write a good prompt. The goal is to describe what you want the code to do, not how to write it.
Is PDD really a programming language?
Yes, in the source-of-truth sense. A PDD program is the versioned prompt suite plus its includes, examples, tests, architecture metadata, and configuration. pdd sync compiles that source into conventional code and validates the result.
Getting Help
Use inline help to discover commands and options:
pdd --help
pdd generate --help
pdd fix --help
...
Happy Prompt-Driven Coding!
Project details
Verified details
These details have been verified by PyPIProject links
GitHub Statistics
Maintainers
Release history Release notifications | RSS feed


Download files
Download the file for your platform. If you're not sure which to choose, learn more about installing packages.
Source Distribution
Built Distribution
Filter files by name, interpreter, ABI, and platform.
If you're not sure about the file name format, learn more about wheel file names.
Copy a direct link to the current filters
File details
Details for the file pdd_cli-0.0.296.tar.gz.
File metadata
- Download URL: pdd_cli-0.0.296.tar.gz
- Upload date:
- Size: 17.9 MB
- Tags: Source
- Uploaded using Trusted Publishing? Yes
- Uploaded via: twine/6.1.0 CPython/3.13.12
File hashes
| Algorithm | Hash digest | |
|---|---|---|
| SHA256 |
861067bd798415f2e86eb4fb69a59575ed111ee07be467b0994fc24ca2633029
|
|
| MD5 |
d2657487e018fabd6ac41e6baaa9c261
|
|
| BLAKE2b-256 |
a9475123ceeaf6b821b4516f4b74de13e4cc6da8ebb315c68619165253cd90a5
|
Provenance
The following attestation bundles were made for pdd_cli-0.0.296.tar.gz:
Publisher:
release.yml on promptdriven/pdd
-
Statement:
-
Statement type:
https://in-toto.io/Statement/v1 -
Predicate type:
https://docs.pypi.org/attestations/publish/v1 -
Subject name:
pdd_cli-0.0.296.tar.gz -
Subject digest:
861067bd798415f2e86eb4fb69a59575ed111ee07be467b0994fc24ca2633029 - Sigstore transparency entry: 2083977812
- Sigstore integration time:
-
Permalink:
promptdriven/pdd@1c40a1841a51b1d9bf4644683ab14863bd73d562 -
Branch / Tag:
refs/tags/v0.0.296 - Owner: https://github.com/promptdriven
-
Access:
public
-
Token Issuer:
https://token.actions.githubusercontent.com -
Runner Environment:
github-hosted -
Publication workflow:
release.yml@1c40a1841a51b1d9bf4644683ab14863bd73d562 -
Trigger Event:
push
-
Statement type:
File details
Details for the file pdd_cli-0.0.296-py3-none-any.whl.
File metadata
- Download URL: pdd_cli-0.0.296-py3-none-any.whl
- Upload date:
- Size: 3.7 MB
- Tags: Python 3
- Uploaded using Trusted Publishing? Yes
- Uploaded via: twine/6.1.0 CPython/3.13.12
File hashes
| Algorithm | Hash digest | |
|---|---|---|
| SHA256 |
3078408e41b2dc329aff788d93f9ac473092c325bae166a3e9c58fdfb8c56afd
|
|
| MD5 |
540c78fe8984f999e25fc225dee12336
|
|
| BLAKE2b-256 |
be7c7da3c1e2608076a2dbb31aaef5b51df298e4f78ae005a4231edcf97d8d8d
|
Provenance
The following attestation bundles were made for pdd_cli-0.0.296-py3-none-any.whl:
Publisher:
release.yml on promptdriven/pdd
-
Statement:
-
Statement type:
https://in-toto.io/Statement/v1 -
Predicate type:
https://docs.pypi.org/attestations/publish/v1 -
Subject name:
pdd_cli-0.0.296-py3-none-any.whl -
Subject digest:
3078408e41b2dc329aff788d93f9ac473092c325bae166a3e9c58fdfb8c56afd - Sigstore transparency entry: 2083977821
- Sigstore integration time:
-
Permalink:
promptdriven/pdd@1c40a1841a51b1d9bf4644683ab14863bd73d562 -
Branch / Tag:
refs/tags/v0.0.296 - Owner: https://github.com/promptdriven
-
Access:
public
-
Token Issuer:
https://token.actions.githubusercontent.com -
Runner Environment:
github-hosted -
Publication workflow:
release.yml@1c40a1841a51b1d9bf4644683ab14863bd73d562 -
Trigger Event:
push
-
Statement type:


