
pibooth-picture-template



pibooth-picture-template is a plugin for the pibooth application.
It permits to define the captures/texts positions and sizes using a template. The template file (XML based on mxGraphModel definition) can be easily created/edited using the free online diagram software Flowchart Maker. Note that
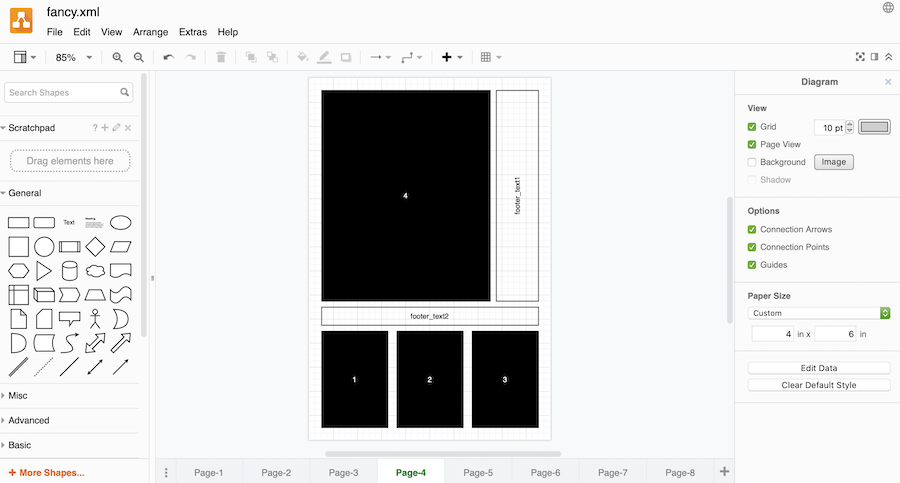
A set of templates can be found on GitHub.
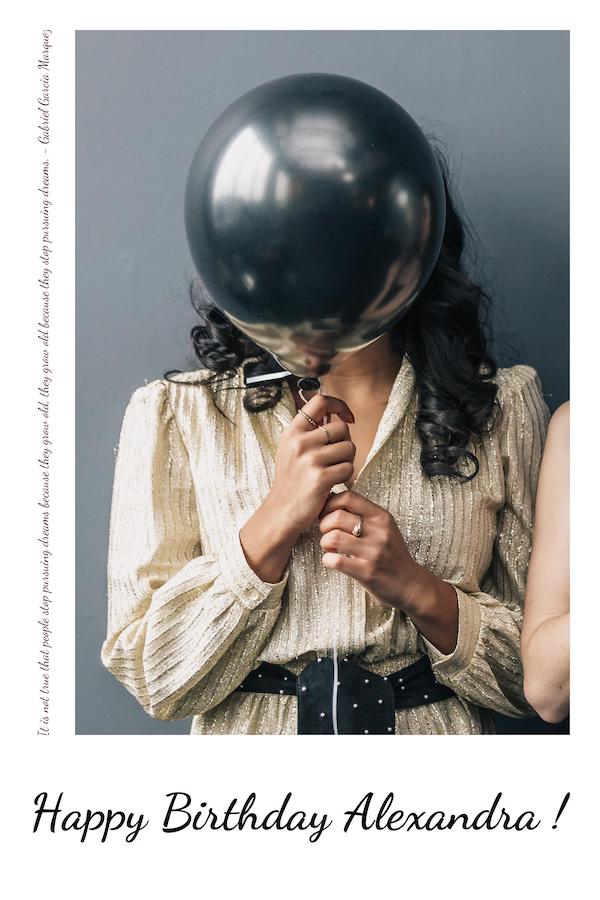
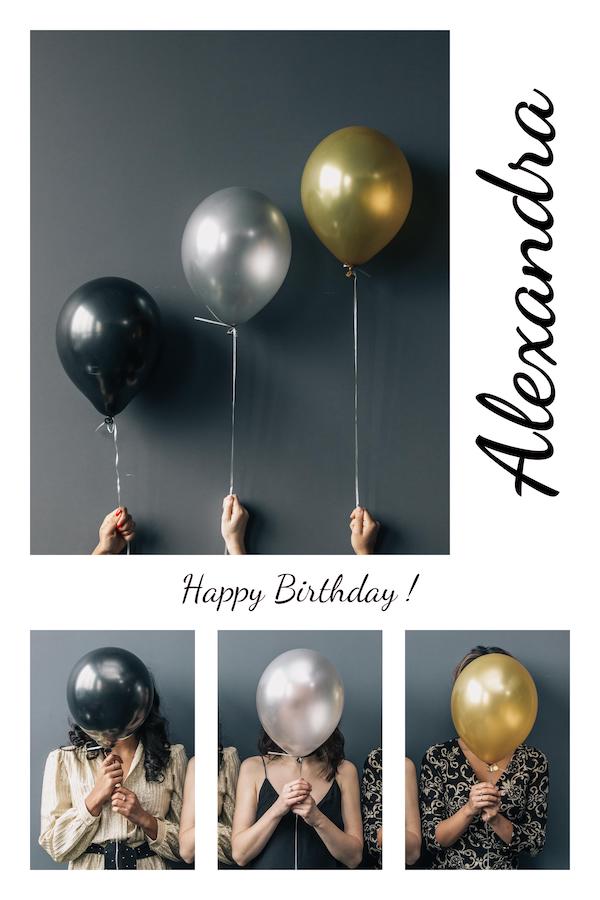
The fancy.xml template is automatically installed by this plugin in ~/.config/pibooth/picture_template.xml.
Below are the pictures generated with this one (learn here how to Create a template):






Install
$ pip3 install pibooth-picture-template
Configuration
Here below the new configuration options available in the pibooth configuration. The keys and their default values are automatically added to your configuration after first pibooth restart.
[PICTURE]

# Pictures template path, it should contain 8 pages (4 capture numbers and 2 orientations)
template = picture_template.xmlPicture rendering
Only captures, texts and images position/size are rendered. It means that, in addition to the template, the following configuration keys are still taken in account to render the final picture:
[PICTURE][footer_text1]
[PICTURE][footer_text2]
[PICTURE][text_colors]
[PICTURE][text_fonts]
[PICTURE][text_alignments]
[PICTURE][overlays]
[PICTURE][backgrounds]
Picture orientation
A TemplateParserError is raised if the requested orientation for the selected captures number can not be found in the template file.
If [PICTURE][orientation] = auto the best orientation is chosen following these rules:
find a template with the correct number of captures and placeholders with same orientation than the captures.
find a template with the correct number of captures.
find a template with portrait orientation
Create a template
The steps below will show how to create a basic template file from scratch using the Flowchart Maker application.
This file may contain several templates to define the picture layout for 1 / 2 / 3 / 4 captures and portrait / landscape orientations.
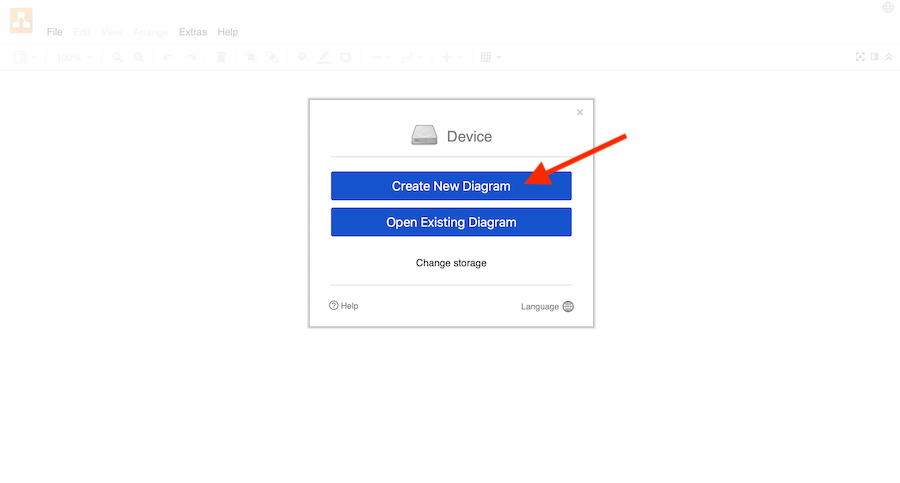
Step 1: create a new file
Click on Create New Diagram. |
|
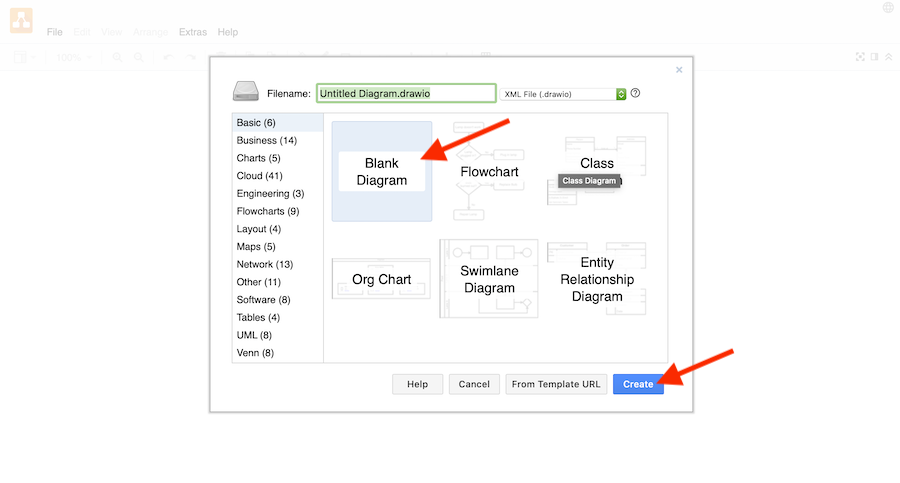
Choose a blank diagram. Modify the name of the diagram, it will be the name of the exported file. Click on Create. |
|
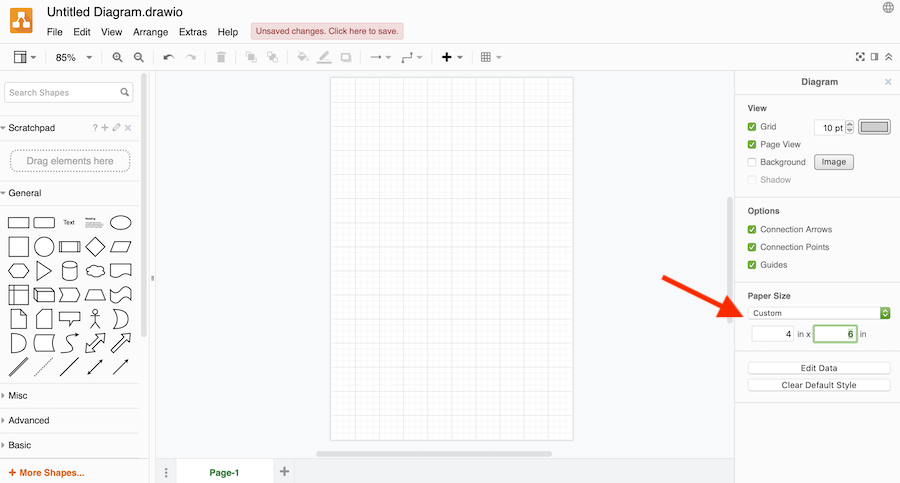
Select the appropriated paper size. A custom one can be defined in inches. |
Step 2: placeholder for captures
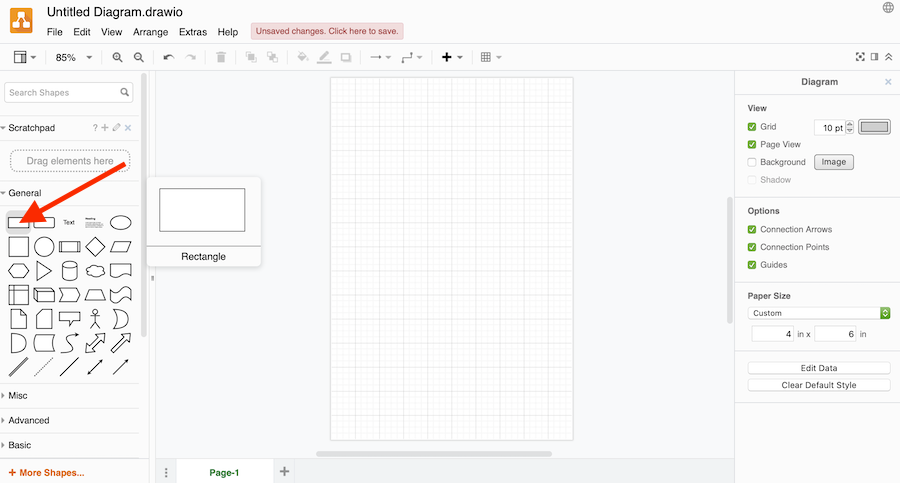
Choose a rectangle to define a capture placeholder. Other shapes have no effect and will be considered as rectangles. |
|
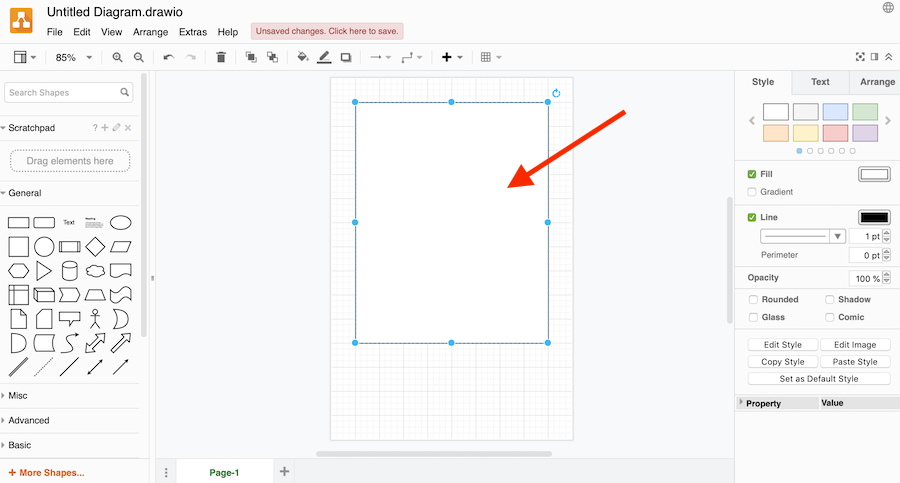
Resize the rectangle to fit the desired size. The rectangle can overflow the border of the page to make design effects. Up to 4 rectangles can be drawn. |
|
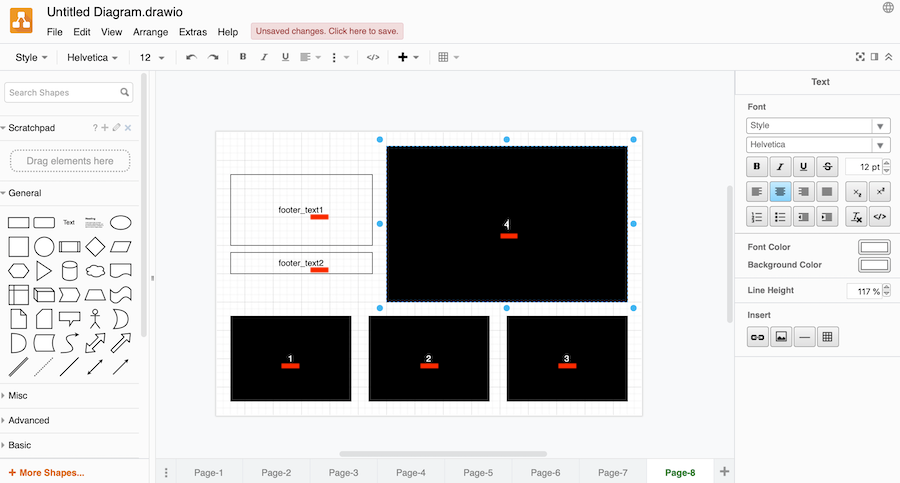
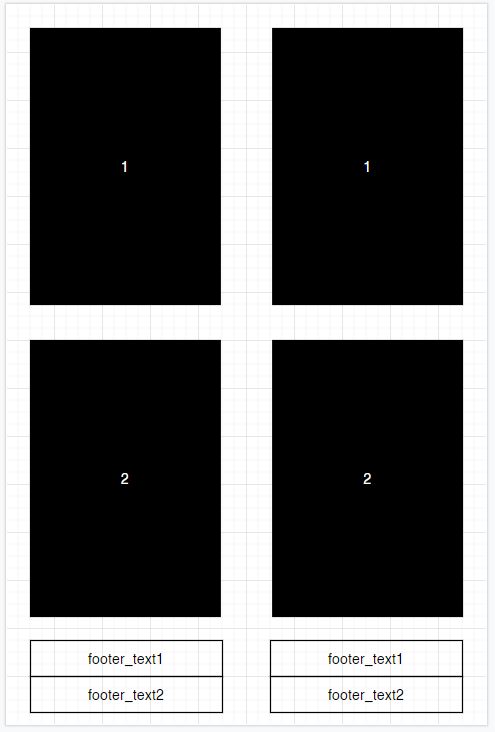
The captures placeholders shall be numbered (1 to 4) to define the captures to be placed inside. Colored shapes give a better overview of the layout but they are not rendered on the final picture. |
Step 3: placeholder for texts
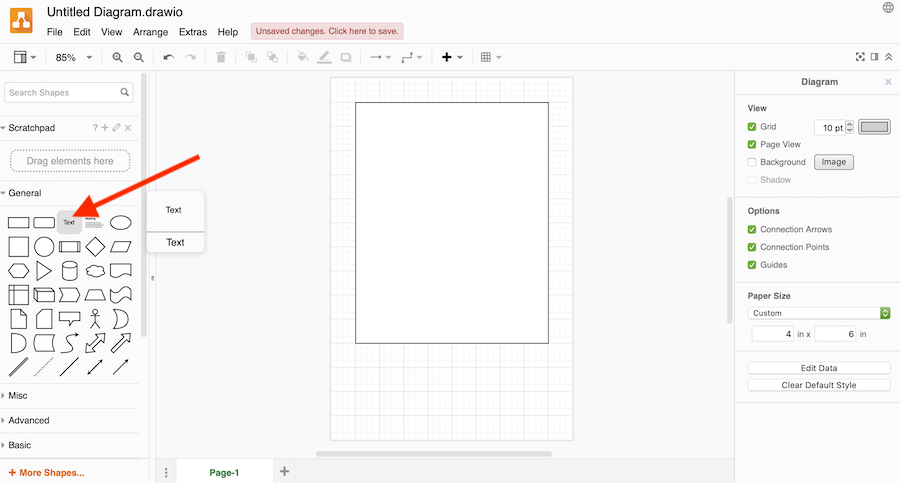
Choose a text box to represent a text placeholder. |
|
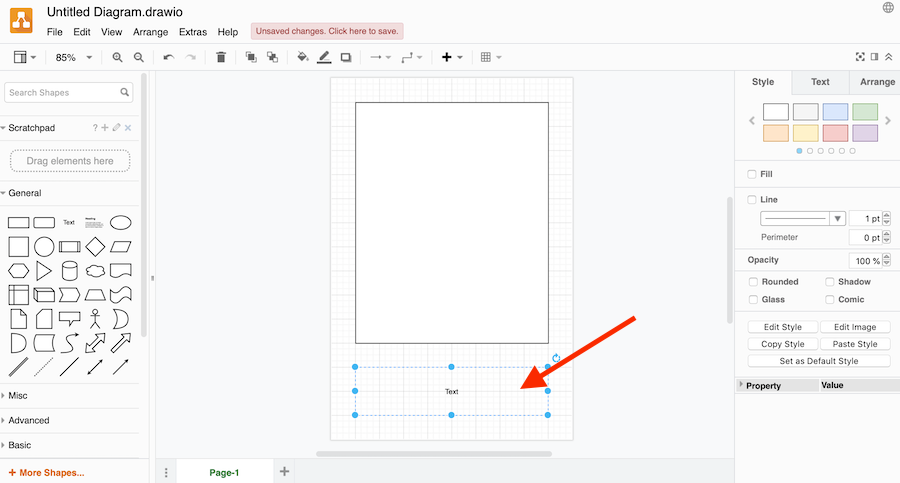
Resize the text box to fit the desired size. Up to 2 text boxes can be drawn depending on the pibooth configuration. |
|
The text placeholders shall be numbered (1, 2, footer_text1 or footer_text2) to define the text to be placed inside. |
Step 4: picture resolution
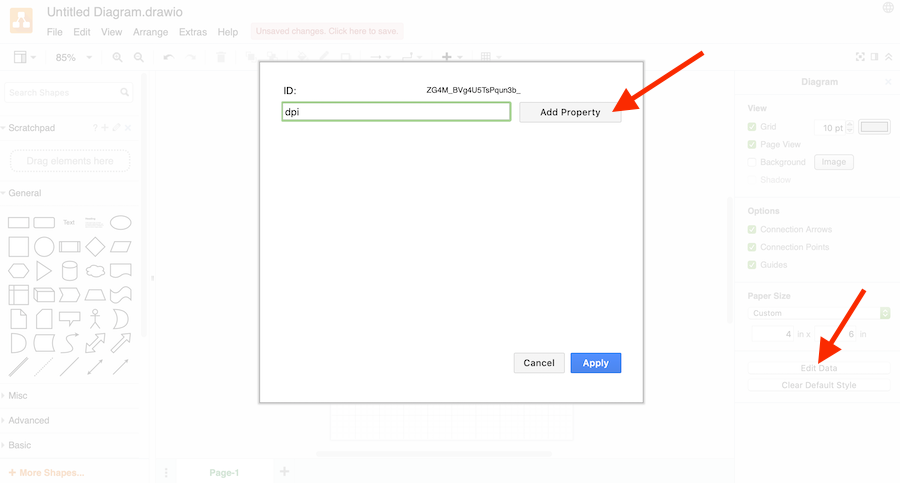
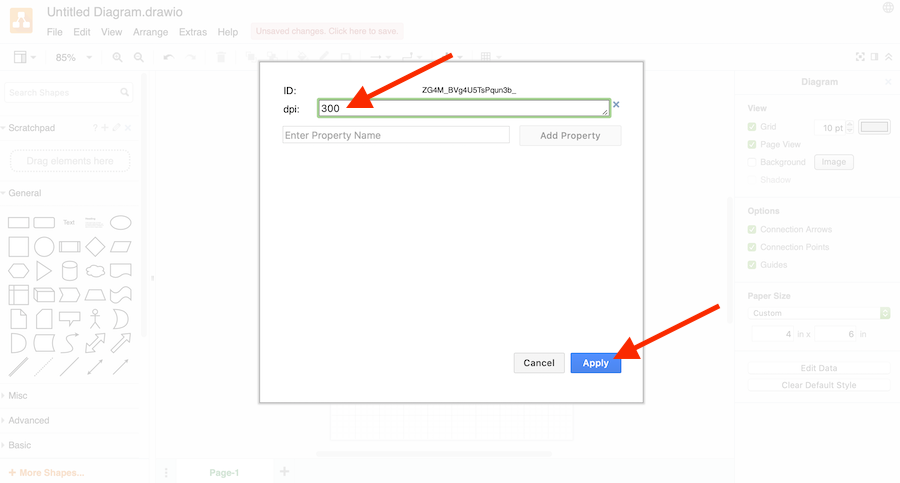
Extra properties can be set to the template. Click on the button Edit Data (close to the paper size settings). Type dpi in the entry box and click on Add Property. |
|
By default a resolution of 600 DPI is used. It means that the picture size will be 2400x3600 pixels for a resolution of 4x6 inches. Set it to the desired value and click on Apply. |
Step 5: add new a template
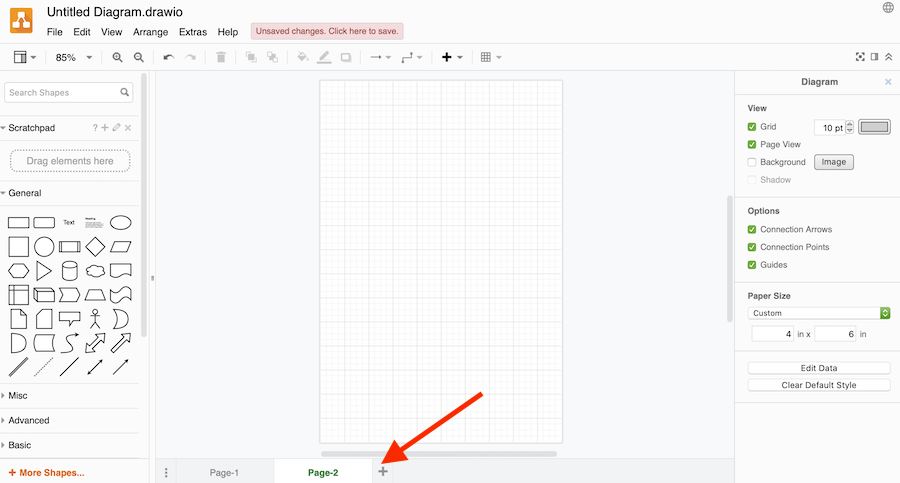
Once the template is created. A new one can be defined for an other captures number or other orientation. Click on + to add a new page. |
|
The same picture can be used several times in the template to allows a symmetric template for example (one copy for you, one for your guests). |
Step 6: save the template file
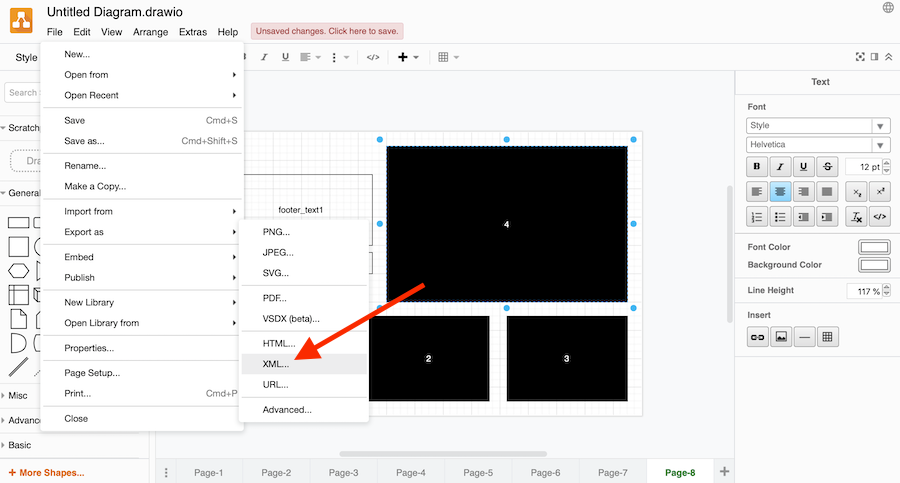
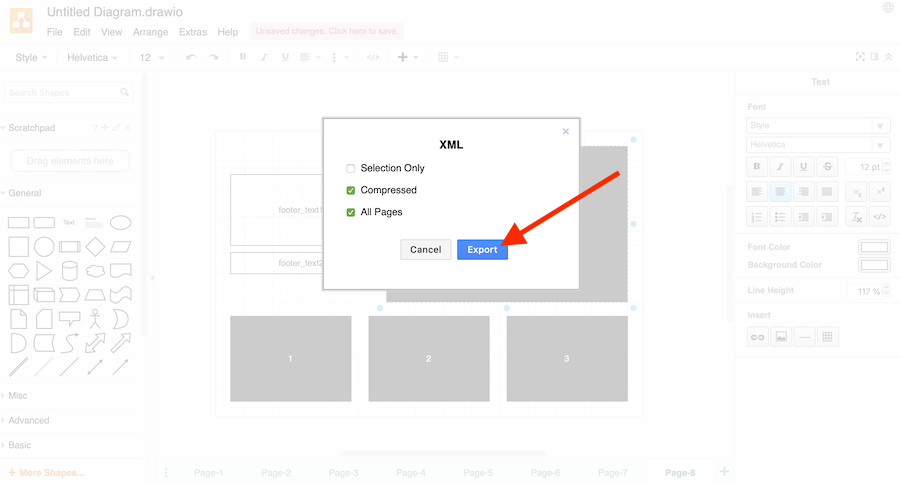
Generate the XML file by clicking File, Export as, XML.... |
|
Click on Export (unselect Compressed if you want to edit the file manually later). |


Release files for pibooth-picture-template 1.1.1
For a detailed explanation of source distributions (sdists) and built distributions (wheels), please see the package formats documentation.
Source distribution (sdist)
| File | Size | Uploaded | |
|---|---|---|---|
| pibooth_picture_template-1.1.1.tar.gz | 27.6 kB | Details |
Built distribution (wheel)
| File | Interpreter | ABI | Platform | Reset |
|---|---|---|---|---|
| pibooth_picture_template-1.1.1-py3-none-any.whl | Python 3 | none | any | Details |
Total release size: 54.2 kB
Release files / pibooth_picture_template-1.1.1.tar.gz
| Download URL | pibooth_picture_template-1.1.1.tar.gz |
|---|---|
| Size | 27.6 kB |
| Tags | Source |
|
SHA-256 checksum How to use checksums |
1bb6f44a0ca344cb168c6932400764e797822dd93ebfd8bc8322ab527005b185
|
|
BLAKE2b-256 checksum How to use checksums |
972363ebab729753b1503537e4f416e554ecbc0fc3d350affc4d031a43690173
|
| Upload date | |
|
Uploaded using Trusted Publishing? What is trusted publishing? |
Yes |
| Uploaded via |
twine/7.0.0 CPython/3.13.14
|
Provenance
Provenance describes where a file came from. On PyPI, provenance is shared via attestations, which provide a verifiable record of the build or publishing details. View details, limitations and caveats.


PyPI Publish Attestation
PyPI verified that this artifact, at this checksum, originated from the publisher listed below.
Signed by GitHub Actions, verified by PyPI on Sep 29, 2026.
Transparency logRelease files / pibooth_picture_template-1.1.1-py3-none-any.whl
| Download URL | pibooth_picture_template-1.1.1-py3-none-any.whl |
|---|---|
| Size | 26.6 kB |
| Tags | Python 3 |
|
SHA-256 checksum How to use checksums |
654285c9c91099140c8758352fa2c65ed092449c8a94bd3877209d85772c1dcb
|
|
BLAKE2b-256 checksum How to use checksums |
9056fad6d10c5bec171292a8a0a6fc9c8f60ea176817a7d4c8643caa2152c92d
|
| Upload date | |
|
Uploaded using Trusted Publishing? What is trusted publishing? |
Yes |
| Uploaded via |
twine/7.0.0 CPython/3.13.14
|
Provenance
Provenance describes where a file came from. On PyPI, provenance is shared via attestations, which provide a verifiable record of the build or publishing details. View details, limitations and caveats.
PyPI Publish Attestation
PyPI verified that this artifact, at this checksum, originated from the publisher listed below.
Signed by GitHub Actions, verified by PyPI on Sep 29, 2026.
Transparency log













