Render pixelated text in the console using customizable symbols and colors.

Project description
Pixel Pretender
A Python package for rendering pixelated text in the console, with customizable ASCII and Unicode* symbols and optional color formatting.
Table of Contents
- Features
- Installation
- Usage
- Support Functions
- Help
- Notes
- Contributing
- Author
- Licenses
- Acknowledgements
Features
- Transform text into pixelated representations using customizable symbols.
- Enhance color customization with rich and colorama libraries.
- Simple functions for rendering and displaying pixel text with style.
Installation
- You can install
pixel_pretendervia pip:
pip install pixel_pretender
Usage
-
- adjust maximum number of pixel characters to display to your screen
import pixel_pretender as pxp

# Determine the maximum number of pixel characters your screen can display.
pxp.max_display_capacity()

# Set the maximum number of pixel characters to display per line.
pxp.set_max_pixels(20)
-
- using
pxp.digitise()function to Transform text into its pixelated form.
- using
import pixel_pretender as pxp
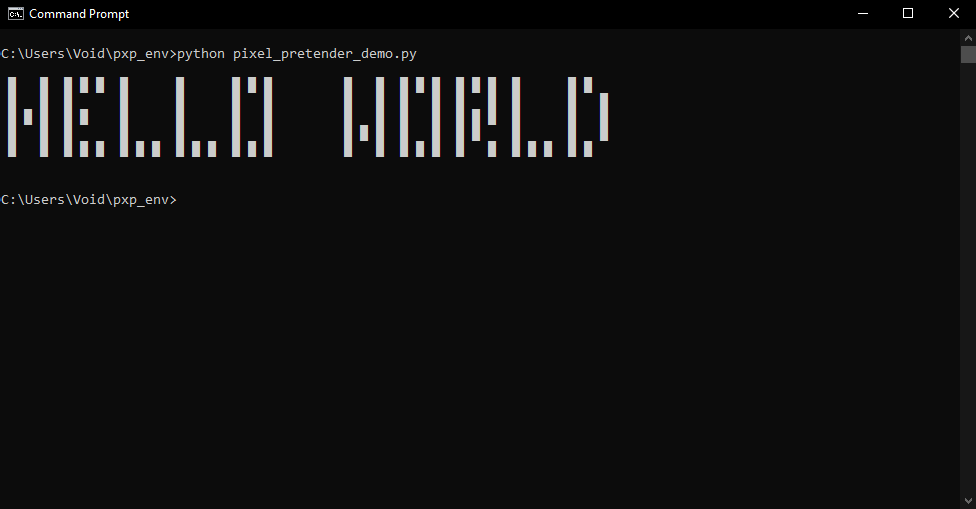
# Text to be pixelated
text = "hello world"
# Convert text to pixels.
pixels = pxp.digitise(text, symbol='█')
# Display the pixelated text.
pxp.display_pixels(pixels)
-
- result :
 █   █  █ █ █  █      █      █ █ █         █   █  █ █ █  █ █ █  █      █ █
 █   █  █      █      █      █   █         █   █  █   █  █   █  █      █   █
 █ █ █  █ █    █      █      █   █         █   █  █   █  █ █ █  █      █   █
 █   █  █      █      █      █   █         █ █ █  █   █  █ █    █      █   █
 █   █  █ █ █  █ █ █  █ █ █  █ █ █         █   █  █ █ █  █   █  █ █ █  █ █
-
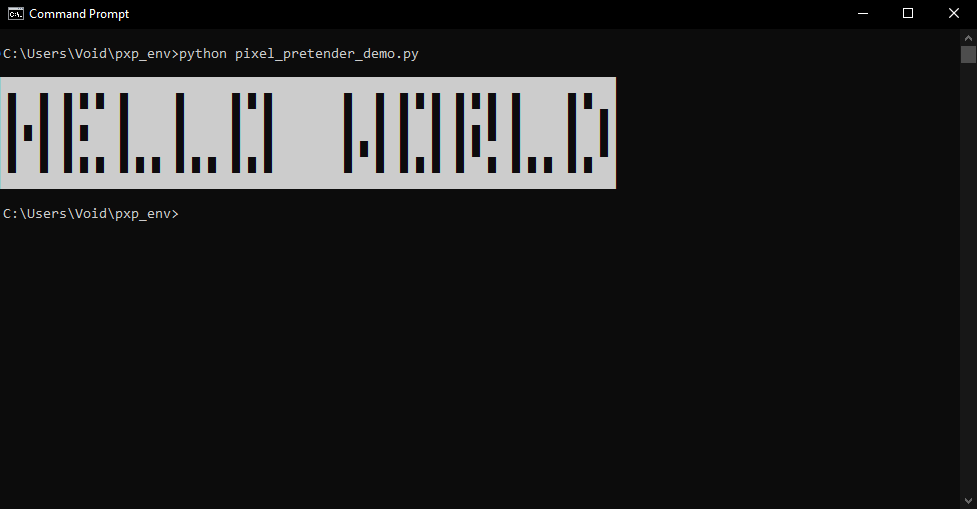
- Use the
pxp.digitise()function with thenegative_image=Trueoption to invert the image, swapping whitespace with the symbol.
- Use the
import pixel_pretender as pxp

# Text to be pixelated
text = "hello world"
# Generate a negative image of the pixelated text.
pixels = pxp.digitise(text, symbol='█', negative_image=True)

# Display the negative image.
pxp.display_pixels(pixels)
-
- result :
█████████████████████████████████████████████████████████████████████████████
█ ███ ██ █ █ ██ ██████ ██████ █ █ █████████ ███ ██ █ █ ██ █ █ ██ ██████ █ ███
█ ███ ██ ██████ ██████ ██████ ███ █████████ ███ ██ ███ ██ ███ ██ ██████ ███ █
█ █ █ ██ █ ████ ██████ ██████ ███ █████████ ███ ██ ███ ██ █ █ ██ ██████ ███ █
█ ███ ██ ██████ ██████ ██████ ███ █████████ █ █ ██ ███ ██ █ ████ ██████ ███ █
█ ███ ██ █ █ ██ █ █ ██ █ █ ██ █ █ █████████ ███ ██ █ █ ██ ███ ██ █ █ ██ █ ███
█████████████████████████████████████████████████████████████████████████████
Pixelated text output with negative_image=True
Colorama Color Function:
Apply 16 standard colors to your pixel characters using colorama.
The following colors are available:
- 'red', 'yellow', 'green', 'blue', 'cyan', 'magenta', 'black', 'white'
- 'light red', 'light yellow', 'light green', 'light blue', 'light cyan', 'light magenta', 'light black', 'light white'
import pixel_pretender as pxp

# Transform text into its pixelated form
pixels = pxp.digitise("> python 3.8 <", symbol='▄')

# Apply a color to the pixel characters using colorama (16 available colors).
colorama_pixels = pxp.apply_colorama_color(pixels, "yellow")

# Display the colorized pixel text.
pxp.display_pixels(colorama_pixels)
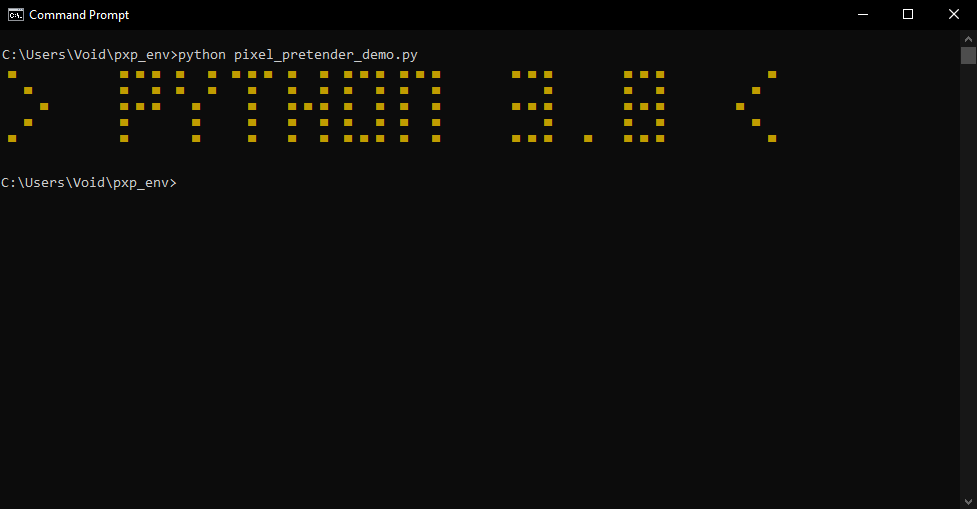
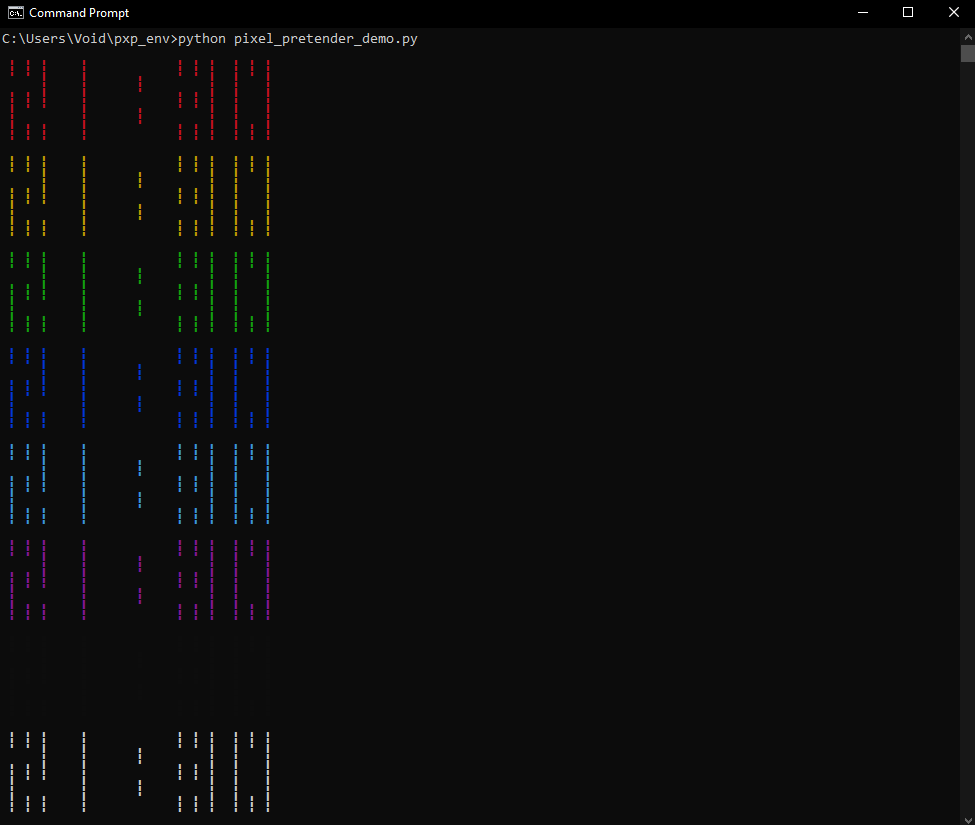
Applying Colorama Colors in a Loop:
Apply multiple colors to the same pixel text in sequence.
import pixel_pretender as pxp

# Transform text into its pixelated form
pixels = pxp.digitise("21:30", symbol='┇')

# Tuple containing all available colorama color names.
colors = pxp.colorama_colors

# Loop through colors and apply each to the pixel text.
for color in colors:
    # Apply the current color to the pixel characters.
    colorama_pixels = pxp.apply_colorama_color(pixels, color)

    # Display the pixel text with the applied color.
    pxp.display_pixels(colorama_pixels)
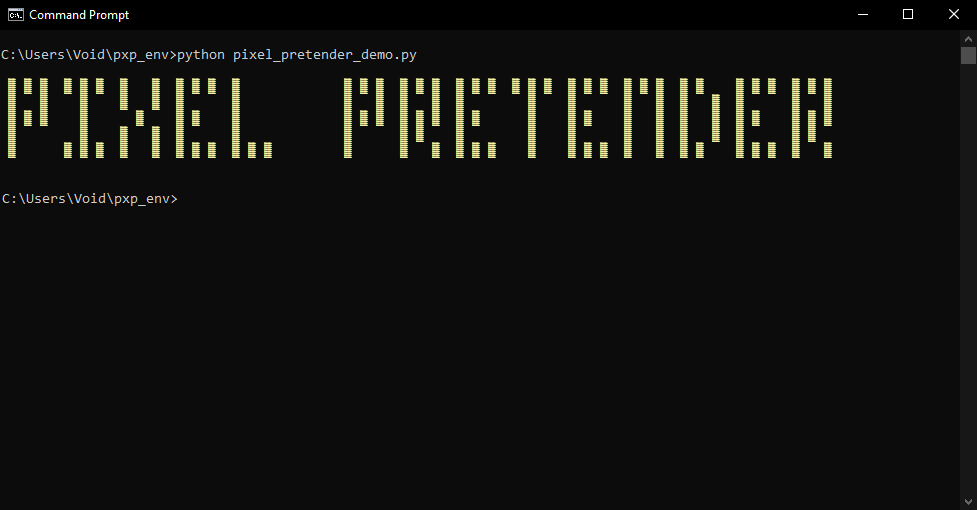
Rich Color Function
The Rich color library provides advanced coloring options that you can apply to customize your pixel characters.
- Without Background
import pixel_pretender as pxp

# Generate pixel list
pixels = pxp.digitise("pixel pretender", symbol='▓')

# Apply Rich color: True Color, 256 Colors, Basic Colors
rich_pixels = pxp.apply_rich_color(pixels, text_color="#ffff87")  # Note: PyCharm users should run their script in the terminal to view Rich colors

# Display the result
pxp.display_pixels(rich_pixels)
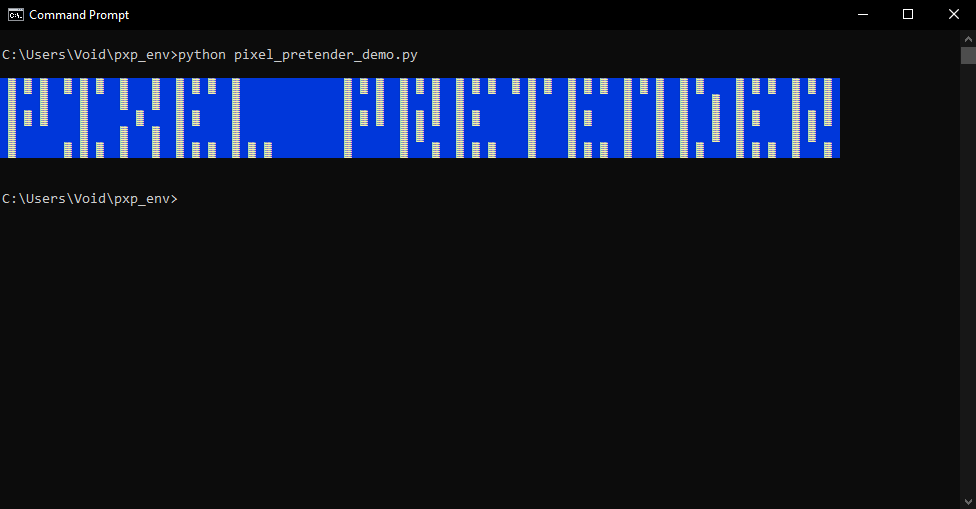
- With Background
import pixel_pretender as pxp

# Generate pixel list
pixels = pxp.digitise("pixel pretender", symbol='▓')

# Apply Rich color with background: True Color, 256 Colors, Basic Colors
rich_pixels = pxp.apply_rich_color(pixels, text_color="#ffff87", background_color="color(4)")  # Note: PyCharm users should run their script in the terminal to view Rich colors

# Display the result
pxp.display_pixels(rich_pixels)
Support Functions
max_display_capacity()
Determines the maximum number of pixel characters your screen can display and helps you optimize the display settings for your pixelated text.
import pixel_pretender as pxp

# Check the maximum display capacity for your screen.
pxp.max_display_capacity()
set_max_pixels()
Allows you to customize the number of pixel characters displayed per line by setting a positive integer value. This ensures your pixelated text fits your screen perfectly.
import pixel_pretender as pxp

# Define the maximum number of pixels per line based on your screen capacity.
user_max_pixels = 27

# Set the maximum pixel limit for display.
pxp.set_max_pixels(user_max_pixels)
try_pixel_samples()
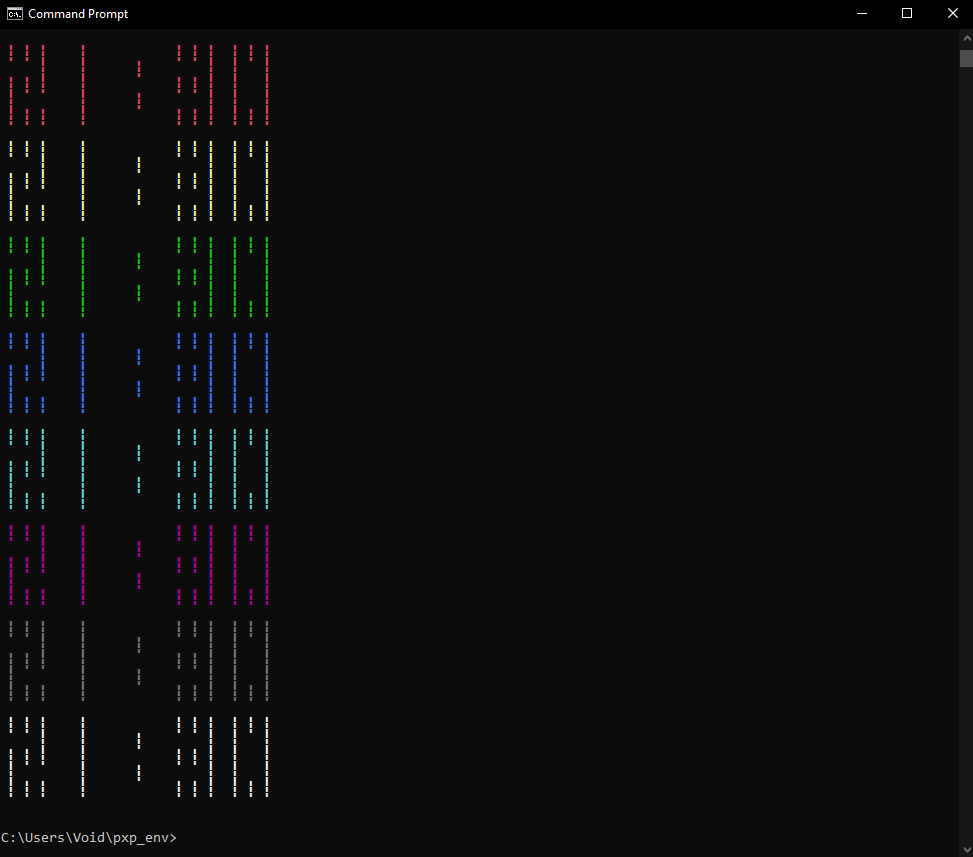
Displays a test phrase in pixelated form using various symbols. The function shows the symbols in customizable increments, allowing you to experiment with different styles interactively.
import pixel_pretender as pxp

# Display the test phrase using a series of different pixel symbols.
pxp.try_pixel_samples(test_phrase="test - 1234567890", increment=10, try_all=False)
test_phrase: The phrase to be represented in pixels. > Default is "test - 1234567890".increment (int): Number of symbols to display before prompting for user input. > Default is 10.try_all (bool): If True, uses the entire custom_pixel_list instead of the default increments. > Default is False.custom_pixel_list (list): A custom list of symbols to be used for pixel representation. > Default is pixel_samples.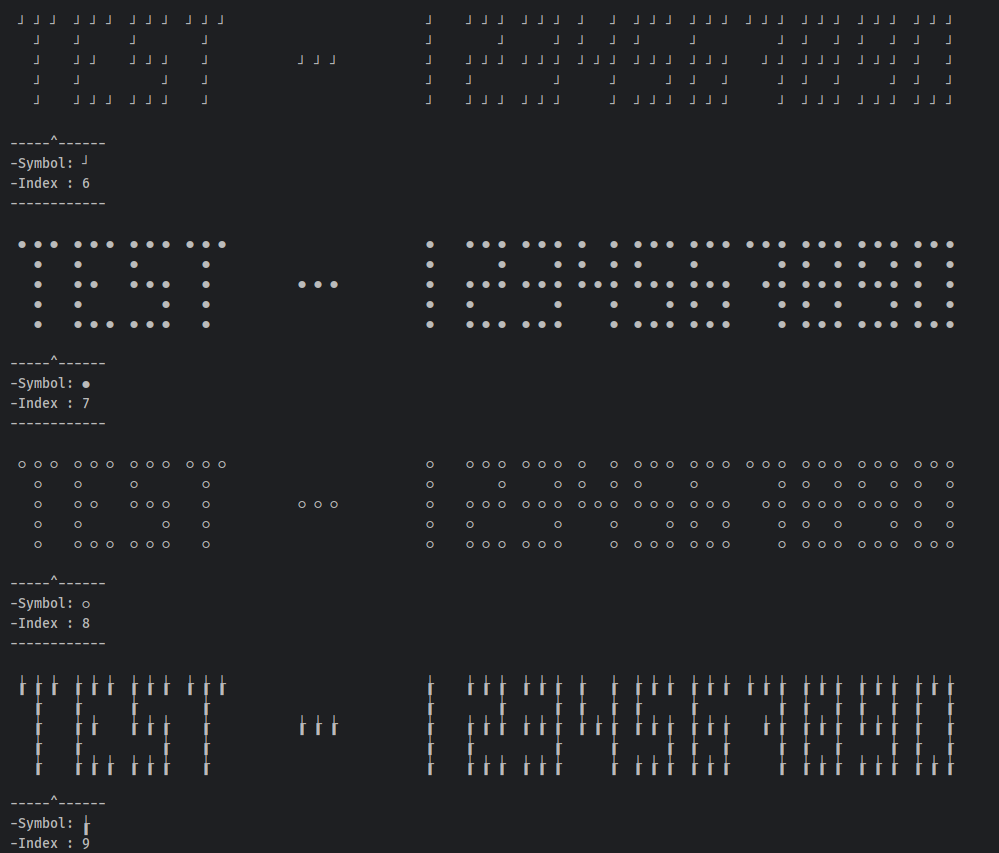
try_rich_colors()
Showcases a test phrase using 255 rich color styles, letting users explore and preview color customization options.
import pixel_pretender as pxp

# Display the test phrase using 255 Rich colors for a full range of color effects.
pxp.try_rich_colors(test_phrase="test - 1234567890", increment=10, try_all=False)
test_phrase: The phrase to be represented in rich colors. > Default is "test - 1234567890".increment (int): Number of colors to display before prompting for user input. > Default is 10.try_all (bool): If True, displays all colors instead of the default increments > Default is False.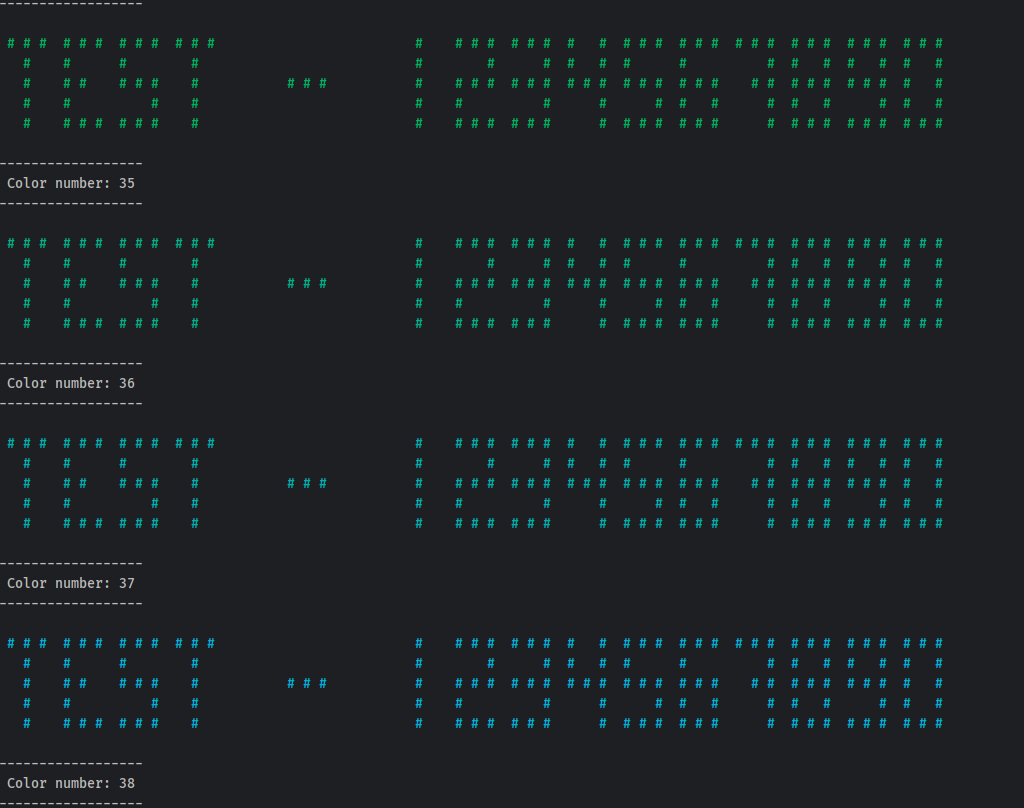
Available Features for Users
colorama_colors
A tuple of all color names available in Colorama, allowing you to easily apply colors to your pixel text.
import pixel_pretender as pxp

# Display all available Colorama color names.
print(pxp.colorama_colors)
- result:
('red', 'yellow', 'green', 'blue', 'cyan', 'magenta', 'black', 'white', 'light red', 'light yellow', 'light green', 'light blue', 'light cyan', 'light magenta', 'light black', 'light white')
rich_colors
A tuple containing 16 color names available in the Rich library for quick access and application to your pixel text.
import pixel_pretender as pxp

# Display the 16 basic color names available in Rich.
print(pxp.rich_colors)
- result:
('red', 'green', 'yellow', 'blue', 'magenta', 'cyan', 'white', 'black', 'bright_red', 'bright_green', 'bright_yellow', 'bright_blue', 'bright_magenta', 'bright_cyan', 'bright_white', 'bright_black')
pixel_samples
A list of Unicode symbols that can be used as pixel characters, ensuring compatibility across various terminals.
import pixel_pretender as pxp

# Display all compatible Unicode symbols for pixel representation.
print(pxp.pixel_samples)
- result:
['┞', '┬', 'α', '▄', 'Ζ', 'τ', '┘', 'ß', '●', '○', '┟', 'Θ', 'ά', '◫', '┅', '¶', '╘', '►', '╂', 'Δ', '⌷', '₽', 'Ρ', '━', '◶', 'μ', '▛', '█', ...]
cool_pixel_samples
A curated list of Unicode symbols that are visually appealing and work well as pixel characters.
import pixel_pretender as pxp

# Display a selection of recommended symbols for pixelated text.
print(pxp.cool_pixel_samples)
- result:
['╳', '╲', '╱', '╮', '╵', '▄', '▅', '▆', '▇', '█', '▉', '▝', '▚', '▖', '▓', '▒', '░', '▐', '□', '▪', '■', '▟','◆', '◇', '◉', '○', '◎', '●', ...]
Need Help with a Specific Function?
- To get detailed information on any function, use Python's built-in
help()function on the function name.- For example:
import pixel_pretender as pxp

help(pxp.apply_colorama_color)
-
- result:
Help on function apply_colorama_color in module pixel_pretender:

apply_colorama_color(pixel_list, color)
    Applies a specified text color to a list of pixel strings using Colorama.

    Parameters:
    - pixel_list (list of str): A list of pixel strings to color.
    - color (str): A color name that specifies the text color to be applied. (e.g., "red", "blue", "light green").
          - A tuple containing all available color names from the colorama library is stored in colorama_colors

    Returns:
    - list of str: A new list of pixel strings with the specified text color applied to the first
                   line and a reset applied to the last line.

    Raises:
    - TypeError: If pixel_list is not a list of strings or if color is not a string.
    - ValueError: If color is not in colorama_colors.
Notes
- Unicode* :
- Some Unicode symbols may not display correctly due to varying spacing compared to ASCII letters
- Rich Library :
- PyCharm users should enable the “Emulate terminal in output console” option in the run/debug configuration, or run the program in the terminal to view the styled output.
Contributing
This project is maintained as time and resources permit, However, the community is encouraged to contribute, fork, and modify the code freely. Contributions are always welcome and appreciated.
You are encouraged to:
- Submit pull requests for bug fixes or feature enhancements.
- Fork the repository and adapt it to suit your needs.
There are no strict guidelines or requirements for contributing, this project is now a collaborative effort for the benefit of the community. However, please note that approving pull requests may take some time.
Publishing to PyPI
This project is published on PyPI as pixel_pretender. If you contribute a significant feature and would like to publish it, please request to be added as a maintainer on PyPI by opening an issue. Alternatively, feel free to fork this project and publish your version independently.
Author
Created by Anasse Gassab.
Licenses
-
Pixel_Pretender is licensed under the MIT License - see the LICENSE file for details.
-
Colorama is licensed under the BSD license. See Colorama License for details.
-
Rich is licensed under the MIT license. See Rich License for details.
Acknowledgements
-
This project uses the Colorama library for basic terminal color support.
-
This project uses the Rich library for advanced text formatting and styling in the terminal.
-
Thanks to the Python community for the awesome libraries like
coloramaandrich. -
Inspired by Seven Segment Displays, ASCII art and creative console designs.
Release history Release notifications | RSS feed


Download files
Download the file for your platform. If you're not sure which to choose, learn more about installing packages.
Source Distribution
Built Distribution
Filter files by name, interpreter, ABI, and platform.
If you're not sure about the file name format, learn more about wheel file names.
Copy a direct link to the current filters
File details
Details for the file pixel_pretender-1.0.0.tar.gz.
File metadata
- Download URL: pixel_pretender-1.0.0.tar.gz
- Upload date:
- Size: 25.6 kB
- Tags: Source
- Uploaded using Trusted Publishing? No
- Uploaded via: twine/5.1.1 CPython/3.10.14
File hashes
| Algorithm | Hash digest | |
|---|---|---|
| SHA256 |
1498e5fd938d81f9e3a137525b06d48eb529caaded1739cd37df0b453a9463a6
|
|
| MD5 |
d51346d7f6441f97a24156bd5561292c
|
|
| BLAKE2b-256 |
c3dcca89a25d403a8d7f92f0c47a73a443947af3959699f79c28f2f7bc89b2c5
|
File details
Details for the file pixel_pretender-1.0.0-py3-none-any.whl.
File metadata
- Download URL: pixel_pretender-1.0.0-py3-none-any.whl
- Upload date:
- Size: 16.4 kB
- Tags: Python 3
- Uploaded using Trusted Publishing? No
- Uploaded via: twine/5.1.1 CPython/3.10.14
File hashes
| Algorithm | Hash digest | |
|---|---|---|
| SHA256 |
7ae6a0e57ff98524380d5a69db3321c63b8a221748fde1fe6c5c3f8bc0196206
|
|
| MD5 |
54527ae9beab86e4e0d0401ad2975ec6
|
|
| BLAKE2b-256 |
492af5ffcd1309285a5d0fdb993df0a2e26a9f376f3c4a455cfcde6be4365273
|


