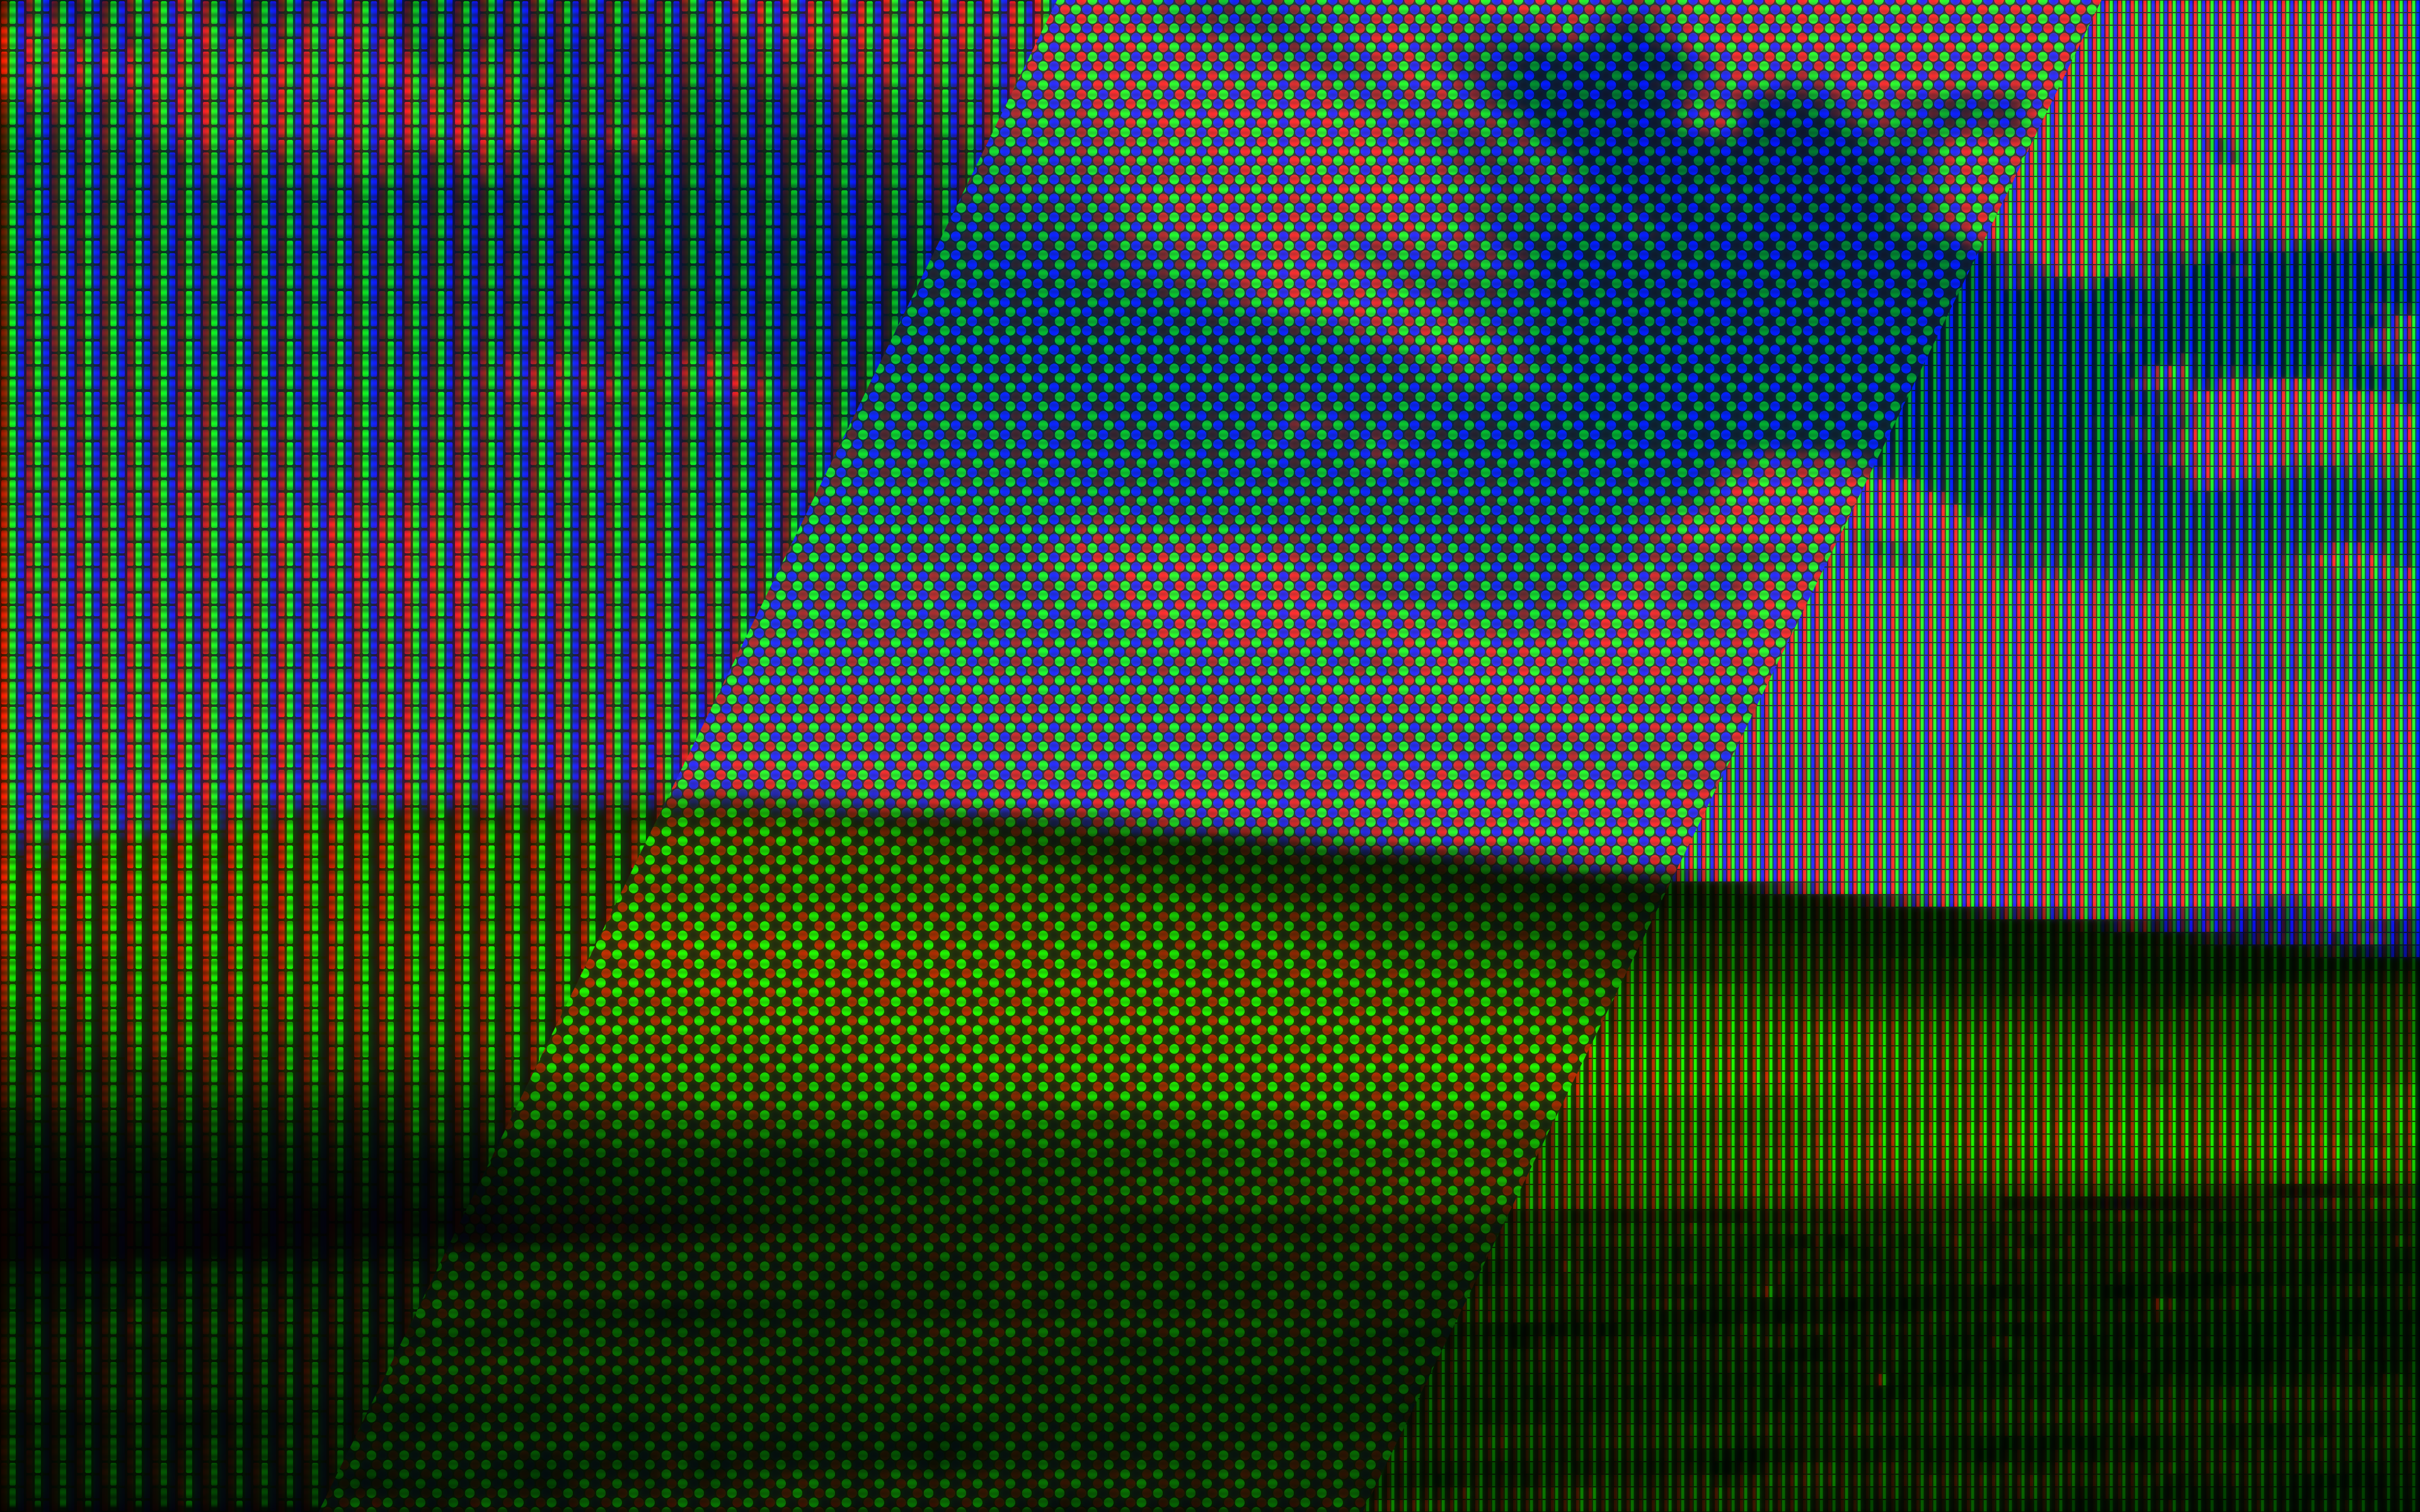
A highly realistic RGB pixel filter

Project description
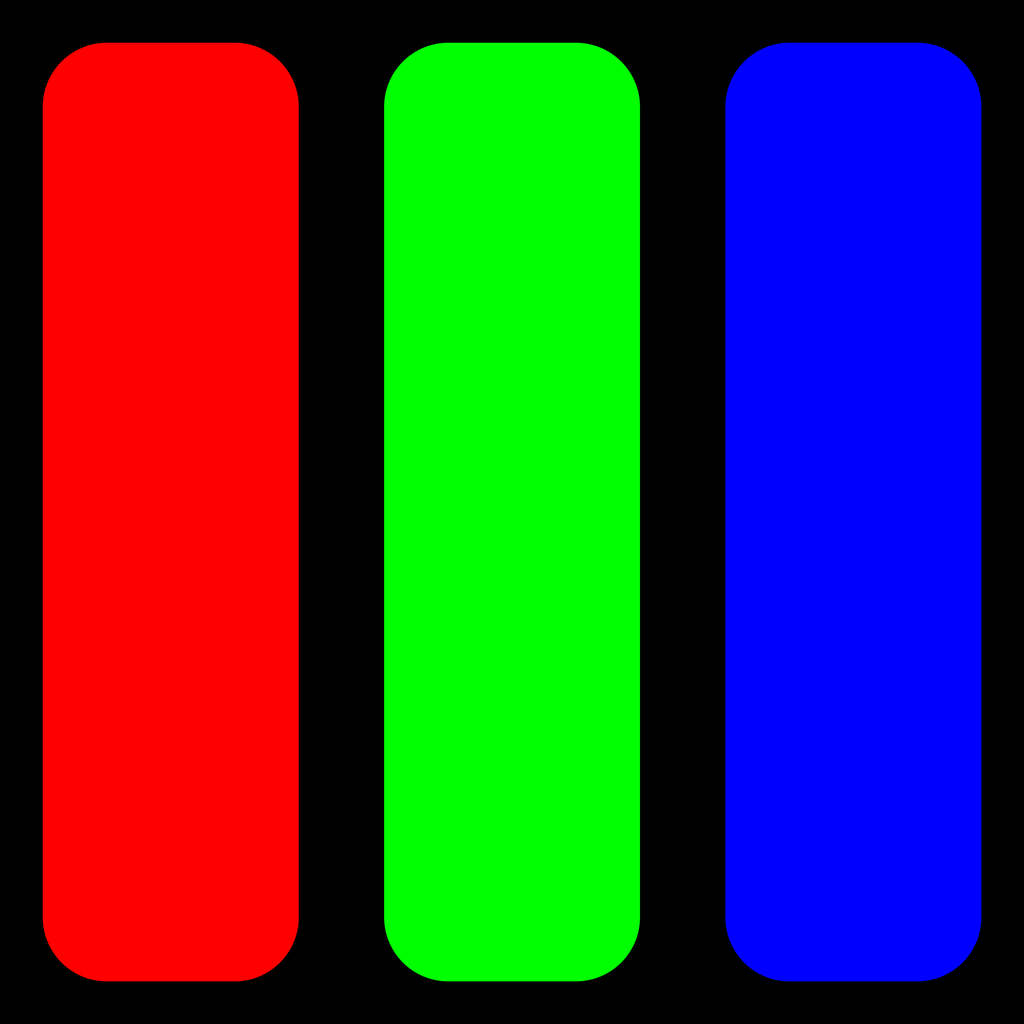 Pixelgreat
A highly realistic RGB pixel filter.
Command Line Usage
The command to convert a single image is pixelgreat:
usage: pixelgreat [-h] -i IMAGE_IN -o IMAGE_OUT -s PIXEL_SIZE [-os OUTPUT_SCALE]
                  [-t SCREEN_TYPE] [-d DIRECTION] [-a PIXEL_ASPECT] [-npx] [-br BRIGHTEN]
                  [-b BLUR_AMOUNT] [-w WASHOUT] [-sst SCANLINE_STRENGTH]
                  [-ssp SCANLINE_SPACING] [-ssz SCANLINE_SIZE] [-sb SCANLINE_BLUR]
                  [-gst GRID_STRENGTH] [-p PADDING] [-r ROUNDING] [-bst BLOOM_STRENGTH]
                  [-bsz BLOOM_SIZE]

A highly realistic RGB pixel filter

Valid values are shown in {braces}
Default values are shown in [brackets]

options:
  -h, --help            show this help message and exit
  -i IMAGE_IN, --input IMAGE_IN
                        the image to convert
  -o IMAGE_OUT, --output IMAGE_OUT
                        where to save the converted image, and what filetype to save it as
  -s PIXEL_SIZE, --size PIXEL_SIZE
                        the size of the pixels {3 - no limit}
  -os OUTPUT_SCALE, --output-scale OUTPUT_SCALE
                        How much to scale the output size by {no limits, 1.0 is no scaling,
                        2.0 is 2x size} [1.0]
  -t SCREEN_TYPE, --type SCREEN_TYPE
                        the type of RGB filter to apply {LCD, CRT_TV, CRT_MONITOR} [LCD]
  -d DIRECTION, --direction DIRECTION
                        the direction of the RGB filter {V, H} [varies w/ screen type]
  -a PIXEL_ASPECT, --aspect PIXEL_ASPECT
                        the aspect ratio of the pixels, width / height {0.33 - 3.0} [1.0]
  -npx, --no-pixelate   if given, the image will not be pixelated, but the other filters
                        will still be applied
  -br BRIGHTEN, --brighten BRIGHTEN
                        how much to brighten the source image {0.0 - 1.0} [1.0]
  -b BLUR_AMOUNT, --blur BLUR_AMOUNT
                        how much to blur the source image {0.0 - 1.0} [varies w/ screen
                        type]
  -w WASHOUT, --washout WASHOUT
                        how much to brighten dark pixels {0.0 - 1.0} [varies w/ screen
                        type]
  -sst SCANLINE_STRENGTH, --scanline-strength SCANLINE_STRENGTH
                        the strength of the CRT scanline filter {0.0 - 1.0} [varies w/
                        screen type]
  -ssp SCANLINE_SPACING, --scanline-spacing SCANLINE_SPACING
                        how far apart to space the CRT scanlines {0.33 - 3.0} [0.79]
  -ssz SCANLINE_SIZE, --scanline-size SCANLINE_SIZE
                        how wide the CRT scanlines are {0.0 - 1.0} [0.75]
  -sb SCANLINE_BLUR, --scanline-blur SCANLINE_BLUR
                        how much blur to apply to the CRT scanline filter {0.0 - 1.0}
                        [0.25]
  -gst GRID_STRENGTH, --grid-strength GRID_STRENGTH
                        the strength of the RGB pixel grid filter {0.0 - 1.0} [1.0]
  -p PADDING, --padding PADDING
                        how much black padding to add around the pixels {0.0 - 1.0} [varies
                        w/ screen type]
  -r ROUNDING, --rounding ROUNDING
                        how much to round the corners of the pixels {0.0 - 1.0} [varies w/
                        screen type]
  -bst BLOOM_STRENGTH, --bloom-strength BLOOM_STRENGTH
                        the amount of bloom to add to the output image {0.0 - 1.0} [1.0]
  -bsz BLOOM_SIZE, --bloom-size BLOOM_SIZE
                        the size of the bloom added to the output image {0.0 - 1.0} [0.5]
To process an image sequence, use the command pixelgreat-sequence:
usage: pixelgreat-sequence [-h] -i IMAGE_IN -o IMAGE_OUT -s PIXEL_SIZE [-os OUTPUT_SCALE]
                           [-t SCREEN_TYPE] [-d DIRECTION] [-a PIXEL_ASPECT] [-npx]
                           [-br BRIGHTEN] [-b BLUR_AMOUNT] [-w WASHOUT]
                           [-sst SCANLINE_STRENGTH] [-ssp SCANLINE_SPACING]
                           [-ssz SCANLINE_SIZE] [-sb SCANLINE_BLUR] [-gst GRID_STRENGTH]
                           [-p PADDING] [-r ROUNDING] [-bst BLOOM_STRENGTH]
                           [-bsz BLOOM_SIZE]

A highly realistic RGB pixel filter

Valid values are shown in {braces}
Default values are shown in [brackets]

For image sequences, the output size is based on the first image in the sequence

options:
  -h, --help            show this help message and exit
  -i IMAGE_IN, --input IMAGE_IN
                        the image to convert (must be part of a sequence)
  -o IMAGE_OUT, --output IMAGE_OUT
                        where to save the converted image sequence, and what filetype to
                        save them as
  -s PIXEL_SIZE, --size PIXEL_SIZE
                        the size of the pixels {3 - no limit}
  -os OUTPUT_SCALE, --output-scale OUTPUT_SCALE
                        How much to scale the output size by {no limits, 1.0 is no scaling,
                        2.0 is 2x size} [1.0]
  -t SCREEN_TYPE, --type SCREEN_TYPE
                        the type of RGB filter to apply {LCD, CRT_TV, CRT_MONITOR} [LCD]
  -d DIRECTION, --direction DIRECTION
                        the direction of the RGB filter {V, H} [varies w/ screen type]
  -a PIXEL_ASPECT, --aspect PIXEL_ASPECT
                        the aspect ratio of the pixels, width / height {0.33 - 3.0} [1.0]
  -npx, --no-pixelate   if given, the image will not be pixelated, but the other filters
                        will still be applied
  -br BRIGHTEN, --brighten BRIGHTEN
                        how much to brighten the source image {0.0 - 1.0} [1.0]
  -b BLUR_AMOUNT, --blur BLUR_AMOUNT
                        how much to blur the source image {0.0 - 1.0} [varies w/ screen
                        type]
  -w WASHOUT, --washout WASHOUT
                        how much to brighten dark pixels {0.0 - 1.0} [varies w/ screen
                        type]
  -sst SCANLINE_STRENGTH, --scanline-strength SCANLINE_STRENGTH
                        the strength of the CRT scanline filter {0.0 - 1.0} [varies w/
                        screen type]
  -ssp SCANLINE_SPACING, --scanline-spacing SCANLINE_SPACING
                        how far apart to space the CRT scanlines {0.33 - 3.0} [0.79]
  -ssz SCANLINE_SIZE, --scanline-size SCANLINE_SIZE
                        how wide the CRT scanlines are {0.0 - 1.0} [0.75]
  -sb SCANLINE_BLUR, --scanline-blur SCANLINE_BLUR
                        how much blur to apply to the CRT scanline filter {0.0 - 1.0}
                        [0.25]
  -gst GRID_STRENGTH, --grid-strength GRID_STRENGTH
                        the strength of the RGB pixel grid filter {0.0 - 1.0} [1.0]
  -p PADDING, --padding PADDING
                        how much black padding to add around the pixels {0.0 - 1.0} [varies
                        w/ screen type]
  -r ROUNDING, --rounding ROUNDING
                        how much to round the corners of the pixels {0.0 - 1.0} [varies w/
                        screen type]
  -bst BLOOM_STRENGTH, --bloom-strength BLOOM_STRENGTH
                        the amount of bloom to add to the output image {0.0 - 1.0} [1.0]
  -bsz BLOOM_SIZE, --bloom-size BLOOM_SIZE
                        the size of the bloom added to the output image {0.0 - 1.0} [0.5]
Usage In Custom Code
You can also import the module into your project.
Here is a short example script that opens a single image, applies the default settings at 4x scale, and saves the result:
from PIL import Image
import pixelgreat as pg

# Open the image
image_in = Image.open("image.png")

# Call a single-use command to convert the image (slow)
image_out = pg.pixelgreat(
    image=image_in,
    pixel_size=20,
    output_scale=4
)

# Save the image
image_out.save("pixelated.png")

# Close the images
image_in.close()
image_out.close()
If you want to process multiple images using the same settings and output size each time, make a reusable object, like so:
from PIL import Image
import pixelgreat as pg
import os

image_names = ["image1.png", "image2.png", "image3.png"]

# Get the size of the first image
first_image = Image.open(image_names[0])
first_image_size = first_image.size
first_image.close()

# Scale it up by 4x to get the output size
output_size = (
    round(first_image_size[0] * 4),
    round(first_image_size[1] * 4),
)

# Make the re-usable converter object just once (slow)
converter = pg.Pixelgreat(
    output_size=output_size,
    pixel_size=20
)

# Loop through the images
for image_name in image_names:
    # Open image
    image_in = Image.open(image_name)

    # Convert the image with the reusable converter (fast)
    image_out = converter.apply(image_in)

    # Get new image filename
    main_name, ext = os.path.splitext(image_name)
    output_name = f"{main_name}_pixelated{ext}"

    # Save the image
    image_out.save(output_name)

    # Close the images
    image_in.close()
    image_out.close()
Full Documentation
Here are the full definitions for the main class Pixelgreat and the main function pixelgreat:
pixelgreat.Pixelgreat.__init__()
Creates a reusable pixelgreat.Pixelgreat object
Returns: A pixelgreat.Pixelgreat object
output_size[required]- The size of the final output
- A tuple, (width, height)
- Each dimension must be at least
3pixels
pixel_size[required]- The approximate size of a single pixel
- Must be at least
3pixels
screen_type[optional]- The screen type, can be:
pixelgreat.ScreenType.LCDpixelgreat.ScreenType.CRT_TVpixelgreat.ScreenType.CRT_MONITOR
- The screen type, can be:
direction[optional]- The direction of the pixels, can be:
pixelgreat.Direction.VERTICALpixelgreat.Direction.HORIZONTAL
- The direction of the pixels, can be:
pixel_aspect[optional]- The aspect ratio of the pixels (width / height)
- Must be between
0.33and3.0
pixelate[optional]- If the image should be pixelated before applying the filters
- A boolean value
brighten[optional]- How much to brighten the image (before processing)
- Must be between
0.0and1.0 0disables the brightening effect
blur[optional]- How much to blur the image (after pixelation, before applying the filter)
- Must be between
0.0and1.0 0disables the blur effect
washout[optional]- How much light to add to dark pixels
- Must be between
0.0and1.0 0disables thw washout effect
scanline_strength[optional]- How dark the miniature scanlines are
- Must be between
0.0and1.0 0disables the scanline effect
scanline_spacing[optional]- How far apart the scanlines are
- Must be between
0.33and3.0 1should have approximately 1 scanline per pixel
scanline_size[optional]- How thick the scanlines are
- Must be between
0.0and1.0 0disables the scanline effect
scanline_blur[optional]- How much to blur the scanlines
- Must be between
0.0and1.0 0disables the scanline blur, making the lines have hard edges
grid_strength[optional]- How strongly to apply the RGB pixel grid filter
- Must be between
0.0and1.0 0disables the RGB pixel effect
pixel_padding[optional]- How much black space is between pixel elements
- Must be between
0.0and1.0 0disables the padding, giving plain RGB stripes
rounding[optional]- How much to round the corners of the pixel elements
- Only affects the LCD and CRT_TV filters
- Must be between
0.0and1.0
bloom_strength[optional]- How much bloom to add to the final image
- Must be between
0.0and1.0 0disables the bloom effect
bloom_size[optional]- How large to make the bloom added to the final image
- Must be between
0.0and1.0 0disables the bloom effect
color_mode[optional]- The PIL color mode to use
- Must have at least 1 red channel, 1 green channel, and 1 blue channel
pixelgreat.Pixelgreat.apply()
Applies the specified effects to an image
Returns: A PIL.Image object
image[required]- The image to convert
- Must be a
PIL.Imageobject
pixelgreat.Pixelgreat.get_grid_filter()
Returns the filter image for the RGB pixel grid
Returns: A PIL.Image object
adjusted[optional]- If the returned filter should be adjusted by
grid_strengthor not
- If the returned filter should be adjusted by
pixelgreat.Pixelgreat.get_grid_filter_tile()
Returns the tile used to build the filter image for the RGB pixel grid
Returns: A PIL.Image object
- This method takes no arguments
pixelgreat.Pixelgreat.get_scanline_filter()
Returns the filter image used for the scanlines
Returns: A PIL.Image object
adjusted[optional]- If the returned filter should be adjusted by
scanline_strengthor not
- If the returned filter should be adjusted by
pixelgreat.pixelgreat()
Applies effects to a single image
Returns: A PIL.Image object
image[required]- The image to convert
- Each dimension must be at least
3pixels
pixel_size[required]- The approximate size of a single pixel
- Must be at least
3pixels
output_scale[optional]- How much to scale the output by, relative to the source image size
screen_type[optional]- The screen type, can be:
pixelgreat.ScreenType.LCDpixelgreat.ScreenType.CRT_TVpixelgreat.ScreenType.CRT_MONITOR
- The screen type, can be:
direction[optional]- The direction of the pixels, can be:
pixelgreat.Direction.VERTICALpixelgreat.Direction.HORIZONTAL
- The direction of the pixels, can be:
pixel_aspect[optional]- The aspect ratio of the pixels (width / height)
- Must be between
0.33and3.0
pixelate[optional]- If the image should be pixelated before applying the filters
- A boolean value
brighten[optional]- How much to brighten the image (before processing)
- Must be between
0.0and1.0 0disables the brightening effect
blur[optional]- How much to blur the image (after pixelation, before applying the filter)
- Must be between
0.0and1.0 0disables the blur effect
washout[optional]- How much light to add to dark pixels
- Must be between
0.0and1.0 0disables thw washout effect
scanline_strength[optional]- How dark the miniature scanlines are
- Must be between
0.0and1.0 0disables the scanline effect
scanline_spacing[optional]- How far apart the scanlines are
- Must be between
0.33and3.0 1should have approximately 1 scanline per pixel
scanline_size[optional]- How thick the scanlines are
- Must be between
0.0and1.0 0disables the scanline effect
scanline_blur[optional]- How much to blur the scanlines
- Must be between
0.0and1.0 0disables the scanline blur, making the lines have hard edges
grid_strength[optional]- How strongly to apply the RGB pixel grid filter
- Must be between
0.0and1.0 0disables the RGB pixel effect
pixel_padding[optional]- How much black space is between pixel elements
- Must be between
0.0and1.0 0disables the padding, giving plain RGB stripes
rounding[optional]- How much to round the corners of the pixel elements
- Only affects the LCD and CRT_TV filters
- Must be between
0.0and1.0
bloom_strength[optional]- How much bloom to add to the final image
- Must be between
0.0and1.0 0disables the bloom effect
bloom_size[optional]- How large to make the bloom added to the final image
- Must be between
0.0and1.0 0disables the bloom effect
Release history Release notifications | RSS feed


Download files
Download the file for your platform. If you're not sure which to choose, learn more about installing packages.
Source Distribution
Built Distribution
Filter files by name, interpreter, ABI, and platform.
If you're not sure about the file name format, learn more about wheel file names.
Copy a direct link to the current filters
File details
Details for the file pixelgreat-1.3.2.tar.gz.
File metadata
- Download URL: pixelgreat-1.3.2.tar.gz
- Upload date:
- Size: 57.8 kB
- Tags: Source
- Uploaded using Trusted Publishing? No
- Uploaded via: twine/4.0.2 CPython/3.10.13
File hashes
| Algorithm | Hash digest | |
|---|---|---|
| SHA256 |
8ea227302795382cdf65430b95dfb93aeb4e112dcb900181de2561dcd5780d35
|
|
| MD5 |
31edf730d78e941e7093d18efd855cd6
|
|
| BLAKE2b-256 |
be2a1d4c50aec6dd8ff4c27277e74c49135071a66a3b87c383aa14eeb1579b23
|
File details
Details for the file pixelgreat-1.3.2-py3-none-any.whl.
File metadata
- Download URL: pixelgreat-1.3.2-py3-none-any.whl
- Upload date:
- Size: 42.2 kB
- Tags: Python 3
- Uploaded using Trusted Publishing? No
- Uploaded via: twine/4.0.2 CPython/3.10.13
File hashes
| Algorithm | Hash digest | |
|---|---|---|
| SHA256 |
049d2cdb58533903357aadfd418ae48c18b98f8906923dd3f2d2c58e0c310422
|
|
| MD5 |
e1994513978e7e7d90900b6cc0930263
|
|
| BLAKE2b-256 |
cbcb1e70922f8988faa3ac0bc469b37651335a04907149ce2d244051fbb88722
|


