
PixelOE: Detail-Oriented Pixelization based on Contrast-Aware Outline Expansion.
Create stunning pixel art from high-resolution images without AI or complex networks.



PixelOE is a Python library that generates high-quality pixel art from standard images using a novel, contrast-aware approach. This method focuses on preserving crucial visual details by first expanding outlines of key features, then applying an intelligent downscaling to the target resolution.
Key Features:
- No AI/NN Required: Utilizes classical image processing methods for efficient and predictable results.
- Detail-Oriented: Emphasizes preservation of fine details and sharp edges.
- Contrast-Aware: Adapts downsampling based on local image contrast.
- Outline Expansion: Broadens important features before downscaling to prevent loss of detail.
- Flexible Downscale Modes: Offers various downsampling methods for different styles (center, contrast, k-centroid, bicubic, nearest).
- Color Palette Optimization: Option to quantize color palettes for a classic pixel art aesthetic.
- Fast Pure Pytorch implementation Achieving over 180img/sec (bs1) on RTX4090 with 1920x1080 input and 480x270 output
- GPU Free: All the core logic can be used without GPU.
- Slang Compute-Shader Backend: The whole pipeline is also implemented as Slang compute kernels (CUDA / Vulkan / D3D12 / native CPU). It gives the same results as the torch pipeline and is 5-10x faster on GPU and ~3x faster on CPU.
pixelize()picks the fastest backend that works on your machine automatically.
Usage
ComfyUI

We provide ComfyUI Custom Node implementation in this repository directly, you just need to clone this repo into the custom_node directory and it will work!
cd custom_nodes
git clone https://github.com/KohakuBlueleaf/PixelOE
There are 3 nodes are provided in this extensions:
- PixelOE: The pixelization Nodes
- OutlineExpansion: Only utilize the OutlineExpansion algorithm
- PreResize: Resize based on target pixel image resolution and each pixel's size.
Installation
To utilize this package in your code or utilize its CLI implementation, you need to install it with pip first:
pip install pixeloe
This also installs slangpy (the Slang backend) on Windows x64, Linux x64/arm64 and macOS 26+ on Apple Silicon. On other platforms PixelOE runs the torch pipeline.
Command Line Interface (CLI)
Note: CLI in PixelOE is currently using legacy API which will be deprecated in near future.
The pixeloe package provides two primary commands:
pixeloe.pixelize: Full pixelization processpixeloe.outline: Outline expansion
To view command usage, use the --help flag:
pixeloe.pixelize --help
usage: pixeloe.pixelize [-h] [--output_img OUTPUT_IMG] [--mode {center,contrast,k-centroid,bicubic,nearest}] [--target_size TARGET_SIZE]
                        [--patch_size PATCH_SIZE] [--thickness THICKNESS] [--no_color_matching] [--contrast CONTRAST]
                        [--saturation SATURATION] [--colors COLORS] [--no_upscale] [--no_downscale]
                        input_img

positional arguments:
  input_img

options:
  -h, --help            show this help message and exit
  --output_img OUTPUT_IMG, -O OUTPUT_IMG
  --mode {center,contrast,k-centroid,bicubic,nearest}, -M {center,contrast,k-centroid,bicubic,nearest}
  --target_size TARGET_SIZE, -S TARGET_SIZE
  --patch_size PATCH_SIZE, -P PATCH_SIZE
  --thickness THICKNESS, -T THICKNESS
  --no_color_matching
  --contrast CONTRAST
  --saturation SATURATION
  --colors COLORS
  --no_upscale
  --no_downscale
Example:
pixeloe.pixelize img/test.webp --output_img img/test2.webp --target_size 256 --patch_size 8
Gradio

pip install -r requirements-gradio.txt
Then run the demo:
python ./client/demo-gr.py
After startup, the app should be available at http://localhost:7860
With Standalone Window (Desktop app):
pip install -r requirements-standalone.txt # With standalone window
Note that the standalone window may have additional requirements to run. For example, on Linux, you must have either QT or GTK with Python extensions installed in order to use pywebview.
Python API
You can integrate PixelOE directly into your Python/Pytorch projects:
legacy API (numpy/cv2 based, slow)
import cv2
from pixeloe.pixelize import pixelize

img = cv2.imread("img/test.webp")
img = pixelize(img, target_size=256, patch_size=8)
cv2.imwrite("img/test2.webp", img)
torch API (Fast, GPU supported)
import torch
from PIL import Image

from pixeloe.torch.pixelize import pixelize
from pixeloe.torch.utils import to_numpy, pre_resize

img = Image.open("img/snow-leopard.webp")
img = pre_resize(img, target_size=256, patch_size=4).cuda().half()
result = pixelize(img, pixel_size=4, thickness=3)
result_img = Image.fromarray(to_numpy(result)[0])
result_img.save("img/snow-leopard-pixel.webp")
Backend selection (torch API): pixelize() runs on the fastest Slang backend that works for the input tensor's device, and falls back to the torch pipeline otherwise. To choose one explicitly, pass backend= or set the PIXELOE_BACKEND environment variable:
result = pixelize(img, pixel_size=4, thickness=3)                   # "auto"
result = pixelize(img, pixel_size=4, thickness=3, backend="torch")  # torch pipeline
result = pixelize(img, pixel_size=4, thickness=3, backend="vulkan") # cuda / vulkan / d3d12 / cpu
Slang API (backend contexts, extra options such as sliding-window outline statistics):
from pixeloe.slang import pixelize, get_context

result = pixelize(img, pixel_size=4, thickness=3, context=get_context("cuda"))
result = pixelize(img, pixel_size=4, thickness=3, local_stats="sliding")
Slang CLI:
pixeloe.slang img/snow-leopard.webp out.png --backend cuda --target-size 256 --pixel-size 4
Example
Outline Expansion
| Original | Expanded |
|---|---|
 |
 |
With this outline expansion method, you can obtain descent pixelization through some naive downsampling method:
| Expanded | Dowsampled |
|---|---|
 |
 |
Pixelization


Use outline expansion to improve existing method
Use the outline expansion method can improve lot of existing pixelization method. Even the Neural Network based method can also be improved:
Here is the example of using outline expansion to improve "Make Your Own Sprites: Aliasing-Aware and Cell-Controllable Pixelization"(SIGGRAPH Asia 2022)

Algorithms Implemented in This Project
- Contrast-Awared Outline Expansion
- Contrast-Awared Down Sampling
- Deterministic K-Means with image-specialized initial centroids
- Weighed/Repeat K-Means for smoother results
How It Works
The PixelOE algorithm has two key stages:
1. Contrast-Aware Outline Expansion:
This step is designed to make sure that fine details and high-contrast edges will survive after the downscaling step. Here is the process:
-
Weight Map Generation:
- The input image is converted to grayscale.
- Local median brightness is calculated.
- Local max and min brightness values within each patch are found.
- "Bright" and "dark" distances are calculated using local max/min and median.
- Two weights are combined:
- The first weight is prioritize brighter details in darker median area
- The second weight is based on the distance between the brighter/darker details.
- The combined weight is normalized to 0-1.
-
Selective Morphological Operations:
- The input image is eroded to shrink bright regions
- The input image is dilated to expand bright regions
- The eroded and dilated results are blended together based on the generated weight map.
- Morphological closing and opening are then applied to clean up edge artifacts.
| Dilation | Erosion |
|---|---|
 |
 |
| Blended | Weight |
|---|---|
|
 |
2. Contrast-Based Downsampling:
This method reduces the image resolution while maintaining important luminance details.
- LAB Color Space Conversion: The image is converted to the LAB color space to process luminance (L) and color (A, B) channels separately.
- Luminance Channel (L) Processing:
- A sliding window with
find_pixelfunction is used, and each patch is processed independently. - Inside each patch, the center pixel is selected based on its relationship with the median, mean, min, max value within the patch.
- If a patch has skewed distribution on low value, the minimum value will be selected to keep the dark detail and vice versa.
- Otherwise, keep the center value.
- A sliding window with
- Color Channel (A and B) Processing: A simple median filter is applied to the A and B channels
- Convert back to RGB The processed LAB channels are combined and converted back to the RGB color space.
By adaptively selecting the most representative pixel for each local area, the downscaling method preserves important luminance details and edges to maintain the artistic style in pixel art.
Optional Enhancements
- Color Palette Optimization: You can reduce the number of colors using k-means clustering or maxcover method for a more classic pixel art look.
- Color Matching: Optionally transfer the color palette from the original image.
Slang Backend
pixeloe.slang implements the full pipeline as Slang compute kernels, written against the torch pipeline and tested against it. It covers outline expansion, every downscale mode, color matching, sharpening, k-means quantization and ordered / error-diffusion dithering. The same shader source runs on:
| backend | device | notes |
|---|---|---|
cuda |
NVIDIA GPU | shares torch's CUDA context and stream, zero-copy; compiles through NVRTC (needs the CUDA toolkit) |
vulkan / d3d12 |
any GPU | CUDA-shared buffers on NVIDIA; other adapters (e.g. Intel Arc: "d3d12:B50") go through host staging |
cpu |
CPU | Slang-generated C++ kernels on an OpenMP thread pool (Windows, needs MSVC) |
In "auto" mode, CUDA tensors try cuda → vulkan → d3d12 and CPU tensors try cpu. Each backend is checked once per process with a small test image. If none works, the torch pipeline runs.
How it matches the torch pipeline:
- Order-independent integer (fixed-point) sums make k-means and k-centroid deterministic on every backend.
- Exact median selection, and the torch pipeline's padding and rounding behavior.
- Differences are limited to floating-point rounding, plus k-centroid blocks whose two clusters are the same size. There the Slang backend deterministically picks the first cluster.
Speed-up over the fastest torch variant (fp16 / fp32, eager / torch.compile) on an RTX 4090, over 5 sizes × 18 settings:
| Slang backend | median | range |
|---|---|---|
| cuda | 8.5x | 2.2x - 20.6x |
| vulkan | 7.0x | 2.2x - 20.9x |
| d3d12 | 6.6x | 1.7x - 18.2x |
| cpu (vs torch CPU) | 3.0x | 1.8x - 6.2x |

Full benchmark scripts and figures (scaling, memory, CPU thread count, other GPUs) are in benchmarks/slang_vs_torch.
Acknowledgement
- Astropulse
- k-centroid downscaling algorithm.
- Claude 3 opus:
- Convert some matlab code to python.
- Gemini 2.0 Flash
- Refine this README
Citation
@misc{PixelOE,
    title={Detail-Oriented Pixelization based on Contrast-Aware Outline Expansion.},
    author={Shin-Ying Yeh},
    year={2024},
    month={March},
    howpublished=\url{https://github.com/KohakuBlueleaf/PixelOE},
}
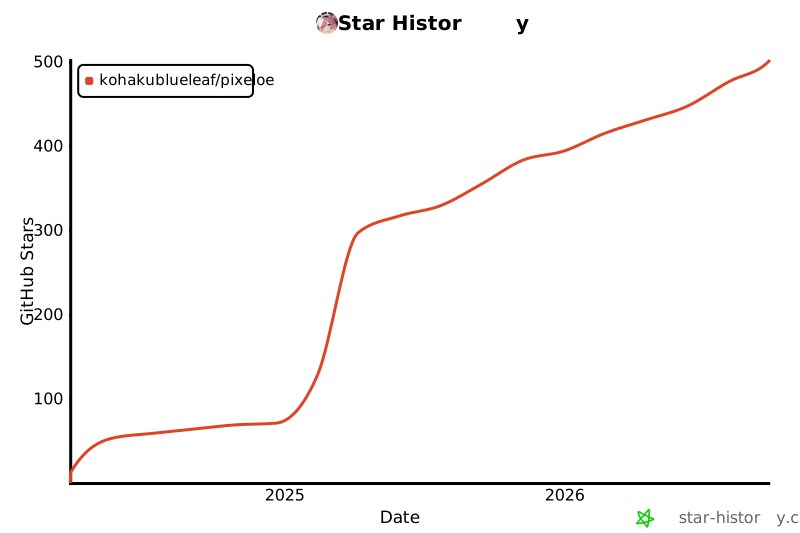
Star History
1 maintainer

Release files for pixeloe 1.0.0
For a detailed explanation of source distributions (sdists) and built distributions (wheels), please see the package formats documentation.
Source distribution (sdist)
| File | Size | Uploaded | |
|---|---|---|---|
| pixeloe-1.0.0.tar.gz | 85.9 kB | Details |
Built distribution (wheel)
| File | Interpreter | ABI | Platform | Reset |
|---|---|---|---|---|
| pixeloe-1.0.0-py3-none-any.whl | Python 3 | none | any | Details |
Total release size: 190.8 kB
Release files / pixeloe-1.0.0.tar.gz
| Download URL | pixeloe-1.0.0.tar.gz |
|---|---|
| Size | 85.9 kB |
| Tags | Source |
|
SHA-256 checksum How to use checksums |
93ff10ebd4e83024d8d11b25df5e3c673a7cbb60982c3fab0bd135c9bfae3872
|
|
BLAKE2b-256 checksum How to use checksums |
8c1eff5997699c2ee8085dc337b2ee48865a4da9840af7d332246e7941a30327
|
| Upload date | |
|
Uploaded using Trusted Publishing? What is trusted publishing? |
Yes |
| Uploaded via |
twine/7.0.0 CPython/3.13.14
|
Provenance
Provenance describes where a file came from. On PyPI, provenance is shared via attestations, which provide a verifiable record of the build or publishing details. View details, limitations and caveats.


PyPI Publish Attestation
PyPI verified that this artifact, at this checksum, originated from the publisher listed below.
Signed by GitHub Actions, verified by PyPI on Sep 24, 2026.
Transparency logRelease files / pixeloe-1.0.0-py3-none-any.whl
| Download URL | pixeloe-1.0.0-py3-none-any.whl |
|---|---|
| Size | 104.9 kB |
| Tags | Python 3 |
|
SHA-256 checksum How to use checksums |
6bdf16a41be71a4fdee182d6280ef61ea90af7da9a431909b81ad8540d239a78
|
|
BLAKE2b-256 checksum How to use checksums |
204dfdb0ccfdf93ee25aa4d5c1006b317d354e1ddec813048ba0e17387323a76
|
| Upload date | |
|
Uploaded using Trusted Publishing? What is trusted publishing? |
Yes |
| Uploaded via |
twine/7.0.0 CPython/3.13.14
|
Provenance
Provenance describes where a file came from. On PyPI, provenance is shared via attestations, which provide a verifiable record of the build or publishing details. View details, limitations and caveats.
PyPI Publish Attestation
PyPI verified that this artifact, at this checksum, originated from the publisher listed below.
Signed by GitHub Actions, verified by PyPI on Sep 24, 2026.
Transparency log













