
pwncat
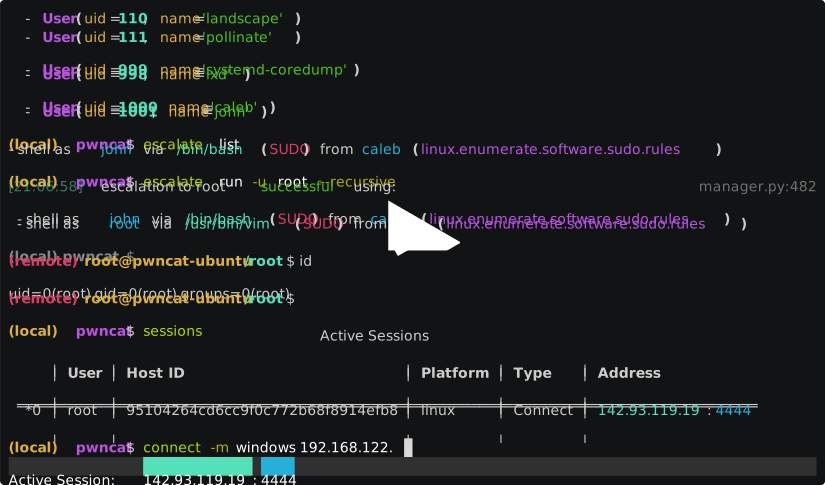
pwncat is a post-exploitation platform for Linux targets. It started out as a
wrapper around basic bind and reverse shells and has grown from there. It
streamlines common red team operations while staging code from your attacker
machine, not the target.
This project ships two entry points, both installed from PyPI under the
package name pwncat-mcp:
pwncat-cs— the classic interactive post-exploitation platformpwncat-mcp— an MCP server exposing the pwncat API (40+ tools) to AI agents: session management, file operations, command execution, enumeration, privilege escalation, implants and config.
pwncat used to only support Linux, but there has been a lot of work recently to support multiple platforms. Currently, there is alpha support for Windows targets. Please see the latest documentation for details on how to use pwncat with a Windows target.
pwncat intercepts the raw communication with a remote shell and allows the user to perform automated actions on the remote host including enumeration, implant installation and even privilege escalation.
After receiving a connection, pwncat will setup some common configurations for working with remote shells.
- Disable history in the remote shell
- Normalize shell prompt
- Locate useful binaries (using
which) - Attempt to spawn a pseudo-terminal (pty) for a full interactive session
pwncat knows how to spawn pty's with a few different methods and will
cross-reference the methods with the executables previously enumerated. After
spawning a pty, it will setup the controlling terminal in raw mode, so you can
interact in a similar fashion to ssh.
pwncat will also synchronize the remote pty settings (such as rows, columns,
TERM environment variable) with your local settings to ensure the shell
behaves correctly with interactive applications such as vim or nano.
John Hammond and I presented pwncat at GRIMMCon. Our presentation, which
can be found on YouTube here.
This video demonstrates an early version of the API and interface. Please
refer to the documentation for up to date usage and API documentation!
pwncat documentation is being built out on Read the Docs. Head there for the latest usage and development documentation!
pwncat requires Python 3.9+ on Linux
Installation
pwncat only depends on a working Python development environment running on Linux.
In order to install some of the packages required with pip, you will likely need
your distribution's "Python Development" package. On Debian based systems,
this is python-dev. For Arch, the development files are shipped with the
main Python repository. For Enterprise Linux, the package is named
python-devel.
pwncat is pushed to PyPI under the name pwncat-mcp, and can be installed with
pip like so:
pip install pwncat-mcp
This installs both the interactive platform and the MCP server:
pwncat-cs   # interactive post-exploitation platform
pwncat-mcp  # MCP server (stdio)
However, it is recommended to install pwncat from a virtual environment.
python3 -m venv pwncat-env
source pwncat-env/bin/activate
pip install pwncat-mcp
For a development environment, pwncat usage Python Poetry. You can clone the
repository locally and use poetry to setup a development environment.
# Setup pwncat inside a poetry-managed virtual environment
git clone git@github.com:Vip3r-MC/pwncat-mcp.git
cd pwncat-mcp
poetry install

# Enter the virtual environment
poetry shell
MCP Server
The pwncat-mcp entry point runs the MCP server over stdio. Use it with
any MCP client (Claude Code, Cursor, etc.) configured to spawn:
pwncat-mcp
It can also be run directly with python -m pwncat_mcp.server. The server
maintains a singleton Manager shared across all tools, so state carries
between calls. Typical agent flow:
pwncat_connect— establish a bind/reverse/ssh sessionpwncat_enumerate/pwncat_escalation_paths/pwncat_run_module— reconpwncat_upload/pwncat_download/pwncat_run— operate on the targetpwncat_install_implant/pwncat_trigger_implant— persistence
A ready-made Claude Desktop / Claude Code config lives in data/pwncatrc.
See pwncat_mcp/server.py for the full tool list (each tool's JSON schema is
exposed via the MCP tools/list handshake).
Shared database (pwncat-cs + pwncat-mcp)
Both the CLI and the MCP server talk to ZODB, which is single-writer per file —
two processes on file://db/pwncat lock each other out. To let the operator and
the agent share one DB, serve it with a ZEO server (every pwncat process then
connects as a ZEO client):
runzeo -a 127.0.0.1:9100 -f db/pwncat
data/pwncatrc already points at zeo://127.0.0.1:9100. Restart your CLI
and MCP after starting the ZEO server. What's shared: targets, facts and
implants (persisted state); live sessions stay per-process.
Windows Support
pwncat now supports connections from Windows targets starting at v0.4.0a1. The Windows
platform utilizes a .Net-based C2 library which is loaded automatically. Windows
targets should connect with either a cmd.exe or powershell.exe shell, and
pwncat will take care of the rest.
The libraries implementing the C2 are implemented at pwncat-windows-c2.
The DLLs for the C2 will be automatically downloaded from the targeted release
for you. If you do not have internet connectivity on your target machine,
you can tell pwncat to pre-stage the DLLs using the --download-plugins
argument. If you are running a release version of pwncat, you can also download
a tarball of all built-in plugins from the releases page.
The plugins are stored by default in ~/.local/share/pwncat, however this is
configurable with the plugin_path configuration. If you download the packaged
set of plugins from the releases page, you should extract it to the path pointed
to by plugin_path.
Aside from the main C2 DLLs, other plugins may also be available. Currently, the only provided default plugins are the C2 and an implementation of BadPotato. pwncat can reflectively load .Net binaries to be used a plugins for the C2. For more information on Windows C2 plugins, please see the documentation.
Modules
Recently, the architecture of the pwncat framework was redesigned to
incorporate a generic "module" structure. All functionality is now
implemented as modules. This includes enumeration, persistence and
privilege escalation. Interacting with modules is similar to most other
post-exploitation platforms. You can utilize the familiar run, search
and info commands and enter module contexts with the use command.
Refer to the documentation for more information.
BlackArch Packaging
Installation on BlackArch is as simple as:
pacman -Syu pwncat-caleb
Connecting to a Victim
The command line parameters for pwncat attempt to be flexible and accept a variety of common connection syntax. Specifically, it will try to accept common netcat and ssh like syntax. The following are all valid:
# Connect to a bind shell
pwncat-cs connect://10.10.10.10:4444
pwncat-cs 10.10.10.10:4444
pwncat-cs 10.10.10.10 4444
# Listen for reverse shell
pwncat-cs bind://0.0.0.0:4444
pwncat-cs 0.0.0.0:4444
pwncat-cs :4444
pwncat-cs -lp 4444
# Connect via ssh
pwncat-cs ssh://user:password@10.10.10.10
pwncat-cs user@10.10.10.10
pwncat-cs user:password@10.10.10.10
pwncat-cs -i id_rsa user@10.10.10.10
# SSH w/ non-standard port
pwncat-cs -p 2222 user@10.10.10.10
pwncat-cs user@10.10.10.10:2222
# Reconnect utilizing installed persistence
#   If reconnection fails and no protocol is specified,
#   SSH is used as a fallback.
pwncat-cs reconnect://user@10.10.10.10
pwncat-cs reconnect://user@c228fc49e515628a0c13bdc4759a12bf
pwncat-cs user@10.10.10.10
pwncat-cs c228fc49e515628a0c13bdc4759a12bf
pwncat-cs 10.10.10.10
By default, pwncat assumes the target platform is Linux. In order to
connect to a Windows reverse or bind shell, you must pass the --platform/-m
argument:
pwncat-cs -m windows 10.10.10.10 4444
pwncat-cs -m windows -lp 4444
For more information on the syntax and argument handling, see the
help information with pwncat-cs --help or visit the documentation.
Docker Image
The recommended installation method is a Python virtual environment. This
provides the easiest day-to-day usage of pwncat. However, there has been
interest in using pwncat from a docker image, so I have provided a
Dockerfile which provides a working pwncat installation. To build the image
use:
docker build -t pwncat .
This will build the pwncat docker image with the tag "pwncat". The working
directory within the container is /work. The entrypoint for the container
is the pwncat binary. It can be used like so:
# Connect to a bind shell at 10.0.0.1:4444
docker run -v "/some/directory":/work -t pwncat 10.0.0.1 4444
In this example, only the files in /some/directory are exposed to the container.
Obviously, for upload/download, the container will only be able to see the files
exposed through any mounted directories.
Features and Functionality
pwncat provides two main features. At it's core, it's goal is to automatically
setup a remote PseudoTerminal (pty) which allows interaction with the remote
host much like a full SSH session. When operating in a pty, you can use common
features of your remote shell such as history, line editing, and graphical
terminal applications.
The other half of pwncat is a framework which utilizes your remote shell to
perform automated enumeration, persistence and privilege escalation tasks. The
local pwncat prompt provides a number of useful features for standard
penetration tests including:
- File upload and download
- Automated privilege escalation enumeration
- Automated privilege escalation execution
- Automated persistence installation/removal
- Automated tracking of modified/created files
pwncatalso offers the ability to revert these remote "tampers" automatically
The underlying framework for interacting with the remote host aims to abstract away the underlying shell and connection method as much as possible, allowing commands and plugins to interact seamlessly with the remote host.
You can learn more about interacting with pwncat and about the underlying framework
in the documentation. If you have an idea for a new privilege escalation method
or persistence method, please take a look at the API documentation specifically.
Pull requests are welcome!
Planned Features
pwncat would like to be come a red team swiss army knife. Hopefully soon, more features will be added.
- More privilege escalation methods (sudo -u#-1 CVE, LXD containers, etc.)
- Persistence methods (bind shell, cronjobs, SSH access, PAM abuse, etc.)
- Aggression methods (spam randomness to terminals, flush firewall, etc.)
- Meme methods (terminal-parrot, cowsay, wall, etc.)
- Network methods (port forward, internet access through host, etc.)
Known Issues
Because pwncat is trying to abstractly interact with any shell with minimal remote system
dependencies, there are some edge cases we have found. Where we find them, we do
everything we can to account for them and hide them from the user. However, some have
slipped through the cracks and been observed in the wild. When this happens, pwncat
will do whatever it can to preserve your terminal, but you may be greeted with some
peculiar output or command failures.
BSD Support
While BSD is a Unix-based kernel, in practice it's userland tools are noticeably
different from their Linux counterparts. Due to this, many of the automated
features of pwncat will not work or outright fail when running against a BSD
based target. I have tried to catch all errors or edge cases, however there are
likely some hiccups which haven't been fully tested against BSD. In any case,
the stabilized shell should function within a BSD environment, but I don't
provide any guarantees.
If I find some time later down the road, I may try to stabilize pwncat on BSD,
but for now my focus is on Linux-based distributions. If you'd like to
contribute to making pwncat behave better on BSD, you are more then welcome to
reach out or just fork the repo. As always, pull requests are welcome!
1 maintainer

Download files
Download the file for your platform. If you're not sure which to choose, learn more about installing packages.
Source Distribution
Built Distribution
Filter files by name, interpreter, ABI, and platform.
If you're not sure about the file name format, learn more about wheel file names.
Copy a direct link to the current filters
File details
Details for the file pwncat_mcp-0.0.3.tar.gz.
File metadata
- Download URL: pwncat_mcp-0.0.3.tar.gz
- Upload date:
- Size: 2.1 MB
- Tags: Source
- Uploaded using Trusted Publishing? Yes
- Uploaded via: twine/7.0.0 CPython/3.13.14
File hashes
| Algorithm | Hash digest | |
|---|---|---|
| SHA256 |
263ccea73c432a8bdead753df0cccdd45d076c8a1205b5df1fdc0c9f1439c2ef
|
|
| MD5 |
17f7cb1e81f7c604bd54b3d2ad3068cb
|
|
| BLAKE2b-256 |
cd658642363855ea08eb1d3e87adf7c978042b89a1ca8b7f1f1ebee49dc744e9
|
Provenance
The following attestation bundles were made for pwncat_mcp-0.0.3.tar.gz:
Publisher:
publish.yml on Vip3r-MC/pwncat-mcp
-
Statement:
-
Statement type:
https://in-toto.io/Statement/v1 -
Predicate type:
https://docs.pypi.org/attestations/publish/v1 -
Subject name:
pwncat_mcp-0.0.3.tar.gz -
Subject digest:
263ccea73c432a8bdead753df0cccdd45d076c8a1205b5df1fdc0c9f1439c2ef - Sigstore transparency entry: 2410907879
- Sigstore integration time:
-
Permalink:
Vip3r-MC/pwncat-mcp@bc53e53554c9e402c527ec56f6376bc29c9034c9 -
Branch / Tag:
refs/tags/v0.0.3 - Owner: https://github.com/Vip3r-MC
-
Access:
public
-
Token Issuer:
https://token.actions.githubusercontent.com -
Runner Environment:
github-hosted -
Publication workflow:
publish.yml@bc53e53554c9e402c527ec56f6376bc29c9034c9 -
Trigger Event:
push
-
Statement type:
File details
Details for the file pwncat_mcp-0.0.3-py3-none-any.whl.
File metadata
- Download URL: pwncat_mcp-0.0.3-py3-none-any.whl
- Upload date:
- Size: 2.4 MB
- Tags: Python 3
- Uploaded using Trusted Publishing? Yes
- Uploaded via: twine/7.0.0 CPython/3.13.14
File hashes
| Algorithm | Hash digest | |
|---|---|---|
| SHA256 |
4d723f2694223b07ab1f058a4dc677eb61dd62101c33520ae8500ede9273ac83
|
|
| MD5 |
e3c0c63378900b3da903c4f64ad00c51
|
|
| BLAKE2b-256 |
9cbf4c951ce49ebd91872e130003181f96490596a7fecab34ce5c2eda28c07f6
|
Provenance
The following attestation bundles were made for pwncat_mcp-0.0.3-py3-none-any.whl:
Publisher:
publish.yml on Vip3r-MC/pwncat-mcp
-
Statement:
-
Statement type:
https://in-toto.io/Statement/v1 -
Predicate type:
https://docs.pypi.org/attestations/publish/v1 -
Subject name:
pwncat_mcp-0.0.3-py3-none-any.whl -
Subject digest:
4d723f2694223b07ab1f058a4dc677eb61dd62101c33520ae8500ede9273ac83 - Sigstore transparency entry: 2410907935
- Sigstore integration time:
-
Permalink:
Vip3r-MC/pwncat-mcp@bc53e53554c9e402c527ec56f6376bc29c9034c9 -
Branch / Tag:
refs/tags/v0.0.3 - Owner: https://github.com/Vip3r-MC
-
Access:
public
-
Token Issuer:
https://token.actions.githubusercontent.com -
Runner Environment:
github-hosted -
Publication workflow:
publish.yml@bc53e53554c9e402c527ec56f6376bc29c9034c9 -
Trigger Event:
push
-
Statement type:







