A Python CLI Nest Thermostat controller and dashborading tool
Project description
Version: v0.0.5
py-nest-thermostat
Python CLI Nest Controller and Reporting Tool.
Build it with me on Twitch: https://www.twitch.tv/datafrittata
Disclaimer: This project is very much work in progress while in version 0 anything can change, anything can break and some parts of the code are probably very ugly. Feel free to test it, contribute (see CONTRIBUTING.md), report bugs
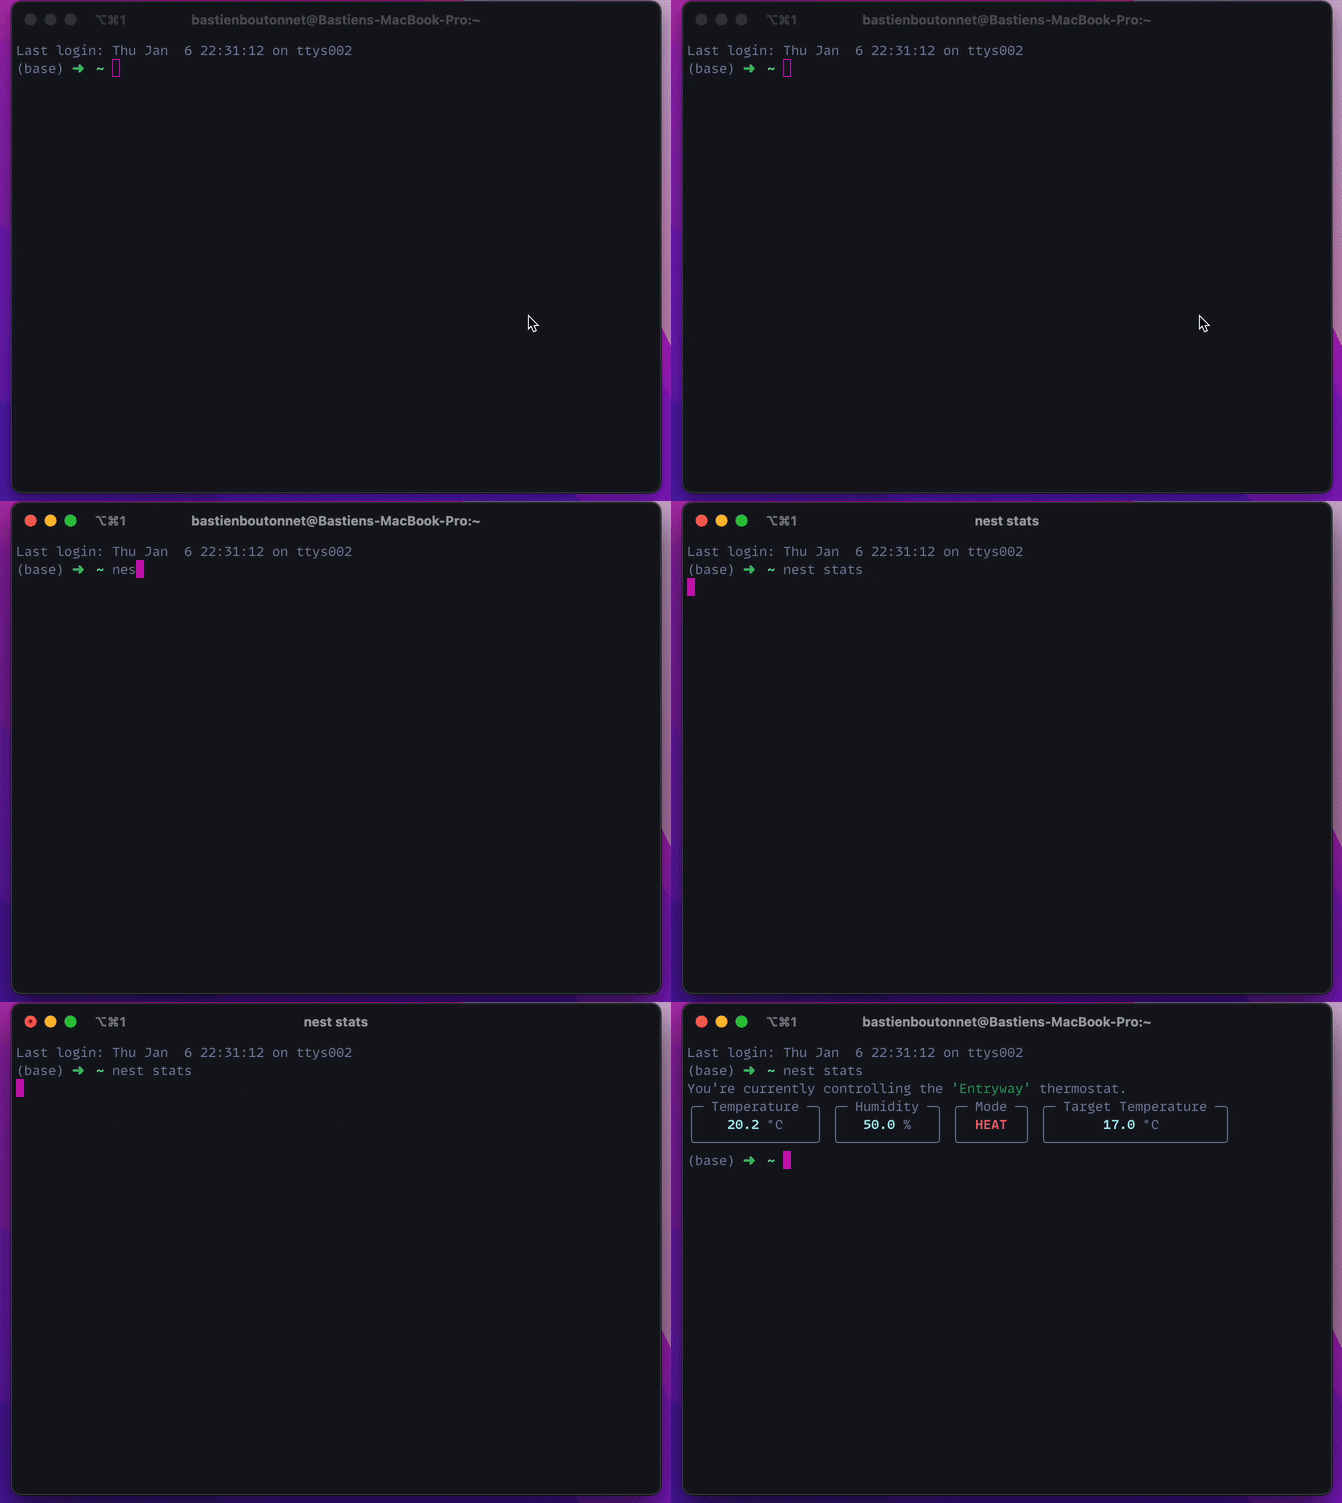
Get device stats:
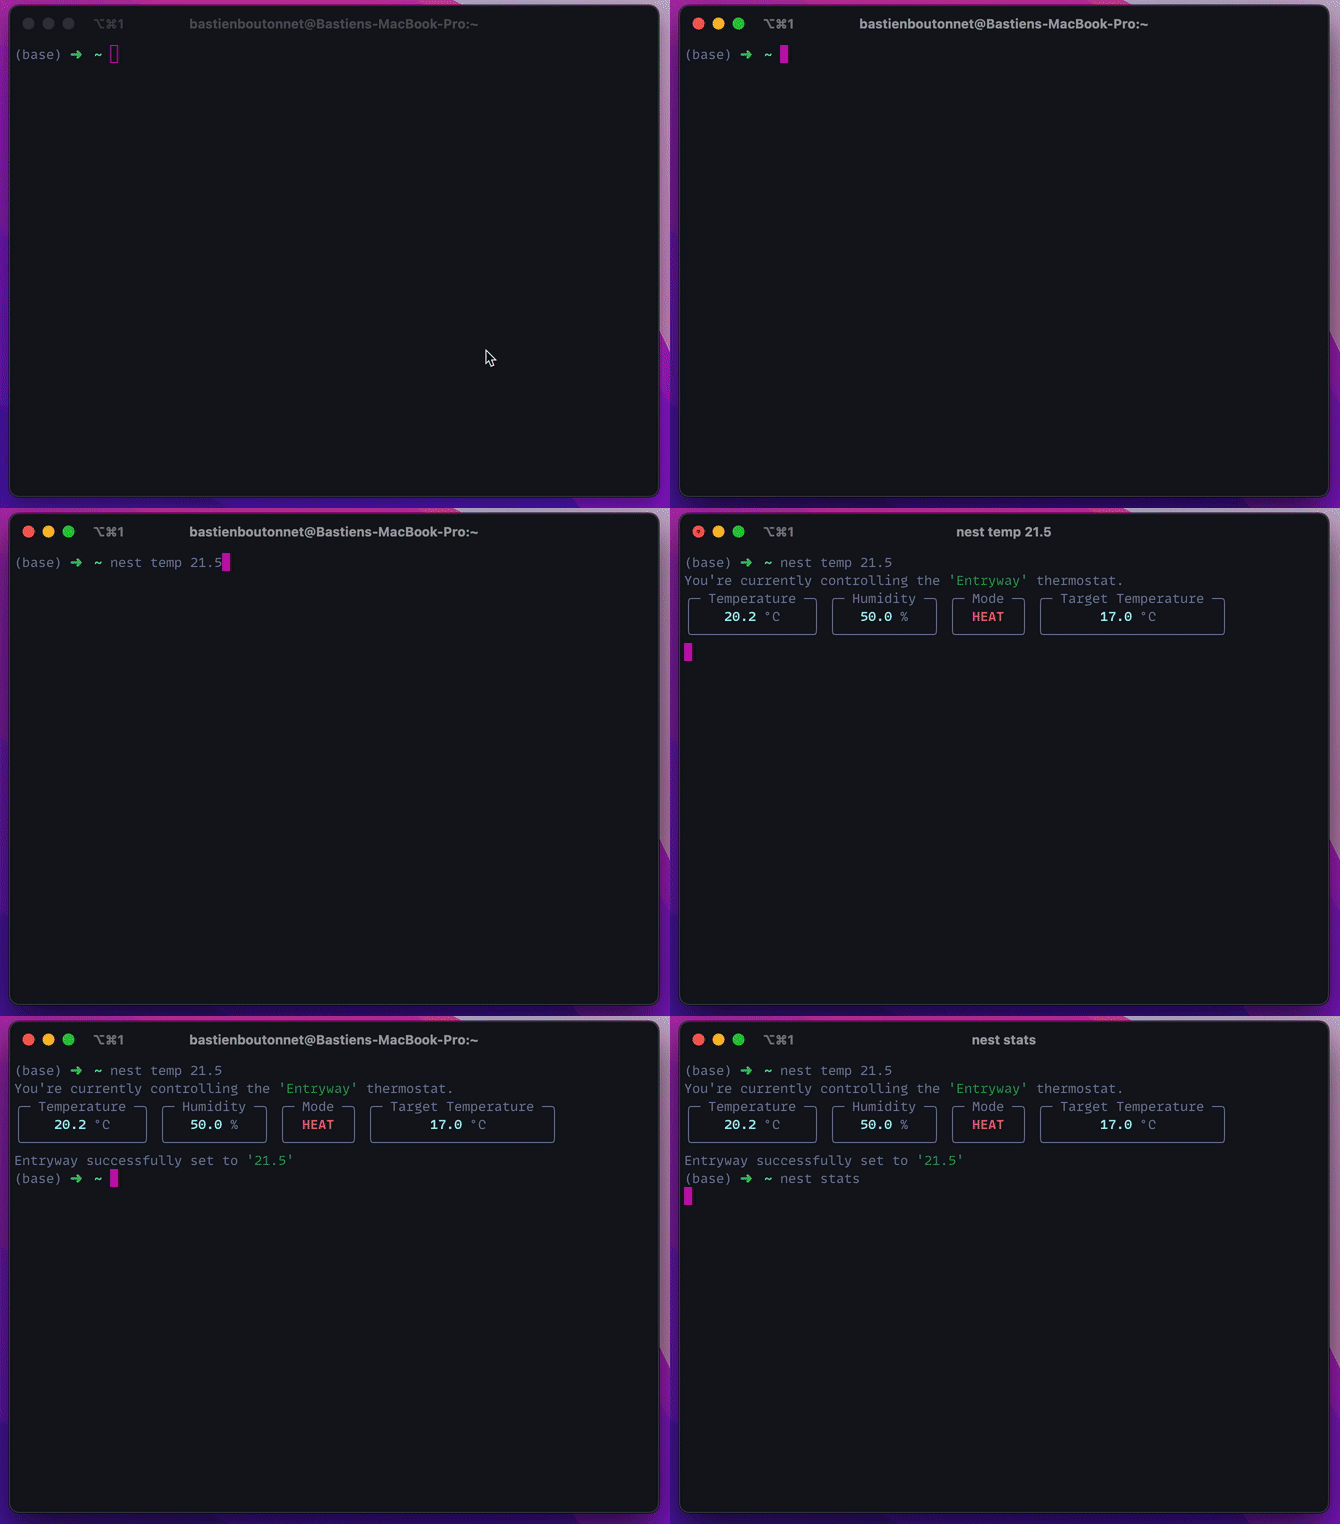
Set Device Temperature:
Features:
- print device stats
- set target temperature
Future Features:
- capture device statistics into a database
- plot device statistics over time
- some ML?
Installation
The tool is intallable from PyPI via pip or pipx. But you must first set up access via Google's Developer console (which currently costs a one time $5 fee and is a bit of a pain).
Set Up Google and Authorization
This part of the process is a real pain, especially if you've never set up Authorization via Google. Luckily Wouter Nieuwerth made a really nice guide with pictures that I encourage you to check out
Google Documentation Links
Google has some pretty extensive documentation:
Once setup, you will be able to access your nest devicesc, and manage your authorizations in the following places:
If you have issues, and neither the step by step guide from Wouter nor the links above help you feel free to open an issue and if I have time I'll try and help out.
Install py-nest-thermostat
If you want to be able to access the tool from anywhere I recomment setting it up via pipx. Pipx will give you access to py-nest globally while keeping it in an isolated python virtual environment. The best of both worlds really!
You can install with pipx like so:
pipx install py-nest-thermostat
Create your credentials file
nest expects your credentials and other handy authentication parameters to be in an file named config.yaml and it should be placed at this location ~/.py-nest-thermostat/. We might implement the possibility to pass a custom location later. If you're too impatient feel free to help out! :)
You can find an example of this file here
If you prefer to use regular pip, follow those steps:
- create a python3 virtual environment (with
venvorvirtualenv--up to you) - activate the virtual environment (
source /path/to/virtual/environment) pip install py-nest-thermostat
Usage
Until I write some more extensive docs, once you have installed the tool use use the CLI --help command
nest --help
Project details
Release history Release notifications | RSS feed
Download files
Download the file for your platform. If you're not sure which to choose, learn more about installing packages.
Source Distribution
Built Distribution
Hashes for py_nest_thermostat-0.0.5-py3-none-any.whl
| Algorithm | Hash digest | |
|---|---|---|
| SHA256 | d1ba6028a633fa9882cfb02133be3449fd6e412ec40159da86244165eddc348e |
|
| MD5 | d3ee5f04d7d75b9a372fb056661ff841 |
|
| BLAKE2b-256 | 81deb39475a5022db1133a584596af46d1127658226858b817d34769bd64ebd2 |


