Python Energy-Participation-Ratio (EPR) package for quantum chip design
Verified details
These details have been verified by PyPIProject links
GitHub Statistics
Maintainers


Project description
Welcome to pyEPR :beers:! (see arXiv:2010.00620)
Automated Python module for the design and quantization of Josephson quantum circuits


What is pyEPR?
pyEPR implements the energy-participation ratio (EPR) method for the design and quantization of superconducting quantum circuits. The EPR framework, introduced in Minev et al., npj Quantum Information (2021) (arXiv:2010.00620), bridges classical electromagnetic simulation and quantum circuit theory:
- Classical EM — simulate the linearized circuit in Ansys HFSS to obtain eigenmode frequencies and field distributions.
- EPR extraction — compute the energy participation ratios $p_{mj}$ of each Josephson junction $j$ in each mode $m$, and the zero-point phase fluctuations $\varphi_{\rm zpf}^{(mj)} = \sqrt{p_{mj},\hbar\omega_m / (2E_J)}$.
- Quantum Hamiltonian — diagonalize $H = \sum_m \omega_m a_m^\dagger a_m - \sum_j E_J [\cos(\hat\varphi_j) - 1 + \hat\varphi_j^2/2]$ numerically to get dressed frequencies and the dispersive-shift matrix $\chi$.
The method works for any number of modes and junctions, handles strongly anharmonic circuits (fluxonium, $\varphi_{\rm zpf} \gtrsim 1$), and requires no manual circuit diagram — only the 3D geometry in HFSS.
Documentation
How to cite
If you use pyEPR in your research, please cite:
-
EPR method paper (primary reference for the method): Z. K. Minev, Z. Leghtas, S. O. Mundhada, L. Christakis, I. M. Pop, M. H. Devoret, Energy-participation quantization of Josephson circuits, npj Quantum Information 7, 131 (2021) · arXiv:2010.00620
-
Software (Zenodo DOI for the specific version):
Use this BibTeX file for both.
Related references:
- Z. K. Minev, Ph.D. Dissertation, Yale University (2018), Chapter 4. (arXiv:1902.10355)
- A. Petrescu, C. T. Hann, Z. K. Minev et al., EPR for very anharmonic circuits. (arXiv:2411.15039)
Who uses pyEPR?
- Yale University, Michel Devoret lab QLab, CT, USA
- Yale University, Rob Schoelkopf lab RSL, CT, USA
- IBM Quantum and IBM's Qiskit Metal
- QUANTIC (QUANTUM INFORMATION CIRCUITS), PARIS — INRIA, ENS, MINES PARISTECH, UPMC, CNRS. Groups of Zaki Leghtas and team. France
- Quantum Circuit Group Benjamin Huard, Ecole Normale Supérieure de Lyon, France
- Emanuel Flurin, CEA Saclay, France
- Ioan Pop group, KIT Physikalisches Institut, Germany
- UC Berkeley, Quantum Nanoelectronics Laboratory, Irfan Siddiqi, CA, USA
- Quantum Circuits, Inc., CT, USA
- Seeqc (spin-out of Hypres) Digital Quantum Computing, USA
- Serge Rosenblum Lab quantum circuits group, Weizmann Institute, Israel
- University of Oxford — Leek Lab, UK
- Britton Plourde Lab, Syracuse University, USA
- Javad Shabani Lab Quantum Materials & Devices, NYU, NY, USA
- UChicago Dave Schuster Lab, USA
- SQC lab — Shay Hacohen-Gourgy, Israel
- Lawrence Berkeley National Lab
- Colorado School of Mines, USA
- IPQC, SJTU, Shanghai, China
- Bhabha Atomic Research Centre, India
- Quantum Computing UK
- Alice&Bob, France
- Centre for Quantum Technologies / Qcrew
- Quantum Device Lab ETHZ — Andreas Wallraff
- Bleximo
- ... and many more! (Please e-mail
zlatko.minev@aya.yale.eduwith updates.)
Contents:
- Start here: Using
pyEPR - Tutorial Notebooks
- Video Tutorials
- Setup and Installation
- HFSS Project Setup for
pyEPR - Troubleshooting
pyEPR - Authors and Contributors

Start here: Using pyEPR
- Install — see Installation and setup below. The fastest path:
pip install pyEPR-quantum. - Tutorials — work through the Jupyter notebook tutorials below. No HFSS licence? Start with Tutorial 6.
- Read the docs — pyepr-docs.readthedocs.io for the API reference and detailed guides.
- Cite
pyEPR— arXiv:2010.00620
Start-up example
The following code illustrates how to perform a complete EPR analysis of a simple two-qubit, one-cavity device in just a few lines. In the HFSS file, first specify the non-linear junction rectangles and variables (see HFSS Project Setup below). All operations in the eigenmode analysis and Hamiltonian computation are fully automated.
import pyEPR as epr

# 1. Connect to Ansys HFSS and load your design
pinfo = epr.ProjectInfo(project_path = r'C:\sim_folder',
                        project_name = r'cavity_with_two_qubits',
                        design_name  = r'Alice_Bob')

# 2a. Specify Josephson junctions (non-linear elements)
pinfo.junctions['jAlice'] = {'Lj_variable':'Lj_alice', 'rect':'rect_alice',
                              'line': 'line_alice', 'Cj_variable':'Cj_alice'}
pinfo.junctions['jBob']   = {'Lj_variable':'Lj_bob',   'rect':'rect_bob',
                              'line': 'line_bob',   'Cj_variable':'Cj_bob'}
pinfo.validate_junction_info()

# 2b. (Optional) Dissipative elements for loss calculation
pinfo.dissipative['dielectrics_bulk']    = ['si_substrate']
pinfo.dissipative['dielectric_surfaces'] = ['interface1', 'interface2']

# 3. Classical EM analysis — extract EPR participation ratios φ_zpf
eprd = epr.DistributedAnalysis(pinfo)
eprd.hfss_report_full_convergence()   # check HFSS convergence
eprd.do_EPR_analysis()                # compute p_mj and φ_zpf for all modes/junctions

# 4. Quantum Hamiltonian analysis — dress frequencies and compute χ matrix
epra = epr.QuantumAnalysis(eprd.data_filename)
epra.analyze_all_variations(cos_trunc=8, fock_trunc=15)

# 5. Report results
swp_variable = 'Lj_alice'
epra.plot_hamiltonian_results(swp_variable=swp_variable)
epra.report_results(swp_variable=swp_variable, numeric=True)
Tutorial Notebooks
The tutorials are Jupyter notebooks in the _tutorial_notebooks/ folder. They build on each other — work through them in order for the best experience.
| # | Title | Requires HFSS? | Topics |
|---|---|---|---|
| 1 | Startup example | Yes | Full end-to-end workflow: connect to HFSS, define junctions, run EPR, get χ matrix |
| 2 | Dielectric loss EPR | Yes | Dielectric energy participation ratios, loss rates, HFSS fields calculator |
| 3 | Circuit QED parameters | No | Josephson junction physics, E_J, E_C, L_J, I_c conversions, transmon model |
| 4 | Parametric sweeps | Yes | All HFSS Optimetrics sweep types: linear, log, file-based |
| 5 | Generic junction potential & fluxonium | No | Exact cosine for fluxonium, custom potentials, asymmetric SQUIDs |
| 6 | EPR without HFSS | No | Purely numerical workflow: supply freqs, Ljs, φ_zpf directly |
No HFSS? Start with Tutorials 3, 5, and 6, which are self-contained and require only
pip install pyEPR-quantum.
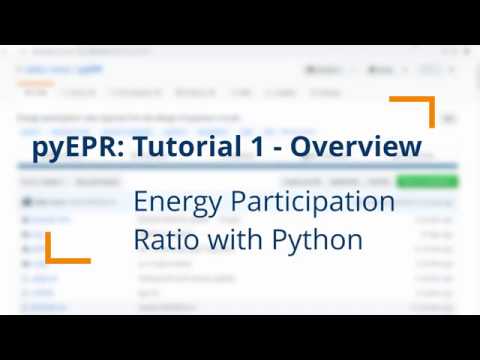
pyEPR Video Tutorials 
Installation and setup of pyEPR
Requires Python 3.9–3.12. All dependencies are installed automatically.
Quick install
uv (recommended — fast, modern):
uv pip install pyEPR-quantum
pip:
pip install pyEPR-quantum
conda (conda-forge channel):
conda install -c conda-forge pyepr-quantum
The conda-forge package name is
pyepr-quantum(lower-case); the PyPI name ispyEPR-quantum. Either way you import it asimport pyEPR as epr.
Development / editable install
git clone https://github.com/zlatko-minev/pyEPR.git
cd pyEPR
pip install -e ".[test]"
pytest          # runs all tests that don't need a live HFSS session
Platform support
pyEPR has two layers with different platform requirements:
| Feature | Windows | macOS | Linux |
|---|---|---|---|
EPR / quantum analysis (DistributedAnalysis, QuantumAnalysis) |
✅ | ✅ | ✅ |
Ansys HFSS COM interface (HfssDesign, ansys.py) |
✅ | ⚠️ limited | ⚠️ limited |
EPR and quantum analysis are pure-Python and work on all platforms — no Ansys installation required for post-processing or for the fully numerical workflow (Tutorials 3, 5, 6).
The HFSS COM interface (ansys.py) was written for Windows, where HFSS exposes automation via pythoncom/win32com. On macOS/Linux you can still reach a remote Windows HFSS instance over a network COM bridge.
Note on PyAEDT: PyAEDT is Ansys's official cross-platform Python scripting library for AEDT. pyEPR predates it and focuses on the quantum EPR quantization workflow that PyAEDT does not cover. They are complementary: use PyAEDT for geometry/mesh/solve scripting, pyEPR for EPR-based Hamiltonian extraction.
Optional configuration
Edit pyEPR/_config_user.py to set your data-save directory and logging level.
To keep local changes out of git:
git update-index --skip-worktree pyEPR/_config_user.py
Legacy users
pyEPR was significantly refactored in v0.8 (2020). Key classes were renamed — see the tutorials and docs. If you cannot upgrade yet, use the stable v0.7 tag.
HFSS Project Setup for pyEPR
Eigenmode Design — How to set up junctions
The EPR method requires each Josephson junction to be modelled as a lumped RLC boundary on a rectangle in HFSS, together with a polyline spanning the junction that defines the current direction. Follow these steps:
- Define circuit geometry and electromagnetic boundary conditions.
- Junction rectangle and BC: Create a rectangle for each Josephson junction and give it a descriptive name, e.g.,
rect_alicefor a qubit named Alice. A 50 × 100 μm rectangle is typical, though smaller sizes work fine. Assign aLumped RLCboundary condition on this rectangle surface, with an inductance value given by a local variable (e.g.,Lj_alice). The variable name is passed to pyEPR. - Current-direction polyline: Over each junction rectangle, draw a model
polylinespanning the full length of the rectangle to define the current-flow direction. Best practice: define it in an object coordinate system on the junction rectangle so they move together when the geometry is modified. The polyline name is passed to pyEPR. - Note: The linearised Josephson inductance used in HFSS is $L_J = (\Phi_0/2\pi)^2 / E_J$. This is the small-signal inductance that appears in the classical eigenmode problem; the full nonlinear cosine potential is restored in the quantum Hamiltonian step.
- Junction rectangle and BC: Create a rectangle for each Josephson junction and give it a descriptive name, e.g.,
- Meshing.
- Lightly mesh the thin-film metal boundary condition.
- Lightly mesh the junction rectangles.
- Simulation setup.
- We recommend
mixed ordersolutions for best accuracy. - Make sure "Save Fields" is enabled for each variation if running a parametric sweep (see Tutorial 4).
- We recommend

Troubleshooting pyEPR
First run: pint error: system='mks' unknown.
Please update to pint version newer than 0.7.2:
pip install pint --upgrade
QuTiP installation
QuTiP is a required dependency and is installed automatically with pip install pyEPR-quantum.
If you need to install it separately:
pip install qutip          # PyPI (qutip >= 5.0 required)
conda install -c conda-forge qutip   # conda-forge
AttributeError: module 'numpy' has no attribute '__config__' on importing qutip
Update your numpy installation:
conda update qutip
conda update numpy
COM Error on opening HFSS
Check the project and design file names carefully. Make sure the file path does not contain apostrophes or other special characters (e.g., C:\Minev's PC\my:Project). Check that HFSS has not popped up an error dialogue such as "File locked." Manually open HFSS and the file.
COM error on calculation of expression
Either HFSS has popped an error dialog, frozen up, or a name is misspelled. Verify all object and variable names match exactly.
HFSS refuses to close
If your script terminates improperly, this can happen. pyEPR tries to catch termination events and handle them. Call hfss.release() when finished. Use the Task Manager (Activity Monitor on macOS) to kill HFSS if necessary.
Parametric sweep error — missing field solutions
When running a parametric sweep in HFSS, make sure you save the fields for each variation before running pyEPR. Right-click on your ParametricSetup → Properties → Options → "Save Fields and Mesh". See Tutorial 4 for details.
ValueError: cannot set WRITEABLE flag to True of this array
This occurs with numpy 1.16 and certain HDF files. Upgrade numpy or downgrade to 1.15.4.
Authors and Contributors
- Authors: Zlatko Minev & Zaki Leghtas, with contributions from many friends and colleagues.
- 2015 – present.
- Contributors: Phil Reinhold, Lysander Christakis, Devin Cody, Zachary Parrott, and many others.
- Original versions of pyHFSS.py and pyNumericalDiagonalization.py contributed by Phil Reinhold — excellent original repo.
- Terms of use: Use freely and kindly cite the paper (arXiv:2010.00620) and/or this package.
- How can I contribute? Contact Z. Minev or Z. Leghtas.
How do I cite pyEPR?
Use this BibTeX file for pyEPR and cite the energy-participation-ratio paper arXiv:2010.00620 for the method.


Project details
Verified details
These details have been verified by PyPIProject links
GitHub Statistics
Maintainers
Release history Release notifications | RSS feed


Download files
Download the file for your platform. If you're not sure which to choose, learn more about installing packages.
Source Distribution
Built Distribution
Filter files by name, interpreter, ABI, and platform.
If you're not sure about the file name format, learn more about wheel file names.
Copy a direct link to the current filters
File details
Details for the file pyepr_quantum-0.9.5.tar.gz.
File metadata
- Download URL: pyepr_quantum-0.9.5.tar.gz
- Upload date:
- Size: 127.8 kB
- Tags: Source
- Uploaded using Trusted Publishing? Yes
- Uploaded via: twine/6.1.0 CPython/3.13.7
File hashes
| Algorithm | Hash digest | |
|---|---|---|
| SHA256 |
6648bf86760846750b969db86db928748115467fa52b4277eb4e147b36493724
|
|
| MD5 |
c4141aacd30dadfa7b43003369749fb6
|
|
| BLAKE2b-256 |
0ad99c0c048e29f7c34c3a628e31d8a4c4054906bda0bd76c57031961af48e38
|
Provenance
The following attestation bundles were made for pyepr_quantum-0.9.5.tar.gz:
Publisher:
publish-to-pypi.yml on zlatko-minev/pyEPR
-
Statement:
-
Statement type:
https://in-toto.io/Statement/v1 -
Predicate type:
https://docs.pypi.org/attestations/publish/v1 -
Subject name:
pyepr_quantum-0.9.5.tar.gz -
Subject digest:
6648bf86760846750b969db86db928748115467fa52b4277eb4e147b36493724 - Sigstore transparency entry: 1556231985
- Sigstore integration time:
-
Permalink:
zlatko-minev/pyEPR@d0e8e90789f15bc9ac5a7f3cb0822429b52858e1 -
Branch / Tag:
refs/tags/0.9.5 - Owner: https://github.com/zlatko-minev
-
Access:
public
-
Token Issuer:
https://token.actions.githubusercontent.com -
Runner Environment:
github-hosted -
Publication workflow:
publish-to-pypi.yml@d0e8e90789f15bc9ac5a7f3cb0822429b52858e1 -
Trigger Event:
release
-
Statement type:
File details
Details for the file pyepr_quantum-0.9.5-py3-none-any.whl.
File metadata
- Download URL: pyepr_quantum-0.9.5-py3-none-any.whl
- Upload date:
- Size: 114.1 kB
- Tags: Python 3
- Uploaded using Trusted Publishing? Yes
- Uploaded via: twine/6.1.0 CPython/3.13.7
File hashes
| Algorithm | Hash digest | |
|---|---|---|
| SHA256 |
12644117cf0b208b164645638cf9d6c46b387d4bbc2fb45e5c96485c6f5b151b
|
|
| MD5 |
8f16d21a966d4cf3d3ab0061d6928139
|
|
| BLAKE2b-256 |
c415cb22a4efe6f1f5dcb22ad7b98465e47a2e129d77e4e0a3e715b1e09a4676
|
Provenance
The following attestation bundles were made for pyepr_quantum-0.9.5-py3-none-any.whl:
Publisher:
publish-to-pypi.yml on zlatko-minev/pyEPR
-
Statement:
-
Statement type:
https://in-toto.io/Statement/v1 -
Predicate type:
https://docs.pypi.org/attestations/publish/v1 -
Subject name:
pyepr_quantum-0.9.5-py3-none-any.whl -
Subject digest:
12644117cf0b208b164645638cf9d6c46b387d4bbc2fb45e5c96485c6f5b151b - Sigstore transparency entry: 1556232037
- Sigstore integration time:
-
Permalink:
zlatko-minev/pyEPR@d0e8e90789f15bc9ac5a7f3cb0822429b52858e1 -
Branch / Tag:
refs/tags/0.9.5 - Owner: https://github.com/zlatko-minev
-
Access:
public
-
Token Issuer:
https://token.actions.githubusercontent.com -
Runner Environment:
github-hosted -
Publication workflow:
publish-to-pypi.yml@d0e8e90789f15bc9ac5a7f3cb0822429b52858e1 -
Trigger Event:
release
-
Statement type:


