
PyNeoInstance Package
Documentation
Full documentation is available at https://jose-alvarado-guzman.github.io/pyneoingest/
How to install it?
pip install pyneoinstance
The Rust-accelerated Neo4j driver (neo4j-rust-ext) is included by default for faster data serialization.
How to use it?
Instantiating the Neo4jInstance class
In order to use this package, you first need to import the Neo4jInstance class.
from pyneoinstance import Neo4jInstance
Once imported, you need to instantiate this class by providing the following arguments:
- uri: The Neo4j instance unique resource identifier.
- user: The user name used to authenticate.
- password: The user name password.
uri = 'bolt://localhost:7687'
user = 'neo4j'
password = 'password'

graph = Neo4jInstance(uri, user, password)
Although the previous code is valid, it is not recommended to hard code your user credentials in your application. As an alternative you can store this information as part of your OS user environment variables and then retrieve them in Python.
import os

uri = os.environ['NEO4J_URI']
user = os.environ['NEO4J_USER']
password = os.environ['NEO4J_PASSWORD']
graph = Neo4jInstance(uri,user,password)
Another alternative is to create a YAML configuration file to store this information.
# configuration.yaml
db_info:
  uri: neo4j_uri
  user: neo4j_user
  password: user_password
  database: neo4j
This YAML file can then be loaded in Python and this information can be retrieve.
from pyneoinstance import load_yaml_file

config = load_yaml_file(configuration.yaml)
db_info = config['db_info']
graph = Neo4jInstance(db_info['uri'], db_info['user'], db_info['password'])
Submitting a Cypher read query
Once you instantiated the Neo4jInstance class, you can submit a Cypher read query by using the class method execute_read_query. This method receives the Cypher query string as an argument and optionally the name of the database on which the query should be executed. If the database name is not provided the query will be execute using your default Neo4j database. The results of the query are return as a Pandas Data Frame. To avoid unwanted column names in the resulting Data Frame, always provide aliases for all returned properties.
query = """
    MATCH (m:Movie {title: "The Matrix"})
    RETURN m.tile AS title,
           m.released AS releasedYear,
           m.tagline AS tagline;
"""

data = graph.execute_read_query(query,db_info['database'])
Submitting a Cypher read query with parameters
The method execute_read_query can optionally received a Python Dictionary with the parameters required as part of you Cypher query.
query = """
    MATCH (m:Movie {title: $movie_title})
    RETURN m.tile AS title,
           m.released AS releasedYear,
           m.tagline AS tagline;
"""

data = graph.execute_read_query(query, db_info['database'], parameters={'movie_title':'The Matrix'})
Submitting a Cypher write query
You can submit a Cypher write query using the method execute_write_query. The signature of this method is identical to the execute_read_query. This method returns a dictionary containing the updates made to the database. As with read queries you can also specify a Python dictionary containing Cypher parameters.
query = """
    MERGE(m:Movie {title:$movie_title})
    ON CREATE SET
        m.release = $year,
        m.tagline = $tagline
"""

results = graph.execute_write_query(query, db_info['database'],
  parameters={
    'movie_title': 'Wakanda Forever',
    'year': 2022,
    'tagline': 'Wakanda Forever! Long Live Wakanda! For Honor, For Legacy, For Wakanda!'
  })
Updating a database with data in a DataFrame: Sequentially
We can update a Neo4j database with data contained in a Pandas Data Frame using the methods execute_write_query_with_data or execute_write_queries_with_data. These methods return a dictionary containing the numbers and types of updates made to the database. Besides taking the query or list of queries as an argument, we can pass to these methods the following arguments:
- data: Pandas Data Frame containing data to process.
- database: Optional, database on which to execute the queries.
- batchSize: Optional, number of records per batch use to break the Data Frame in smaller chucks.
- parallel: Whether to execute the query using multiple Python process.
- workers: The number of processes to spawn to execute the queries in parallel.
- parameters: Extra arguments containing optional cypher parameters.
To illustrates how to use these methods lets imagine we have a csv file that looks like this:
# people.csv
personId,name,birthYear,deathYear
23945,Gérard Pirès,1942,
553509,Helen Reddy,1941,
113934,Susan Flannery,1939,
26706,David Rintoul,1948,
237537,Rita Marley,1946,
11502,Harry Davenport,1866,1949
11792,George Dickerson,1933,
7242,Temuera Morrison,1960,
3482,Chus Lampreave,1930,
We want to update our database by loading this data as a node with the label Person containing the properties id, name, birthYear and deathYear. To accomplish this, we need to performed the following steps:
- Load the csv to Python as a Data Frame.
- Develop the Cypher query that is going to be use to load the Data Frame into Neo4j.
- Call the execute_write_query_with_data of an existing instance of the Neo4jInstance class passing the Data Frame, Cypher query and any other optional arguments to this method.
import pandas as pd

person_data = pd.read_csv('people.csv')

person_load_query = """
  WITH $rows AS rows
  UNWIND rows AS row
  MERGE(p:Person {id:row.personId})
    ON CREATE
      SET p.id = row.personId,
          p.name = row.name,
          p.birthYear=toInteger(row.birthYear),
          p.deathYear = toInteger(row.deathYear)
"""

person_load_result = graph.execute_write_query_with_data(person_load_query, person_data, db_info['database'])
It is not a good practice to store your Cypher queries as strings within your Python modules. To solve this, we can extend our YAML configuration file to store all our Cypher queries.
# configuration.yaml
db_info:
  uri: neo4j_uri
  user: neo4j_user
  password: user_password
  database: neo4j
loading_queries:
  nodes:
    Person: |
      WITH $rows AS rows
      UNWIND rows AS row
      MERGE(p:Person {id:row.personId})
        ON CREATE
          SET p.id = row.personId,
              p.name = row.name,
              p.birthYear=toInteger(row.birthYear),
              p.deathYear = toInteger(row.deathYear)
Now that we added the loading query to our configuration file, lets re-write our Python script to get this query from the configuration file.
import pandas as pd

person_data = pd.read_csv('people.csv')

node_load_queries = config['loading_queries']['nodes']

person_load_result = graph.execute_write_query_with_data(node_load_queries['Person'], person_data, db_info['database'])
If the number of rows in your Data Frame is 100K or more it is recommended to break the Data Frame in smaller chunks so that they can be process in different transactions. This will avoid running out of heap error. To do this, just indicate in the batchSize argument the number of records per data batch to break this Data Frame into smaller data batches. These partitions will be loaded in different sequential transactions unless you specified loading them in parallel by setting the parallel argument to true. We will discuss this process in the next section.
person_load_result = graph.execute_write_query_with_data(
    node_load_queries['person'],
    person_data,
    db_info['database'],
    batchSize = 100000
    )
Updating a database with data in a Data Frame: Parallel
To load the data in the Data Frame in parallel, we need to partition the Data Frame by incrementing the batchSize argument and set the parallel argument to true. By default, this will use all the available virtual CPUs in the machine. If you need to use less, you can specify how many to use by setting the workers argument.
person_load_result = graph.execute_write_query_with_data(
    node_load_queries['person'],
    person_data,
    batchSize = 100000,
    parallel = True,
    workers = 5
    )
Graph EDA
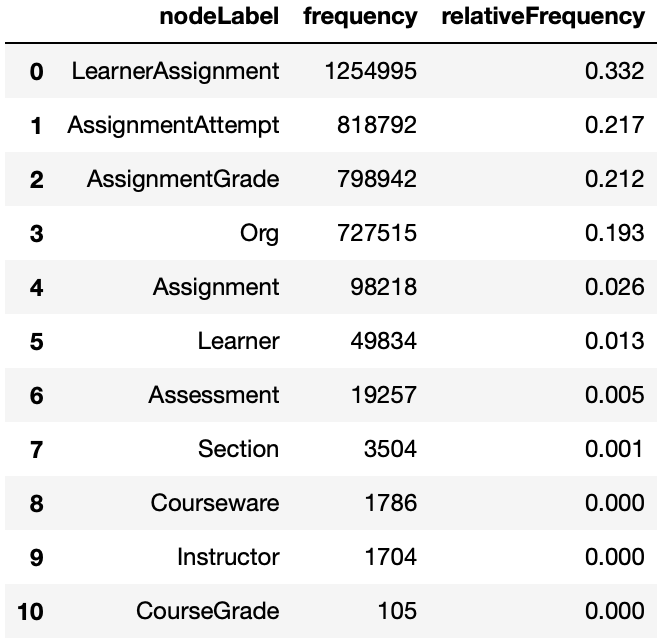
Node Label Frequency
The get_node_label_freq method provides the frequency and relative frequency of all nodes in the graph. This method consider all node labels as single labels, if you want the distribution considering multiple labels use the get_node_multilabel_freq method.
graph.get_node_label_freq(database='mydbname')
Relationship Type Frequency
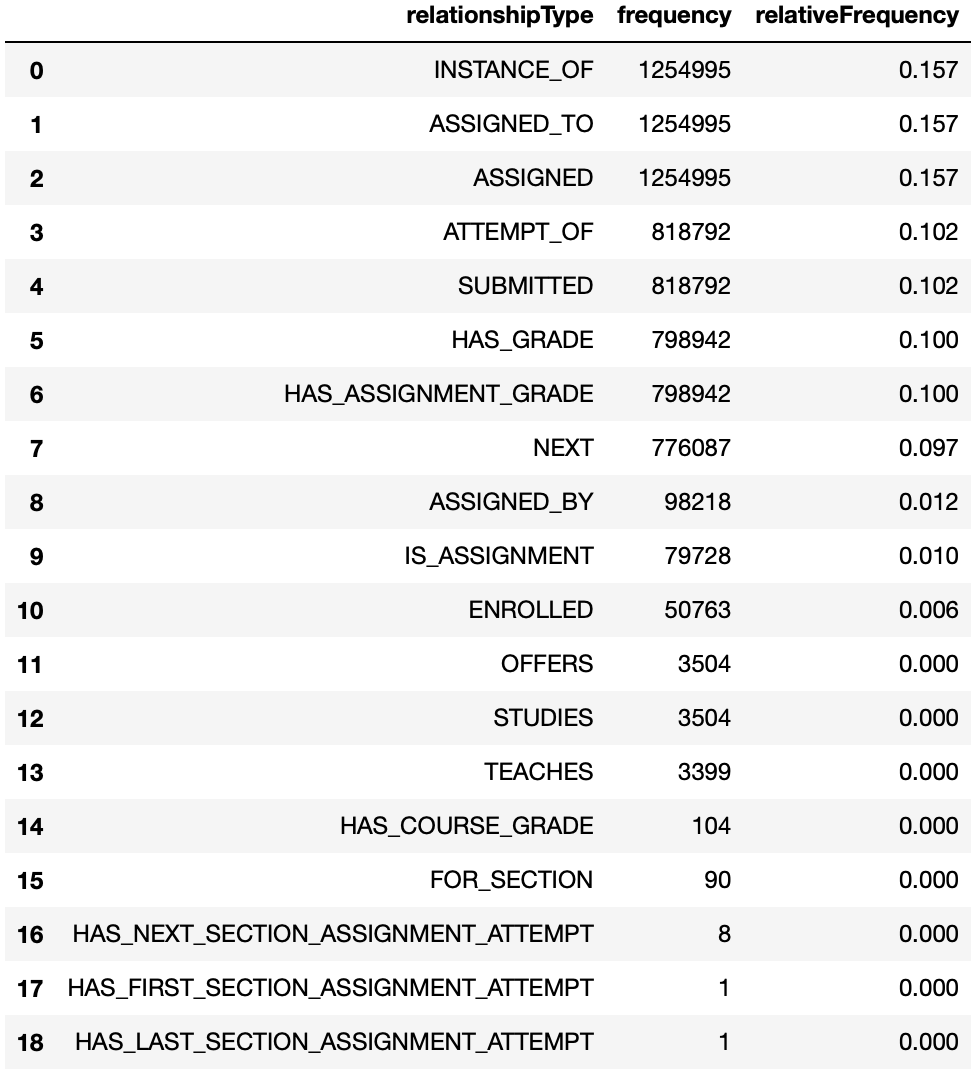
The get_rela_type_freq method provides the frequency and relative frequency of all relationship types in the graph.
graph.get_rela_type_freq(database='mydbname')
Relationship Source-Target Frequency
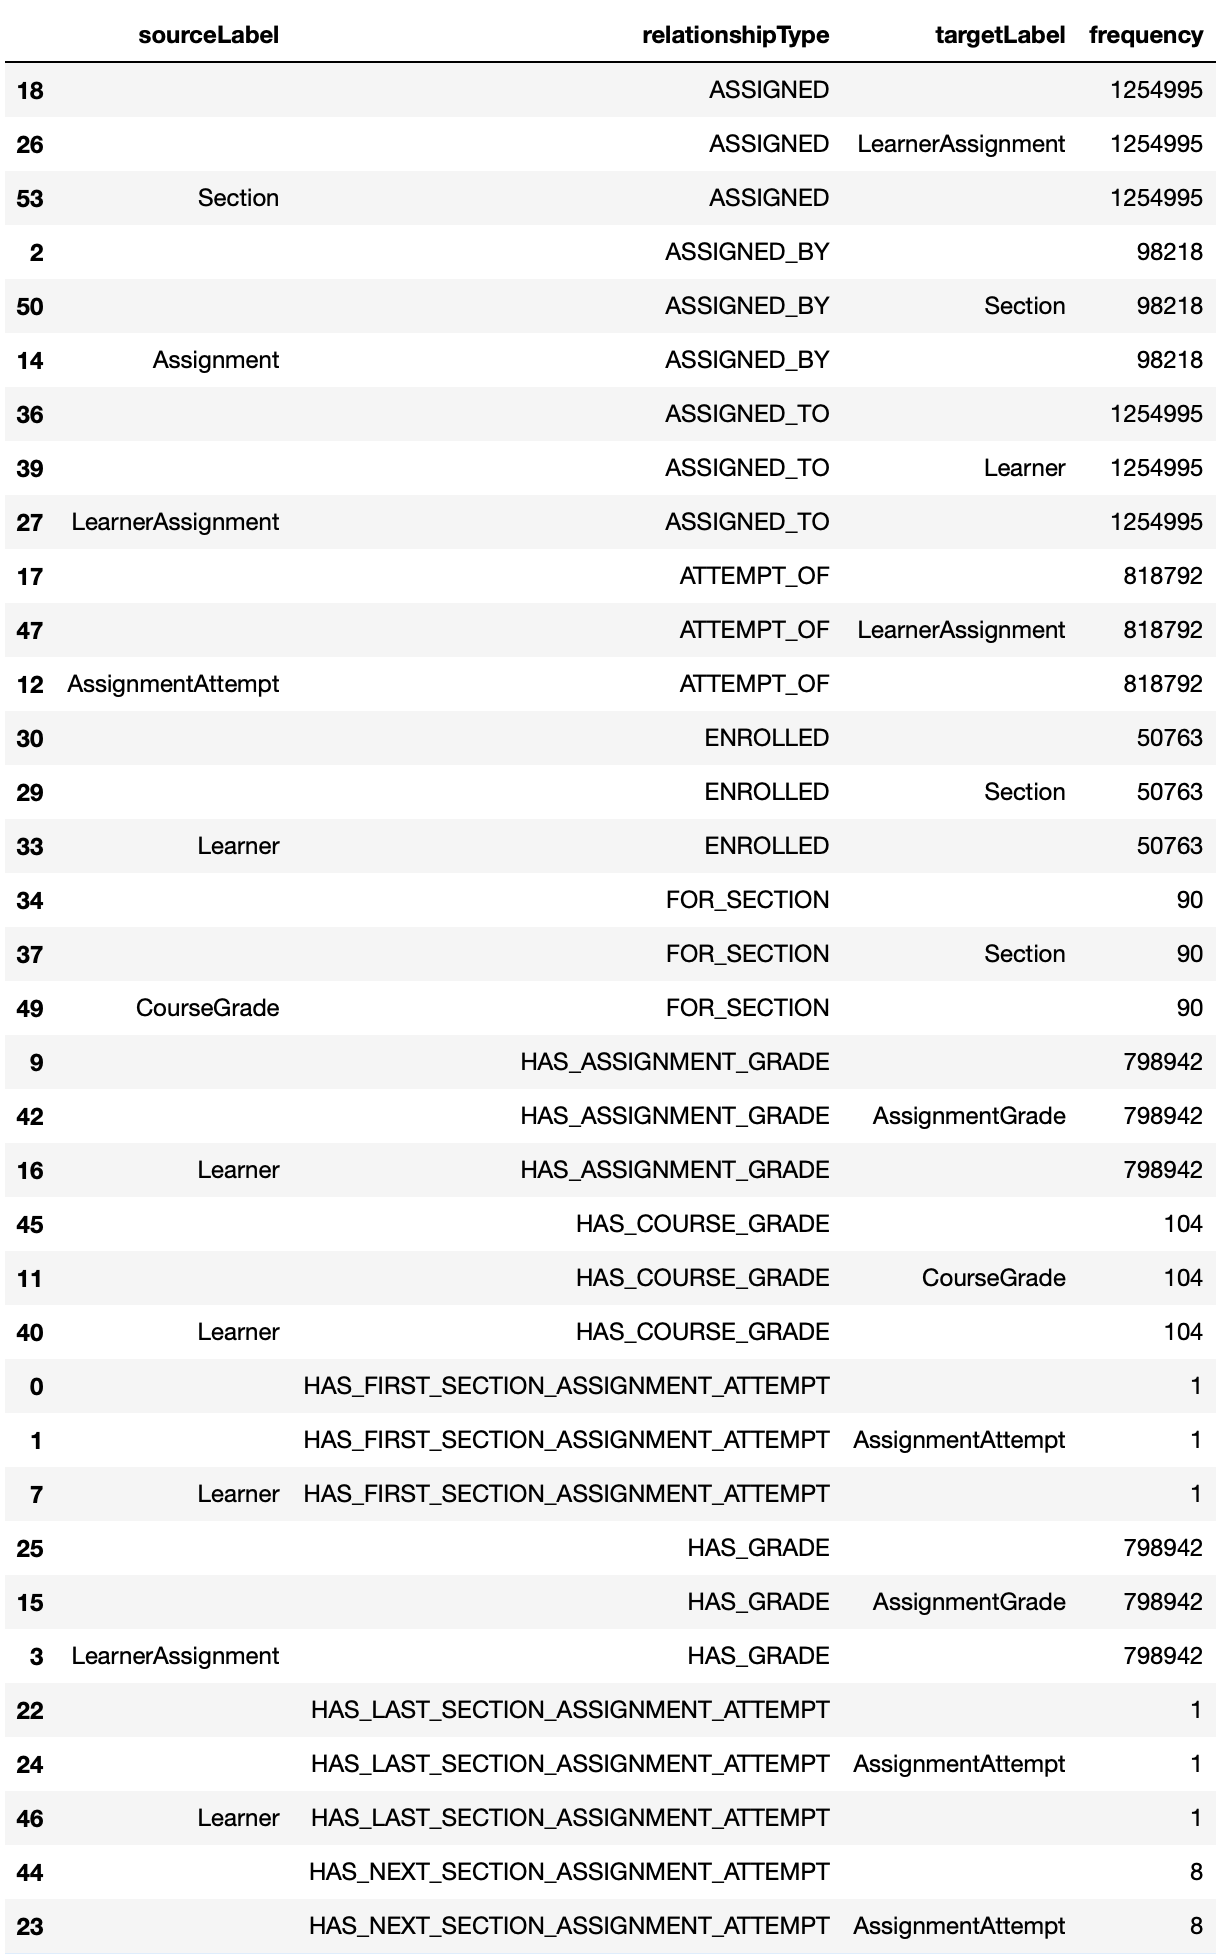
The get_rela_source_target_freq method provides the frequency and relative frequency of all relationship types considering the node label of the source and targets of the relationships.
graph.get_rela_type_freq(database='mydbname')
Properties
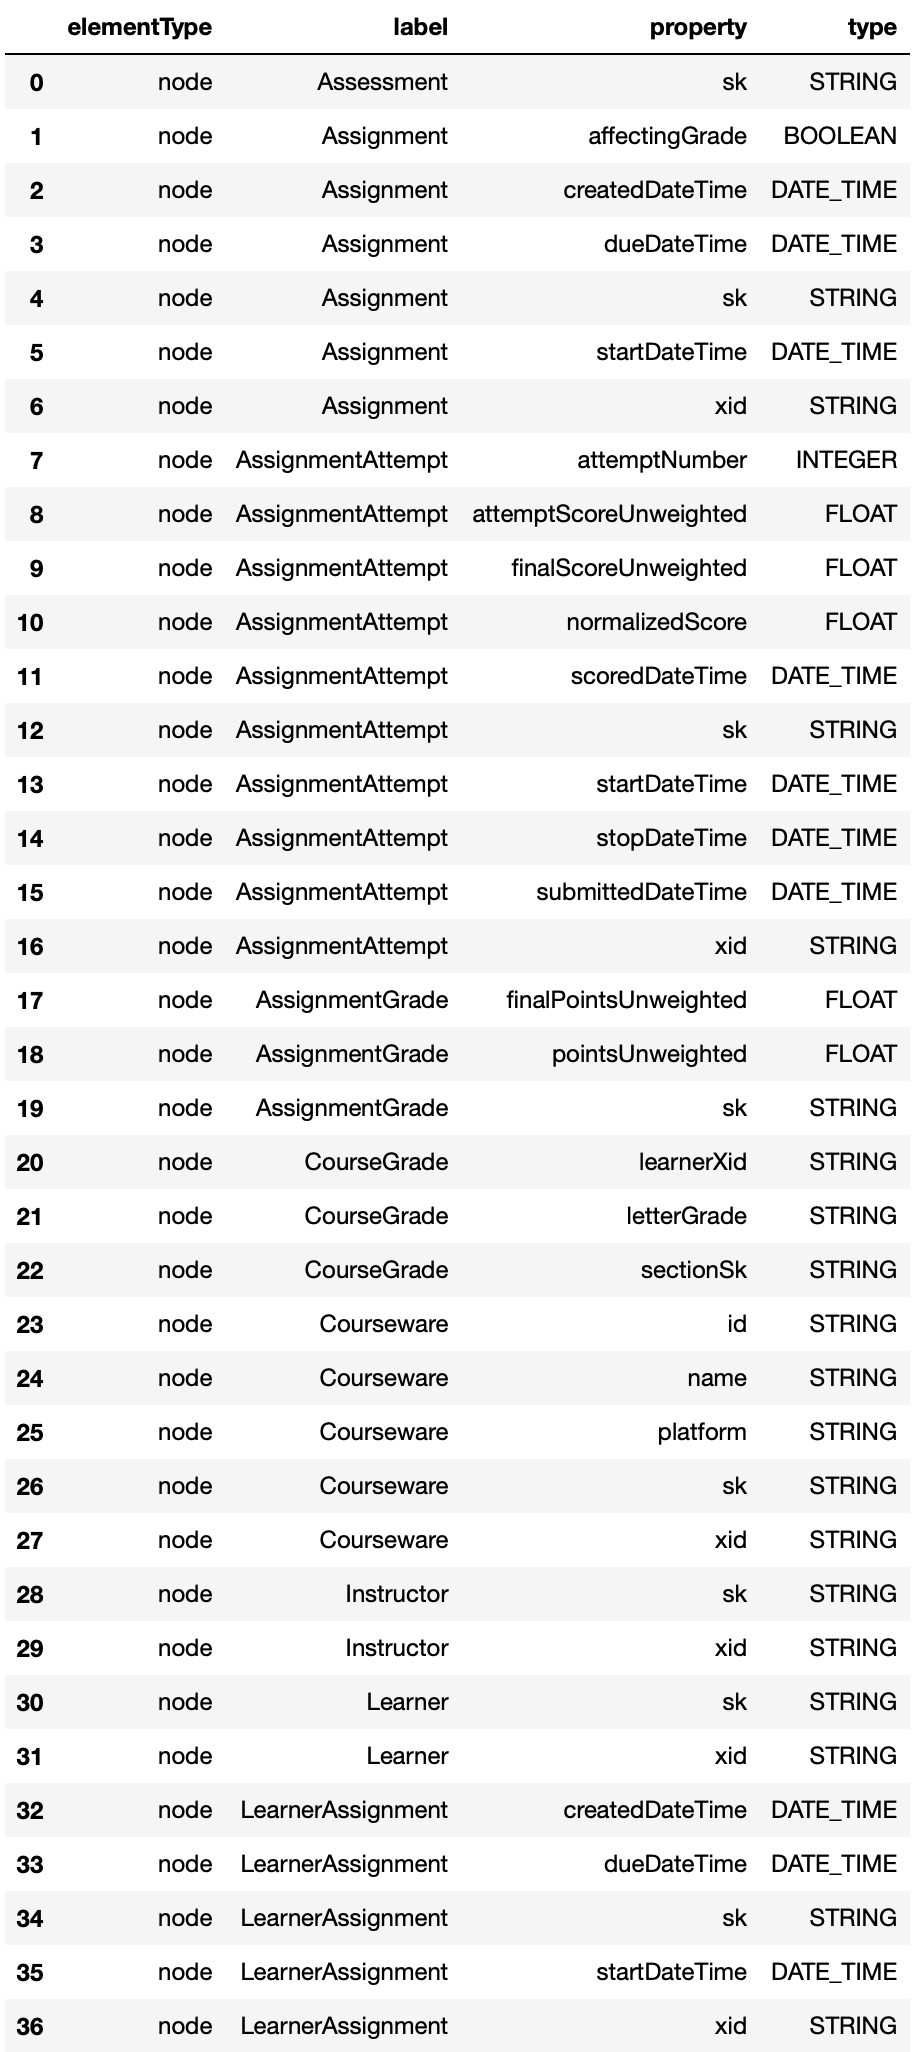
The get_properties method provides information about all the nodes and relationships properties.
graph.get_properties(database='mydbname')
Constraints
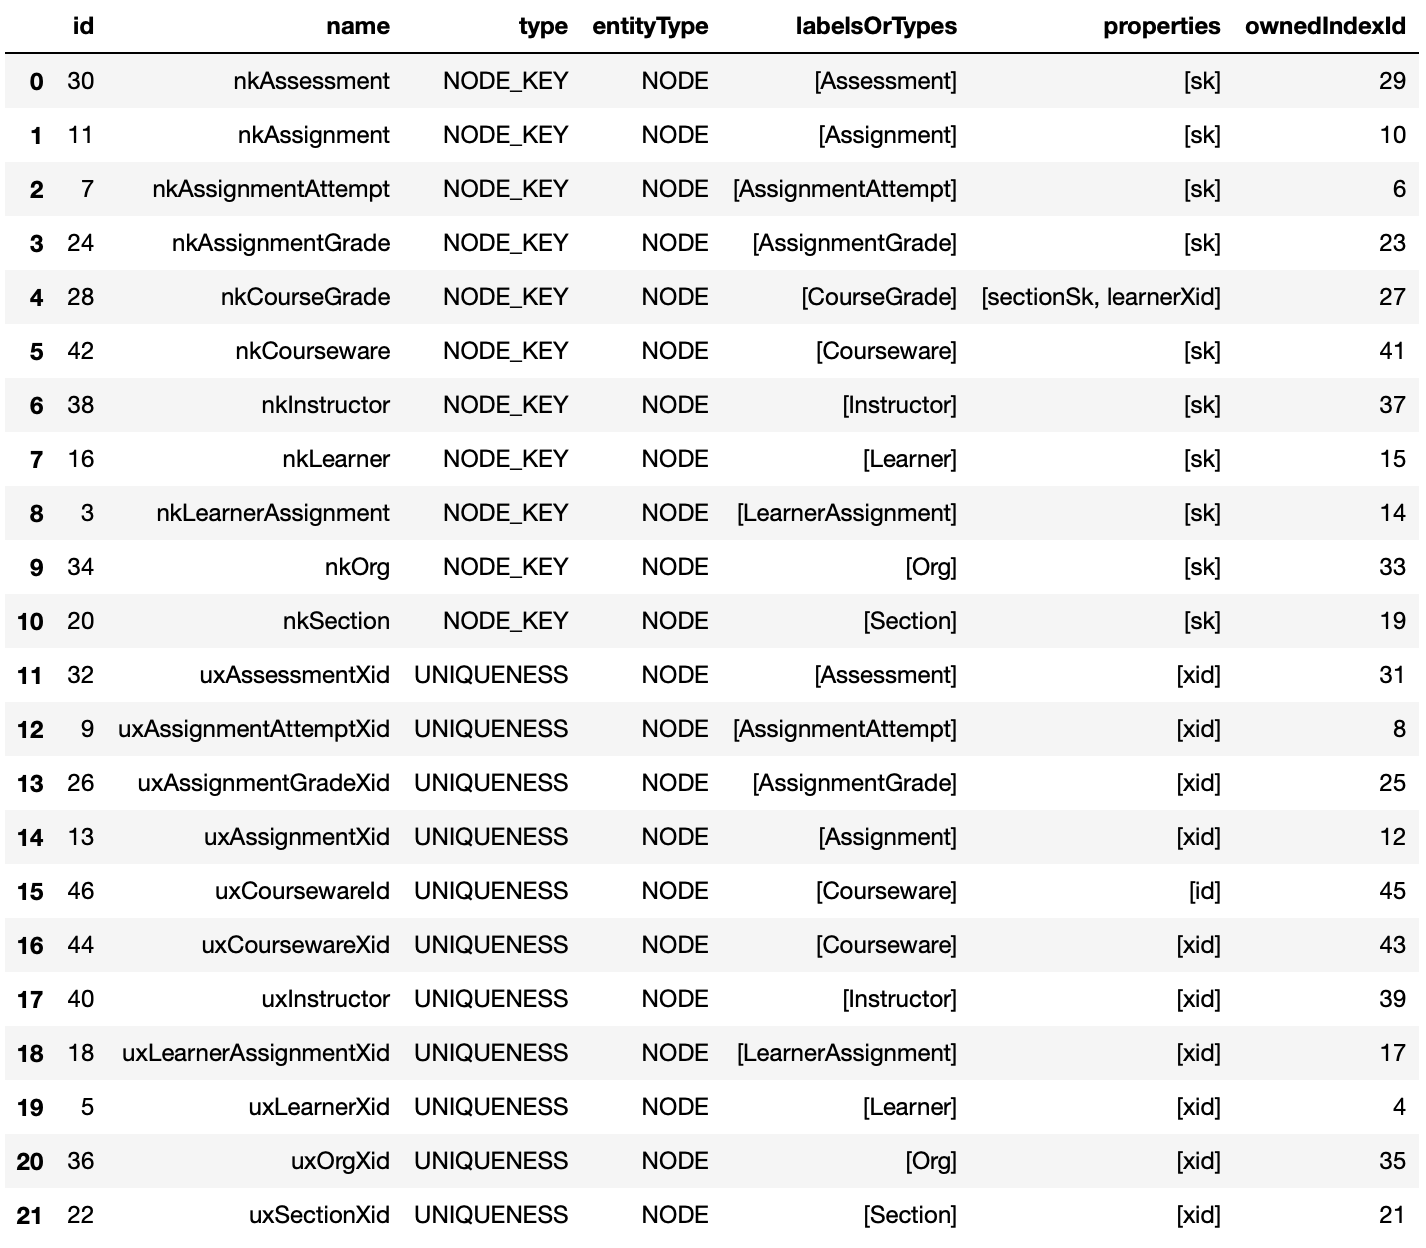
The get_constraints method provides information about all the graph constraints.
graph.get_constraints(database='mydbname')
Indexes
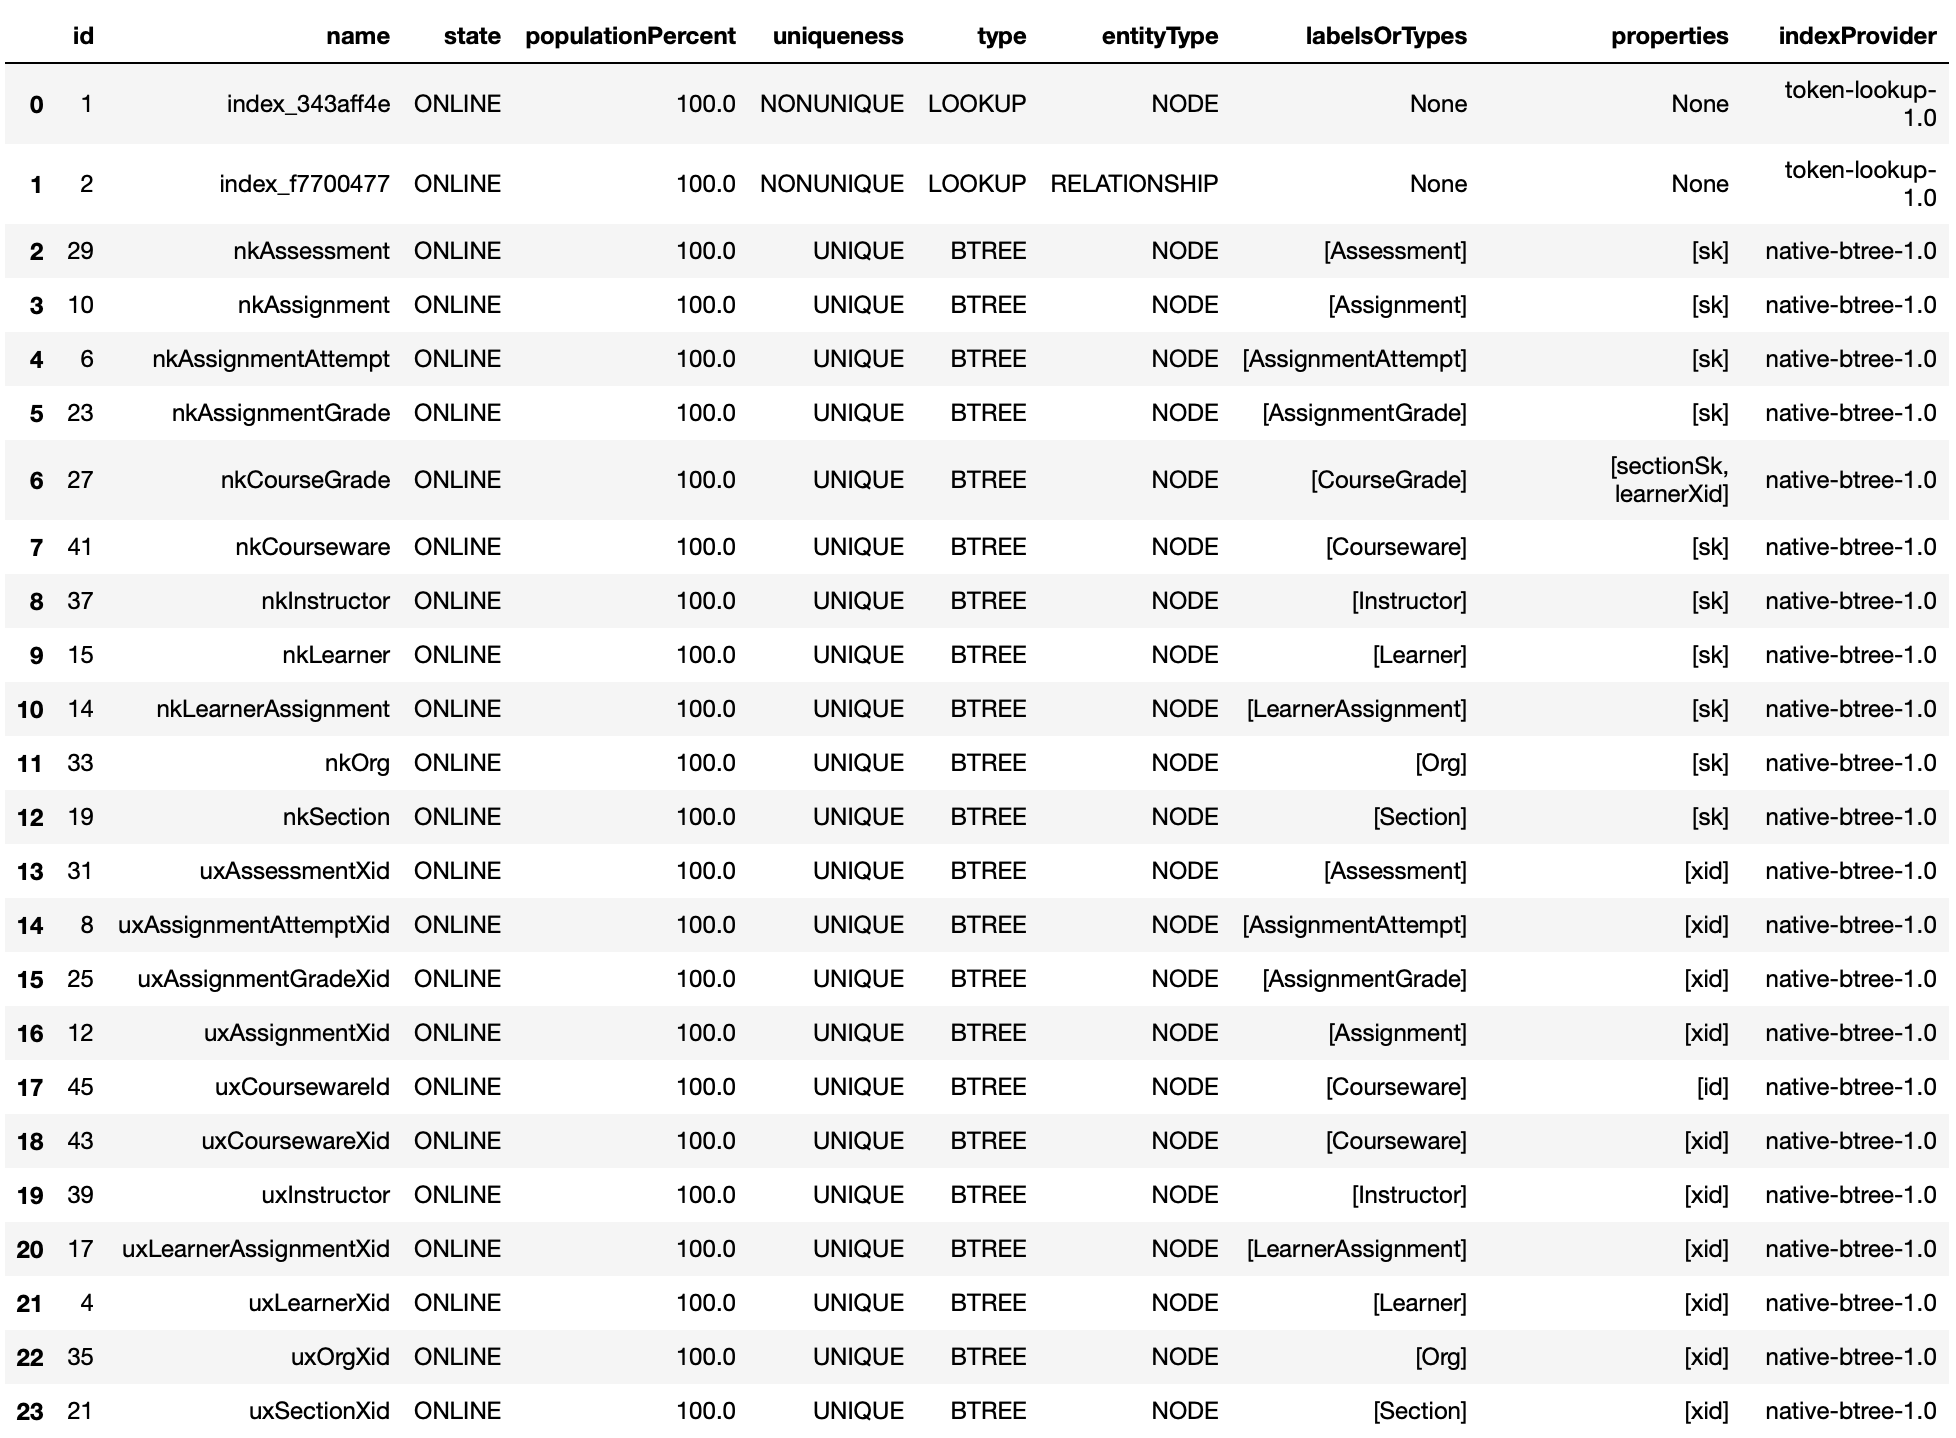
The get_indexes method provides information about all the graph indexes.
graph.get_indexes(database='mydbname')
Query Graph Visualization
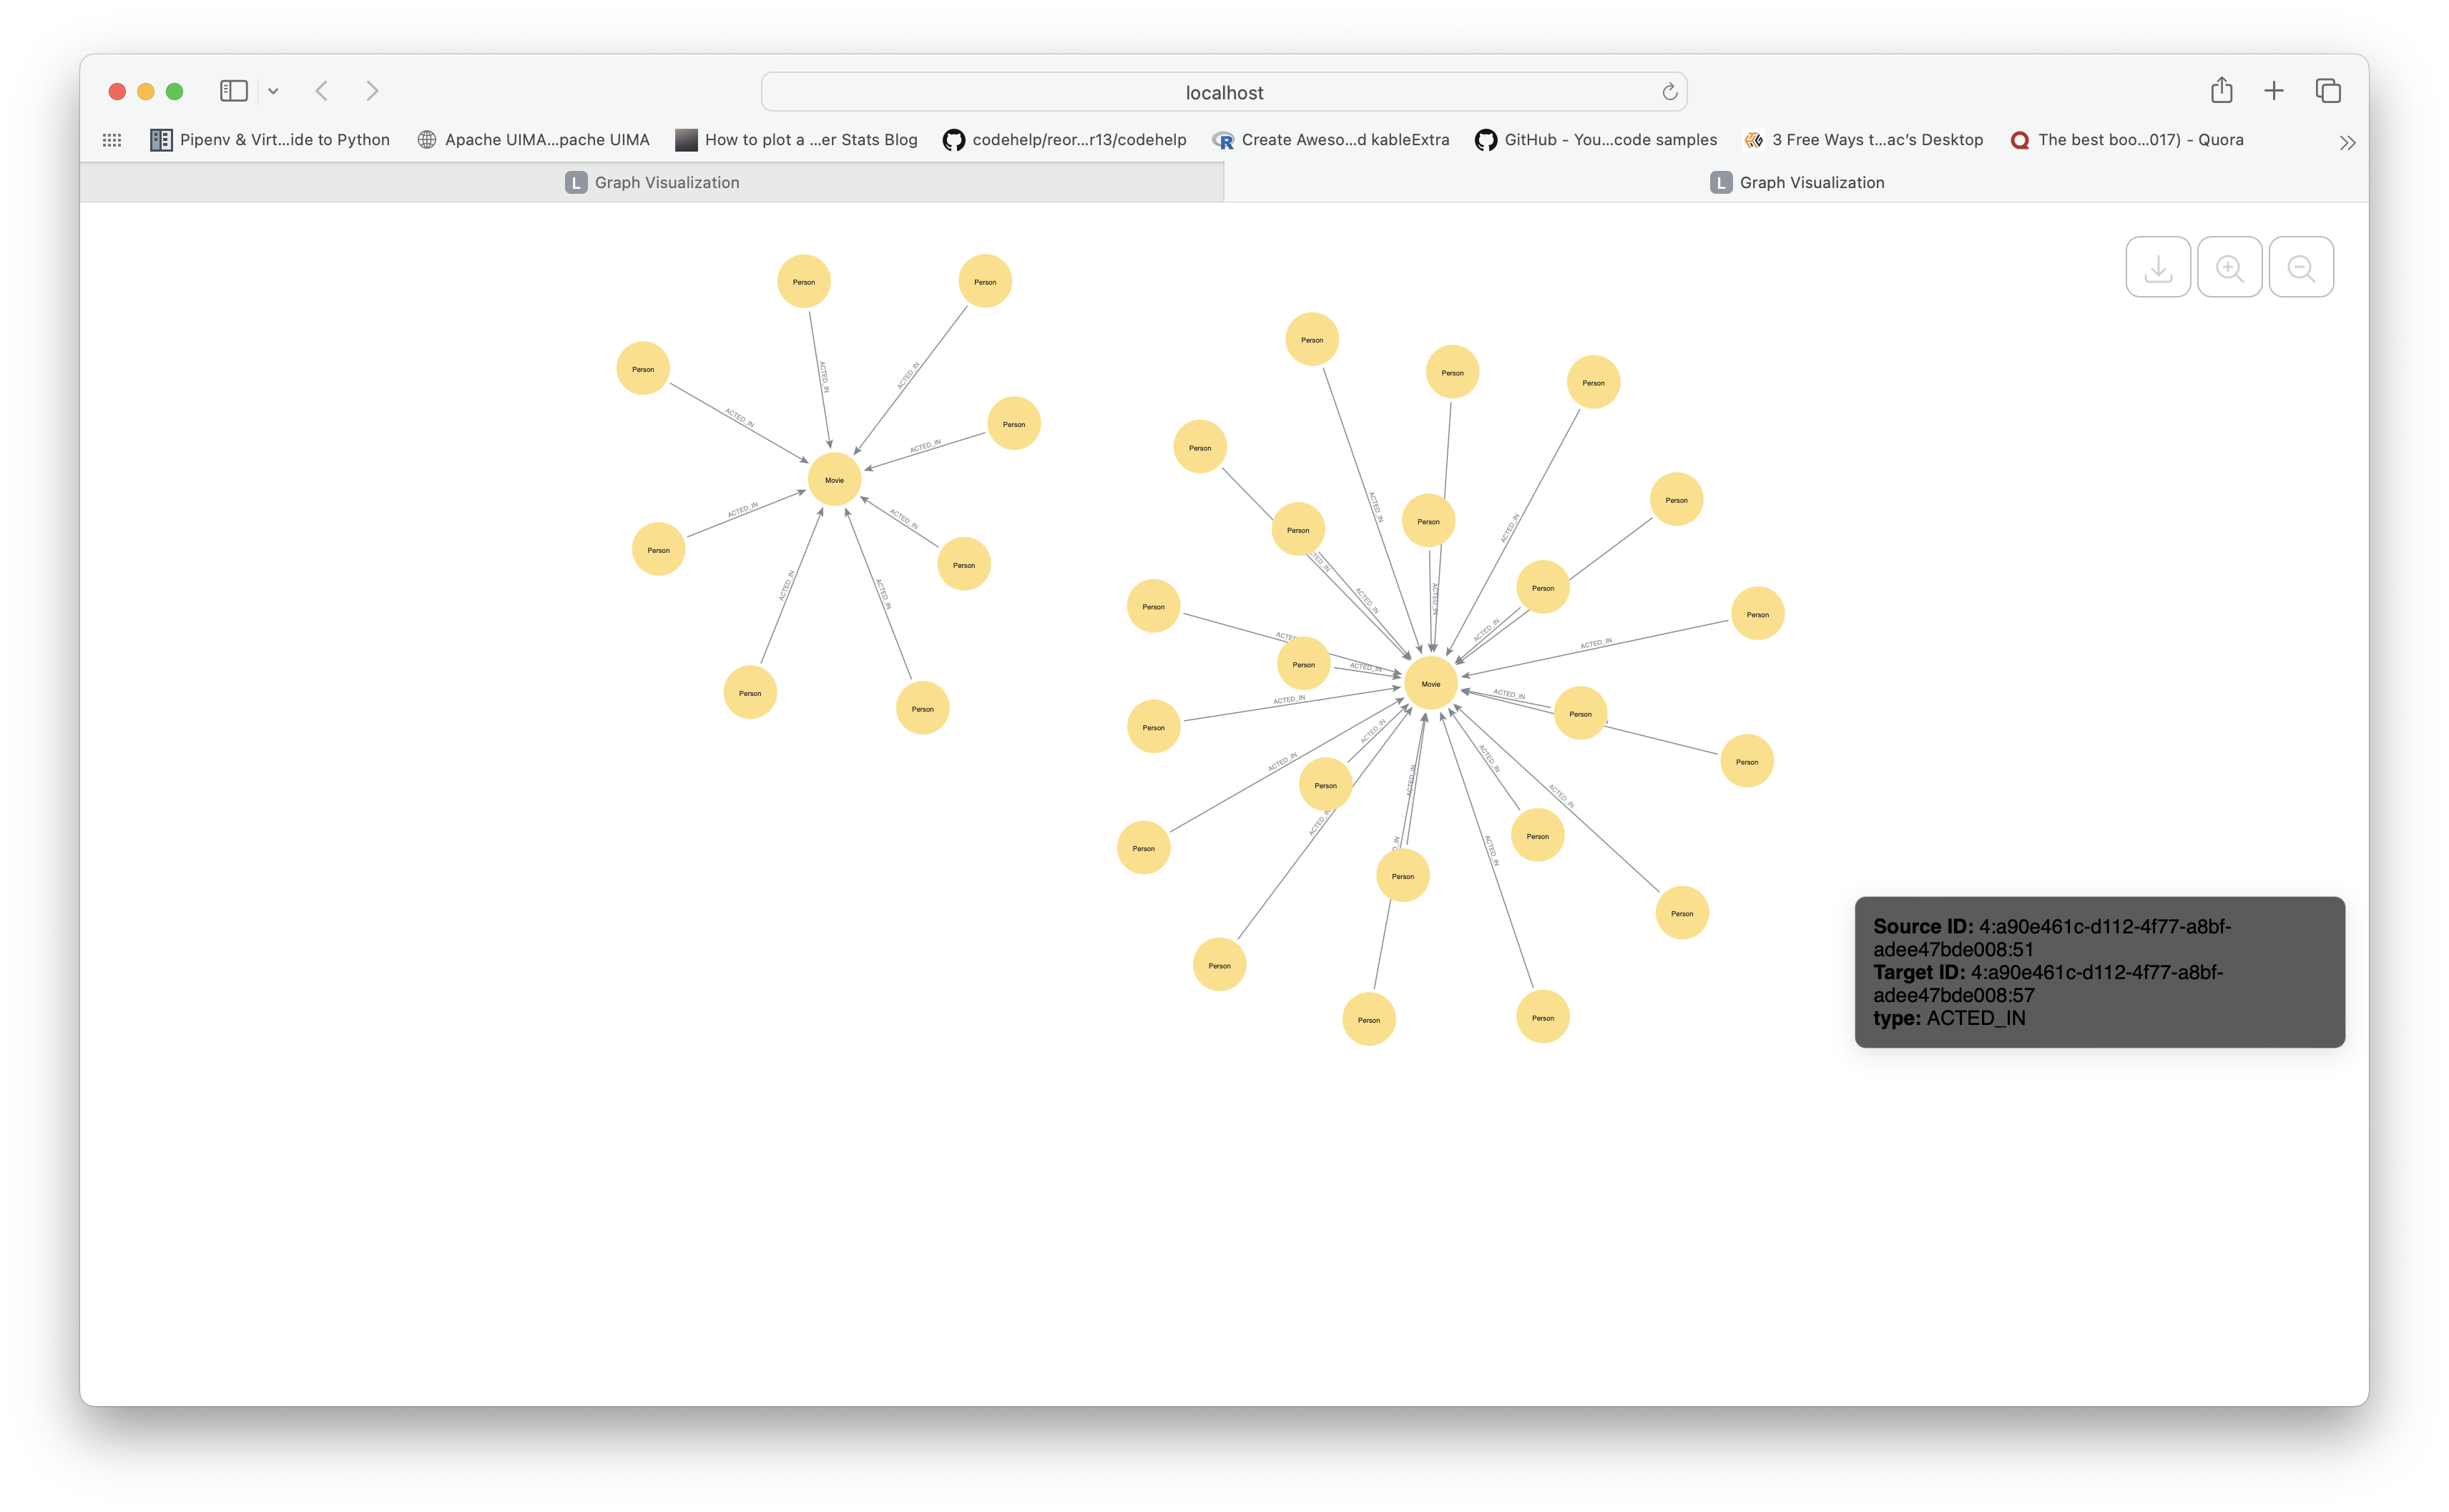
The get_query_visualization method executes a Cypher query that returns nodes and relationships and renders the result as an interactive graph. Node labels are displayed as captions and all properties appear as tooltips on hover.
query = """
    MATCH (p:Person)-[r:ACTED_IN]->(m:Movie)
    RETURN p, r, m
    LIMIT 50
"""
vg = graph.get_query_visualization(query, database='mydbname')

# In a Jupyter notebook — renders inline:
vg.render()

# As a standalone HTML file:
with open('graph.html', 'w') as f:
    f.write(f'<!DOCTYPE html><html><body>{vg.render().data}</body></html>')
Schema Visualization
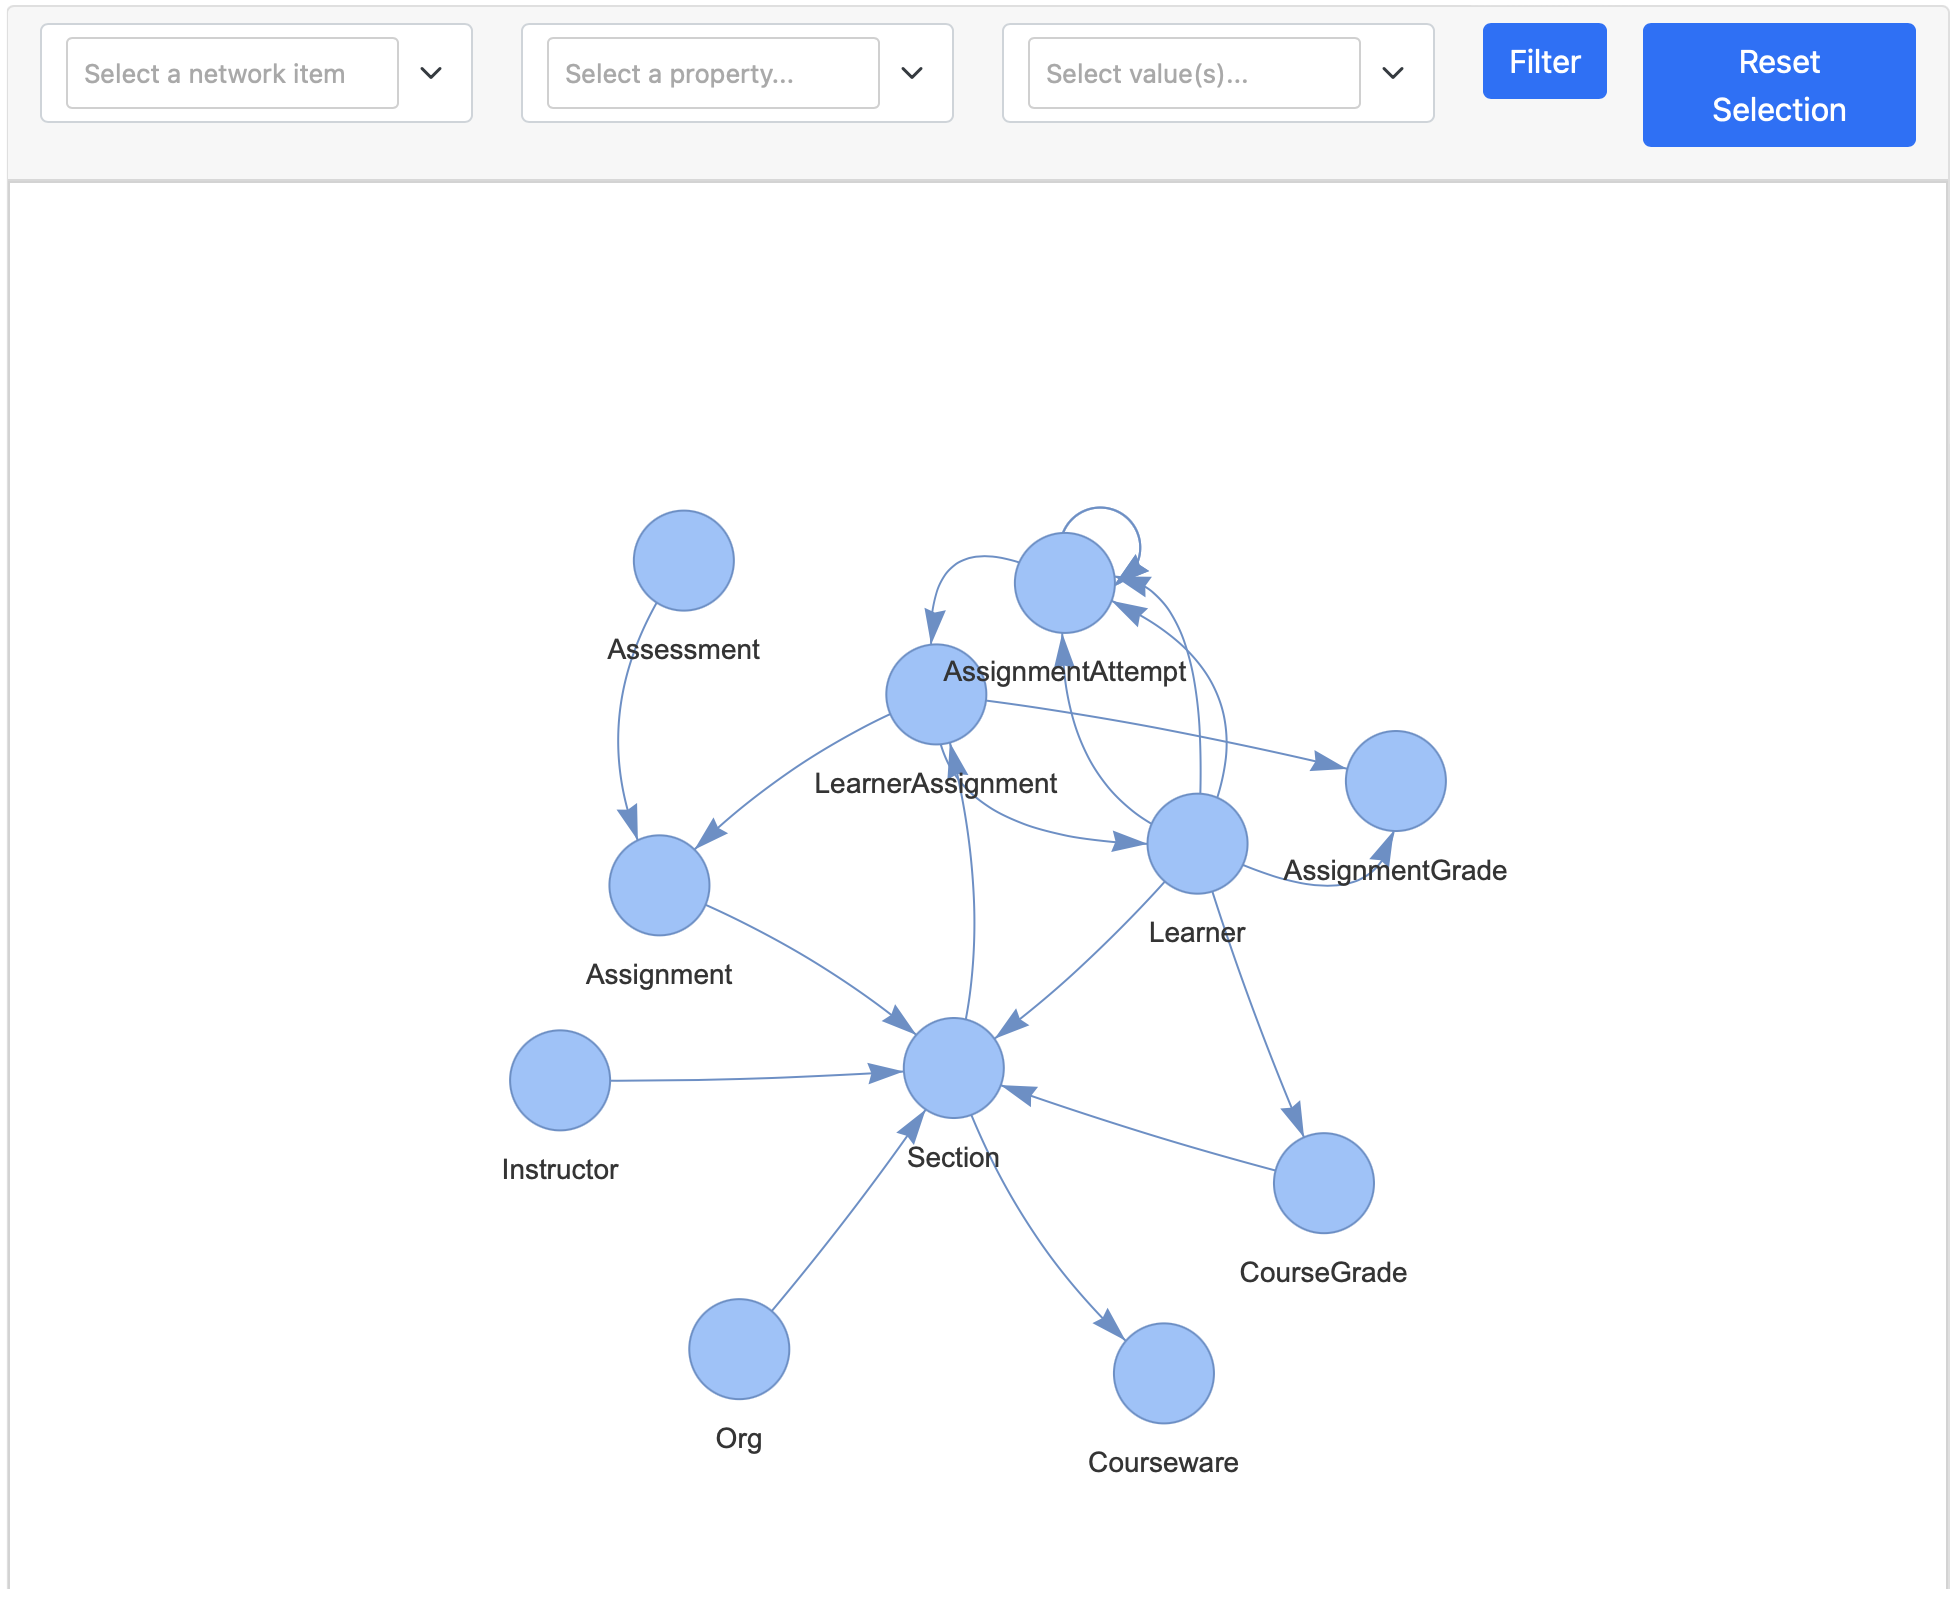
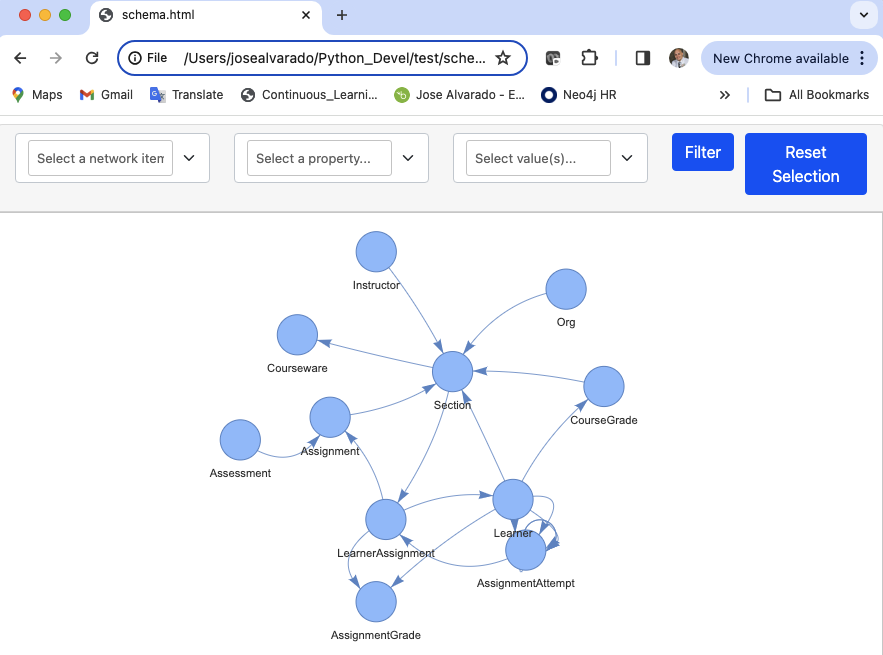
The get_schema_visualization method provides an interactive visualization of the graph schema with the ability to filter by label. Node labels are displayed as strings next to nodes; relationship types are shown on mouse hover.
schema = graph.get_schema_visualization(database='mydbname')
schema.write_html('schema.html')
Open schema.html in your browser to explore the schema interactively.
More detailed examples
For more detailed examples please refer to the following articles:
- Data ingestion: PyNeoInstance: A User-Friendly Python Library for Neo4j.
- Graph EDA: Performing graph EDA with the PyNeoInstance Python Package
1 maintainer

Download files
Download the file for your platform. If you're not sure which to choose, learn more about installing packages.
Source Distribution
Built Distribution
Filter files by name, interpreter, ABI, and platform.
If you're not sure about the file name format, learn more about wheel file names.
Copy a direct link to the current filters
File details
Details for the file pyneoinstance-4.0.1.tar.gz.
File metadata
- Download URL: pyneoinstance-4.0.1.tar.gz
- Upload date:
- Size: 2.1 MB
- Tags: Source
- Uploaded using Trusted Publishing? No
- Uploaded via:
twine/6.1.0 CPython/3.9.16
File hashes
| Algorithm | Hash digest | |
|---|---|---|
| SHA256 |
3dbfa83ce7e09840214fce267e19d1f672113a9eb96c6bea4c33b3338ec976cb
|
|
| MD5 |
fff8a5fe39912102b53a045cbaed9e4f
|
|
| BLAKE2b-256 |
89906cc0e0794f84ff5bbe9897a34aedda136e1433f444fab3c7334d47f4c721
|
File details
Details for the file pyneoinstance-4.0.1-py3-none-any.whl.
File metadata
- Download URL: pyneoinstance-4.0.1-py3-none-any.whl
- Upload date:
- Size: 41.0 kB
- Tags: Python 3
- Uploaded using Trusted Publishing? No
- Uploaded via:
twine/6.1.0 CPython/3.9.16
File hashes
| Algorithm | Hash digest | |
|---|---|---|
| SHA256 |
812dccb8011b2fb5b0b186a6d82a0bdf5b4b35b3c9ea7a23b5b513aba4d5e9c1
|
|
| MD5 |
ce7ef177a65b87a545ba963173f6858b
|
|
| BLAKE2b-256 |
fdcc7f963e62c97386720f3dedea70b6917fb6dfb47f7f920a57ad6080f1c29b
|














