Python module for 3D Monte Carlo Simulation of Light Propagation


Project description
PyTissueOptics
A hardware-accelerated Python module to simulate light transport in arbitrarily complex 3D media with ease.


This python package is a fast and flexible implementation of Monte Carlo modeling for light transport in diffuse media. The package is easy to set up and use, and its mesh-based approach makes it a polyvalent tool to simulate light transport in arbitrarily complex scenes. The package offers both a native Python implementation and a hardware-accelerated version using OpenCL which supports most GPUs and CPUs.
Designed with research and education in mind, the code aims to be clear, modular, and easy to extend for a wide range of applications.
Notable features
- Supports arbitrarily complex mesh-based 3D environments.
- Normal smoothing for accurate modeling of curved surfaces like lenses.
- Per-photon data points of deposited energy, fluence rate and intersection events.
- Hardware accelerated with
OpenCLusing PyOpenCL. - Photon traces & detectors.
- Import external 3D models (
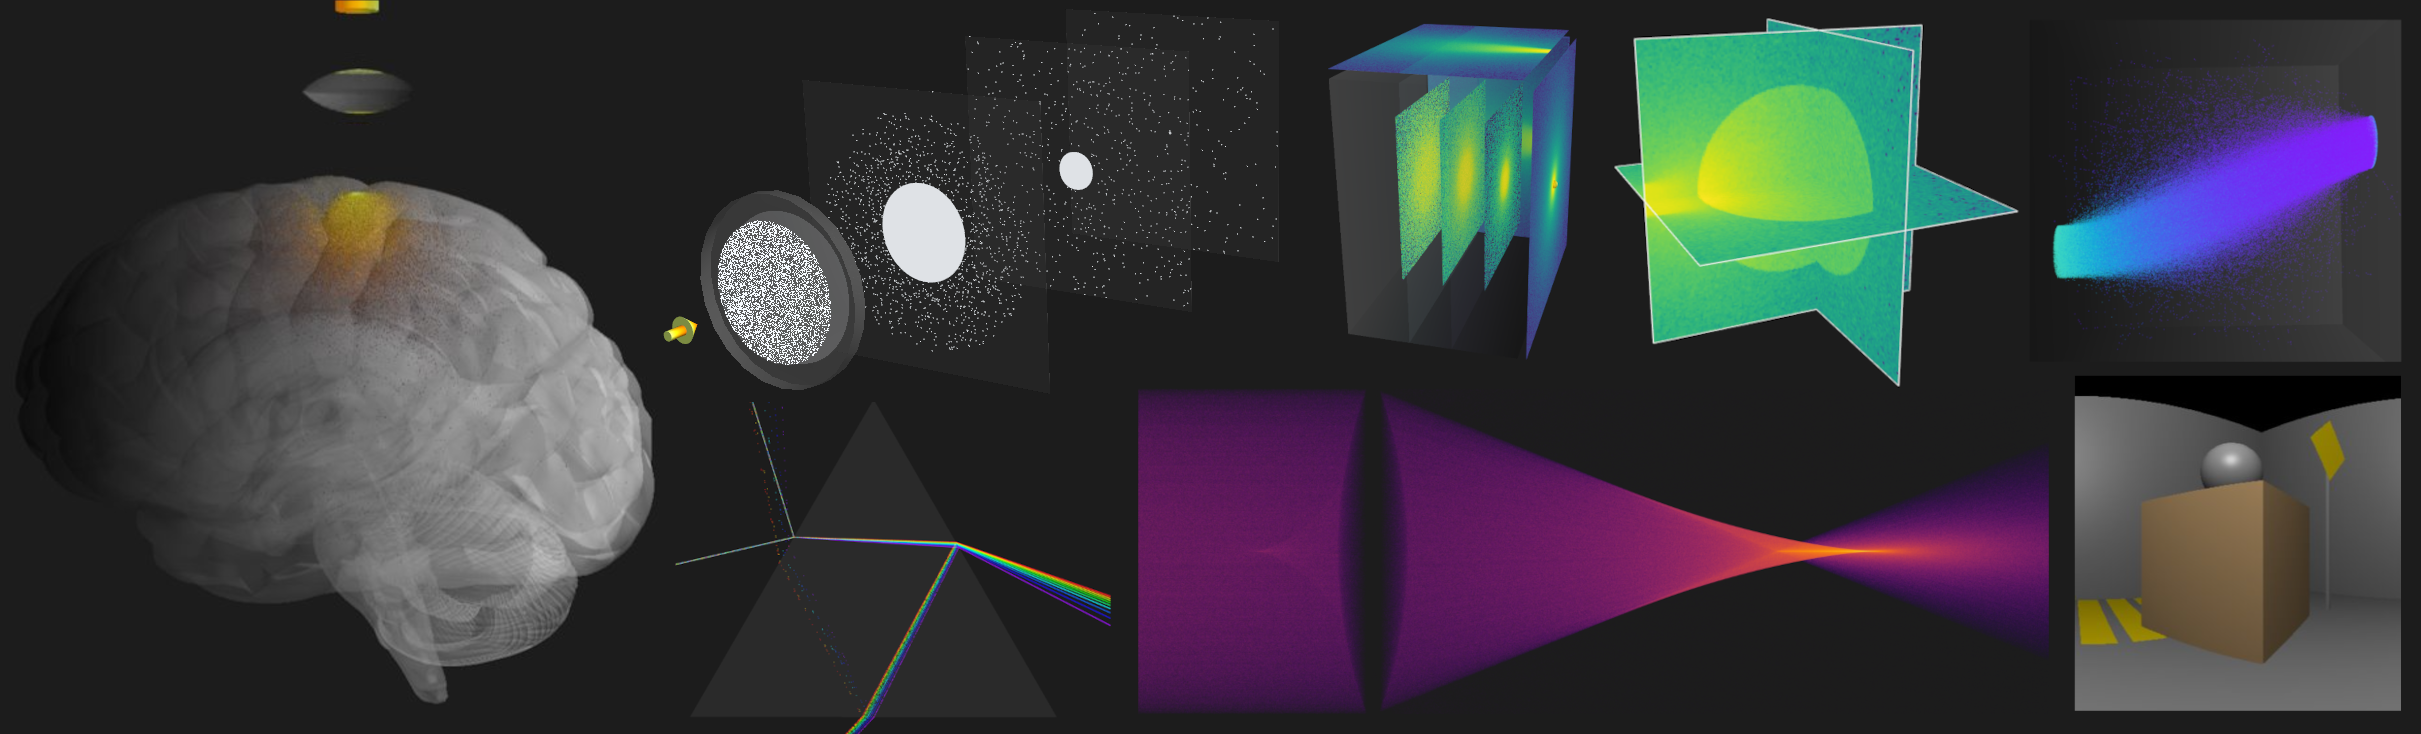
.OBJ). - Many 3D visualization options built with Mayavi.
- Low memory mode with auto-binning to 2D views.
- Reusable graphics framework to kickstart other raytracing projects like SensorSim.
Installation
pip install pytissueoptics
Getting started
A command-line interface is available to quicky run a simulation from our pool of examples:
python -m pytissueoptics --help
You can kick start your first simulation using one of our pre-defined scene under the samples module.
from pytissueoptics import *
# Define (scene, source, logger)
N = 500_000
scene = samples.PhantomTissue()
source = DivergentSource(
position=Vector(0, 0, -0.1), direction=Vector(0, 0, 1), N=N, diameter=0.2, divergence=0.78
)
logger = EnergyLogger(scene)
# Run
source.propagate(scene, logger=logger)
# Stats & Visualizations
viewer = Viewer(scene, source, logger)
viewer.reportStats()
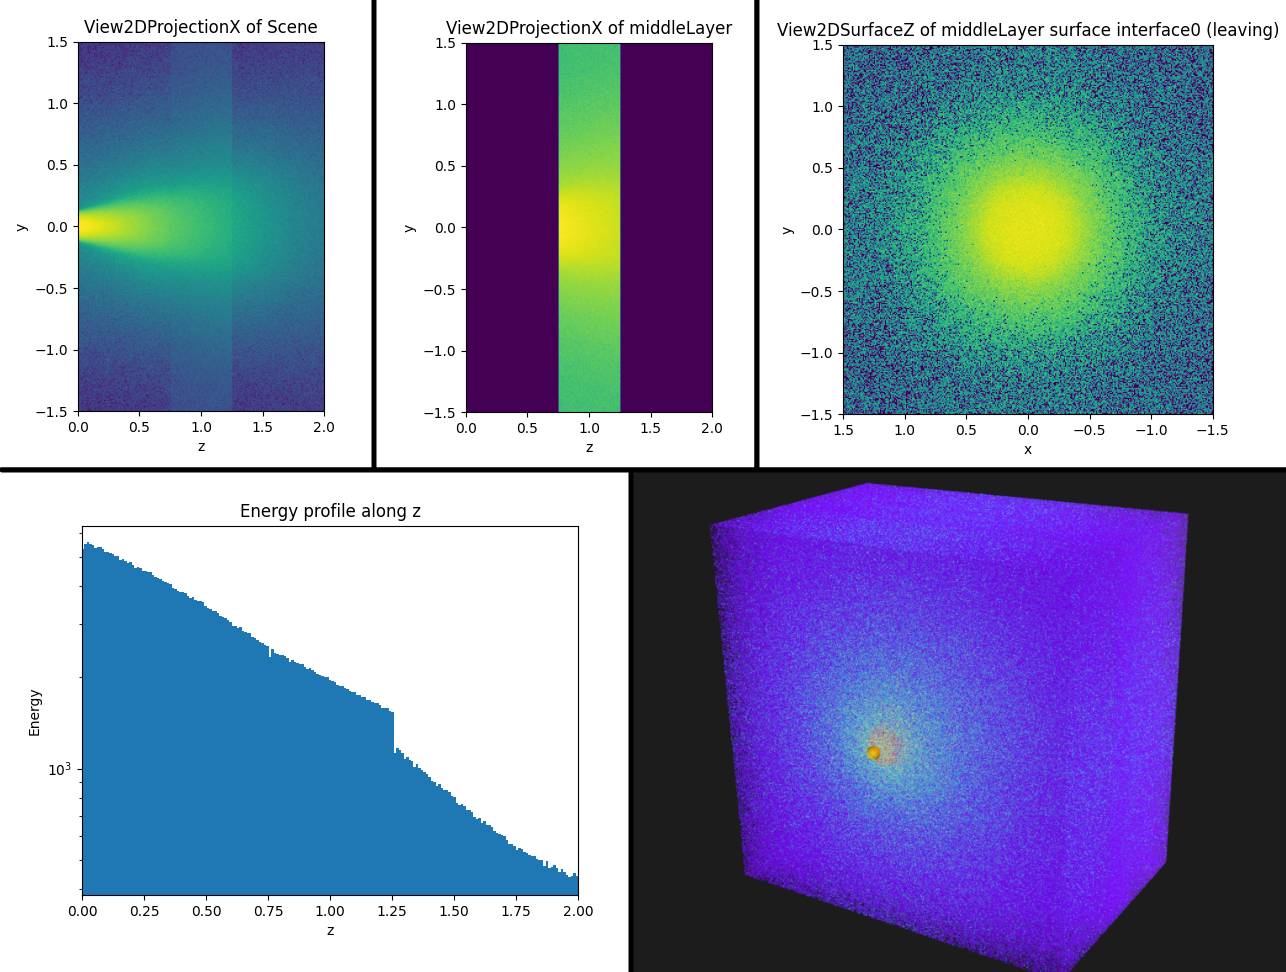
viewer.show2D(View2DProjectionX())
viewer.show2D(View2DProjectionX(solidLabel="middleLayer"))
viewer.show2D(View2DSurfaceZ(solidLabel="middleLayer", surfaceLabel="interface0"))
viewer.show1D(Direction.Z_POS)
viewer.show3D()
Expected output
Report of solid 'backLayer'
  Absorbance: 67.78% (10.53% of total power)
    Transmittance at 'backLayer_back': 22.4%
    Transmittance at 'interface0': 4.9%
    ...
Scene definition
Here is the explicit definition of the above scene sample. We recommend you look at other examples to get familiar with the API.
materials = [
   ScatteringMaterial(mu_s=2, mu_a=1, g=0.8, n=1.4),
   ScatteringMaterial(mu_s=3, mu_a=1, g=0.8, n=1.7),
   ScatteringMaterial(mu_s=2, mu_a=1, g=0.8, n=1.4),
]
w = 3
frontLayer = Cuboid(a=w, b=w, c=0.75, material=materials[0], label="frontLayer")
middleLayer = Cuboid(a=w, b=w, c=0.5, material=materials[1], label="middleLayer")
backLayer = Cuboid(a=w, b=w, c=0.75, material=materials[2], label="backLayer")
layerStack = backLayer.stack(middleLayer, "front").stack(frontLayer, "front")
scene = ScatteringScene([layerStack])
Hardware acceleration
Depending on your platform and GPU, you might already have OpenCL drivers installed, which should work out of the box. Run a PyTissueOptics simulation first to see your current status.
Follow the instructions on screen to get setup properly. It will offer to run a benchmark test to determine the ideal number of work units for your hardware. For more help getting OpenCL to work, refer to PyOpenCL's documentation on the matter. Note that you can disable hardware acceleration at any time with
disableOpenCL()or by setting the environment variablePTO_DISABLE_OPENCL=1.
Examples
All examples can be run using the CLI tool:
python -m pytissueoptics --list
python -m pytissueoptics --examples 1,2,3
- Scene sample
- Infinite medium
- Optical lens & saving progress
- Custom layer stack
- Sphere in cube
- Sampling volume simulation
Other scene and benchmark examples are available under /examples, including:
Known limitations
- It uses Henyey-Greenstein approximation for scattering direction because it is sufficient most of the time.
- Reflections are specular, which does not account for the roughness of materials. A Bling-Phong reflection model could be added in a future release.
Acknowledgment
This package was first inspired by the standard, tested, and loved MCML from Wang, Jacques and Zheng , itself based on Prahl and completely documented, explained, dissected by Jacques and Prahl. The original idea of using Monte Carlo for tissue optics calculations was first proposed by Wilson and Adam in 1983. This would not be possible without the work of these pioneers.


Download files
Download the file for your platform. If you're not sure which to choose, learn more about installing packages.
Source Distribution
Built Distribution
Filter files by name, interpreter, ABI, and platform.
If you're not sure about the file name format, learn more about wheel file names.
Copy a direct link to the current filters
File details
Details for the file pytissueoptics-2.0.1.tar.gz.
File metadata
- Download URL: pytissueoptics-2.0.1.tar.gz
- Upload date:
- Size: 1.4 MB
- Tags: Source
- Uploaded using Trusted Publishing? No
- Uploaded via: twine/6.2.0 CPython/3.12.10
File hashes
| Algorithm | Hash digest | |
|---|---|---|
| SHA256 |
6b822ac2f68d6737d4efe0224d046b9acee7564a54d09d9cd9309d7c5dd858c9
|
|
| MD5 |
f681390b5ef028b0580ad830d487f2e6
|
|
| BLAKE2b-256 |
0ea2c7b95ac9c424aac5a96958bf46374efc87e57835a13f73fd438f209743a2
|
File details
Details for the file pytissueoptics-2.0.1-py3-none-any.whl.
File metadata
- Download URL: pytissueoptics-2.0.1-py3-none-any.whl
- Upload date:
- Size: 436.2 kB
- Tags: Python 3
- Uploaded using Trusted Publishing? No
- Uploaded via: twine/6.2.0 CPython/3.12.10
File hashes
| Algorithm | Hash digest | |
|---|---|---|
| SHA256 |
b1681217c85885036fc2b2c91aa9e4cc8d32c1fdfbe0fa5bbf480f1564da790f
|
|
| MD5 |
8de7862656f1616bde335c5f78d25806
|
|
| BLAKE2b-256 |
083d240f3ef1ca17bffca9ae4fb04610a1fc9ff3476523321ea53c58b387ef6c
|


