
PyUbbink package
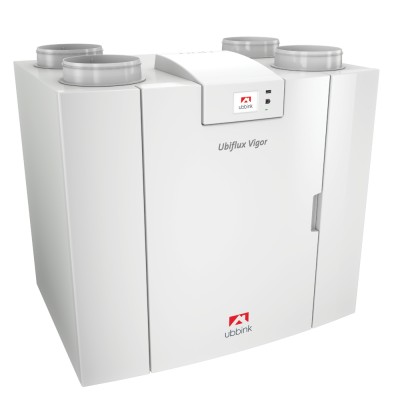
This is an unofficial implementation of the Ubbink Ubiflux Vigor ventillation system Modbus communications.
Why? To be able to control these devices from HomeAssistant, or from your computer.
Hardware prerequisites
- Ubiflux Vigor W325 or W400 device
- USB - RS458 dongle
Hardware setup
You have to connect your computer or Pi to the Vigor device with a (preferably) twisted pair of wire. Connect the A, B ports of the dongle to the red Modbus port on the Vigor device, A -> 2, B -> 3. If your dongle has a GND port, connect it to 1. (In my setup, I only use two wires, without GND)
You do not need the Plus PCB to use this package. (Ubbink 0883246 - circuit board 'Plus' for Vigor with WIFI and LAN)
Software Prerequisites
- Install Python 3, did not checked the actual minimum version, 3.7+ will be fine
- Install pymodbus:
pip install pymodbus --upgrade - Install PyUbbink:
pip install pyubbink - For the dongle - depending on the version you have - you might need a CH341 chip driver. For Windows, search
CH341SERand you will find it. For Pi + HomeAssistant it worked for me without additional driver.
Usage
Creating the pymodbus client
Create a pymodbus serial client, typically ModbusSerialClient. Use the device name where you connected. For Windows, simply use the COM port name.
client = ModbusClient(port='/dev/ttyUSB0', baudrate=19200, stopbits = 1, bytesize = 8, parity = 'N', method="rtu")
In the wall unit, you can change the serial speed to other values - make sure you use the same settings.
The RTU mode is important as Vigor devices use RTU framing.
Connection
Use the connect method in the pymodbus client to open the serial port:
client.connect()
When connected you can attach the pyubbink wrapper vigor = VigorDevice(client)
The default ModBus slave address is 20. If you change that on the wall unit you can specify it with the unit parameter, like VigorDevice(client, 42)
When done use close: client.close()
Obtaining device information
get_serial_number() returns the serial number as a string.
Obtaining sensor values
| Sensor | Method | Unit |
|---|---|---|
| Intake temperature | get_supply_temperature() |
Celsius |
| Intake pressure | get_supply_pressure() |
Pa |
| Intake actual airflow | get_supply_airflow_actual() |
m3/h |
| Intake airflow preset | get_supply_airflow_preset() |
m3/h |
| Exhaust temperature | get_extract_temperature() |
Celsius |
| Exhaust pressure | get_extract_pressure() |
Pa |
| Exhaust actual airflow | get_extract_airflow_actual() |
m3/h |
| Exhaust airflow preset | get_extract_airflow_preset() |
m3/h |
Obtaining statuses
Here are some statuses you can query:
| Status | Method | Possible values |
|---|---|---|
| Bypass status | get_bypass_status() |
"opening","closing", "open", "closed" state of the bypass valve,"initializing" during boot |
| Filter status | get_filter_status() |
"normal", "dirty" |
| Airflow mode | get_airflow_mode() |
Wall unit: "wall_unit" in this case the wall unit controls the deviceStandard presets: "holiday","low","normal","high" the last selected preset set by set_airflow_mode()Custom: "custom" if the last setting was done with set_custom_airflow_rate() |
Actions
The following methods are to change the airflow. If the wall unit is in manual mode, it seems all of these are ignored, and the only manual setting of the wall unit used. Once you set it back to clock program, the last setting applied by these method will be used.
Also, it seems, if these settings applied without reasonable delay (>5 secs), the device seems ignoring them.
| Action | Method | Parameters |
|---|---|---|
| Revert to wall unit | set_airflow_mode("wall_unit") |
Use the "wall_unit to hand back the control to the wall unit. |
| Choose preset | set_airflow_mode(mode) |
Selects one of the presets: "holiday","low","normal","high" |
| Custom rate | set_custom_airflow_rate(rate) |
0, 50-400, if out of range the value will be adjusted to a valid one. This option is only available for Vigor W400 (according the documentation. I have W400 and it works.) |
Full example
from pymodbus.client.sync import ModbusSerialClient as ModbusClient
from pyubbink import VigorDevice
import time

client = ModbusClient(port='/dev/ttyUSB0', baudrate=19200, stopbits = 1, bytesize = 8, parity = 'N', method="rtu", timeout=60)
vigor = VigorDevice(client)

client.connect()
print("Device serial number:    " + vigor.get_serial_number())

print("Intake temperature:      " + str(vigor.get_supply_temperature()) + " Celsius")
print("Intake pressure:    " + str(vigor.get_supply_pressure()) + " Pa")
print("Intake actual airflow:   " + str(vigor.get_supply_airflow_actual()) + " m3/h")
print("Intake airflow preset:   " + str(vigor.get_supply_airflow_preset()) + " m3/h")
print("Exhaust temperature:     " + str(vigor.get_extract_temperature()) + " Celsius")
print("Exhaust pressure:   " + str(vigor.get_extract_pressure()) + " Pa")
print("Exhaust actual airflow:  " + str(vigor.get_extract_airflow_actual()) + " m3/h")
print("Exhaust airflow preset:  " + str(vigor.get_extract_airflow_preset()) + " m3/h")

print("Airflow mode:       " + vigor.get_airflow_mode())
print("Bypass status:      " + vigor.get_bypass_status())
print("Filter status:      " + vigor.get_filter_status())

# choose a preset
vigor.set_airflow_mode("low")
time.sleep(60)

# choose a custom rate
vigor.set_airflow_rate(135)
time.sleep(60)

# revert back to wall unit
vigor.set_airflow_mode("wall_unit")

client.close()
References
General description
https://www.ubbink.com/nl-be/ventilatie/woonhuisventilatie/woonhuisventilatie/warmteterugwinunits
Manual
Interestingly, only the Dutch version contains the ModBus commands. https://www.ubbink.com/getmedia/b970e7e8-a20f-4265-82c0-948590c74311/Ubiflux-Vigor-W325-installatiehandleiding-versie-12-2018-NL.PDF
When looking at the PDF, pay attention to the hex and decimal values. In the documentation, they are sometimes hex, sometimes decimal.
Hardware
Dongle
Search for CH340 USB to RS485 485 Converter Adapter Module Looks like:
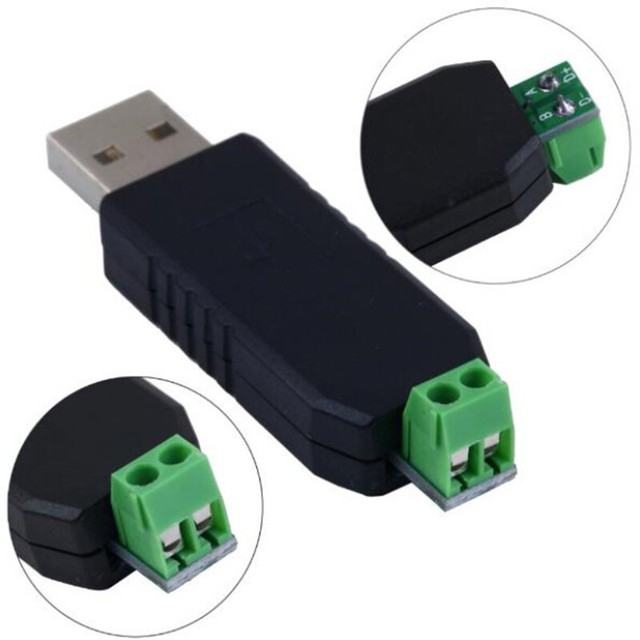
or
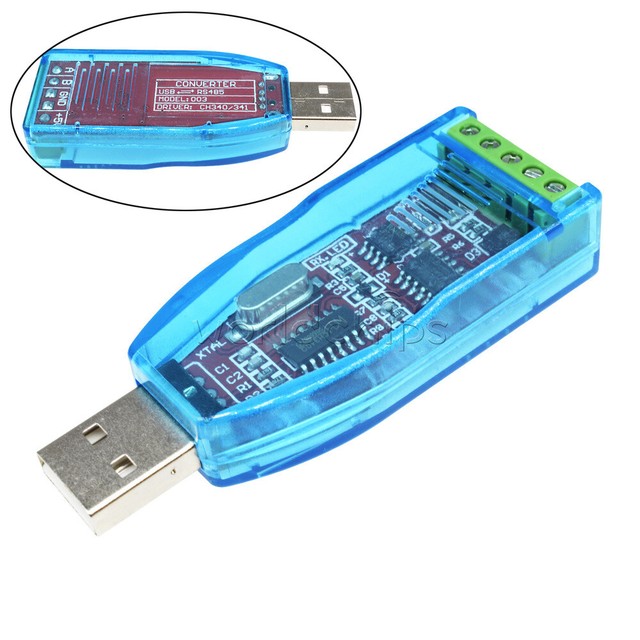
For me, this blue one did not work, but I might got a defective one.
Wall unit
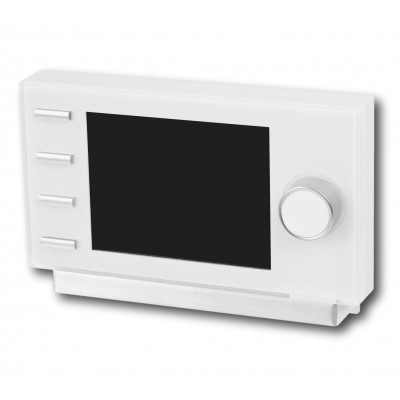
Ubbink 0888030 - digital control panel Air Control
1 maintainer

Metadata
1 maintainer
Release files for pyubbink 0.1
For a detailed explanation of source distributions (sdists) and built distributions (wheels), please see the package formats documentation.
Source distribution (sdist)
| File | Size | Uploaded | |
|---|---|---|---|
| pyubbink-0.1.tar.gz | 7.4 kB | Details |
Built distribution (wheel)
| File | Interpreter | ABI | Platform | Reset |
|---|---|---|---|---|
| pyubbink-0.1-py3-none-any.whl | Python 3 | none | any | Details |
Total release size: 14.5 kB
Release files / pyubbink-0.1.tar.gz
| Download URL | pyubbink-0.1.tar.gz |
|---|---|
| Size | 7.4 kB |
| Tags | Source |
|
SHA-256 checksum How to use checksums |
9af4bf4fbb187efd5141574af1e49084b715c846a5c71a903ade0631eae6ee8b
|
|
BLAKE2b-256 checksum How to use checksums |
f5a32b4761e3a07d145a53c179f152ce685e28cadfe0d4f2d9131cee67bde0f9
|
| Upload date | |
|
Uploaded using Trusted Publishing? What is trusted publishing? |
No |
| Uploaded via |
twine/3.4.1 importlib_metadata/4.4.0 pkginfo/1.7.0 requests/2.25.1 requests-toolbelt/0.9.1 tqdm/4.61.0 CPython/3.9.1
|
Release files / pyubbink-0.1-py3-none-any.whl
| Download URL | pyubbink-0.1-py3-none-any.whl |
|---|---|
| Size | 7.0 kB |
| Tags | Python 3 |
|
SHA-256 checksum How to use checksums |
b36a6646737d25e4865b2b45c71f3efaef95be984b0667de2c17744d76f71b85
|
|
BLAKE2b-256 checksum How to use checksums |
7e461d627beecb731114fd3813cf2563008a03299c1399c26ea6c504a489294a
|
| Upload date | |
|
Uploaded using Trusted Publishing? What is trusted publishing? |
No |
| Uploaded via |
twine/3.4.1 importlib_metadata/4.4.0 pkginfo/1.7.0 requests/2.25.1 requests-toolbelt/0.9.1 tqdm/4.61.0 CPython/3.9.1
|













