VSCP BME680 sensor handler

Project description
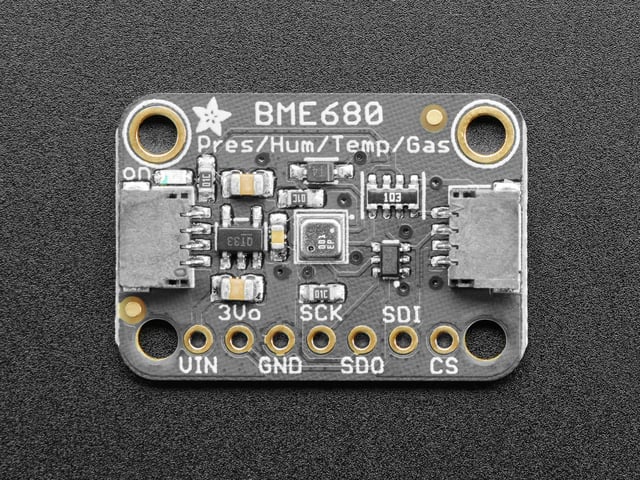
vscp-python-sensor-bme680


This project consist of a scripts to deliver data from a BME680 sensor to a MQTT broker (mqtt-bme680.py). It is built upon the Adafruit BME680 module
It will deliver VSCP events for
- Temperature
- Humidity
- Pressure (raw reading)
- Pressure (adjusted for sea level)
- Altitude
- Gas concentration
- Dew point
Typically the scripts is used in a cron job to deliver the events on timed intervals.
Adafruit is the most popular source for BME680 breakout boards but there are many others available also in different price ranges.
The scripts can be configured to be used with either a SPI or I2C connected sensor.
Install/connect the sensor
Lady Ada has written a very good tutorial on this here. Follow it to install your sensor.
Install
Prerequisites
The code here is dependent on the VSCP helper library. Therefore you have to install this package first. It is available for Debian type systems including Raspberry Pi. Check and download the latest version here
For convenience this is how the current version is installed on a Raaspberry Pi
wget https://github.com/grodansparadis/vscp-helper-lib/releases/download/v14.0.2/libvscphelper14_14.0.2-1_armhf.deb

wget https://github.com/grodansparadis/vscp-helper-lib/releases/download/v14.0.2/libvscphelper14-dev_14.0.2-1_armhf.deb

sudo dpkg -i ./libvscphelper14_14.0.2-1_armhf.deb
sudo dpkg -i ./libvscphelper14-dev_14.0.2-1_armhf.deb
Note that there may be [later versions available)(https://github.com/grodansparadis/vscp-helper-lib/releases) then the one downloaded above. You should always install the latest version.
Install the package
The scripts are available as a package vscp-python-sensor-bme680 on PyPi. This means you can do an automatic install with pip that will handle all dependencies expect for the helper library mentioned above which must be install manually.
The installation process is easy
pip3 install vscp-python-sensor-bme680
To later upgrade to the latest version use
pip3 install --upgrade vscp-python-sensor-bme680
It is not required but recommended to install in a virtual environment To install in a virtual environment in your current project:
mkdir project-name && cd project-name
python3 -m venv .env
source .env/bin/activate
then do the install of vscp-python-sensor-bme680 as of above.
After install you can use vscp-bme680.py from the command line. Info on how to configure the scripts for your needs are below.
Manual Install
For some reason you may not want to use PyPi and want to download the scripts from the github repository.
The script depends on some other modules that you need to install before using it. It is recommended to install everything in a virtual environment.
As mentioned above you need to install the VSCP helper library before installing this module.
It is recommended to install in a virtual environment in your current project:
git clone https://github.com/grodansparadis/vscp-python-sensor-bme680.git
cd vscp-python-sensor-bme680
python3 -m venv .env
source .env/bin/activate
You may need to install Python venv with
apt install python3-venv
if it's not installed.
Configparser
Configparser can be found on PyPi and is documented https://docs.python.org/3/library/configparser.html. Install with
pip3 install configparser
Install adafruit-circuitpython-bme680 module
On supported GNU/Linux systems like the Raspberry Pi, you can install the driver locally from PyPI. To install for current user:
pip3 install adafruit-circuitpython-bme680
To install system-wide (this may be required in some cases):
sudo pip3 install adafruit-circuitpython-bme680
Install VSCP modules
pyvscphelper is not needed if only MQTT should be used. You can install the modules from PyPi
pip3 install pyvscp
pip3 install pyvscphelper
If you need them on more places either go for a global install or use a virtual environment and install all the modules in it.
Install MQTT module
For MQTT functionality Paho MQTT module is needed. You can install the modules from PyPi
pip3 install paho-mqtt
Configure
You setup the code by either editing the scripts or create a configuration file with the settings. In the scripts all relevant values can be found in the beginning of the file along with documentation.
The settings are named the same in the config file as in the script itself so the documentation for the configuration file is valid also for directly adding the scripts.
To get help you can issue
mqtt-bme680.py --help
on the command line after the module is installed.
The recommended way to configure the scripts is to use a configuration file and store this file in a safe location as it contains usernames and password and in that way can protect this sensitive information. The syntax to instruct the script to read a configuration file is
mqtt-bme680.py --configure path-to-config-file
So
mqtt-bme680.py --configure /etc/vscp/bme680-config.ini
will read the configuration from /etc/vscp/bme680-config.ini
Sample configuration file
If you install in a virtual environment as recommended above you will find a sample configuration file in
_.env/pyvscp-sensors-bme680-samp
For a standard install you find it in
_.local/pyvscp-sensors-bme680-samp
and for a global install you can get the path by issuing
pip3 -V
Content
The GENERAL section
bVerbose
Set to
bVerbose = True
to get some info when the script is run. Set to
bVerbose = False
to make the script silent.
bUseSPI
Set
bUseSPI = True
to use SPI communication to connect the sensor instead of I2C
The [VSCP] section
guid
The scripts use the MAC address of the machine they are run on to construct a GUID on the format
FF:FF:FF:FF:FF:FF:FF:FE:M5:M4:M3:M2:M1:M0:id1:id0
where M5:M4:M3:M2:M1:M0 is the MAC address and id1:id0 sensor id.
If you don't want this you can supply your own GUID here. Note that the two lowest positions also now is used for id's so normally the GUID should have zeros in these positions.
sensorindex_temperature
Sensor index for the temperature sensor. Default is that it is set to zero as the GUID is unique for each sensor. Set to a byte value of your choice if you need it.
sensorindex_humidity
Sensor index for the humidity sensor. Default is that it is set to zero as the GUID is unique for each sensor. Set to a byte value of your choice if you need it.
sensorindex_pressure
Sensor index for the pressure sensor. Default is that it is set to zero as the GUID is unique for each sensor. Set to a byte value of your choice if you need it.
sensorindex_pressure_adj
Sensor index for the adjusted sea level pressure. Default is that it is set to zero as the GUID is unique for each sensor. Set to a byte value of your choice if you need it.
sensorindex_gas
Sensor index for the gas concentration sensor. Default is that it is set to zero as the GUID is unique for each sensor. Set to a byte value of your choice if you need it.
sensorindex_altitude
Sensor index for the altitude. Default is that it is set to zero as the GUID is unique for each sensor. Set to a byte value of your choice if you need it.
sensorindex_dewpoint
Sensor index for the dew point. Default is that it is set to zero as the GUID is unique for each sensor. Set to a byte value of your choice if you need it.
zone
Set the zone to a value between 0-255 if you need it. Default is zero.
subzone
Set the subzone to a value between 0-255 if you need it. Default is zero.
id_temperature
Set id_temperature to a value between 0-65535 to set the id for the reported value. This is the two LSB bytes of the GUID used to report the sensor value. Default is 1.
id_humidity
Set id_temperature to a value between 0-65535 to set the id for the reported value. This is the two LSB bytes of the GUID used to report the sensor value. Default is 2.
id_pressure
Set id_temperature to a value between 0-65535 to set the id for the reported value. This is the two LSB bytes of the GUID used to report the sensor value. Default is 3.
id_pressure_adj
Set id_temperature to a value between 0-65535 to set the id for the reported value. This is the two LSB bytes of the GUID used to report the sensor value. Default is 4.
id_gas
Set id_temperature to a value between 0-65535 to set the id for the reported value. This is the two LSB bytes of the GUID used to report the sensor value. Default is 5.
id_altitude
Set id_temperature to a value between 0-65535 to set the id for the reported value. This is the two LSB bytes of the GUID used to report the sensor value. Default is 6.
id_dewpoint
Set id_dewpoint to a value between 0-65535 to set the id for the reported value. This is the two LSB bytes of the GUID used to report the sensor value. Default is 6.
The [MQTT] section
host
The address for the MQTT broker which will get reported values.
port
Port on the MQTT broker.
user
Username used to login to MQTT broker.
password
Password used to login to MQTT broker.
topic_temperature
This is the topic under which the temperature event will be sent. The default is
vscp/{xguid}/{xclass}/{xtype}
- {xguid} will be replaced with the GUID of the event.
- {xclass} will be replaced with the VSCP class of the event.
- {xtype} will be replaced with the VSCP type of the event.
-> stands for "input" and is used by VSCP when talking to a MQTT broker. <-- is the opposite, "output".
topic_humidity
This is the topic under which the humidity event will be sent. The default is
vscp/{xguid}/{xclass}/{xtype}
See topic_temperature for full info.
And empty topic can be used if you don't want the value to be sent.
topic_pressure
This is the topic under which the pressure event will be sent. The default is
vscp/{xguid}/{xclass}/{xtype}
See topic_temperature for full info.
And empty topic can be used if you don't want the value to be sent.
topic_pressure_adj
This is the topic under which the sea level adjusted pressure event will be sent. The default is
vscp/{xguid}/{xclass}/{xtype}
See topic_temperature for full info.
And empty topic can be used if you don't want the value to be sent.
topic_gas
This is the topic under which the gas concentration event will be sent. The default is
vscp/{xguid}/{xclass}/{xtype}
See topic_temperature for full info.
And empty topic can be used if you don't want the value to be sent.
topic_altitude
This is the topic under which the altitude event will be sent. The default is
vscp/{xguid}/{xclass}/{xtype}
See topic_temperature for full info.
And empty topic can be used if you don't want the value to be sent.
topic_dewpoint
This is the topic under which the dew point event will be sent. The default is
vscp/{xguid}/{xclass}/{xtype}
See topic_temperature for full info.
And empty topic can be used if you don't want the value to be sent.
The [BME680] section
sea_level_pressure
Pressure in hPa at sea level. Used for pressure adjustment. Default is 1013.25
temp_corr
Correction value in degrees Celsius for sensor temperature reading. The value entered here will be subtracted from the reading. Default is 0.
height_at_location
Set the height in meters for your location. Used for pressure adjustments. Default is 412.0 meters.
using
After you have installed the module and created a configuration file test the script with
mqtt-bme680.py -v -c path-to-config
the MQTT broker you have defined should receive the events under the defined topics like this

and you will get some verbose info on the screen like this
Connection in progress... 192.168.1.7
-------------------------------------------------------------------------------
Sending...
Temperature: -3.9 C
Humidity: 97.5 %
Pressure: 96604 Pa
Relative pressure: 101568 Pa
Gas: 5014 Ohm
Altitude 401 meter
Dew point -1.9 C
-------------------------------------------------------------------------------
Closed
now you can add the script to cron to get measurement events send to your broker on even intervals.
node-red and node.js
with the VSCP tools available for node.js and node-red you can easily graph and in other ways handel the published measurement data.
VSCP
For VSCP you find info at the VSCP main site
VSCP docs are collected here.
If you are interested in learning more about VSCP the main site is here
Copyright © 2000-2020 Ake Hedman, Grodans Paradis AB - MIT license.


Download files
Download the file for your platform. If you're not sure which to choose, learn more about installing packages.
Source Distributions
Built Distribution
Filter files by name, interpreter, ABI, and platform.
If you're not sure about the file name format, learn more about wheel file names.
Copy a direct link to the current filters
File details
Details for the file pyvscp_sensors_bme680-1.0.1-py2.py3-none-any.whl.
File metadata
- Download URL: pyvscp_sensors_bme680-1.0.1-py2.py3-none-any.whl
- Upload date:
- Size: 25.1 kB
- Tags: Python 2, Python 3
- Uploaded using Trusted Publishing? No
- Uploaded via: twine/3.2.0 pkginfo/1.6.1 requests/2.23.0 setuptools/49.3.1 requests-toolbelt/0.9.1 tqdm/4.51.0 CPython/3.8.6
File hashes
| Algorithm | Hash digest | |
|---|---|---|
| SHA256 |
bf5f895f4b65babd46cfa7065f4dd9a3da921233d8dc866e75f9ba5aea3fc129
|
|
| MD5 |
958e8806dcf7db2c7892b2e8b7ec810e
|
|
| BLAKE2b-256 |
be82e3e2673c6fb36045061c9dd8798e0a0a4b7237e25212862576e66674df71
|


