
Qat (Qt Application Tester)
Description
Qat is a testing framework for Qt-based applications.
Qat provides a Python API to interact with any existing Qt application by accessing QML/QtQuick/QWidget elements and simulating user manipulations.
It is also integrated to behave to support Behavior-Driven Development (BDD) with the Gherkin language.
Although Qat uses the GUI to interact with the tested application, it is oriented towards BDD and functional testing rather than UI or non-regression testing.
The main objective of Qat is to provide quick feedback to developers and easy integration to build systems.
Requirements
Qat requires Python >= 3.9.
Qat supports C++ applications as well as Python bindings such as PySide and PyQt.
Tested applications don't need to be modified but they must be compiled in release mode with a compatible compiler and a dynamically-linked Qt version:
| Qt | Linux (gcc) | Windows (MSVC) | Mac OS (Arm & Intel) |
|---|---|---|---|
| 5.15 (LTS) | yes | yes | yes1 |
| 6.0 | no | no | no |
| 6.1 | no | no | no |
| 6.2 (LTS) | yes | yes | yes |
| 6.3 | yes | yes | yes |
| 6.4 | yes | yes | yes |
| 6.5 (LTS) | yes | yes | yes |
| 6.6 | yes | yes | yes |
| 6.7 | yes | yes | yes |
| 6.8 (LTS) | yes | yes | yes |
| 6.9 | yes | yes | yes |
| 6.10 | yes | yes | yes |
| 6.11 | yes | yes | yes |
1 Qt 5 requires Rosetta to run on Silicon machines
Installation
Qat can be installed with Pip:
pip install qat
This will also install the following dependencies:
- behave (for BDD testing)
- customtkinter and pillow (for GUI)
- tkinter-tooltip (for GUI)
- xmlschema (for test report)
Tkinter
If tkinter did not come pre-packaged with your python installation, you may need to install it manually.
Arch / Manjaro / Other derivatives
To install tkinter, run the following command as root:
pacman -S tk
Debian / Other derivatives
To install tkinter, run the following command as root:
apt-get install python3-tk
Fedora
To install tkinter, run the following command as root:
dnf install python3-tkinter
MacOS
To install tkinter, run the following command as root:
brew install python-tk
Setup
The recommended approach is to install VSCode with the following extensions:
- Python
- Pylance
- Test Explorer UI
- Behave VSC (for BDD)
Any Python (+ Gherkin) environment can be used (PyCharm, Eclipse/Pydev, VSCode, ...) but the present documentation will use VSCode as a tutorial.
Usage
Creating a test
Once Qat is installed and setup is completed, navigate to the folder where you want to store your tests. From there, open a command prompt and run:
qat-create-suite
That will generate all the files to run a demo BDD test.
If you prefer using a pure Python test, run:
qat-create-suite script
Then you need to register the application you want to test. The easiest way is to use the Qat GUI, but you can also use the Python API. In the current test folder, run the following command:
qat-gui
This will open the Application Manager window:
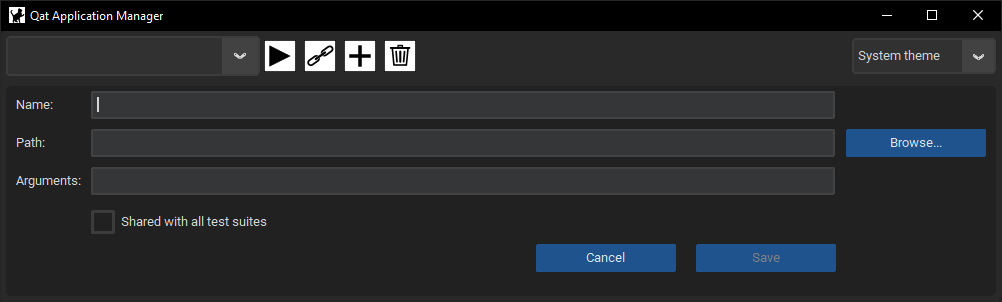
Enter an application name in the Name field, then the application path and arguments in the fields below.
Note: When using PySide or PyQt, enter the path to the main script of the application.
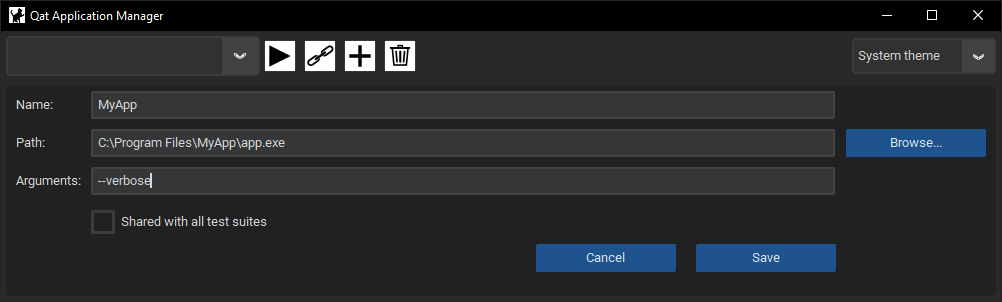
Click on the Save button to register the application.
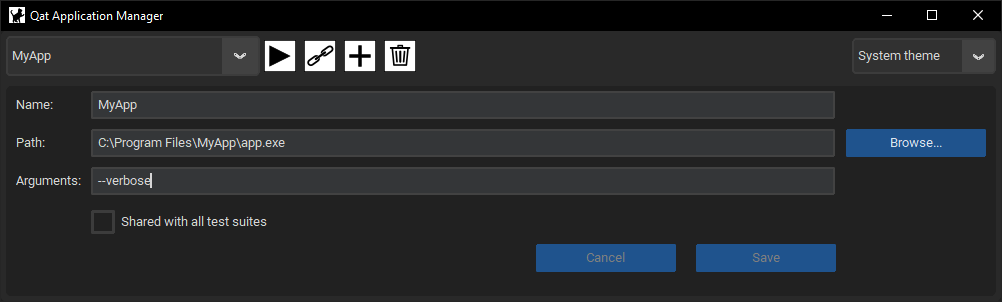
Now you can close the window and launch VSCode:
code .
Running a test
The Python demo can be run like any other script: open demo.py in VSCode then click on Run Python file. For real tests, it is recommended to use a test framework such as Pytest or Unittest.
The BDD demo can be launched from the Test Explorer:
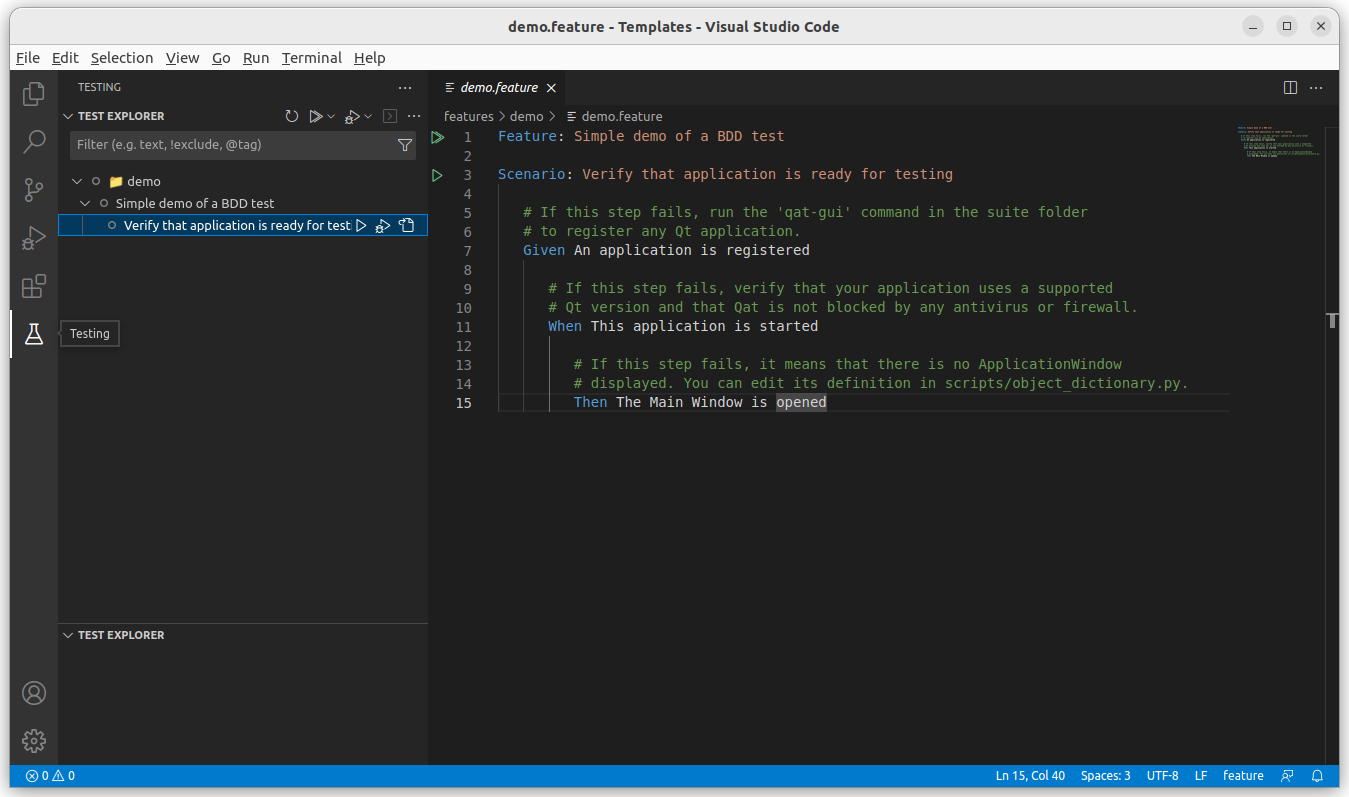
In both cases, the demo will verify that an application has been registered (see previous steps), start it and verify that the main window is opened. An XML report will also be generated.
When the demo is successful, it confirms that Qat is properly working on your machine. Otherwise, please refer to the test itself for indications on how to solve the issue.
Configuring test execution
Test settings are available in testSettings.py. The easiest way to change these values is to add a testSettings.json file to the root of your test suite.
This file can contain the following parameters:
{
   "waitForObjectTimeout": 3000,
   "waitForAppStartTimeout": 60000,
   "waitForAppStopTimeout": 30000,
   "waitForAppAttachTimeout": 3000,
   "longOperationTimeout": 10000,
   "screenshotOnFail": true,
   "continueAfterFail": false,
   "lockUI": "auto"
}
If a key is missing, the default value will be used. During execution, values are available in the Settings class.
If you need to access those values from a script, you can add the following import to your script:
from qat import Settings

# Increase timeout value when finding objects
Settings.wait_for_object_timeout = 5000
All timeouts are in milliseconds.
screenshotOnFail determines whether a screenshot of the application is taken and added to the report after each failure. Default is True.
continueAfterFail determines whether the test execution should continue after a step has failed (BDD only). Default is False
lockUI determines when Qat will lock the application's interface so that it ignores user inputs. Can be one of "always", "never" or "auto" (default, application will not be locked when debugging a test script). Locking the UI allows users to continue working when a test is running, without affecting the test execution.
For more details on API functions please refer to the Python API reference.
You can also explore the tutorials.
Support
You can report any bug, question or feature request by creating a Gitlab issue from this page.
For details, see the issues workflow.
Contributing
Contributions are welcome and accepted through Merge Requests. Please refer to Contributing for detailed instructions.
Authors and acknowledgment
The complete list of authors and contributors is available here.
Qat is built on Gitlab using Docker images provided by Luca Carlon
License
Qat is licensed under the MIT License.
Qat contains a copy of Niels Lohmann's json library which is licensed under the MIT License.
Qat uses components from the Qt framework which is licensed under the LGPLv3 License. Please note that Qat does not distribute any Qt binary: it uses DLL injection to dynamically link to the Qt binaries used by the target application.
The User Interface of Qat uses CustomTkinter and tkinter-tooltip both under the MIT License.
1 maintainer

Release files for qat 1.8.1
For a detailed explanation of source distributions (sdists) and built distributions (wheels), please see the package formats documentation.
Source distribution (sdist)
| File | Size | Uploaded | |
|---|---|---|---|
| qat-1.8.1.tar.gz | 20.5 MB | Details |
Built distribution (wheel)
| File | Interpreter | ABI | Platform | Reset |
|---|---|---|---|---|
| qat-1.8.1-py3-none-any.whl | Python 3 | none | any | Details |
Total release size: 41.2 MB
Release files / qat-1.8.1.tar.gz
| Download URL | qat-1.8.1.tar.gz |
|---|---|
| Size | 20.5 MB |
| Tags | Source |
|
SHA-256 checksum How to use checksums |
697d46b5cd6481197fb616e4be87946f5f775dab481547941460c43c63e0130b
|
|
BLAKE2b-256 checksum How to use checksums |
cb1d6cf0bbc376b24fa0bb1f34eb5d5701d4c8d5a95d80bfedbc1fe9ce97e74a
|
| Upload date | |
|
Uploaded using Trusted Publishing? What is trusted publishing? |
No |
| Uploaded via |
twine/7.0.0 CPython/3.14.7
|
Release files / qat-1.8.1-py3-none-any.whl
| Download URL | qat-1.8.1-py3-none-any.whl |
|---|---|
| Size | 20.7 MB |
| Tags | Python 3 |
|
SHA-256 checksum How to use checksums |
380395843120ab09301f619b44464b59dc8287a1d23aabb27ee8675c5d9eaf45
|
|
BLAKE2b-256 checksum How to use checksums |
d9740bd09599b8b93f0dd34363ee2c50b57b3580bb85660578cf5a28dae76bb2
|
| Upload date | |
|
Uploaded using Trusted Publishing? What is trusted publishing? |
No |
| Uploaded via |
twine/7.0.0 CPython/3.14.7
|














