
Receipt OCR Engine



An efficient OCR engine for receipt image processing.
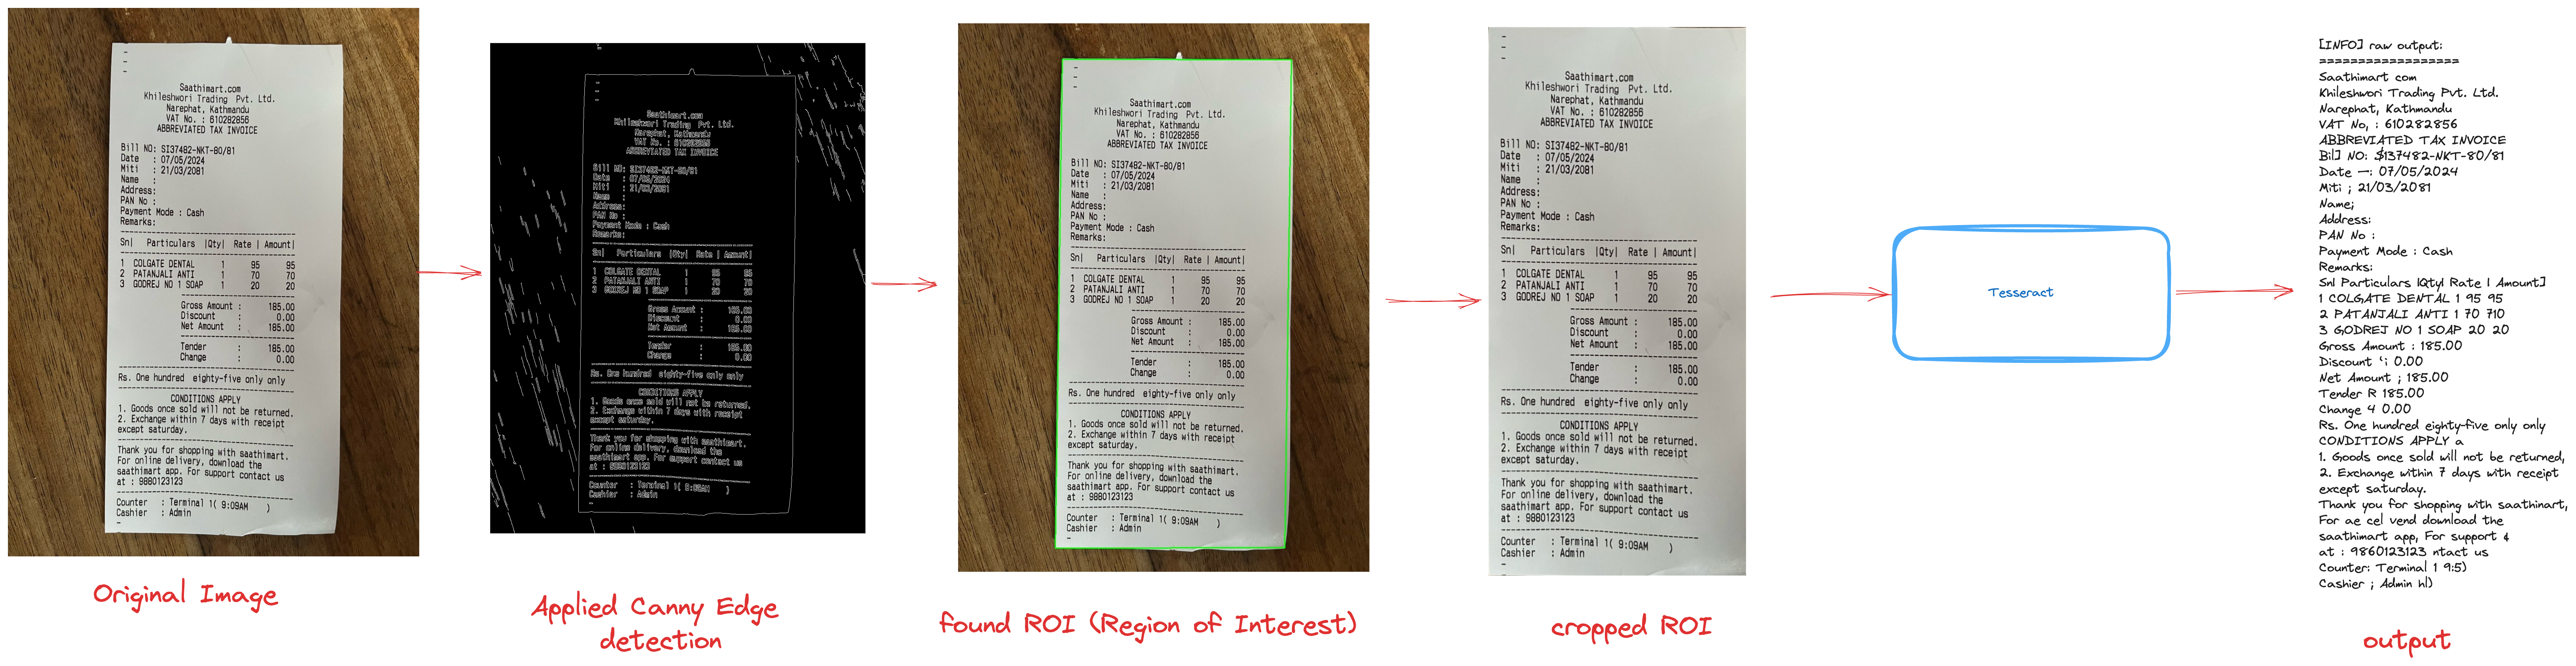
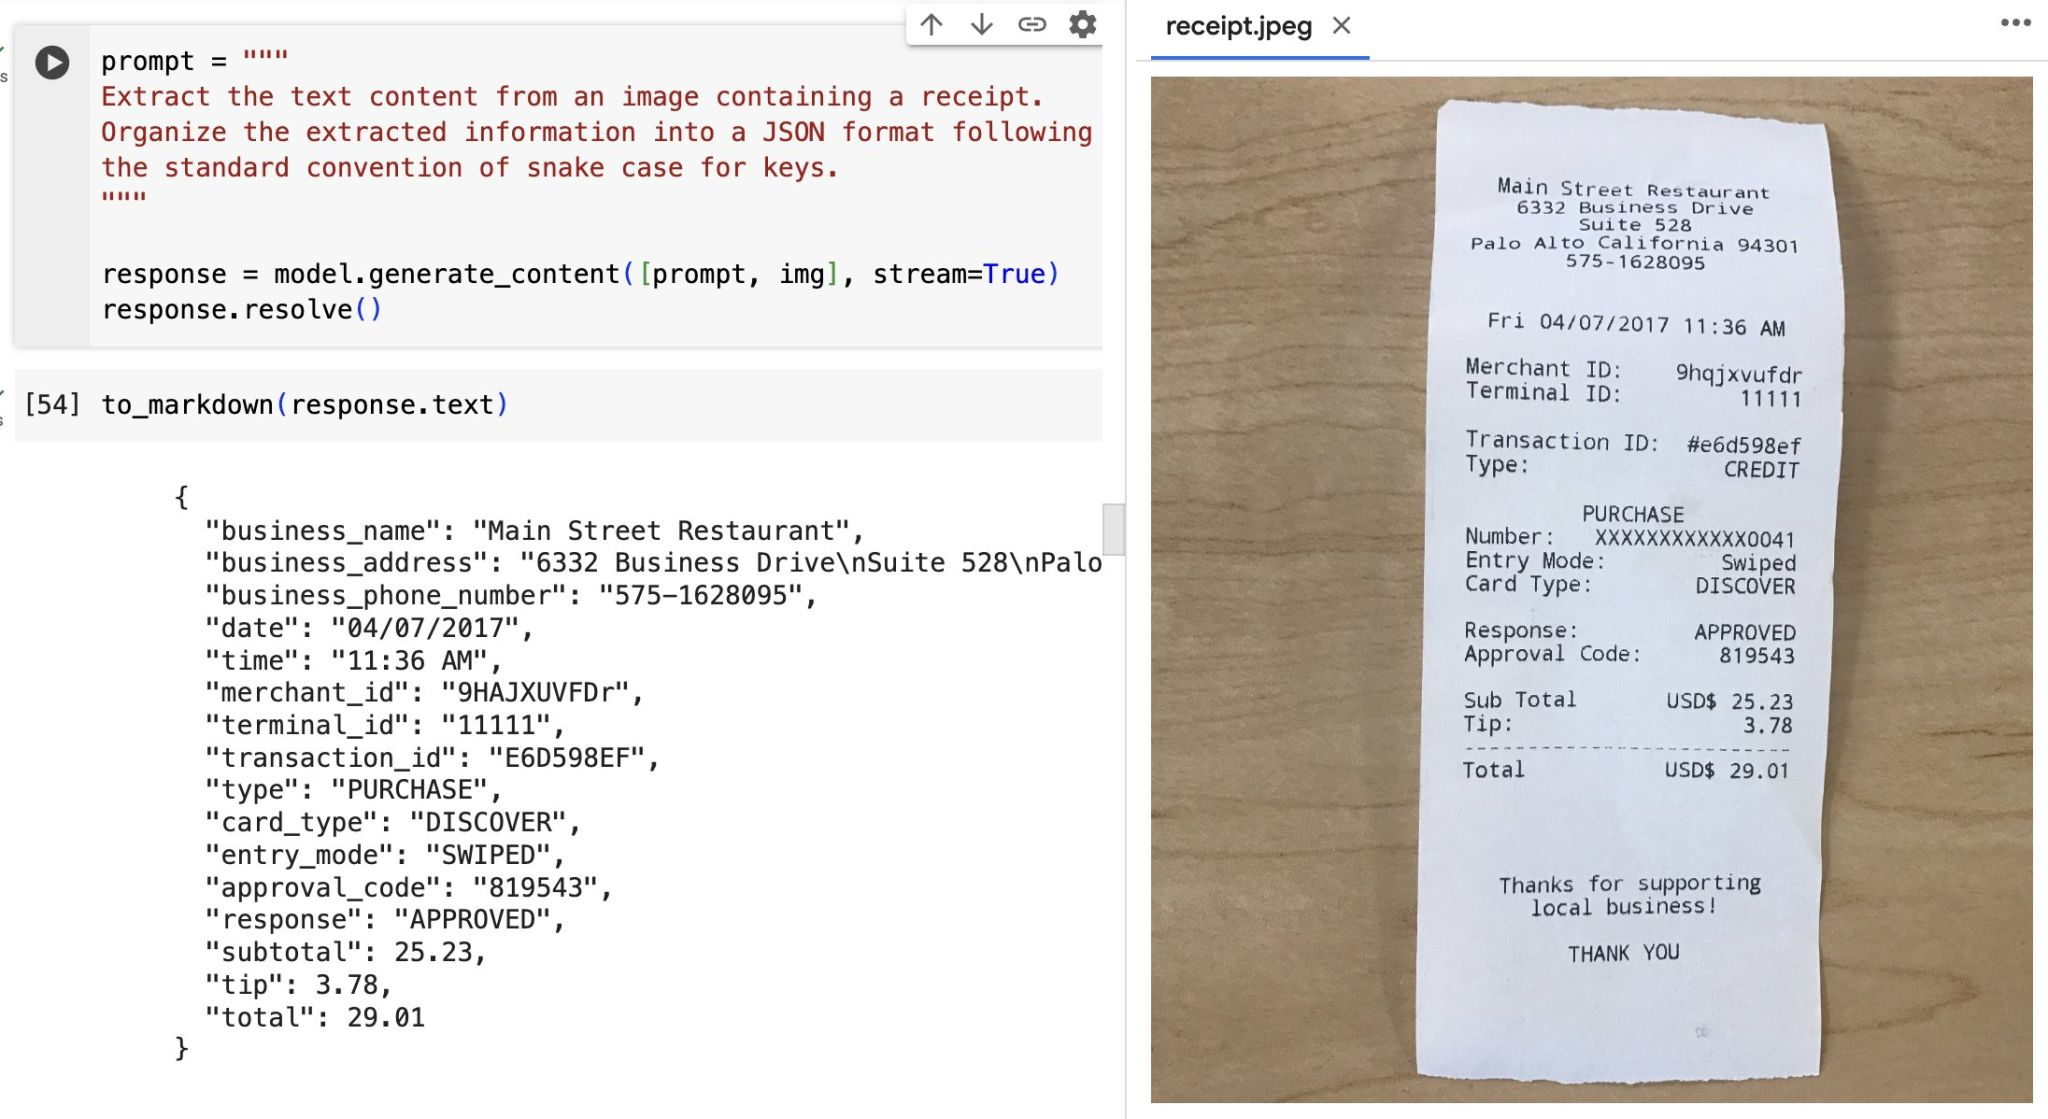
This repository provides a comprehensive solution for Optical Character Recognition (OCR) on receipt images, featuring both a dedicated Tesseract OCR module and a general receipt processing package using LLMs.
Star History
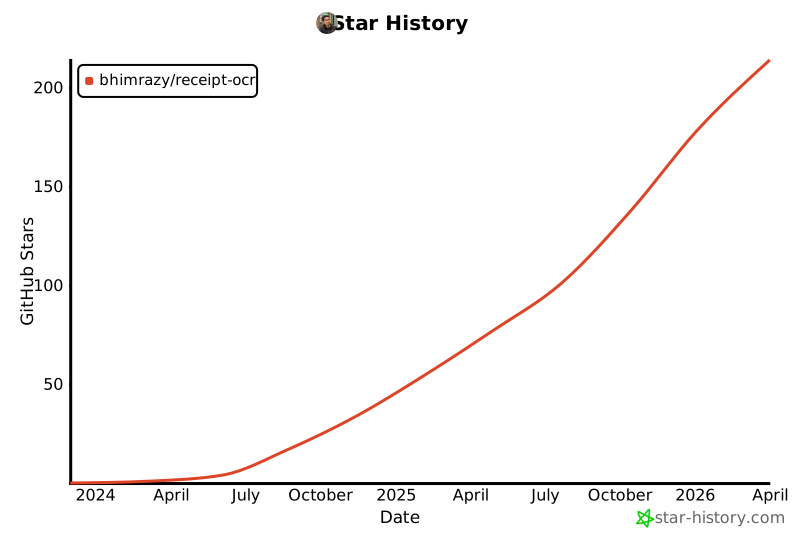
Table of Contents
Quick Start
Extract structured data from a receipt in 3 steps:
-
Install the package:
pip install receipt-ocr
-
Set up your API key:
export OPENAI_API_KEY="your_openai_api_key_here"
-
Process a receipt:
receipt-ocr images/receipt.jpg
For Docker or advanced usage, see How to Use Receipt OCR below.
Project Structure
The project is organized into two main modules:
src/receipt_ocr/: A new package for abstracting general receipt processing logic, including CLI, programmatic API, and a production FastAPI web service for LLM-powered structured data extraction from receipts.src/tesseract_ocr/: Contains the Tesseract OCR FastAPI application, CLI, utility functions, and Docker setup for performing raw OCR text extraction from images.
Prerequisites
- Python 3.x
- Docker & Docker-compose(for running as a service)
- Tesseract OCR (for local Tesseract CLI usage) - Installation Guide
How to Use Receipt OCR
Receipt OCR Module (Structured Data Extraction)
This module provides a higher-level abstraction for processing receipts, leveraging LLMs for parsing and extraction.
To use the receipt-ocr CLI, first install it:
pip install receipt-ocr
-
Configure Environment Variables: Create a
.envfile in the project root or set environment variables directly. This module supports multiple LLM providers.Supported Providers:
-
OpenAI:
Get API key from: https://platform.openai.com/api-keys
OPENAI_API_KEY="your_openai_api_key_here" OPENAI_MODEL="gpt-4o" -
Gemini (Google):
Get API key from: https://aistudio.google.com/app/apikey
OPENAI_API_KEY="your_gemini_api_key_here" OPENAI_BASE_URL="https://generativelanguage.googleapis.com/v1beta/openai/" OPENAI_MODEL="gemini-2.5-pro" -
Groq:
Get API key from: https://console.groq.com/keys
OPENAI_API_KEY="your_groq_api_key_here"
OPENAI_BASE_URL="https://api.groq.com/openai/v1"
OPENAI_MODEL="llama3-8b-8192"
-
-
Process a receipt using the
receipt-ocrCLI:receipt-ocr images/receipt.jpgThis command will use the configured LLM provider to extract structured data from the receipt image.
sample output
{
  "merchant_name": "Saathimart.com",
  "merchant_address": "Narephat, Kathmandu",
  "transaction_date": "2024-05-07",
  "transaction_time": "09:09:00",
  "total_amount": 185.0,
  "line_items": [
    {
      "item_name": "COLGATE DENTAL",
      "item_quantity": 1,
      "item_price": 95.0,
      "item_total": 95.0
    },
    {
      "item_name": "PATANJALI ANTI",
      "item_quantity": 1,
      "item_price": 70.0,
      "item_total": 70.0
    },
    {
      "item_name": "GODREJ NO 1 SOAP",
      "item_quantity": 1,
      "item_price": 20.0,
      "item_total": 20.0
    }
  ]
}
-
Using Receipt OCR Programmatically in Python:
You can also use the
receipt-ocrlibrary directly in your Python code:from receipt_ocr.processors import ReceiptProcessor from receipt_ocr.providers import OpenAIProvider # Initialize the provider provider = OpenAIProvider(api_key="your_api_key", base_url="your_base_url") # Initialize the processor processor = ReceiptProcessor(provider) # Define the JSON schema for extraction json_schema = { "merchant_name": "string", "merchant_address": "string", "transaction_date": "string", "transaction_time": "string", "total_amount": "number", "line_items": [ { "item_name": "string", "item_quantity": "number", "item_price": "number", } ], } # Process the receipt result = processor.process_receipt("path/to/receipt.jpg", json_schema, "gpt-4.1") print(result)
Advanced Usage with Response Format Types:
For compatibility with different LLM providers, you can specify the response format type:
result = processor.process_receipt(
    "path/to/receipt.jpg",
    json_schema,
    "gpt-4.1",
    response_format_type="json_object"  # or "json_schema", "text"
)
Supported
response_format_typevalues:"json_object"(default) - Standard JSON object format"json_schema"- Structured JSON schema format (for newer OpenAI APIs)"text"- Plain text responses
Using
json_schemaformatWhen using
response_format_type="json_schema", you must provide a proper JSON Schema object (not the simple dictionary format). The library handles the OpenAI API boilerplate, so you just need to pass the schema definition.Example proper JSON Schema:
json_schema = {
  "type": "object",
  "properties": {
    "merchant_name": {"type": "string"},
    "merchant_address": {"type": "string"},
    "transaction_date": {"type": "string"},
    "transaction_time": {"type": "string"},
    "total_amount": {"type": "number"},
    "line_items": {
      "type": "array",
      "items": {
        "type": "object",
        "properties": {
          "item_name": {"type": "string"},
          "item_quantity": {"type": "number"},
          "item_price": {"type": "number"}
        },
        "required": ["item_name", "item_quantity", "item_price"],
        "additionalProperties": false
      }
    }
  },
  "required": [
    "merchant_name",
    "merchant_address",
    "transaction_date",
    "transaction_time",
    "total_amount",
    "line_items"
  ],
  "additionalProperties": false
}
See the OpenAI structured outputs documentation for more information.
-
Run Receipt OCR as a Docker web service:
For a production-ready REST API, use the FastAPI web service:
docker compose -f app/docker-compose.yml up
The service provides REST endpoints for receipt processing:
GET /health- Health checkPOST /ocr/- Process receipt images with optional custom JSON schemas
Example API usage:
# Health check
curl http://localhost:8000/health

# Process receipt with default schema
curl -X POST "http://localhost:8000/ocr/" \
  -F "file=@images/receipt.jpg"

# Process with custom schema
curl -X POST "http://localhost:8000/ocr/" \
  -F "file=@images/receipt.jpg" \
  -F 'json_schema={"merchant": "string", "total": "number"}'
For detailed API documentation, visit
http://localhost:8000/docswhen the service is running.
Tesseract OCR Module (Raw Text Extraction)
This module provides direct OCR capabilities using Tesseract. For more detailed local setup and usage, refer to src/tesseract_ocr/README.md.
-
Run Tesseract OCR locally via CLI:
python src/tesseract_ocr/main.py -i images/receipt.jpg
Replace
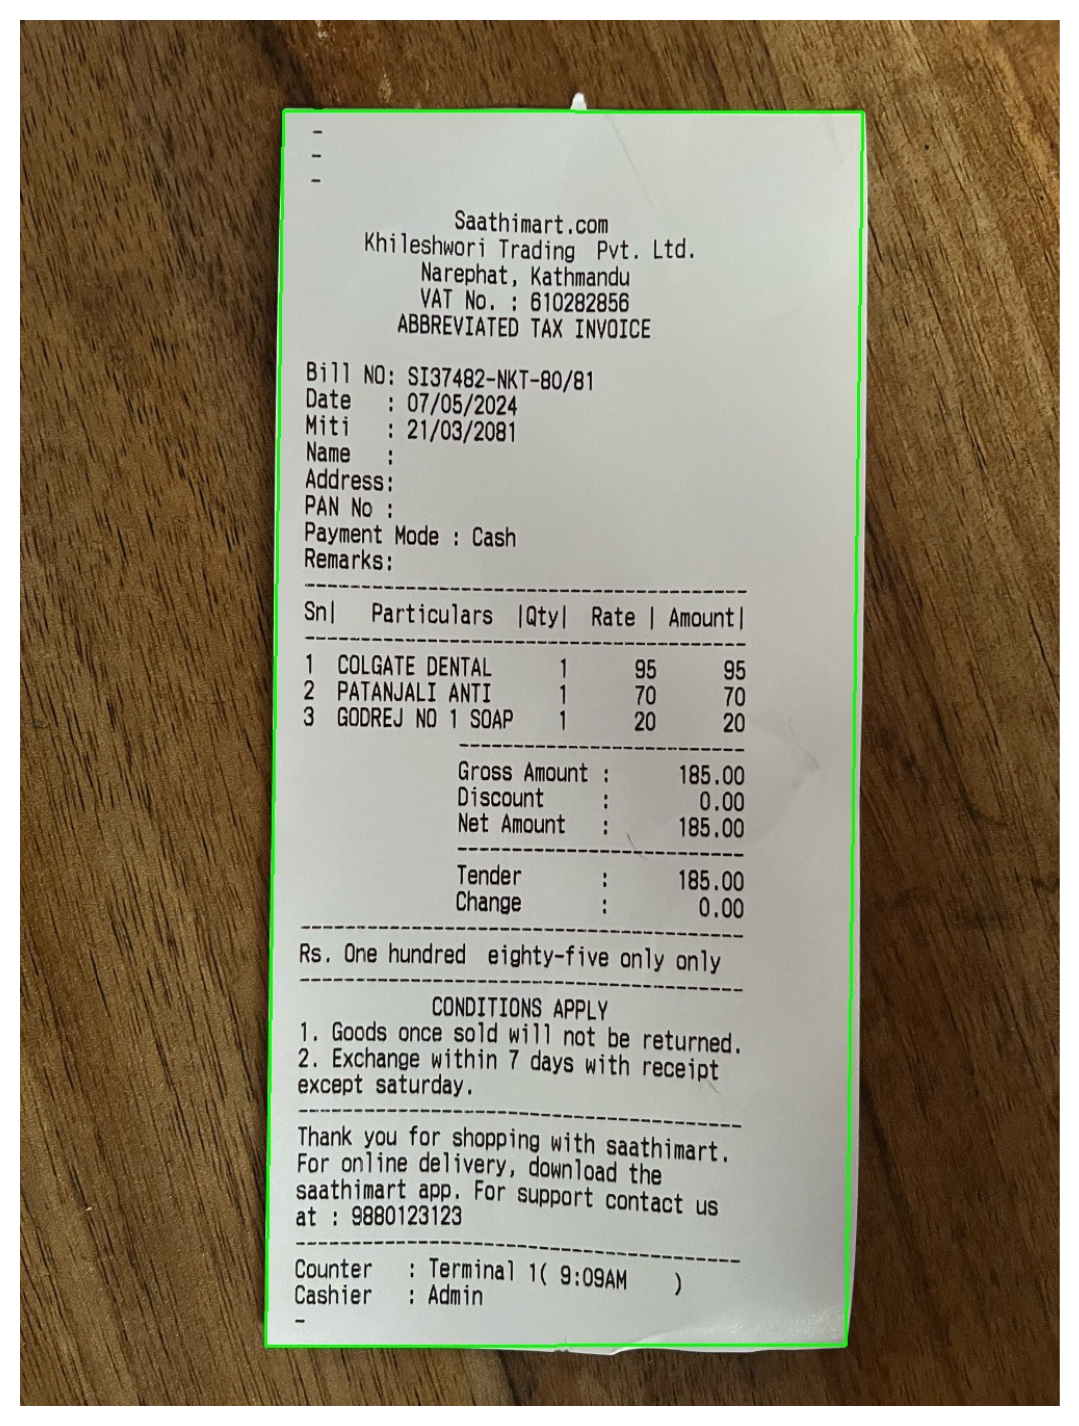
images/receipt.jpgwith the path to your receipt image.Please ensure that the image is well-lit and that the edges of the receipt are clearly visible and detectable within the image.
-
Run Tesseract OCR as a Docker service:
docker compose -f src/tesseract_ocr/docker-compose.yml up
Once the service is up and running, you can perform OCR on receipt images by sending a POST request to
http://localhost:8000/ocr/with the image file.API Endpoint:
- POST
/ocr/: Upload a receipt image file to perform OCR. The response will contain the extracted text from the receipt.
Note: The Tesseract OCR API returns raw extracted text from the receipt image. For structured JSON output with parsed fields such as merchant name, line items, and totals, use the
receipt-ocrinstead.Example usage with cURL:
curl -X 'POST' \
  'http://localhost:8000/ocr/' \
  -H 'accept: application/json' \
  -H 'Content-Type: multipart/form-data' \
  -F 'file=@images/paper-cash-sell-receipt-vector-23876532.jpg;type=image/jpeg'
- POST
Troubleshooting
Common Issues and Solutions:
-
API Key Errors: Ensure your
OPENAI_API_KEYis set correctly and has sufficient credits. Check the provider's dashboard for key status. -
Model Not Found: Verify the
OPENAI_MODELmatches available models for your provider. For OpenAI, check https://platform.openai.com/docs/models. -
Poor OCR Results: Use high-quality, well-lit images. Ensure receipt text is clear and not skewed.
-
Installation Issues: If
pip install receipt-ocrfails, trypip install --upgrade pipfirst. -
Docker Issues: Ensure Docker is running and ports 8000 are available.
For more help, start a GitHub Discussion to ask questions, or create a new issue if you found a bug.
Contributing
We welcome contributions to the Receipt OCR Engine! To contribute, please follow these steps:
-
Fork the repository and clone it to your local machine.
-
Create a new branch for your feature or bug fix.
-
Set up your development environment:
# Navigate to the project root
cd receipt-ocr

# Install uv
curl -LsSf https://astral.sh/uv/install.sh | sh # OR pip install uv

# Create and activate a virtual environment
uv venv --python=3.12
source .venv/bin/activate  # For Windows, use .venv\Scripts\activate

# Install development and test dependencies
uv sync --all-extras --dev
uv pip install -e.

# Optional: Install requirements for the tesseract_ocr module
uv pip install -r src/tesseract_ocr/requirements.txt
-
Make your changes and ensure they adhere to the project's coding style.
-
Run tests to ensure your changes haven't introduced any regressions:
# Run tests for the receipt_ocr module
uv run pytest tests/receipt_ocr

# Run tests for the tesseract_ocr module
uv run pytest tests/tesseract_ocr
-
Run linting and formatting checks:
uvx ruff check .
uvx ruff format .
-
Commit your changes with a clear and concise commit message.
-
Push your branch to your forked repository.
-
Open a Pull Request to the
mainbranch of the upstream repository, describing your changes in detail.
LinkedIn Post
- Gemini Docs: https://ai.google.dev/tutorials/python_quickstart
- LinkedIn Post: https://www.linkedin.com/feed/update/urn:li:activity:7145860319150505984/
License
This project is licensed under the terms of the MIT license.
1 maintainer

Metadata
1 maintainer
Release files for receipt-ocr 0.4.0
For a detailed explanation of source distributions (sdists) and built distributions (wheels), please see the package formats documentation.
Source distribution (sdist)
| File | Size | Uploaded | |
|---|---|---|---|
| receipt_ocr-0.4.0.tar.gz | 680.4 kB | Details |
Built distribution (wheel)
| File | Interpreter | ABI | Platform | Reset |
|---|---|---|---|---|
| receipt_ocr-0.4.0-py3-none-any.whl | Python 3 | none | any | Details |
Total release size: 693.5 kB
Release files / receipt_ocr-0.4.0.tar.gz
| Download URL | receipt_ocr-0.4.0.tar.gz |
|---|---|
| Size | 680.4 kB |
| Tags | Source |
|
SHA-256 checksum How to use checksums |
2f54506ce68c335ea31fa5c6bbea7c366c87be0ed4c2ce5185e34ebec1c9967a
|
|
BLAKE2b-256 checksum How to use checksums |
5c8dee39691dfc5b0f7b0b42d0fd0c9b18c336265c9d66b7e086e01ad1636afa
|
| Upload date | |
|
Uploaded using Trusted Publishing? What is trusted publishing? |
Yes |
| Uploaded via |
uv/0.12.23 {"installer":{"name":"uv","version":"0.12.23","subcommand":["publish"]},"python":null,"implementation":{"name":null,"version":null},"distro":{"name":"Ubuntu","version":"24.04","id":"noble","libc":null},"system":{"name":null,"release":null},"cpu":null,"openssl_version":null,"setuptools_version":null,"rustc_version":null,"ci":true}
|
Provenance
Provenance describes where a file came from. On PyPI, provenance is shared via attestations, which provide a verifiable record of the build or publishing details. View details, limitations and caveats.


PyPI Publish Attestation
PyPI verified that this artifact, at this checksum, originated from the publisher listed below.
Signed by GitHub Actions, verified by PyPI on Oct 6, 2026.
Transparency logRelease files / receipt_ocr-0.4.0-py3-none-any.whl
| Download URL | receipt_ocr-0.4.0-py3-none-any.whl |
|---|---|
| Size | 13.1 kB |
| Tags | Python 3 |
|
SHA-256 checksum How to use checksums |
720d7c4841d9f4342d34383a0a07fb231847bf2122152e49bd20ed4b756bb968
|
|
BLAKE2b-256 checksum How to use checksums |
b819a7493e18c737be7356f00cfe19df94be8d20116d695484058f9b95dbfd67
|
| Upload date | |
|
Uploaded using Trusted Publishing? What is trusted publishing? |
Yes |
| Uploaded via |
uv/0.12.23 {"installer":{"name":"uv","version":"0.12.23","subcommand":["publish"]},"python":null,"implementation":{"name":null,"version":null},"distro":{"name":"Ubuntu","version":"24.04","id":"noble","libc":null},"system":{"name":null,"release":null},"cpu":null,"openssl_version":null,"setuptools_version":null,"rustc_version":null,"ci":true}
|
Provenance
Provenance describes where a file came from. On PyPI, provenance is shared via attestations, which provide a verifiable record of the build or publishing details. View details, limitations and caveats.
PyPI Publish Attestation
PyPI verified that this artifact, at this checksum, originated from the publisher listed below.
Signed by GitHub Actions, verified by PyPI on Oct 6, 2026.
Transparency log













