Raspberry Pi - Thermostat 🔥 for chicken 🐔

Project description
rpi-thermo-chick 🐔🔥
Rapsberry-pi Thermostat for chicken.
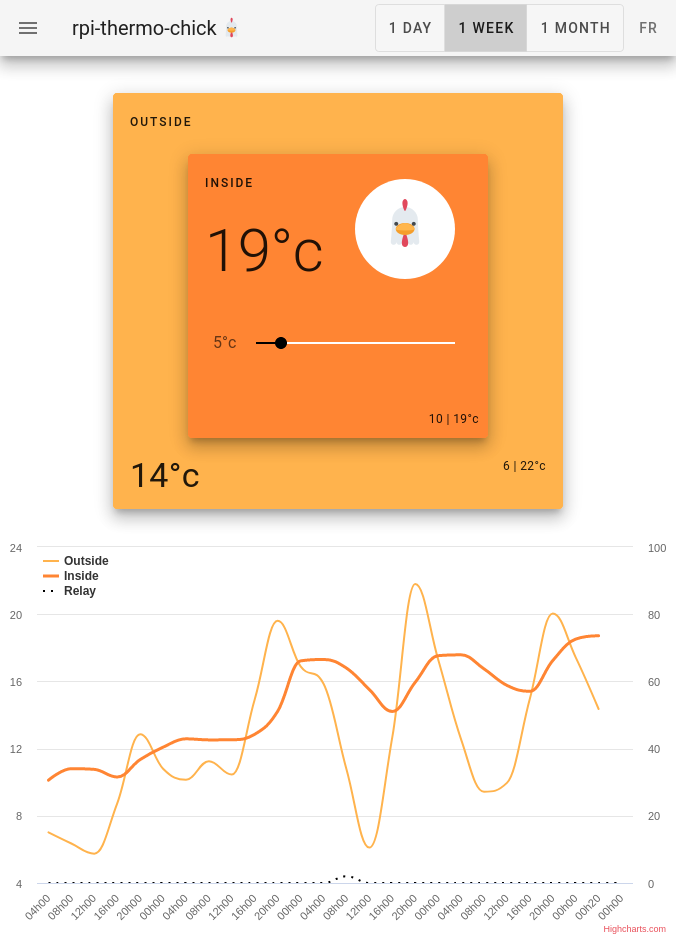
Backend python 3 - fastapi / frontend vuejs - vuetify


Hardware
- Raspberry Pi (
zeroin that case, should work with all the other) - Temperature sensor
DS18B20using1-wire(example) - Relay hat (example)
OS preparation
Enable 1-wire:
Add following lines to your /boot/config.txt:
[all]
dtoverlay=w1-gpio,gpiopin=3
# default pin is 4 but it enter in conflict with relay hat
Install
This project is meant to run as a service (see next section), but to give it a try you can instal it as a normal user (lets assume as pi default user).
# install from pip repository
pip install rpi-thermo-chick

# create empty configuration file
sudo pi-thermo-chick.service configure

# edit configuration file (See configuration section)
sudo nano /root/.config/rpi-thermo-chick/config.json
Install as a service
All the following command are prefix by sudo cause the service will be run as a service (as root user).
# install from pip repository
sudo pip install rpi-thermo-chick

# create empty configuration file
sudo pi-thermo-chick.service configure

# edit configuration file (See configuration section)
sudo nano /root/.config/rpi-thermo-chick/config.json

# install service (register in systemd)
sudo rpi-thermo-chick.service install

# now enable(auto start) and start  the service
sudo systemctl enable rpi-thermo-chick.service
sudo systemctl start rpi-thermo-chick.service

# check if the service is properly running
sudo systemctl status rpi-thermo-chick.service
Now service should be running (open http://<pi-ip>:8000/app to check) and will start automatically with the pi.
Configuration
You have to configure 2 things, the pins you use for the relay and the device id of the thermometers.
To create default config file run:
pi-thermo-chick.service configure
It will create a config file in you current user configuration directory, edit that file (with nano or any other file editor).
For example if you user is pi, config file will be be /home/pi/.config/rpi-thermo-chick/config.json.
Configuration file content is a simple json and look like:
{
    "relays": [
        { "pin": 4 }, { "pin": 7 } ],
    "thermometers": [
        { "device": "28-3c01d0751fcd", "name": "inside" }, { "device": "28-3c01d075db96", "name": "outside"  } ],
    "influxdb": {
        "url": "http://localhost:8086",
        "bucket": "bucket",
        "org": "org",
        "token": "<token>"
    }
}
Configure thermometers
To know your thermometer device id run the following command:
ls /sys/bus/w1/devices | grep 28-*
It will return something like:
28-3c01d0751fcd
28-3c01d075db96
Update your configuration file with your own values.
⚠️ make sure the first thermometer is the inside thermometer that device will control the relay.
Configure relays
Simply update the config file with the physical gpio pins wired to the relays.
⚠️ make sure the first relays is the one controlling the load (second one is not used)
Configure influxdb (optional)
Data history is stored in influxdb (2.x), to enable this feature pass a valid influxdb url/org/bucket/token in the config file.
Obviously the token must provide write permission so relays and temperature sensor data can be stored.
Setup of influxdb is out of the scope of this project, please see https://hub.docker.com/_/influxdb or https://docs.influxdata.com/influxdb/v2.4/install/.
Development
git clone https://github.com/vrince/rpi-thermo-chick.git
cd rpi_thermo_chick

# build and activate a virtual env (optional)

# install in dev mode
pip install -e .

# see configuration
nano config.json

# run it locally with the config you just created
rpi-thermo-chick --config-file config.json --port 8000
- Open
http://<pi-ip>:8000/appto see thevuejsapp - Open
http://<pi-ip>:8000to see current state json payload
Note: replace <pi-ip> by you actual raspberry pi address, like 192.168.2.205
You can still run and develop on a machine that is not a rpi and that has nothing plug to it, temp dat will be random but everything will still work
API
As the API use fast-api the documentation of the API can be access at http://<pi-ip>:8000/docs
References
Release history Release notifications | RSS feed


Download files
Download the file for your platform. If you're not sure which to choose, learn more about installing packages.
Source Distributions
Built Distribution
Filter files by name, interpreter, ABI, and platform.
If you're not sure about the file name format, learn more about wheel file names.
Copy a direct link to the current filters
File details
Details for the file rpi_thermo_chick-1.2.5-py3-none-any.whl.
File metadata
- Download URL: rpi_thermo_chick-1.2.5-py3-none-any.whl
- Upload date:
- Size: 13.6 kB
- Tags: Python 3
- Uploaded using Trusted Publishing? No
- Uploaded via: twine/4.0.1 CPython/3.10.6
File hashes
| Algorithm | Hash digest | |
|---|---|---|
| SHA256 |
027af7e700410cc74f373f8bc044d4dbfa6e4f703f67b72ddb50a1fc29738b79
|
|
| MD5 |
51f290e7e476c32367d2f283a44a4f5a
|
|
| BLAKE2b-256 |
08d96d050f3c79f3bf6c1d80d36516d01f4cbe1ec5ced1ec2d4cacab5859707f
|


