only for http(s) test, base on rtsf

Project description
rtsf-http
基于rtsf测试框架,关键字驱动测试http/https等api
环境准备
安装rtsf-http
pip install rtsf-http
简单介绍
- 基本使用,参见rtsf项目的 使用入门
- rtsf-http 遵循在rtsf项目高阶用法的约定
- 实际上,rtsf-http仅仅做了两件事情
- 设计http(s)接口自动化测试yaml用例,并重写Runner.run_test的执行规则
- 封装常用requests为用例提供yaml函数
用法介绍
安装完成后,有两个命令用于执行yaml测试用例,它们的效果是一样的: hdriver 或者 httpdriver
# 简单用法
hdriver c:\xxx\xxx\test.yaml

# 设置日志级别和路径
hdriver c:\xxx\xxx\test.yaml --log-file c:\xxx\xxx\test.log --log-level debug
用法,实例如下:
rtsf-http的约定
依据rtsf的yaml约定模板,我们在steps中,为rtsf-http约定了一个规则,以便识别为 http的接口自动化测试, 如下
steps:
    - request:
        url:
        method:
        params:
        data:
        json:
        files:
        auth:
        ...
url和method必填,其他参数遵循requests
rtsf-http常用的yaml函数
# 常在glob_var关键字中使用的
GetBasicAuth(username,password)             # -> 获取basic加密,用于传递 requests的auth参数
GetDigestAuth(username,password)            # -> 获取digest加密,用于传递 requests的auth参数

# 常在precommand关键字中使用的
SetVar(name, value)                         # -> 设置变量至变量空间。 但是,不建议使用SetVar定义变量

# 定义变量建议使用 glob_var和glob_regx, 详细说明参见rtsf项目。 yaml示例如:
glob_var:
        username: luokefeng
        password: 123456
        basicauth: ${GetBasicAuth(luokefeng,123456)}

glob_regx:
        rex_lt: 'name="lt" value="([\w\-\.\+/=]+)'
        rex_execution: 'name="execution" value="([\w\-\.\+/=]+)'


# 常在postcommand关键字中使用的, 动态参数化数据
DyStrData(name,regx,index=0)                # -> resp.text or resp.content 返回html/xml等格式时, 依据正则regx和下标index,保存至变量name
DyJsonData(name,sequence)                   # -> resp.text or resp.content 返回json格式时,依据sequence,保存至变量name

# 常在verify关键字中使用的, 验证结果
VerifyContain(strs)                         #  验证相应的body中,包含字符串
VerifyCode(code)                            #  验证响应码为code
VerifyVar(name, expect_value=None)          #  验证变量的值是否为期望值;如果期望值为None,则仅验证变量是否被赋值


# 下载的请求示例,yaml编写:
steps:
    - request:
        url: https://www.baidu.com
        method: get
        download_dir: c:\downloads


# 上传的请求示例, yaml编写
steps:
    - request:
        url: http://127.0.0.1/filestorage/httpUploadFile
        method: post
        files:
            pic1: C:/d_disk/auto/buffer/800x600.png
            pic2:
            pic3:
        data:
            dirType: 1
            unzip: 0
自定义,yaml函数和变量
在case同级目录中,创建 preference.py, 该文件所定义的 变量、函数,可以被动态加载和引用, 具体参见rtsf的介绍
简单使用
依据rtsf和rtsf-http的约定, 做了几个接口测试的示例
Get请求
- 请求百度首页,校验title
# example_1.yml
- project:
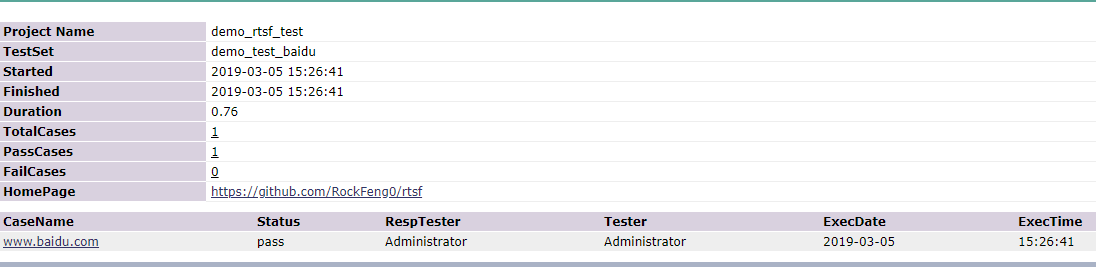
name: demo_rtsf_test
module: demo_test_baidu
- case:
name: www.baidu.com
glob_regx:
rex_name: 'id=su value=([\w\-\.\+/=]+)'
steps:
- request:
url: https://www.baidu.com
method: GET
post_command:
- ${DyStrData(baidu_name,$rex_name)}
verify:
- ${VerifyCode(200)}
- ${VerifyVar(baidu_name, 百度一下)}
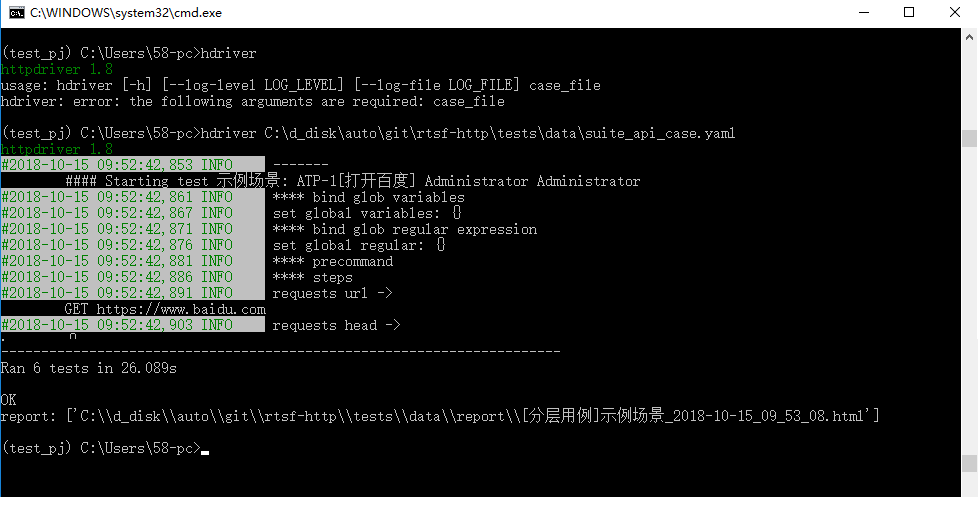
- 执行命令,运行用例
hdriver example_1.yml
- 查看报告
Post请求
- Basic或者Digest加密认证,登录请求。
# example_1.yml

- project:
    name: demo_rtsf_test
    module: demo_test_login

- case:
    name: basic_auth_login
    glob_var:
        basic_auth: ${GetBasicAuth(username, password)}
        digest_auth: ${GetDigestAuth(username, password)}
    steps:
        - request:
            url: http://xxx.xxx.xxx/login
            method: POST
            auth: $basic_auth
    verify:
        - ${VerifyCode(200)}
- 常规的登录请求示例
# example_2.yml

- project:
    name: xxx登录
    module: 登录

- case:
    name: /login?service=https://xxx.xxx.xx/xxx
    glob_var:
        username: luokefeng
        password: 123321
    steps:
        - request:
            url: https://www.xxx.com/login?service=https://xxx.xxx.xx/xxx
            method: POST
            params:
                username: $username
                password: $password
                mobile: 14512341234
                verifycode: 123456
                _eventId: submit
                submit:
                _rememberMe: on
    verify:
        - ${VerifyContain(xxx后台)}
请求过程中的动态参数化
比如 api_1 请求返回的结果中,记录一个 xxx_id,给 api_2接口使用
# example_3.yml

- project:
    name: xxx
    module: xxx

- case:
    name: /api_1?service=https://xxx.xxx.xx/xxx
    glob_var:
        data_contract_id: 23423543
        workerid: 123321
    steps:
        - request:
            url: https://xxx.xxx.xxx/api_1?service=https://xxx.xxx.xx/xxx
            method: POST
            params:
                unsignReason: 2
                unsignDetailReason: 21
                unsignStage: 3
                blackReason: 主动申请
                contractId: $data_contract_id
                workerId: $workerid
    post_command:
        - ${DyJsonData(xxx_id, data.contractId)}
    verify:
        - ${VerifyCode(200)}
        - ${VerifyContain(成功)}

- case:
    name: /api_2?service=https://xxx.xxx.xx/xxx
    steps:
        - request:
            url: https://xxx.xxx.xxx/api_2
            method: GET
            params:
                contract_id: $xxx_id
    verify:
        - ${VerifyCode(200)}
        - ${VerifyContain(成功)}
动态参数化,提供了两个yaml函数: DyStrData 和 DyJsonData
数据驱动和分层用例
在 rtsf项目中,已经有了详细的介绍
分层实例场景
示例场景1: 打开百度,搜索hello,打开bing
示例场景2: 打开bing, 打开百度,搜索hello
应用分层:
- 打开百度 封装为 api_1, 搜索hello 封装为api_2, 打开bing封装为api_3;
# api_test.yaml

- api:
    def: api_1()
    steps:
        - request:
            url: https://www.baidu.com
            method: GET
    verify:
        - ${VerifyCode(200)}

- api:
    def: api_2($keyword)
    steps:
        - request:
            url: https://www.baidu.com/s?wd=$keyword
            method: GET
    verify:
        - ${VerifyCode(200)}

- api:
    def: api_3()
    steps:
        - request:
            url: https://cn.bing.com
            method: GET
    verify:
        - ${VerifyCode(200)}
- suite1排列api_1、api_2、api_3;
# suite_test1.yaml

- project:
    def: suite1($keyword)

- case:
    name: suite1_demo_baidu
    api: api_1()

- case:
    name: suite1_demo_baidu_key
    api: api_2($keyword)

- case:
    name: suite1_demo_bing
    api: api_3()
- suite2排列 api_3、api_1、api_2
# suite_test2.yaml

- project:
    def: suite2($keyword,$password,$username)

- case:
    name: suite2_demo_bing
    api: api_3()

- case:
    name: suite2_demo_baidu
    api: api_1()

- case:
    name: suite2_demo_baidu_key
    api: api_2($keyword)
- 最后测试用例排列 suite1 & suite2
# test_case.yaml

- project:
    name: 分层用例
    module: 示例场景

- case:
    name: 示例场景-case1
    suite: suite1(hello)

- case:
    name: 示例场景-case2
    suite: suite2(hello,123456,luokefeng)
- 执行 hdriver.exe test_case.yaml


Download files
Download the file for your platform. If you're not sure which to choose, learn more about installing packages.
Source Distribution
Built Distribution
Filter files by name, interpreter, ABI, and platform.
If you're not sure about the file name format, learn more about wheel file names.
Copy a direct link to the current filters
File details
Details for the file rtsf-http-2.1.6.tar.gz.
File metadata
- Download URL: rtsf-http-2.1.6.tar.gz
- Upload date:
- Size: 11.1 kB
- Tags: Source
- Uploaded using Trusted Publishing? No
- Uploaded via: twine/3.2.0 pkginfo/1.6.1 requests/2.24.0 setuptools/47.3.1 requests-toolbelt/0.9.1 tqdm/4.51.0 CPython/3.6.8
File hashes
| Algorithm | Hash digest | |
|---|---|---|
| SHA256 |
cf82ba83acfcd05b8dc7dad7ba6a10e00579d84b34b1c2b88f5bf4b51bae0171
|
|
| MD5 |
e797ddd3cef6551ca81f3f11c152f588
|
|
| BLAKE2b-256 |
71f2389699d0eca76e45536dedb1f584097a9302af27da08f5fe98fc140d0a0a
|
File details
Details for the file rtsf_http-2.1.6-py2.py3-none-any.whl.
File metadata
- Download URL: rtsf_http-2.1.6-py2.py3-none-any.whl
- Upload date:
- Size: 12.0 kB
- Tags: Python 2, Python 3
- Uploaded using Trusted Publishing? No
- Uploaded via: twine/3.2.0 pkginfo/1.6.1 requests/2.24.0 setuptools/47.3.1 requests-toolbelt/0.9.1 tqdm/4.51.0 CPython/3.6.8
File hashes
| Algorithm | Hash digest | |
|---|---|---|
| SHA256 |
feacc3b0e0e3db270b591063f2f140f7276f361da64bc5e59e10070847b08e93
|
|
| MD5 |
9699a57f1595018e03a32909f25c9614
|
|
| BLAKE2b-256 |
c494f3abed807d61f9f5921e95d8af1b23bb8627eb2a58e90beb311a1832867f
|


