View a SLURM cluster and inspect nodes and jobs.
Verified details
These details have been verified by PyPIProject links
GitLab Statistics
Maintainers


Project description
Slurm Viewer


Introduction
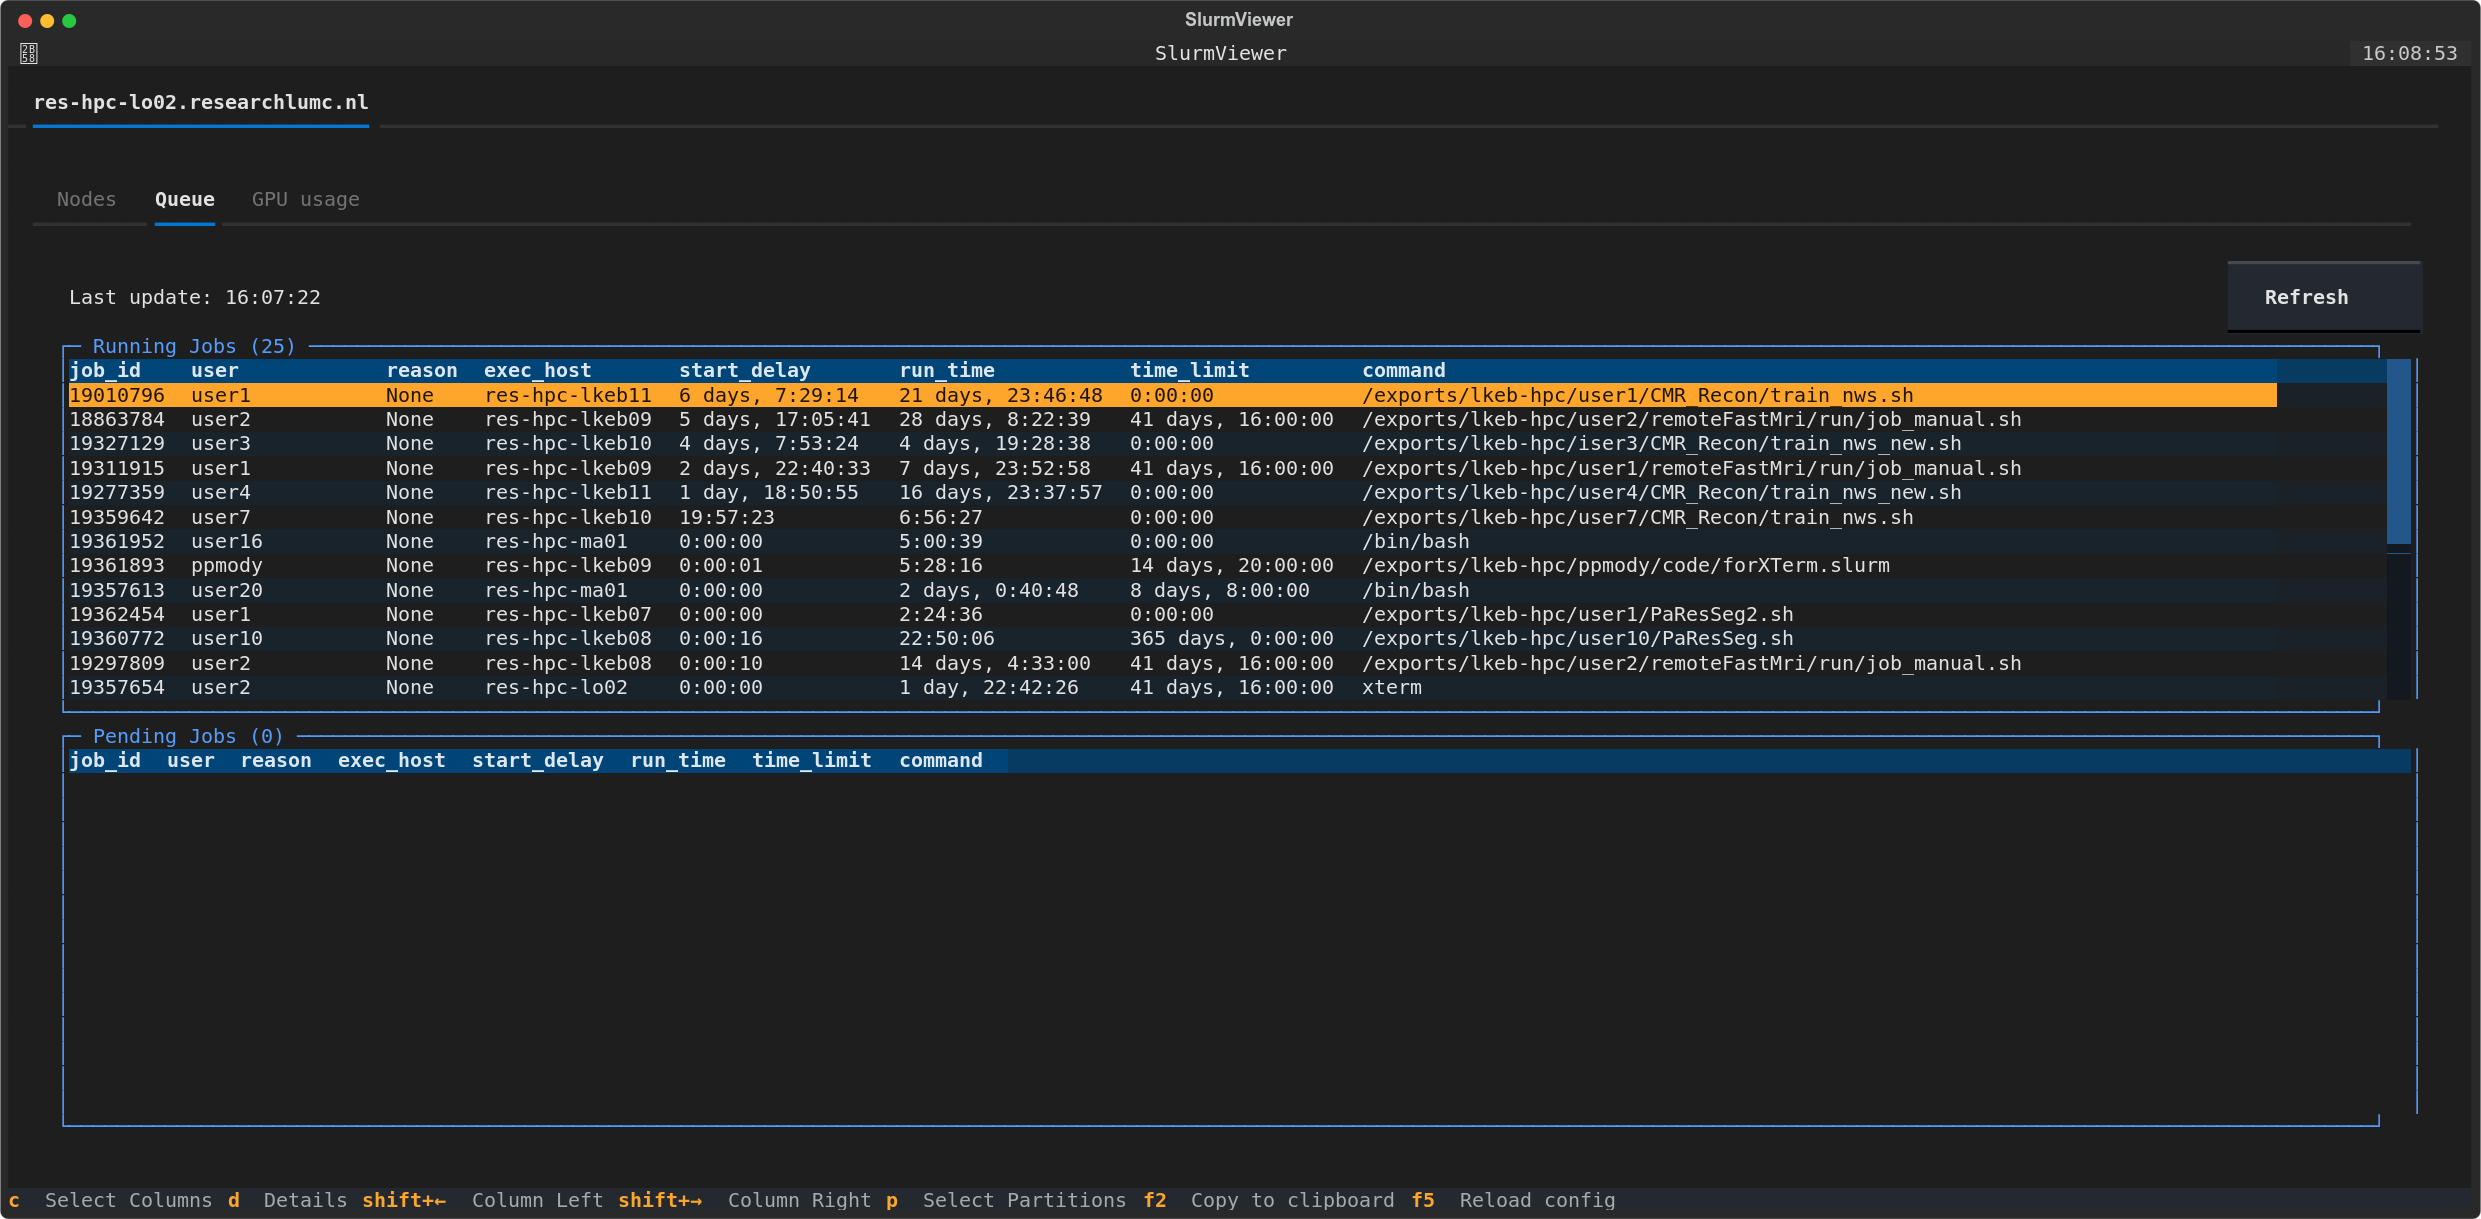
Using a single terminal command, slurm-viewer allows you to view the status of your SLURM cluster (i.e., nodes and jobs). This command combines information from SLURM commands like sinfo, scontrol, squeue and sacct in a tabular and customizable view.
This command line application can be run on the cluster itself or any computer that can ssh into the cluster.
Features
- Single command: The
slurm-viewercommand allows you to view the status of nodes and jobs in your SLURM cluster.- Multiple Clusters: View multiple clusters in a single interface.
- SSH Tunneling: Connect to the cluster using a jumphost/gateway.
- Intuitive Interface:
slurm-viewerpresents all node/job information in a tabular format. - Customizable Interface: Filter and sort nodes and jobs based on various criteria like partitions and GPU availability
- Resource Utilization Plots: View the GPU memory/utilization used over the last 4 weeks.


Installation
pip install slurm-viewer
or
uvx slurm-viewer
Usage
- Run
slurm-viewerto start the UI. - Upon the first run, a default settings file will be created in
~/.config/slurm-viewer/settings.toml. Edit this file to reflect your setup.
Settings
The settings.toml config file allows for defining which clusters you want to connect to and also user preferences on which columns to display.
The location of the used settings file can be found in the help window.
The primary tags are ui and clusters.
UI
In the ui section you can define which columns to display for nodes (node_columns), queue (queue_columns) and priority (priority_columns) views. The columns are defined as a list of strings.
Although the UI allows the reordering of columns it is easier to edit the settings.toml and reload the config using F3. That way the order is preserved for the next time.
Clusters
In the clusters section you can define the clusters you want to connect to. Each cluster has the following tags:
name: A user-defined name of the cluster.partitions: A list of partitions you are interested to view in the cluster.tabs: A list of tabs to display in the UI. The options arenodes,jobs,gpuandstatus.node_name_ignore_prefix: A list of prefixes to ignore in the node names.- For e.g. if the node names are
node-1,node-2,node-3, you can ignore thenode-prefix by settingnode_name_ignore_prefix = ["node"]
- For e.g. if the node names are
servers: A list of servers to connect to the cluster itself. A cluster can have multiple servers defined, they will be tried in order and the first server that connects will be used.- If you have a jumphost/gateway, use the
~/.ssh/configto set up the connections and use theHostname as the server.status
- If you have a jumphost/gateway, use the
[ui]
node_columns = ["node_name", "state", "gpu_tot", "gpu_alloc", "gpu_avail", "gpu_type", "gpu_mem", "cpu_tot", "cpu_alloc", "cpu_avail", "mem_tot", "mem_alloc", "mem_avail", "cpu_gpu", "mem_gpu", "cpuload", "partitions", "active_features"]
queue_columns = ["user", "job_id", "reason", "exec_host", "start_delay", "run_time", "time_limit", "command"]
priority_columns = ["user_name", "job_id", "job_priority_n", "age_n", "fair_share_n", "partition_name"]

refresh_interval = 10 # Interval in seconds when auto refresh is enabled
auto_refresh = "False" # Automatically refresh 'nodes' and 'queue' tabs at the given interval
user_only = "False" # Start with data for the user only or all users of the cluster

[[clusters]]
name = "cluster_1"
partitions = ["partition-cpu", "partition-gpu"]
tabs=["nodes", "jobs", "gpu", "status"]
node_name_ignore_prefix = [""]
servers = ["cluster_1_logon_node_1", "cluster_1_logon_node_2"]

[[clusters]]
name = "cluster_2"
partitions = ["cpu-short", "cpu-medium", "cpu-long", "gpu-short", "gpu-medium", "gpu-long"]
node_name_ignore_prefix = ["node"]
server = "gateway_1"
If you need to connect using a jumphost/gateway use the ~/.ssh/config to setup the connections and use the Host name as
the server.
Example of a ssh config:
Host gateway_1
  User my_user_name
  HostName gateway.somewhere

Host cluster_1_logon_node_1
  User my_user_name
  HostName logonnode.somewhere
  ProxyCommand ssh -W %h:%p gateway_1
Project details
Verified details
These details have been verified by PyPIProject links
GitLab Statistics
Maintainers
Release history Release notifications | RSS feed


Download files
Download the file for your platform. If you're not sure which to choose, learn more about installing packages.
Source Distributions
Built Distribution
Filter files by name, interpreter, ABI, and platform.
If you're not sure about the file name format, learn more about wheel file names.
Copy a direct link to the current filters
File details
Details for the file slurm_viewer-1.0.4-py3-none-any.whl.
File metadata
- Download URL: slurm_viewer-1.0.4-py3-none-any.whl
- Upload date:
- Size: 52.8 kB
- Tags: Python 3
- Uploaded using Trusted Publishing? Yes
- Uploaded via: twine/6.1.0 CPython/3.9.22
File hashes
| Algorithm | Hash digest | |
|---|---|---|
| SHA256 |
d764873324c68d3058f0e7ab1c196c2ef0d59f8670ec8ade08ac03eb3f88caf6
|
|
| MD5 |
49f310b1e013237d2ed9497649d8098b
|
|
| BLAKE2b-256 |
5017d1ec000a7e29a3684d62cde61316c53936d37e98d0bc59aa245c6472ed8d
|


