
SPatial Analysis for CodEX data (SPACEc)





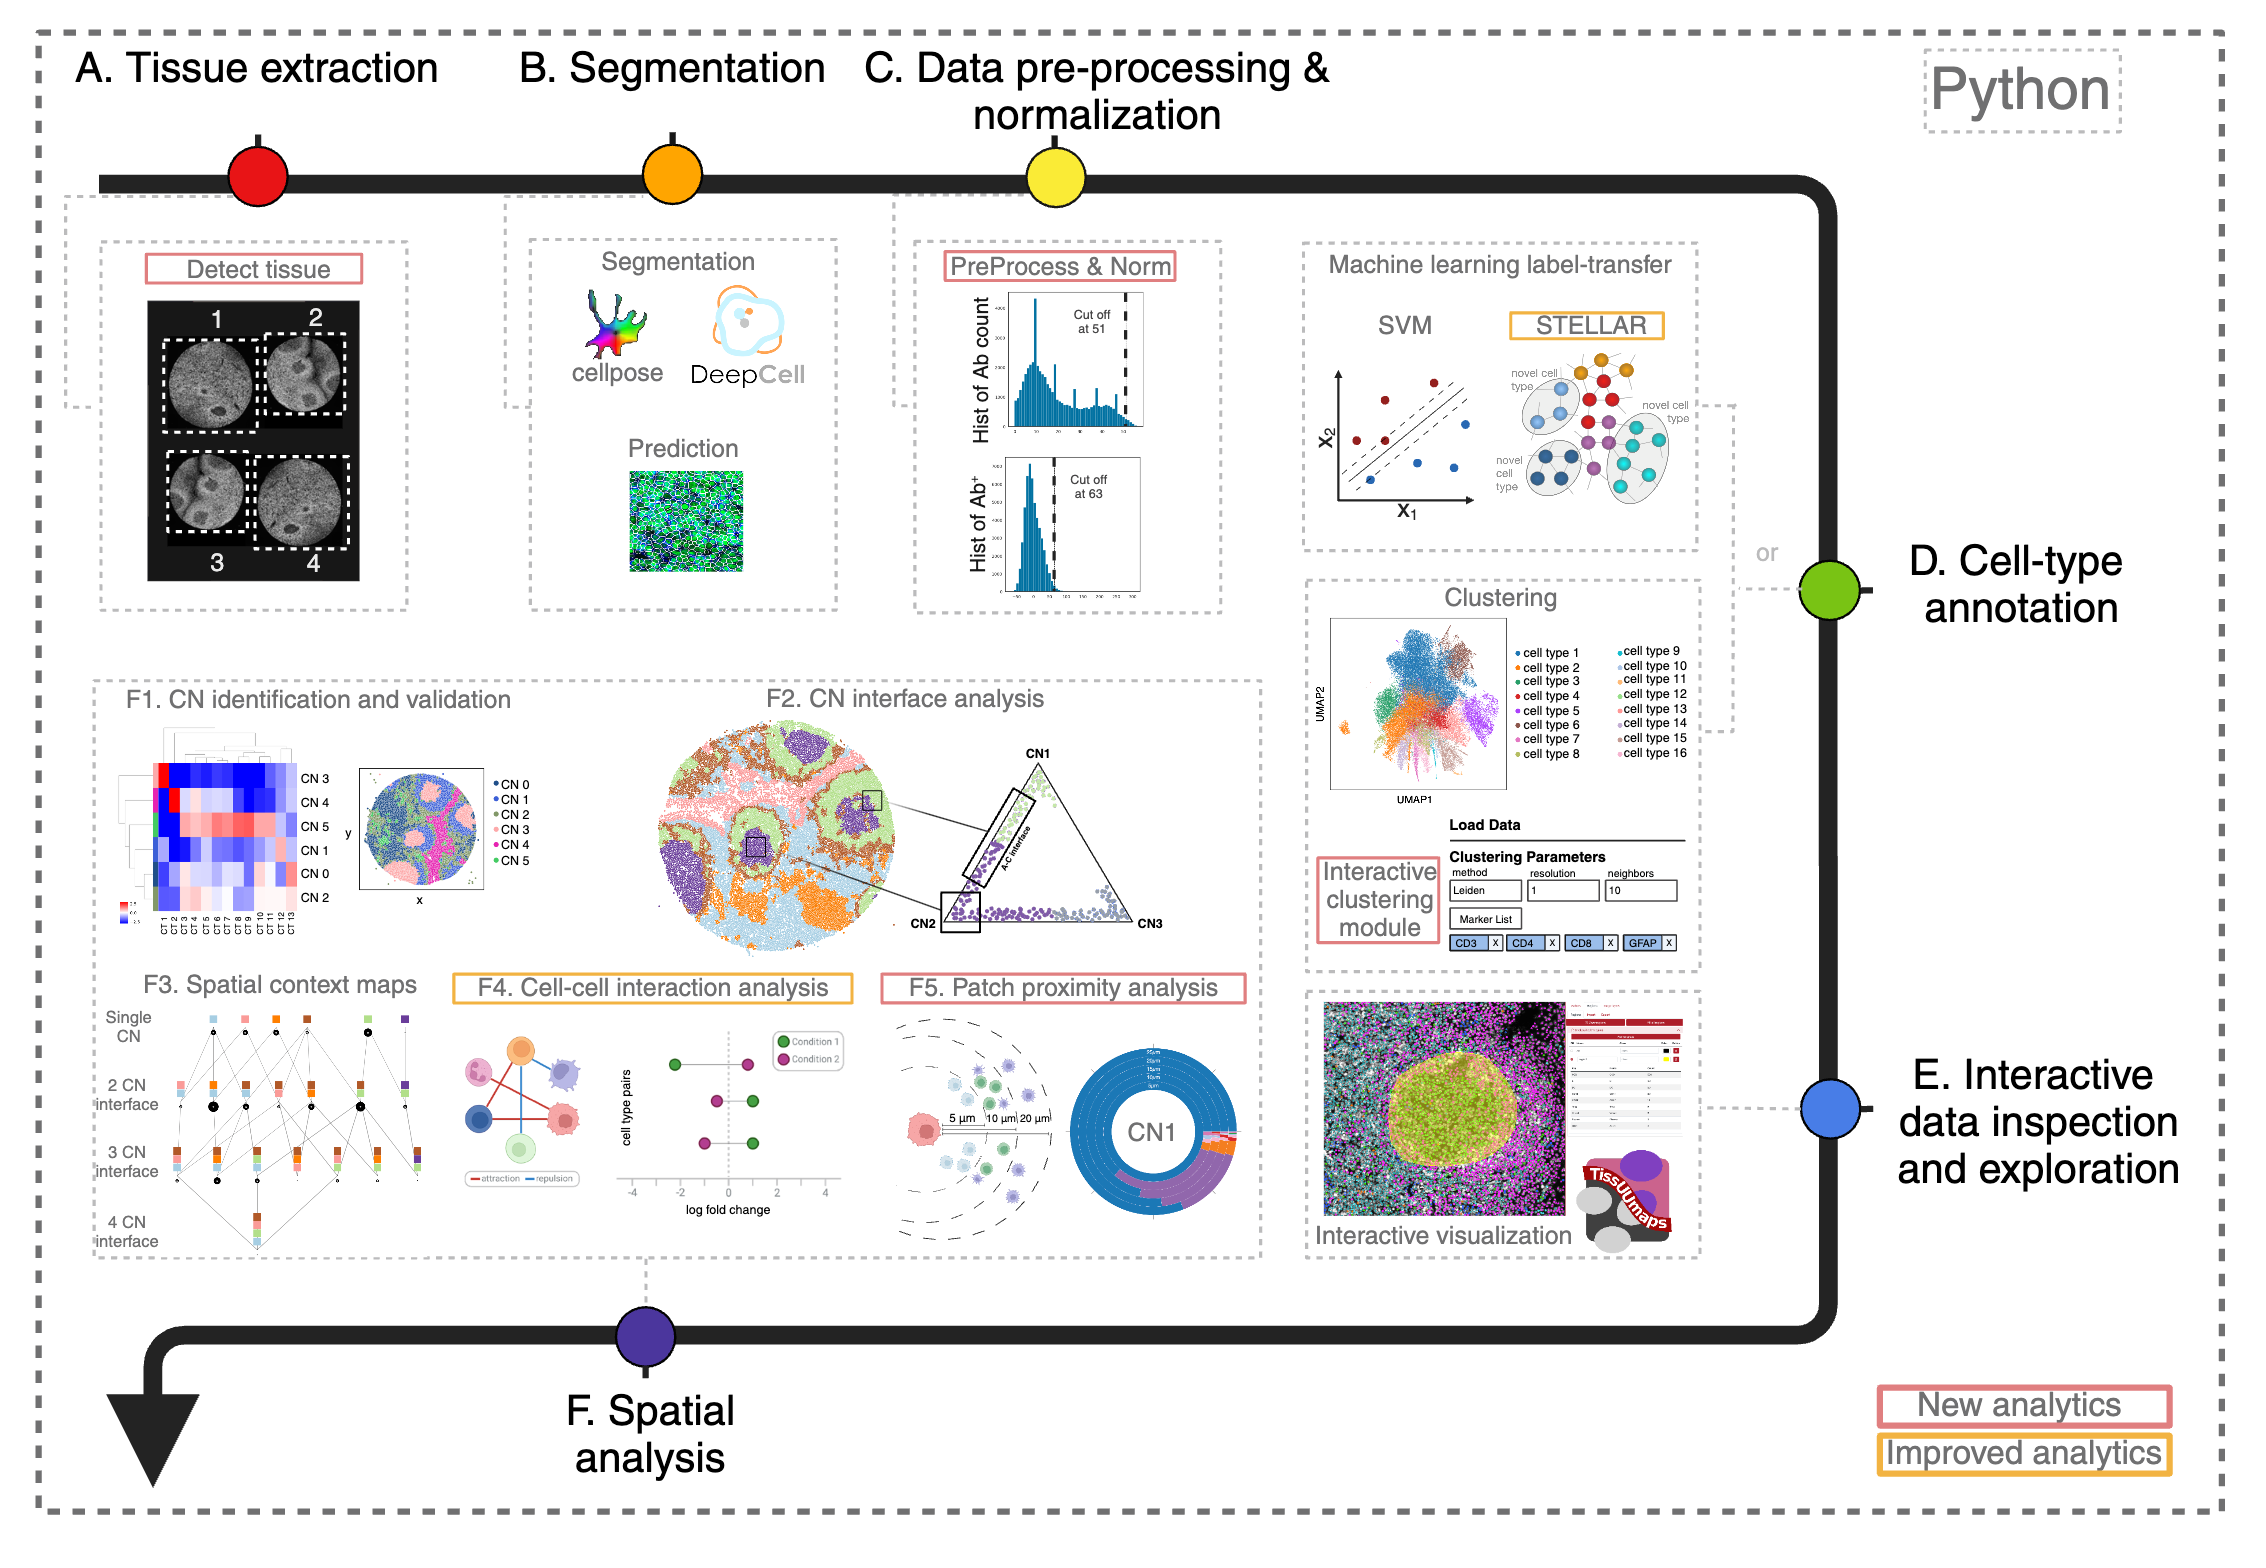
Multiplexed imaging technologies offer valuable insights into intricate tissue structures, yet they pose significant computational hurdles. These include cumbersome data handoffs, inefficiencies in processing large images (often ranging from 8 to 40 gigabytes per image), and limited spatial analysis capabilities. We created SPACEc, an all-in-one, scalable Python platform that advances both analytical capabilities and computational efficiency. Through careful engineering optimization, it streamlines the entire process from image extraction and cell segmentation to data preprocessing, while introducing novel approaches such as Patch Proximity Analysis for mapping cellular microenvironments to fill in the current analytic gaps. The platform significantly improves the performance of existing tools through parallelization and GPU acceleration, including enhanced cell-cell interaction analysis and simplified deep-learning annotation workflows, while its intuitive user-friendly design makes these advanced spatial analyses accessible to a wider scientific audience.
General outline of SPACEc analysis
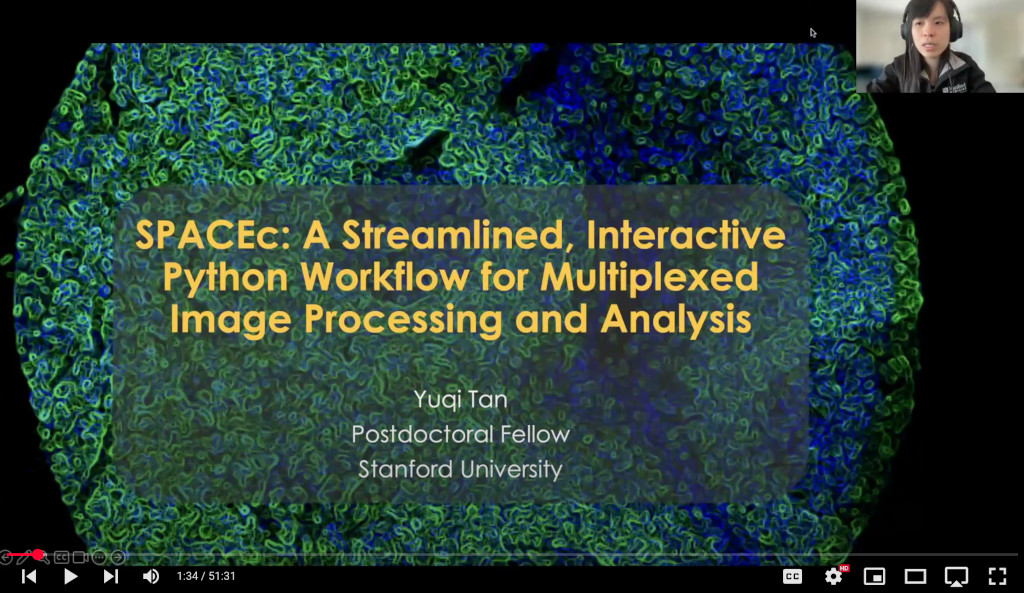
In-depth introduction to SPACEc
For an in-depth introduction to SPACEc, take a look at this YouTube video.
Installation notes
Note: We currently support Python==3.9 and 3.10.
Install
Linux
SPACEc CPU
    # Create conda environment
    conda create -n spacec python==3.10 graphviz libvips openslide
    conda activate spacec

    # Install spacec
    pip install spacec
Continue the following steps only if you have GPU(s)
SPACEc GPU
    # Install CUDA
    conda install conda-forge::cudatoolkit=11.2.2 cudnn=8.1.0.77 -y
    # Set environment variables for Tensorflow to find CUDA libraries
    mkdir -p $CONDA_PREFIX/etc/conda/activate.d && \
        echo 'export LD_LIBRARY_PATH=$CONDA_PREFIX/lib:$LD_LIBRARY_PATH' \
        > $CONDA_PREFIX/etc/conda/activate.d/env_vars.sh
- OPTIONAL: For GPU-accelerated clustering via RAPIDS run the following. Note that only RTX20XX or better GPUs are supported. More information on rapids-singlecell are available here: https://rapids-singlecell.readthedocs.io/en/latest/Installation.html
pip install spacec[rapids] --extra-index-url=https://pypi.nvidia.com
- OPTIONAL: To use STELLAR run the following:
    pip install spacec[stellar] \
        --extra-index-url https://download.pytorch.org/whl/cu113 \
        -f https://data.pyg.org/whl/torch-1.12.0+cu113.html
- Test if SPACEc loads and if your GPU is visible:
python -c "import spacec as sp; sp.hf.check_for_gpu()"
Apple M1/M2/M3/M4
SPACEc CPU:
    # Create conda environment
    conda create -y -n spacec python==3.10 graphviz libvips openslide
    conda activate spacec

    # Install spacec
    pip install spacec

    # Install remaining requirements for deepcell
    # NOTE: Ignore the error about pip's dependency resolver
    pip install -r https://raw.githubusercontent.com/nolanlab/SPACEc/master/requirements/requirements-deepcell-mac-arm64_tf210-metal.txt
    pip install deepcell --no-deps
SPACEc GPU: Mac GPU support is currently only supported for Tensorflow based methods but not PyTorch (in some cases we try to use the MPS backend if possible but that can be tricky). We recommend to use a Linux system for full GPU acceleration.
Windows
Although SPACEc can run directly on Windows systems, we highly recommend running it in WSL. If you are unfamiliar with WSL, you can find more information on how to use and install it here: https://learn.microsoft.com/en-us/windows/wsl/install If you decide to use WSL, follow the Linux instructions.
If you plan to continue with the native Windows environment
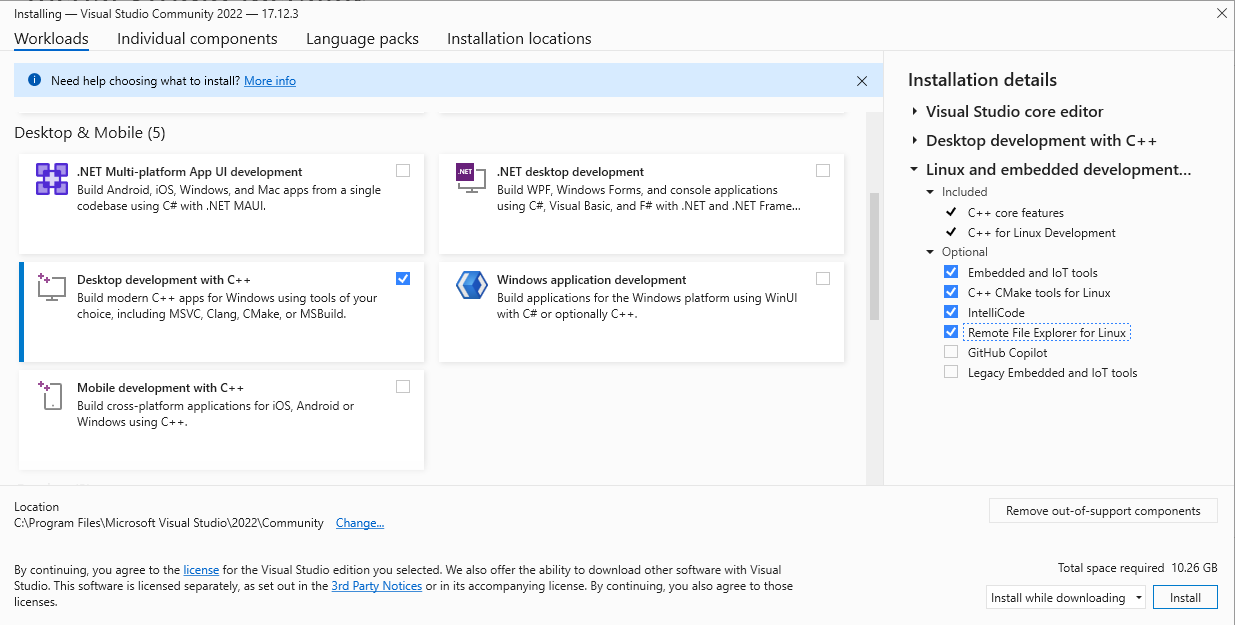
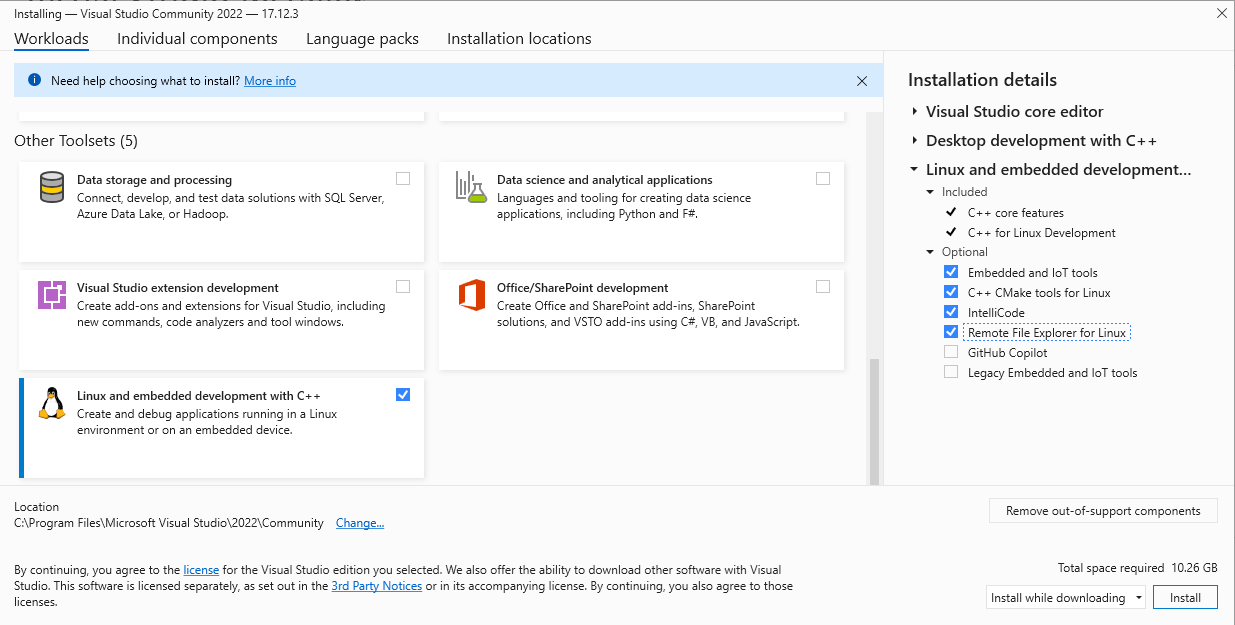
- One of the segmentation tools within SPACEc neeeds a C++ compiler. If your environment doesn't have it already, the easiest way is to:
-
Download the community version of Visual Studio from the official Microsoft website: https://visualstudio.microsoft.com. After installing the software on your system, select the following options to install the components needed for C++ development (see screenshots)
-
In the meantime, you can already install libvips (https://www.libvips.org/) by downloading the pre-compiled Windows binaries from this repository: https://github.com/libvips/build-win64-mxe/releases/tag/v8.16.0 and adding them to your PATH. If you are unsure about which version to choose, vips-dev-w64-all-8.16.0.zip should work for you.
-
Unpack the zip file and add the directory to your PATH environment. If you don’t know how to do that, consider watching this tutorial video that explains the process: https://www.youtube.com/watch?v=O5iBsdAd1_w
-
SPACEc CPU:
    # Create conda environment
    conda create -n spacec python==3.10
    conda activate spacec

    # Install dependencies via conda.
    conda install -c conda-forge graphviz

    # Install spacec
    pip install spacec
SPACEc GPU:
    conda install conda-forge::cudatoolkit=11.2.2 cudnn=8.1.0.77 -y

    mkdir %CONDA_PREFIX%\etc\conda\activate.d && (
    echo @echo off > %CONDA_PREFIX%\etc\conda\activate.d\env_vars.bat
    echo set PATH=%CONDA_PREFIX%\bin;%PATH% >> %CONDA_PREFIX%\etc\conda\activate.d\env_vars.bat
    echo set LD_LIBRARY_PATH=%CONDA_PREFIX%\lib;%LD_LIBRARY_PATH% >> %CONDA_PREFIX%\etc\conda\activate.d\env_vars.bat
    )

    # If Pytorch does not find the GPU try:
    # pip install torch==1.12.0+cu113 torchvision==0.13.0+cu113 torchaudio==0.12.0 --extra-index-url https://download.pytorch.org/whl/cu113
Reinstall SPACEc to be compatible with the GPU setting
    # Install spacec
    pip install spacec
Test if SPACEc loads and if your GPU is visible if you installed the GPU version.
    import spacec as sp
    sp.hf.check_for_gpu()
Docker
If you encounter installation issues or prefer a containerized setup, use the SPACEc Docker image. You can build or modify it using the repository's Dockerfiles.# Run CPU version:
docker build -f ../Docker/spacec_cpu_build.dockerfile -t spacec:cpu .
docker run -p 8888:8888 -p 5100:5100 spacec:cpu
# If running an amd64 image on apple silicon, use the following command:
docker run --platform linux/amd64 -p 8888:8888 -p 5100:5100 spacec:cpu
# Or run GPU version:
docker build -f ../Docker/spacec_gpu_build.dockerfile -t spacec:gpu .
docker run --gpus all -p 8888:8888 -p 5100:5100 spacec:gpu

1 maintainer

Metadata
1 maintainer
Release files for SPACEc 0.1.2
For a detailed explanation of source distributions (sdists) and built distributions (wheels), please see the package formats documentation.
Source distribution (sdist)
| File | Size | Uploaded | |
|---|---|---|---|
| spacec-0.1.2.tar.gz | 162.0 kB | Details |
Built distribution (wheel)
| File | Interpreter | ABI | Platform | Reset |
|---|---|---|---|---|
| spacec-0.1.2-py3-none-any.whl | Python 3 | none | any | Details |
Total release size: 313.1 kB
Release files / spacec-0.1.2.tar.gz
| Download URL | spacec-0.1.2.tar.gz |
|---|---|
| Size | 162.0 kB |
| Tags | Source |
|
SHA-256 checksum How to use checksums |
dcb241e70be1bb89f04daddfa9f3ba50a0ca95e6684808f1098085a05e45d8a9
|
|
BLAKE2b-256 checksum How to use checksums |
ff4150e8789790b2a2a77d65a3de6c3e5002856a47b798241735b68df6c9ad20
|
| Upload date | |
|
Uploaded using Trusted Publishing? What is trusted publishing? |
No |
| Uploaded via |
twine/6.1.0 CPython/3.12.3
|
Release files / spacec-0.1.2-py3-none-any.whl
| Download URL | spacec-0.1.2-py3-none-any.whl |
|---|---|
| Size | 151.1 kB |
| Tags | Python 3 |
|
SHA-256 checksum How to use checksums |
e1e66c54577e8671d1d2a2665542636e74adc51b5f3175e1d90eafca57904ea8
|
|
BLAKE2b-256 checksum How to use checksums |
0ca8cb119048e106ca1156b0d61bbe50e1c24309b3d9dc47b1c78910e80200b7
|
| Upload date | |
|
Uploaded using Trusted Publishing? What is trusted publishing? |
No |
| Uploaded via |
twine/6.1.0 CPython/3.12.3
|














