Sumo Logic collection solution for JFrog Xray.


Project description
sumologic-jfrog-xray
Solution to pull logs from JFrog Xray to Sumo Logic
Installation
This collector can be deployed both onprem and on cloud.
Deploying the collector on a VM
-
Get details for your JFrog Xray instance.
- Get Host Name and port for your JFrog Xray instance.
- For eg - URL is http://host-example:8000/web/#/login.
- Host Name = host-example
- port = 8000
- For eg - URL is http://host-example:8000/web/#/login.
- UserName and password for your JFrog Xray instance.
- Get Host Name and port for your JFrog Xray instance.
-
Add a Hosted Collector and one HTTP Logs Source
- To create a new Sumo Logic Hosted Collector, perform the steps in Configure a Hosted Collector.
- Add an HTTP Logs and Metrics Source.
-
Using the sumologic-jfrog-xrayy collector
-
Method 1 - Configuring the sumologic-jfrog-xray collector
Below instructions assume pip is already installed if not then, see the pip docs on how to download and install pip. sumologic-jfrog-xray is compatible with python 3.7 and python 2.7. It has been tested on Ubuntu 18.04 LTS and Debian 4.9.130. Login to a Linux machine and download and follow the below steps:
-
Install the collector using below command
pip install sumologic-jfrog-xray -
Create a configuration file named jfrogxraycollector.yaml in home directory by copying the below snippet.
JFrogXray:
    HOSTNAME: "<Paste the Host of JFrog Xray Instance>"
    PORT: <Paste the Port of JFrog Xray Instance>
    USERNAME: <Paste the UserName of JFrog Xray Instance>
    PASSWORD: <Paste the password of JFrog Xray Instance>

SumoLogic:
    HTTP_LOGS_ENDPOINT: <Paste the URL for the HTTP Logs source from step 2.>

Collection:
    BACKFILL_DAYS: <Enter the Number of days before the event collection will start.>
-
-
Create a cron job for running the collector every 5 minutes by using the crontab -e and adding the below line
*/5 * * * * /usr/bin/python -m sumojfrogxray.main > /dev/null 2>&1 -
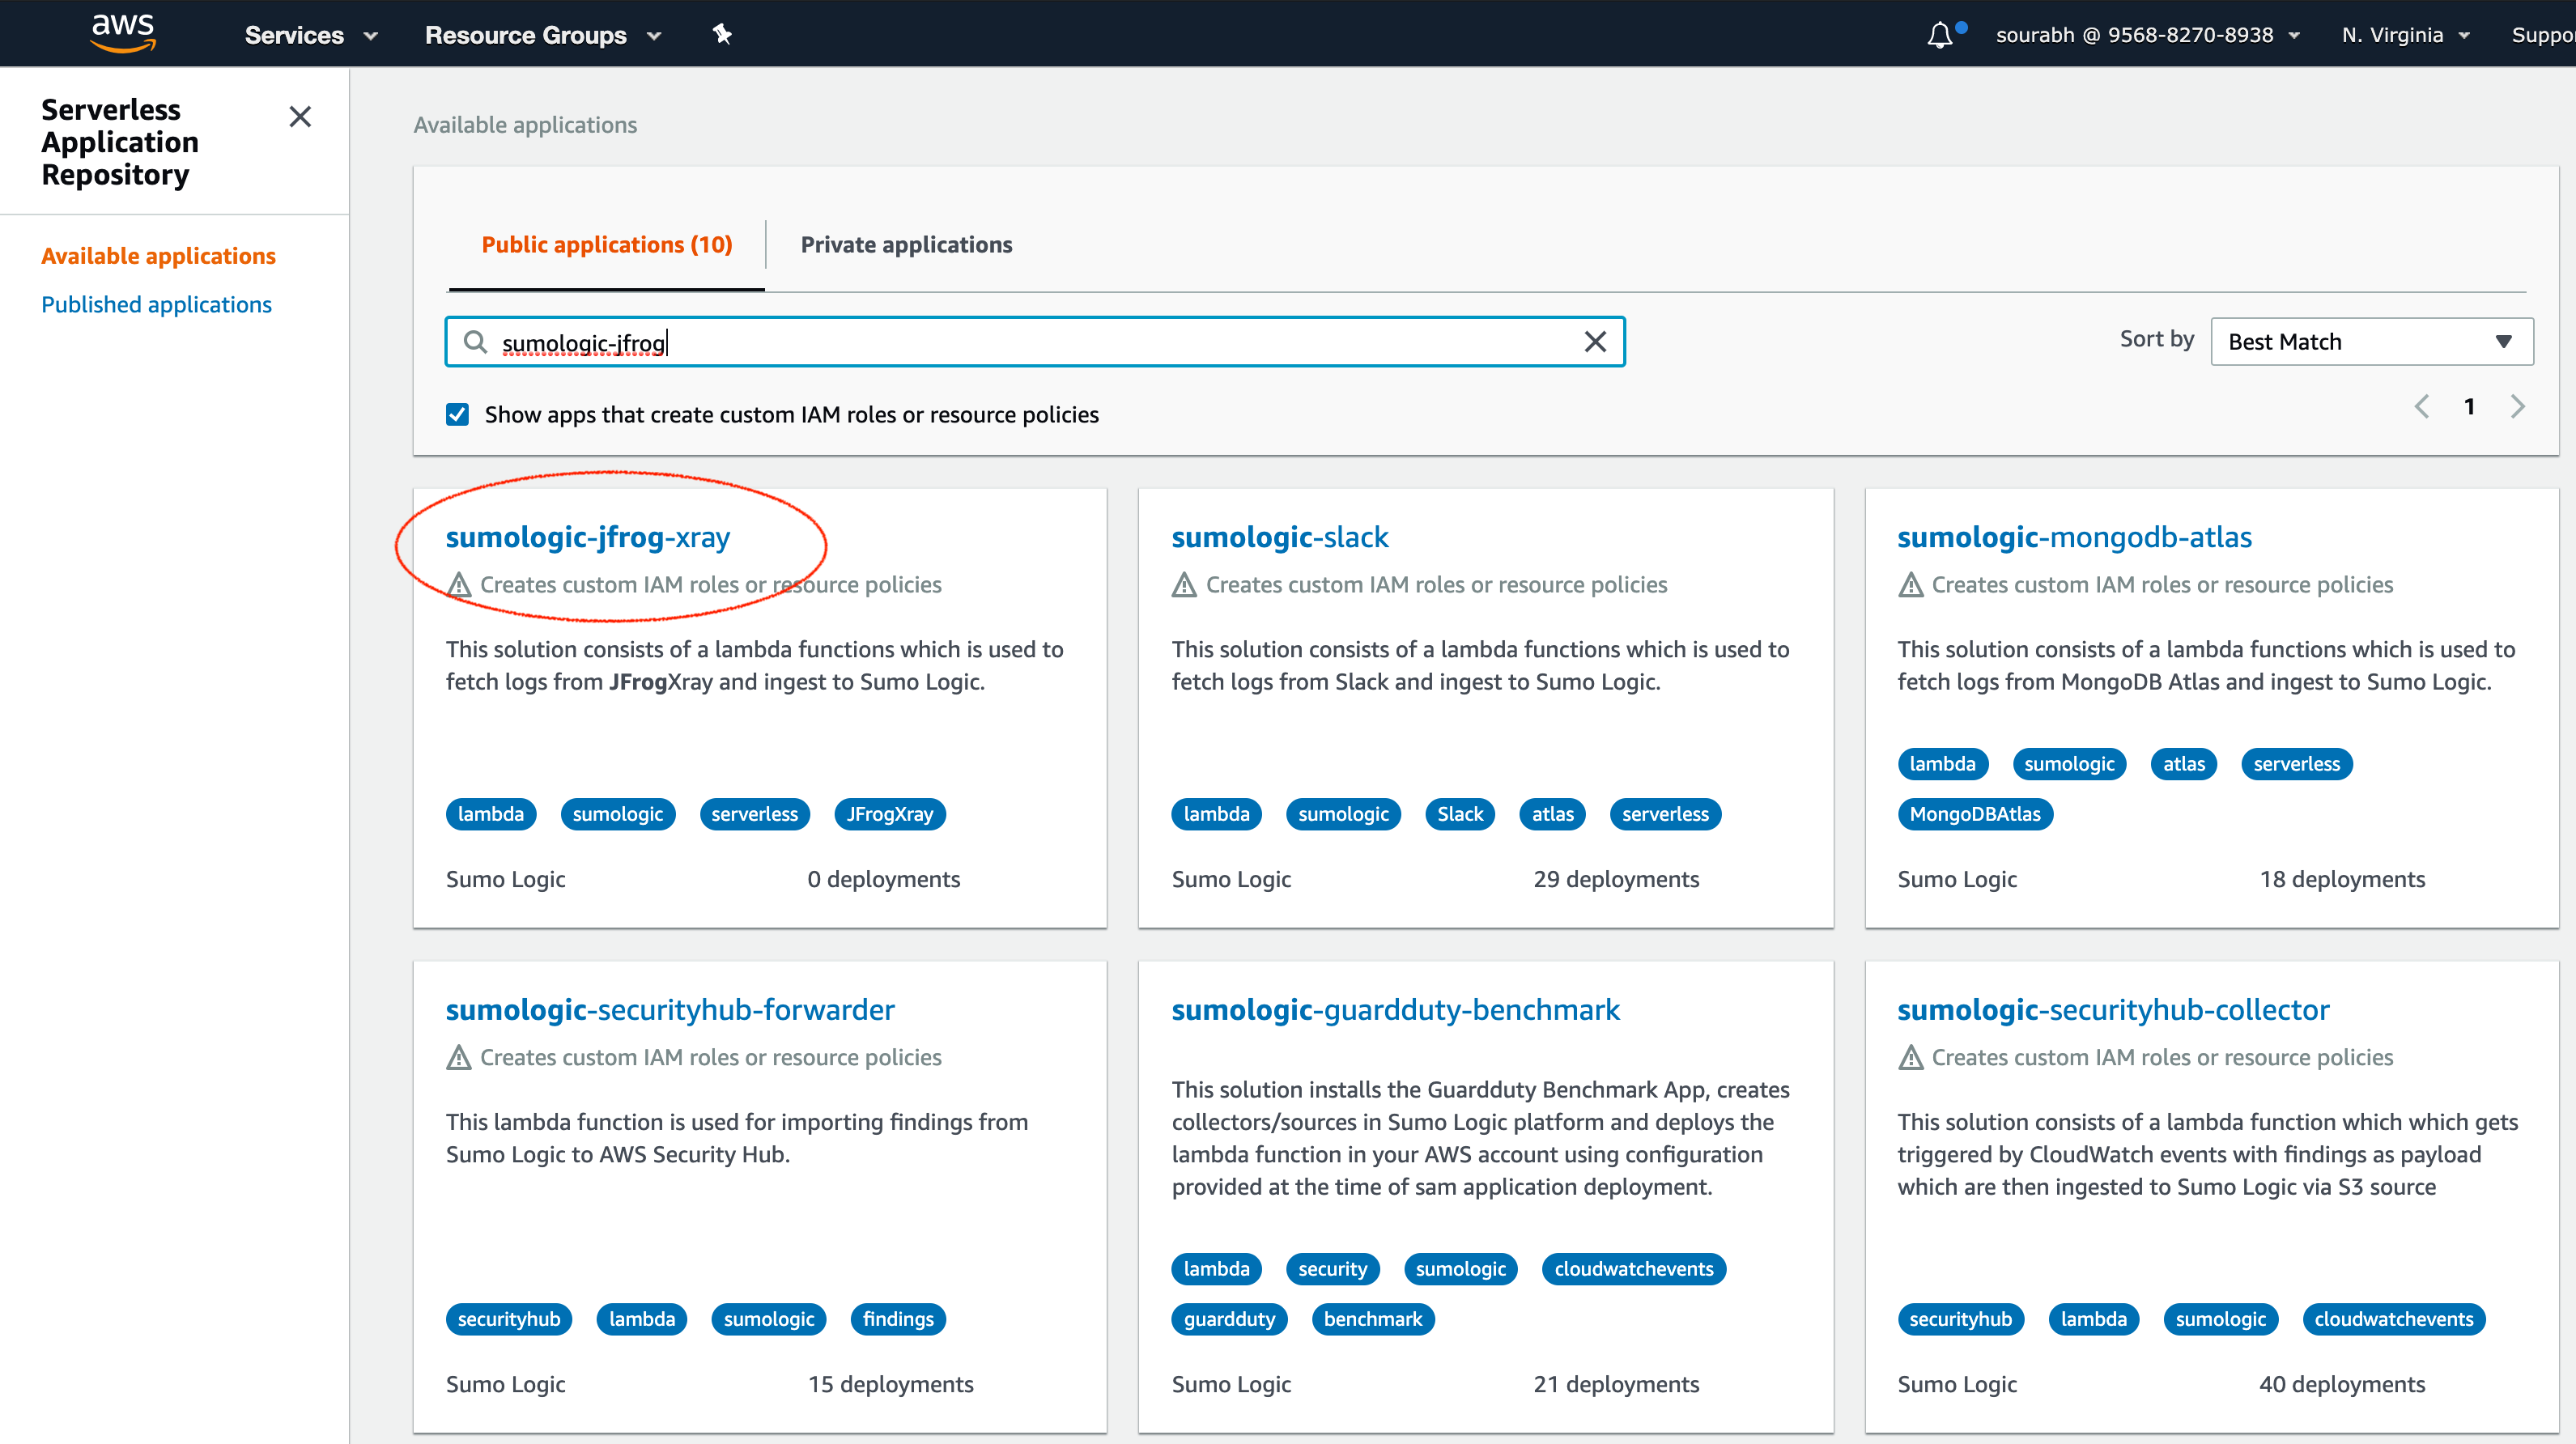
Method 2 - Collection via an AWS Lambda function
To install Sumo Logic’s AWS Lambda script, follow the instructions below:
-
Search for “sumologic-jfrog-xray” and select the app as shown below:
-
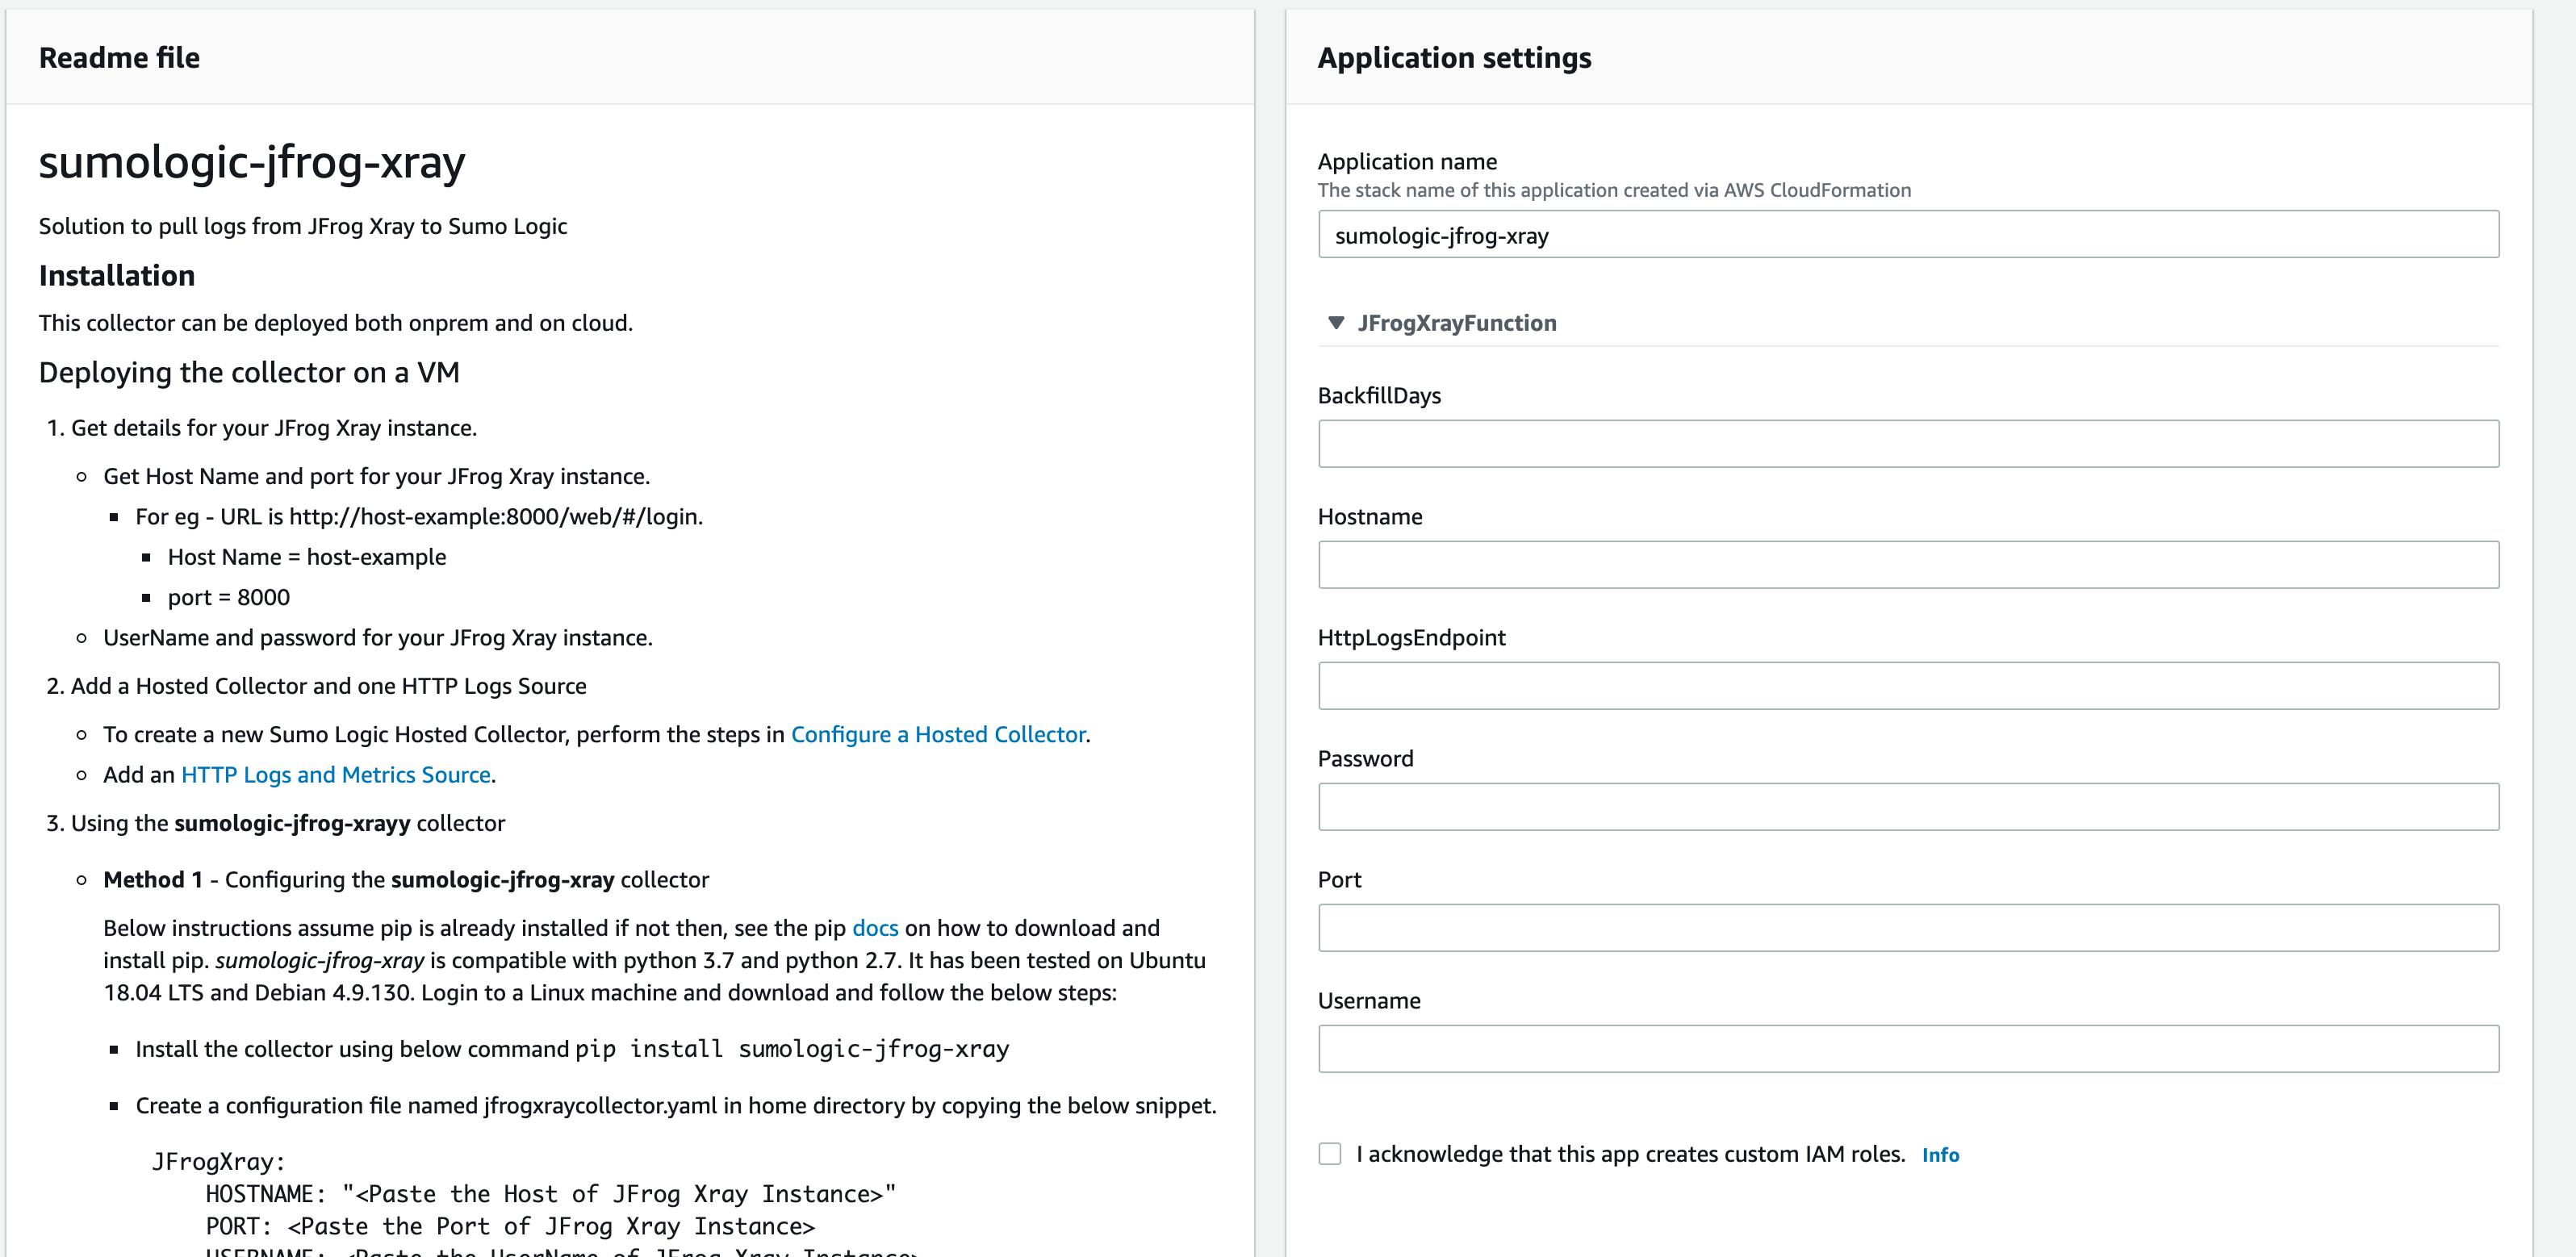
In the Configure application parameters panel, shown below:
Hostname: Paste the Host of JFrog Xray Instance from step 1. HttpLogsEndpoint: Paste the URL for the HTTP Logs source from step 2. Password: Paste the password of JFrog Xray Instance from step 1. Port: Paste the Port of JFrog Xray Instance from step 1. Usernname: Paste the UserName of JFrog Xray Instance from step 1. BackfillDays: Enter the Number of days before the event collection will start -
Click Deploy.
-


Download files
Download the file for your platform. If you're not sure which to choose, learn more about installing packages.
Source Distribution
Built Distribution
Filter files by name, interpreter, ABI, and platform.
If you're not sure about the file name format, learn more about wheel file names.
Copy a direct link to the current filters
File details
Details for the file sumologic-jfrog-xray-1.0.3.tar.gz.
File metadata
- Download URL: sumologic-jfrog-xray-1.0.3.tar.gz
- Upload date:
- Size: 11.8 kB
- Tags: Source
- Uploaded using Trusted Publishing? No
- Uploaded via: twine/1.13.0 pkginfo/1.5.0.1 requests/2.23.0 setuptools/49.2.0 requests-toolbelt/0.9.1 tqdm/4.32.2 CPython/3.7.1
File hashes
| Algorithm | Hash digest | |
|---|---|---|
| SHA256 |
c77899b7b1cb39f8e74ec89f64fd84960650c002b89745a7e8a89d7722fdf707
|
|
| MD5 |
4918fca2f7cd50e1ceb6477c8ab8ec65
|
|
| BLAKE2b-256 |
50f3f9bb2182685cf3937eb0b7b859327ce7b202a321b04bf0f69d792700d1d0
|
File details
Details for the file sumologic_jfrog_xray-1.0.3-py3-none-any.whl.
File metadata
- Download URL: sumologic_jfrog_xray-1.0.3-py3-none-any.whl
- Upload date:
- Size: 12.6 kB
- Tags: Python 3
- Uploaded using Trusted Publishing? No
- Uploaded via: twine/1.13.0 pkginfo/1.5.0.1 requests/2.23.0 setuptools/49.2.0 requests-toolbelt/0.9.1 tqdm/4.32.2 CPython/3.7.1
File hashes
| Algorithm | Hash digest | |
|---|---|---|
| SHA256 |
9fc9caf8397cc1709038d94097c1ae88f8e1069f5caa138f92a6cc2670a4e09b
|
|
| MD5 |
b045e033aaffc9bc00bdc176e07efabb
|
|
| BLAKE2b-256 |
92891411f8568353ea491800176ea0e3b79ebaf79601ec7d7351fe6d5b88d21d
|


