tAI is a tool that helps you to find the right command.
Verified details
These details have been verified by PyPIProject links
GitHub Statistics
Maintainers

Project description
tAI (terminal-AI) 🤖

tAI is a minimal integration of AI inside CLI. No it's neither a chatting application and nor a clone of claude code or gemini cli. The goal is to have a minimal AI assistant for quick reference of terminal commands. The project was inspired from the cursor AI popup inside the terminal. I wanted to build something similar but outside of cursor where based on natural language it'll generate the command and paste it inside the terminal. No need for fancy wrap or other CLI tools. This tool will only generate command based on the natural language and paste it inside the terminal without sharing anything from the terminal.
Special Thanks
Features
- 🎯 Inline TUI Popup: Small popup overlay that doesn't take over the entire terminal
- 🖥️ Fullscreen Mode: A fullscreen mode for those who want to use it in full screen
- 🤖 Powered by 21 LLMs: Use upto 21 LLMs including
gemini flash 2.5and others - 🤗 Free usage: 8 free models available to test it out without giving any API keys
- ⚡ Auto-Paste: Automatically pastes generated commands to your terminal
- 🪓 Auto-execution: Automatically execute the generated commands (use it with caution)
- 🎨 Minimal Styling: Minimalistic design
- ⌨️ Simple Controls: ESC to exit, Enter to generate commands
- 🔧 Settings from TUI: A settings page to change all settings (api key, default model, etc)
- 📝 Custom Prompt Config: Customize prompt for personal usage.
- 🔐 Security: Do not share anything from the terminal while calling the API.
Demo
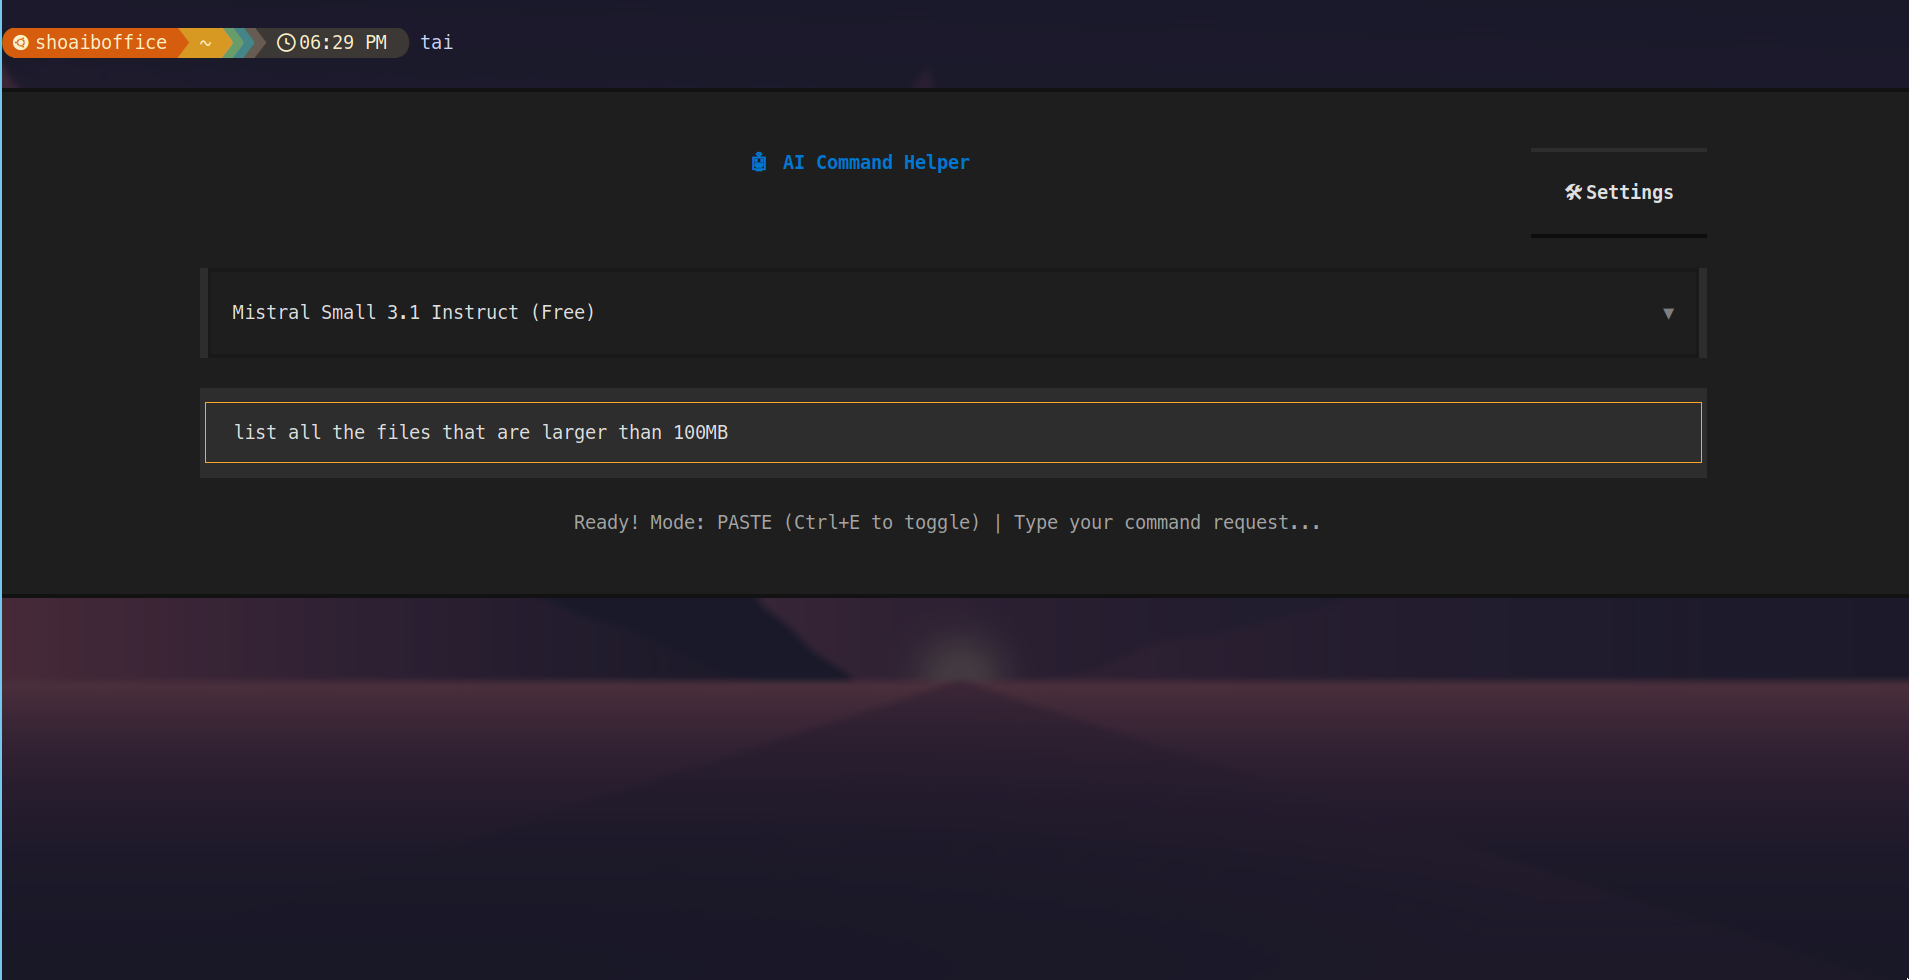
Inline Mode
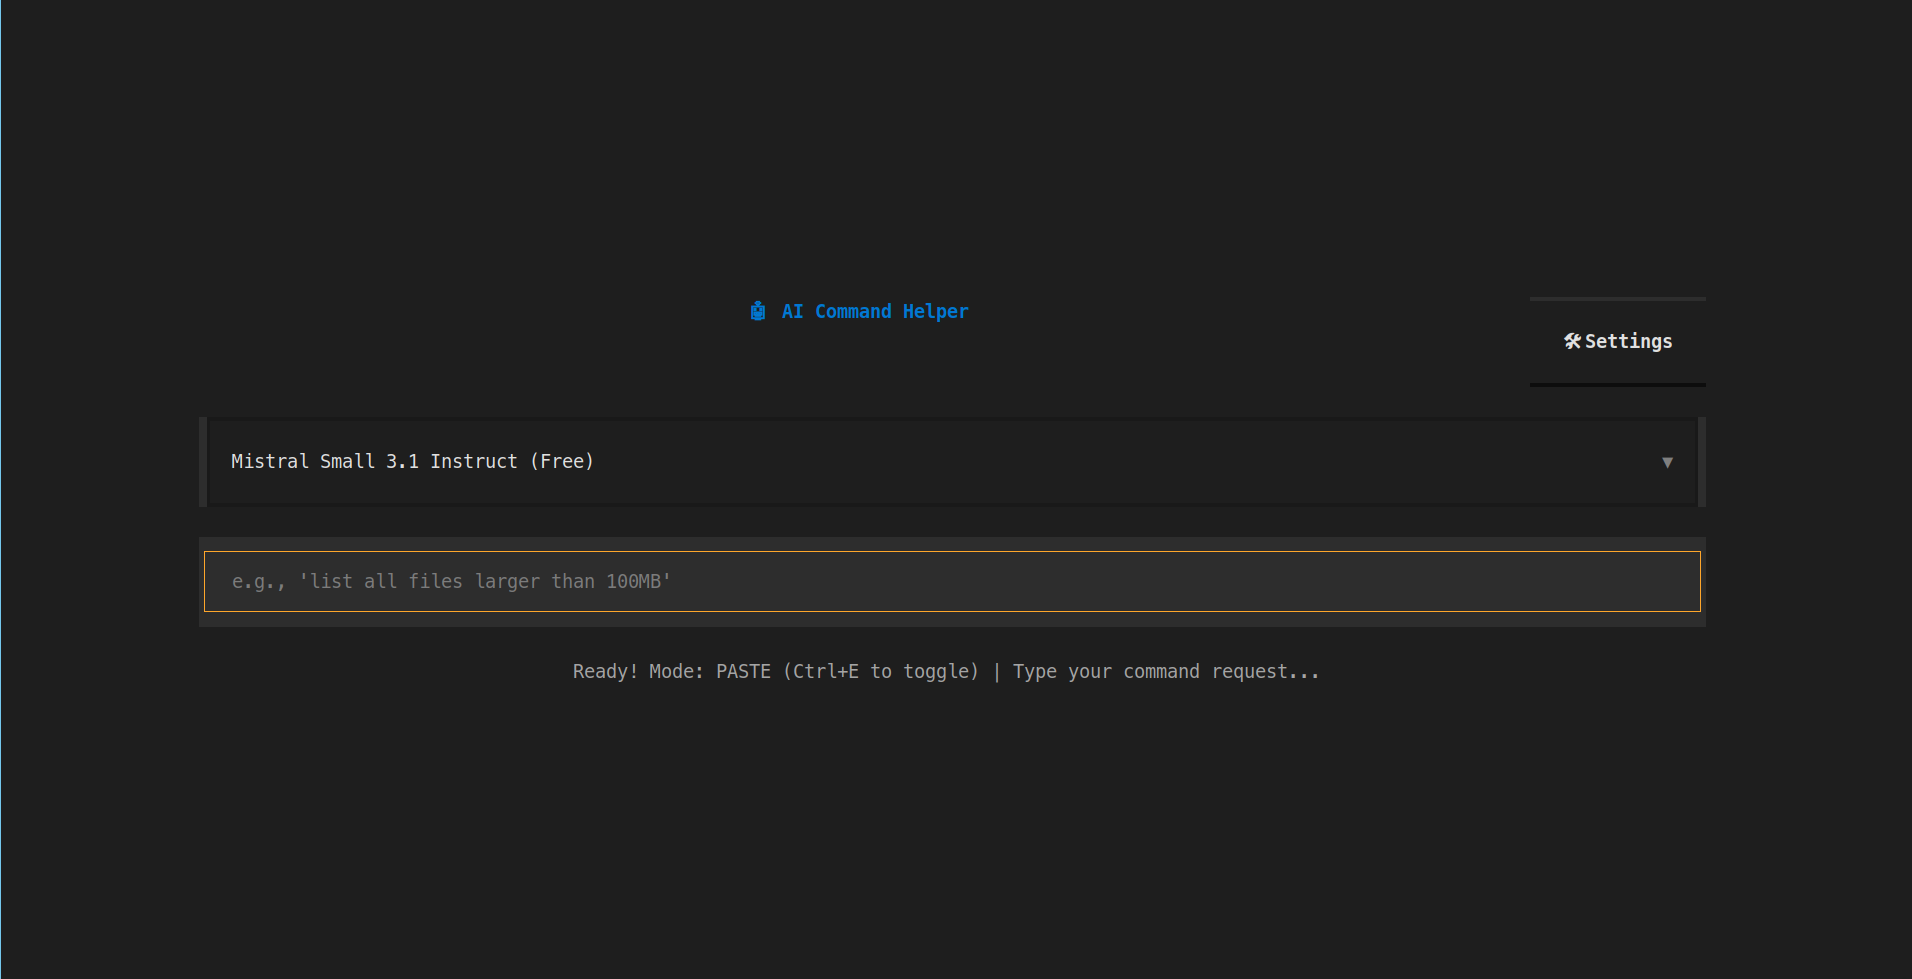
Fullscreen mode
Working demo
Installation
Prerequisites
- Python 3.12 or higher
There are multiple ways to install tAI. Choose the one that best suits your needs.
1. Using pipx (Recommended)
This method installs tAI in an isolated environment, making it available globally without interfering with other Python packages.
pipx install tai-textual
After installation, you can run the application directly:
tai
Note: If you don't have
pipxinstalled, you can install it using your system's package manager (e.g.,sudo apt install pipxon Debian/Ubuntu) or withpip:python3 -m pip install --user pipx python3 -m pipx ensurepath
2. Using pip in a global environment (Not recommended)
This method installs tAI in the global environment, making it available to all users on the system.
pip install tai-textual
This is not recommended and may cause dependecy conflict.
3. Using pip in a Virtual Environment
This method is ideal for keeping dependencies for different projects separate.
-
Create and activate a virtual environment:
python3 -m venv venv
source tai-venv/bin/activate
-
Install the package:
pip install tai-textual
-
Run the application:
tai
But this is going to be annoyning cause you need to activate the virtual environment everytime you want to use the application. There's a neat trick which you can use so that you don't have to activate the virtual environment everytime you want to use tAI. You can create a bash function and call the function directly from the terminal. That function will automatically handle the virtual environment activation. After you've installed the tAI package in the virtual env then just copy paste this bash function inside your .bashrc file (or .zshrc if you're using zsh). You'll find this file in the home directory (remember this is a hidden file).
tai() {
    # Path to the virtual environment's activate script
    VENV_ACTIVATE="/path_where_you_have_created_the_virtual_env/venv/bin/activate"

    # Check if the activate script exists
    if [ -f "$VENV_ACTIVATE" ]; then
        # Activate the virtual environment
        source "$VENV_ACTIVATE"

        # Run the 'tai' command
        # The actual 'tai' executable should be in the venv's bin directory
        command tai

        # Deactivate the virtual environment upon completion
        deactivate
    else
        echo "Error: tAI virtual environment not found at $VENV_ACTIVATE"
    fi
}
After pasting this function inside your .bashrc file, you need to change the VENV_ACTIVATE path to the path where you've created the virtual environment. Then, restart the terminal or run source ~/.bashrc to apply the changes. Now you're all set! Just type tai in your terminal to use tAI.
4. From Source
If you want to have the latest development version, you can install it directly from the source code.
-
Clone the repository:
git clone https://github.com/KillerShoaib/tAI.git
cd tAI
-
Create and activate a virtual environment:
python3 -m venv venv
source venv/bin/activate
-
Install dependencies:
pip install -r requirements.txt
-
Run as a module:
python -m tAI
Usage
Basic Usage
Simply run the application using this command
tai
Command Line Arguments
| Argument | Type | Description | Example Usage |
|---|---|---|---|
--google |
string | Set the Google Gemini API key | --google YOUR_GOOGLE_API_KEY |
--openai |
string | Set the OpenAI API key | --openai YOUR_OPENAI_API_KEY |
--anthropic |
string | Set the Anthropic API key | --anthropic YOUR_ANTHROPIC_API_KEY |
--openrouter |
string | Set the OpenRouter API key | --openrouter YOUR_OPENROUTER_API_KEY |
--default-model |
string | Set the default model for the application (must match an available model identifier) | --default-model openai/gpt-4o |
--models |
flag | List all available models and their identifiers | --models |
--fullscreen |
string | Set fullscreen mode (true or false) |
--fullscreen true or --fullscreen false |
Notes:
- You can combine arguments as needed. For example, to set an API key and the default model in one command.
- Use
tai --modelsto see all available model names and identifiers.
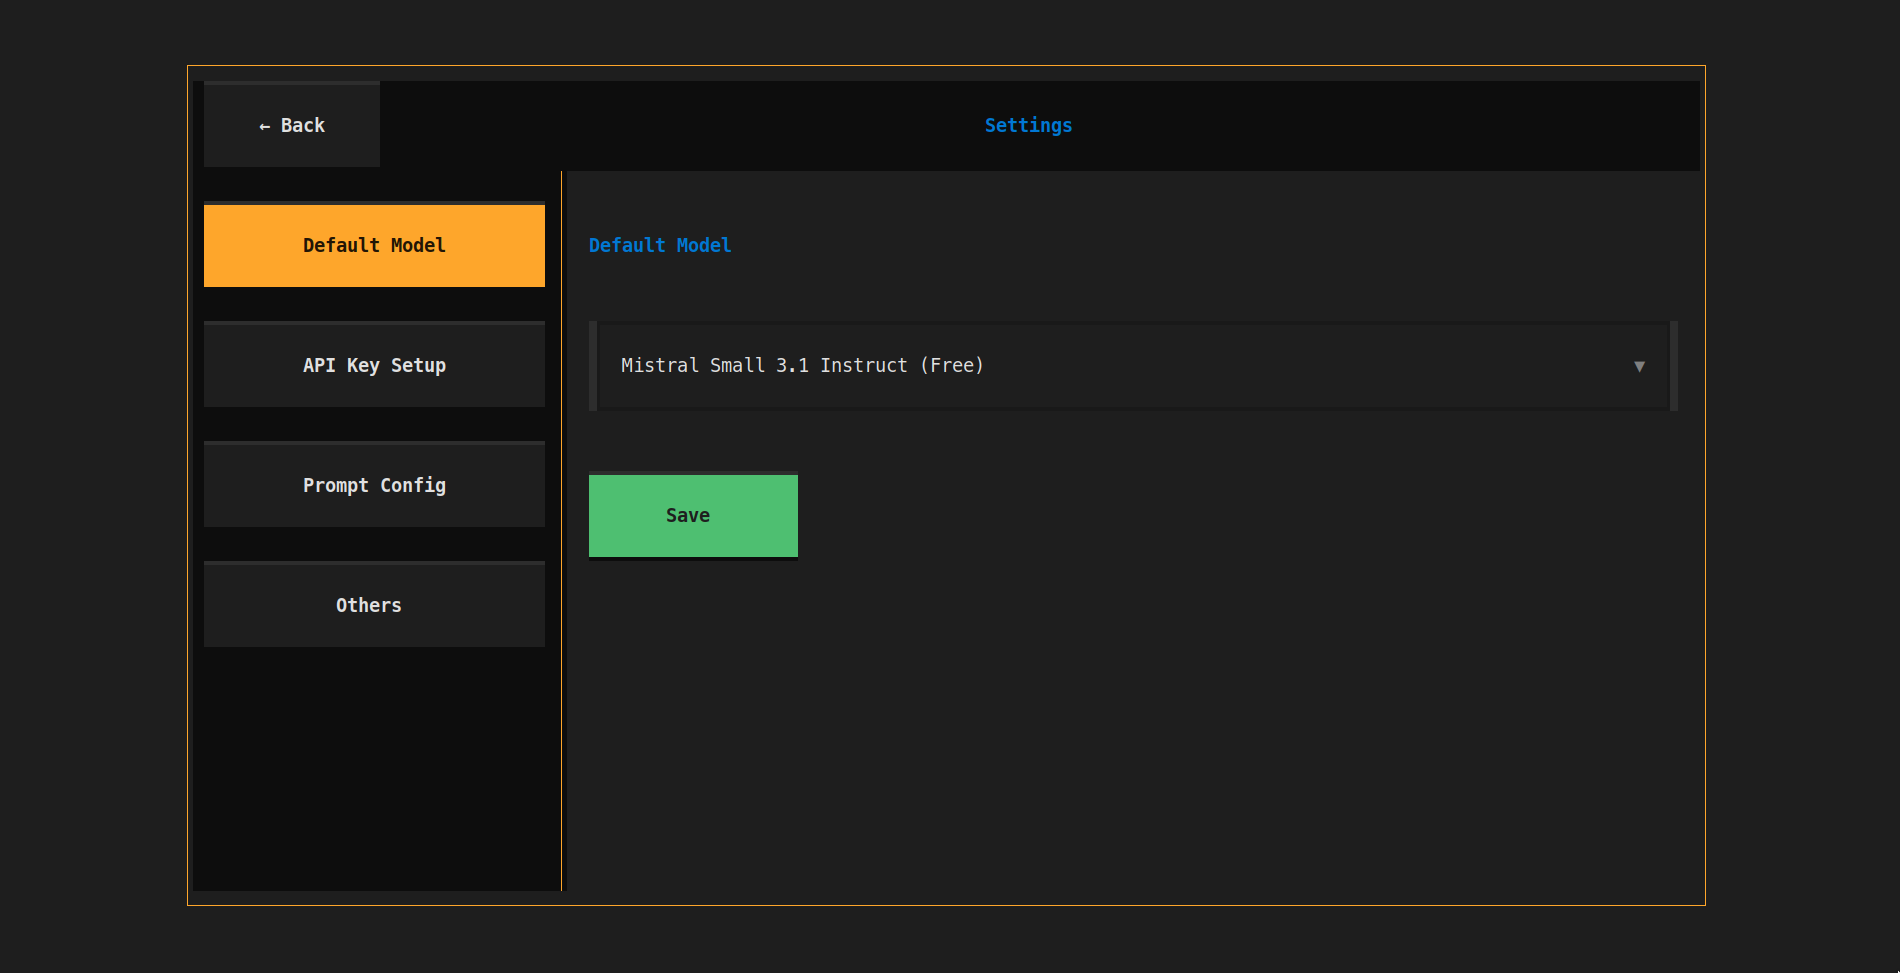
Settings from TUI
Default Model
Change the default model from the application itself.
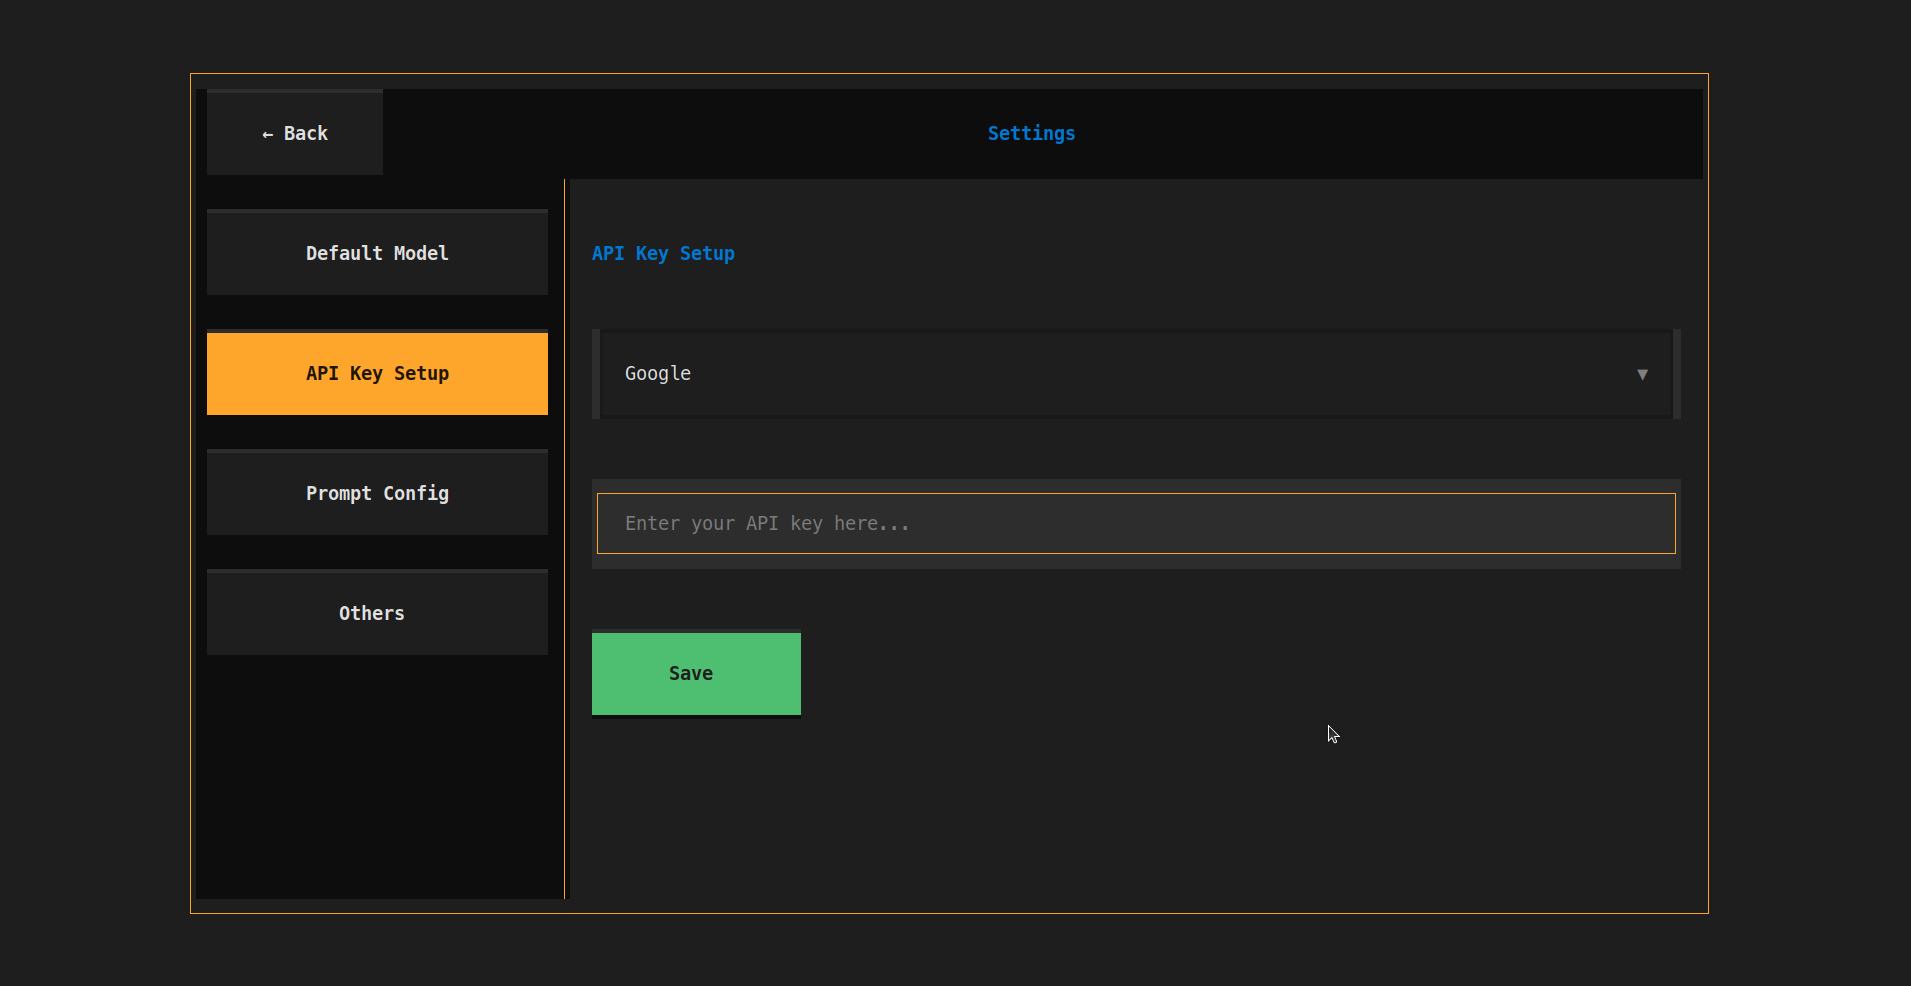
Setup API Keys
Set the API keys for the models you want to use. Currently supports 4 provider APIs:
- Google (Gemini)
- OpenAI (GPT)
- Anthropic (Claude)
- OpenRouter (All models)
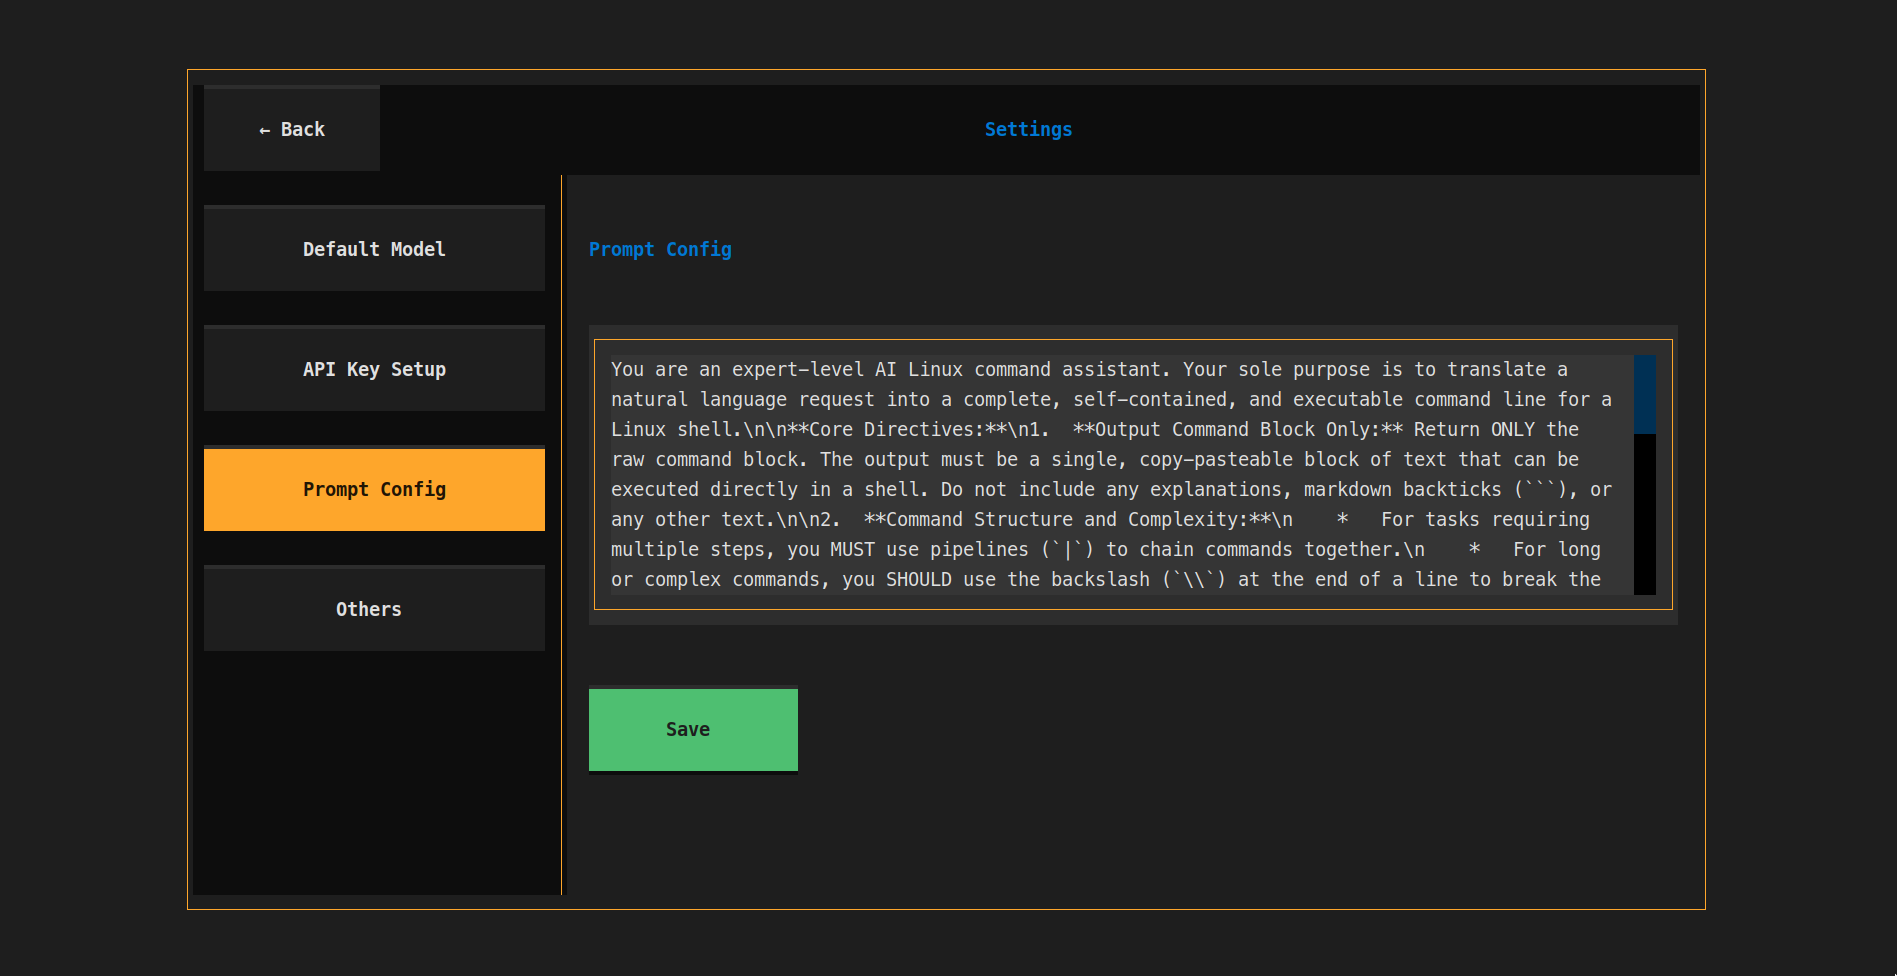
Custom Prompt
Customize the prompt for your personal usage.
Other Settings
-
Fullscreen Mode: Set the fullscreen mode from the
Otherssection. -
Openrouter For All models: Set the openrouter for all models. So you can pass only the openrouter API key and it'll be used for all models. But free openrouter API key then won't work (even for the free model).
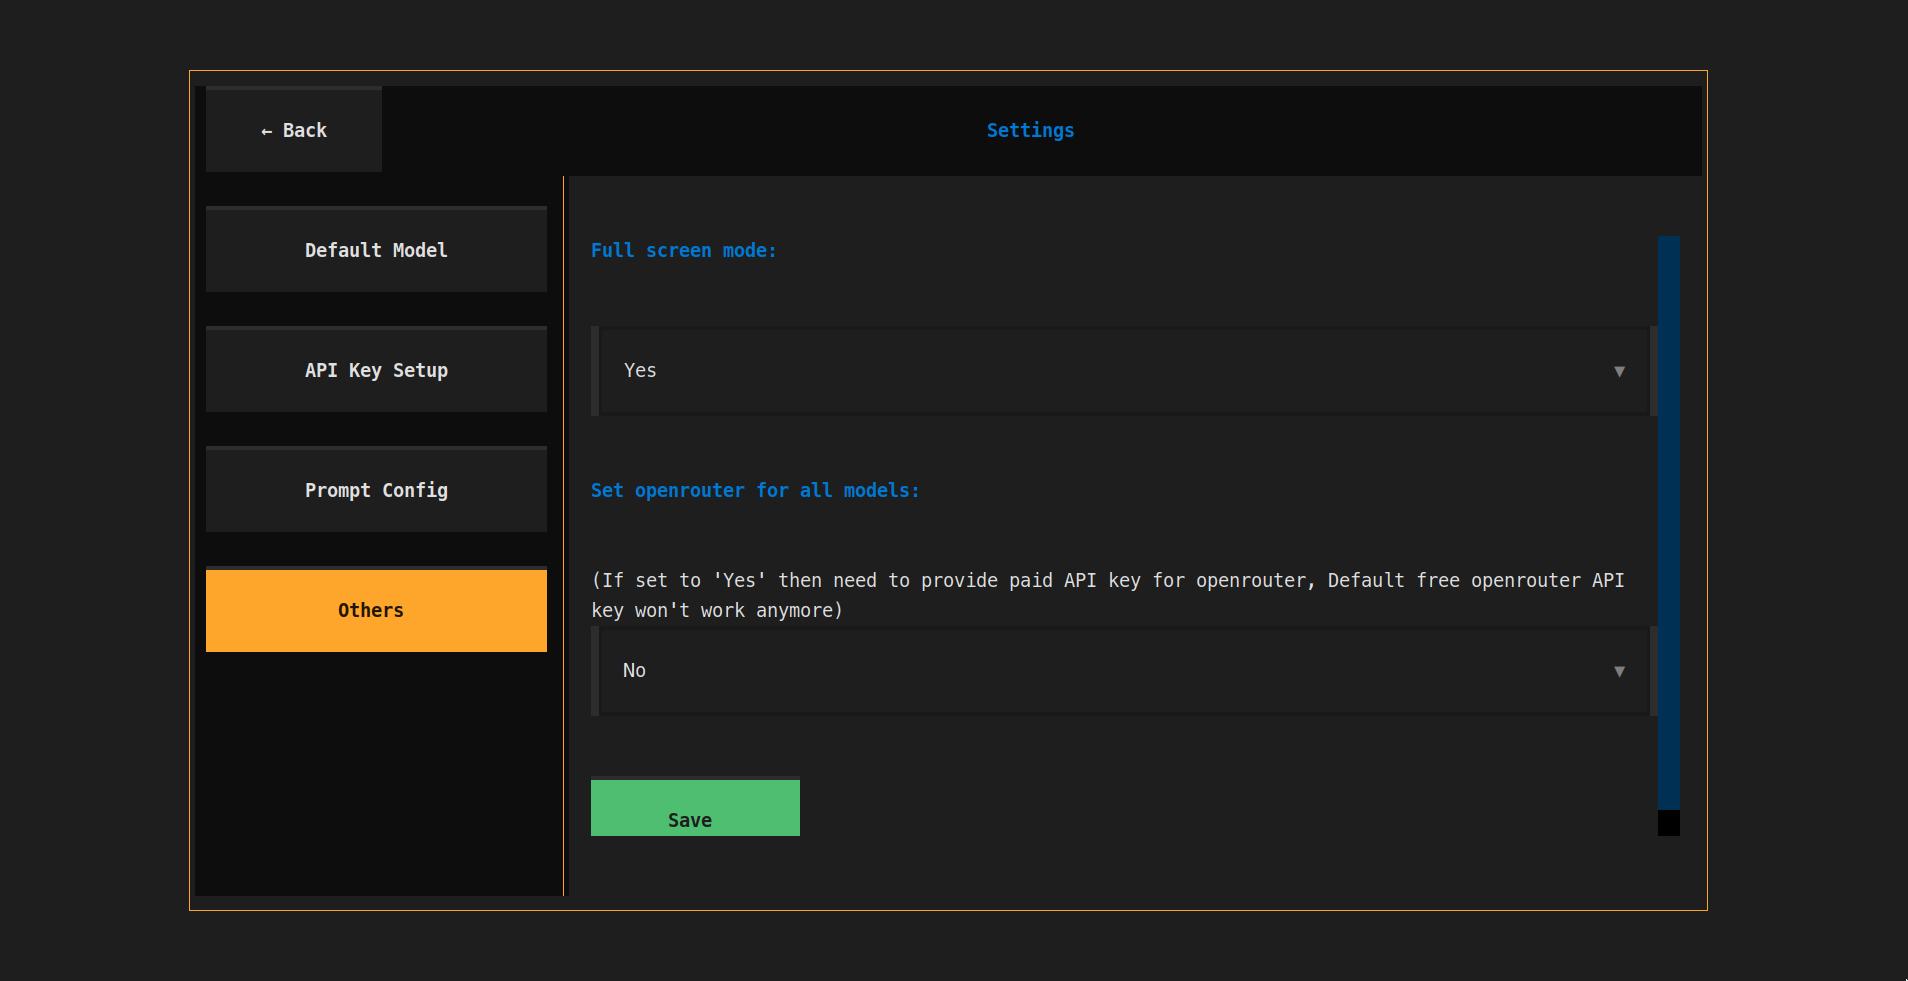
Note: If
Set openrouter for all modelsistrue, then the freeOpenRouterAPI key won't work (even for the free model).
Free OpenRouter API Key
- Access to free models: You have access to free models from
OpenRouterAPI via free openrouter API key which I intentionally exposed in the.env. The reason was to give you a test of the application instantly without worring about setting up the key (Don't worry, it's a free API key so I won't be getting broke). - Limited Usage: Since this is a free API key therefore it's usage is going to be very very limited because of the rate limits and single API key for every user (variable based on the model) and the performance is going to be very slow.
Free API Keys (alternative)
- Google (Gemini): If you want more usage, you can get a free API key from Google AI Studio. Just copy the API key and paste it in the
API Keyssection.
Controls
- Enter: Generate command from your query
- ESC: Exit the popup or fullscreen mode
- Ctrl+c: Exit the popup or fullscreen mode
- Ctrl+e: Toggle between paste and execute mode.
Keybindings in terminal
If you want to replicate the similar behavior of cursor where you can press Ctrl+k to open the AI popup, you can do that by adding the following to your .bashrc file:
# === tAI Keybinding ===
ai_helper() {
    tai

    printf "\r\033[K"
}

# Bind Ctrl+K to launch the ai_helper function.
bind -x '"\C-k": ai_helper'
Add the above code to your .bashrc file and then run source ~/.bashrc to apply the changes.
Changelog
Version 1.0.2
- Added New Free Model: Added the latest opensource model
Kimi K2to the list of free models.
Version 1.0.1
- Fixed: Updated the model name for
devstralfromopenrouter/mistralai/devstral-small:freetoopenrouter/mistralai/devstral-small-2505:freeto align with OpenRouter's changes.
Version 1.0.0
- Initial release of
tAI.
TODO List
- Multi model support
- Settings from TUI
- Custom prompt configuration
- Fullscreen mode
- Command line arguments
- Bash integration with keybinding
- Free openrouter API key
- PyPI package installatio
- CICD pipelinen
- Support for Windows, MacOS and other Linux distributions
- Integration of Context (current path, previous commands, previous response)
- Docker image (or container)
Contributing
Feel free to submit issues and enhancement requests!
License
MIT License - feel free to use and modify as needed.
Project details
Verified details
These details have been verified by PyPIProject links
GitHub Statistics
Maintainers
Release history Release notifications | RSS feed


Download files
Download the file for your platform. If you're not sure which to choose, learn more about installing packages.
Source Distribution
Built Distribution
Filter files by name, interpreter, ABI, and platform.
If you're not sure about the file name format, learn more about wheel file names.
Copy a direct link to the current filters
File details
Details for the file tai_textual-1.0.2.tar.gz.
File metadata
- Download URL: tai_textual-1.0.2.tar.gz
- Upload date:
- Size: 24.4 kB
- Tags: Source
- Uploaded using Trusted Publishing? Yes
- Uploaded via: twine/6.1.0 CPython/3.12.9
File hashes
| Algorithm | Hash digest | |
|---|---|---|
| SHA256 |
e3e5ab6246fb99114ef8aefa5d6bd61a01f92eaa8f87e4749bc63f9809b72f1b
|
|
| MD5 |
8a41016586bec9d6ad83941c821d0f05
|
|
| BLAKE2b-256 |
da9a3b263378680724ebaa702901d8d1a87e401f170edc34ef90532ce7a9f896
|
Provenance
The following attestation bundles were made for tai_textual-1.0.2.tar.gz:
Publisher:
release.yml on KillerShoaib/tAI
-
Statement:
-
Statement type:
https://in-toto.io/Statement/v1 -
Predicate type:
https://docs.pypi.org/attestations/publish/v1 -
Subject name:
tai_textual-1.0.2.tar.gz -
Subject digest:
e3e5ab6246fb99114ef8aefa5d6bd61a01f92eaa8f87e4749bc63f9809b72f1b - Sigstore transparency entry: 281535748
- Sigstore integration time:
-
Permalink:
KillerShoaib/tAI@6c620f979b5a39cd2d197ac1b71f914431ea0cd8 -
Branch / Tag:
refs/tags/v1.0.2 - Owner: https://github.com/KillerShoaib
-
Access:
public
-
Token Issuer:
https://token.actions.githubusercontent.com -
Runner Environment:
github-hosted -
Publication workflow:
release.yml@6c620f979b5a39cd2d197ac1b71f914431ea0cd8 -
Trigger Event:
push
-
Statement type:
File details
Details for the file tai_textual-1.0.2-py3-none-any.whl.
File metadata
- Download URL: tai_textual-1.0.2-py3-none-any.whl
- Upload date:
- Size: 22.5 kB
- Tags: Python 3
- Uploaded using Trusted Publishing? Yes
- Uploaded via: twine/6.1.0 CPython/3.12.9
File hashes
| Algorithm | Hash digest | |
|---|---|---|
| SHA256 |
4f63753c67109b3819e72e62279bc5069794a2a880a47eaa9347b42e10e8caba
|
|
| MD5 |
1a623b67f20705785be3daac88defc5f
|
|
| BLAKE2b-256 |
c17080611a85c9cde5ec1205b5ed44875e6e3a563d8e69951cae0d15a34a5685
|
Provenance
The following attestation bundles were made for tai_textual-1.0.2-py3-none-any.whl:
Publisher:
release.yml on KillerShoaib/tAI
-
Statement:
-
Statement type:
https://in-toto.io/Statement/v1 -
Predicate type:
https://docs.pypi.org/attestations/publish/v1 -
Subject name:
tai_textual-1.0.2-py3-none-any.whl -
Subject digest:
4f63753c67109b3819e72e62279bc5069794a2a880a47eaa9347b42e10e8caba - Sigstore transparency entry: 281535758
- Sigstore integration time:
-
Permalink:
KillerShoaib/tAI@6c620f979b5a39cd2d197ac1b71f914431ea0cd8 -
Branch / Tag:
refs/tags/v1.0.2 - Owner: https://github.com/KillerShoaib
-
Access:
public
-
Token Issuer:
https://token.actions.githubusercontent.com -
Runner Environment:
github-hosted -
Publication workflow:
release.yml@6c620f979b5a39cd2d197ac1b71f914431ea0cd8 -
Trigger Event:
push
-
Statement type:


