AI chat assistant in your terminal powered by OpenAI ChatGPT models.

Project description


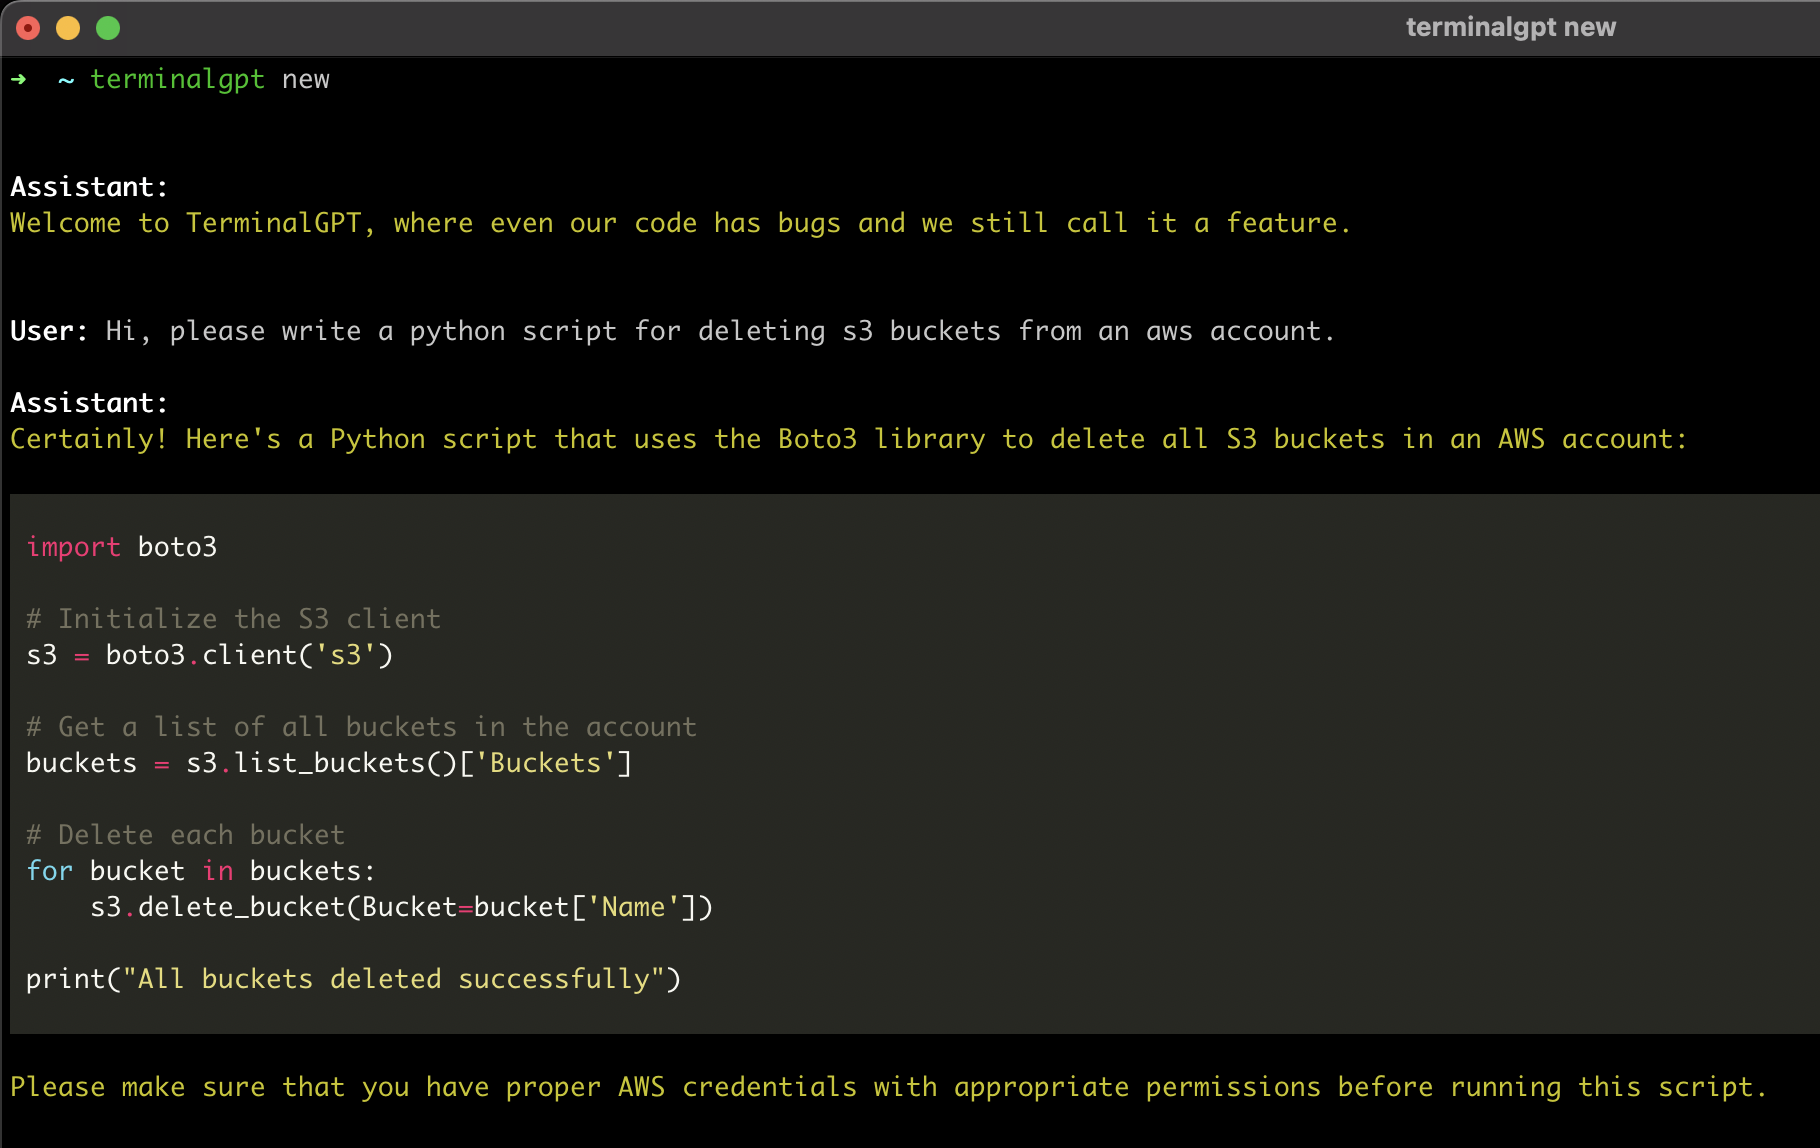
Welcome to terminalGPT, the terminal-based ChatGPT personal assistant app! With terminalGPT, you can easily interact with the OpenAI GPT-3.5, GPT-4, and GPT-5 language models.
Whether you need help with a quick question or want to explore a complex topic, TerminalGPT is here to assist you. Simply enter your query and TerminalGPT will provide you with the best answer possible based on its extensive knowledge base.
Supported Models
- gpt-3.5-turbo
- gpt-4-turbo
- gpt-4o
- gpt-4o-mini
- o1
- o1-mini
- gpt-5-mini
Why?
Some advantages of using TerminalGPT:
- TerminalGPT's answers are tailored to your machine's operating system, distribution, and chip-set architecture.
- Doesn't use your conversation data for training the model.
- Your conversations are stored locally on your machine, so only you can access them.
- Efficient context management for super cheap api usage.
- It's highly available and can be used whenever you need it.
- You can use TerminalGPT with your IDE terminal, which means you won't have to constantly switch between your browser and your IDE when you have questions.
- Fast, reliable, lightweight.
- Quick one shot question mode.
Pre-requisites
- Python 3.6 or higher
- An OpenAI Account and API key.
- Sign up at https://platform.openai.com/signup using email or Google/Microsoft account.
- Go to https://platform.openai.com/account/api-keys or click on "View API keys" in the menu to get your API key.
Installation
Using pip
- Install the latest TerminalGPT with pip install.
pip install terminalgpt -U --user
or
pip3 install terminalgpt -U --user
Using pipx
- remove old installation that was installed with pip
(do this only if you are migrating from a version that was installed with pip)
package_location=$(which terminalgpt)
rm "$package_location"
- install with pipx
pipx install terminalgpt==2.2.7 --force
Setup
- Now you have
terminalgptcommand available in your terminal. Run the following install command to configure the app.
terminalgpt install
-
Enter your OpenAI API key when prompted and press enter.
-
Choose one of the models below as the default model. it can be overridden with the
-m --modelflag later. -
Choose a printing style
That's it! You're ready to use TerminalGPT!
You can now start a new conversation with terminalgpt new or load a previous conversation with terminalgpt load. Also you can reinstall with terminalgpt install or delete previous conversations with terminalgpt delete.
Usage
TL;DR
Usage: terminalgpt [OPTIONS] COMMAND [ARGS]...

  *~ TerminalGPT - Your Personal Terminal Assistant ~*

Options:
  --version                       Show the version and exit.
  -m, --model [gpt-3.5-turbo|gpt-4-turbo|gpt-4o|gpt-4o-mini|o1|o1-mini|gpt-5-mini]
                                  Choose a model to use.  [default:
                                  gpt-4o-mini]
  -s, --style [markdown|plain]    Output style.  [default: plain]
  -t, --token-limit INTEGER       Set the token limit. this will override the
                                  default token limit for the chosen model.
  --help                          Show this message and exit.

Commands:
  delete    Choose a previous conversation to delete.
  install   Installing the OpenAI API key and setup some default settings.
  load      Choose a previous conversation to load.
  new       Start a new conversation.
  one-shot  One shot question answer.
New
Start a new conversation:
terminalgpt new
One-Shot (I love this feature)
One shot question to get a fast answer in the terminal.
terminalgpt one-shot "What is the meaning of life?"
Note: I recommend to make an alias, see at Recommended aliases.
Load
Load previous conversations:
terminalgpt load
Delete
Delete previous conversations:
terminalgpt delete
Recommended aliases
Zsh
echo alias tgpt="terminalgpt" >> ~/.zshrc
echo alias tgpto="terminalgpt one-shot" >> ~/.zshrc
echo alias tgptn="terminalgpt new" >> ~/.zshrc
Bash
echo alias tgpt="terminalgpt" >> ~/.bashrc
echo alias tgpto="terminalgpt one-shot" >> ~/.bashrc
echo alias tgptn="terminalgpt new" >> ~/.bashrc

Release history Release notifications | RSS feed


Download files
Download the file for your platform. If you're not sure which to choose, learn more about installing packages.
Source Distribution
Built Distribution
Filter files by name, interpreter, ABI, and platform.
If you're not sure about the file name format, learn more about wheel file names.
Copy a direct link to the current filters
File details
Details for the file terminalgpt-2.2.8.tar.gz.
File metadata
- Download URL: terminalgpt-2.2.8.tar.gz
- Upload date:
- Size: 14.7 kB
- Tags: Source
- Uploaded using Trusted Publishing? No
- Uploaded via: poetry/2.1.3 CPython/3.13.5 Darwin/24.6.0
File hashes
| Algorithm | Hash digest | |
|---|---|---|
| SHA256 |
4132dea8843d7fd040a0309d21cc2725d7cae0fb070a6b00888bbb04c70710a3
|
|
| MD5 |
0750fe2eedd0a6849b836fb9b6af730f
|
|
| BLAKE2b-256 |
56768c88039b68af5964c534ef5eeae9fd2bb7dc33e1a18b09fc7353e949763c
|
File details
Details for the file terminalgpt-2.2.8-py3-none-any.whl.
File metadata
- Download URL: terminalgpt-2.2.8-py3-none-any.whl
- Upload date:
- Size: 16.6 kB
- Tags: Python 3
- Uploaded using Trusted Publishing? No
- Uploaded via: poetry/2.1.3 CPython/3.13.5 Darwin/24.6.0
File hashes
| Algorithm | Hash digest | |
|---|---|---|
| SHA256 |
e0a91884a189b74d1ad45c15d0c60758b523e6db811f30d35b0faee159bd40bb
|
|
| MD5 |
eb20df4ed867d1abfffc84cb05af84ba
|
|
| BLAKE2b-256 |
56ccae7c1a2ae6eb3fb87a1fd0c74b78888dab68015394af4fb00b482c05e59b
|


