Database Intelligence Layer - Multi-database connectivity with SQLShield integration

Project description
TernoDBI: Database Intelligence Layer


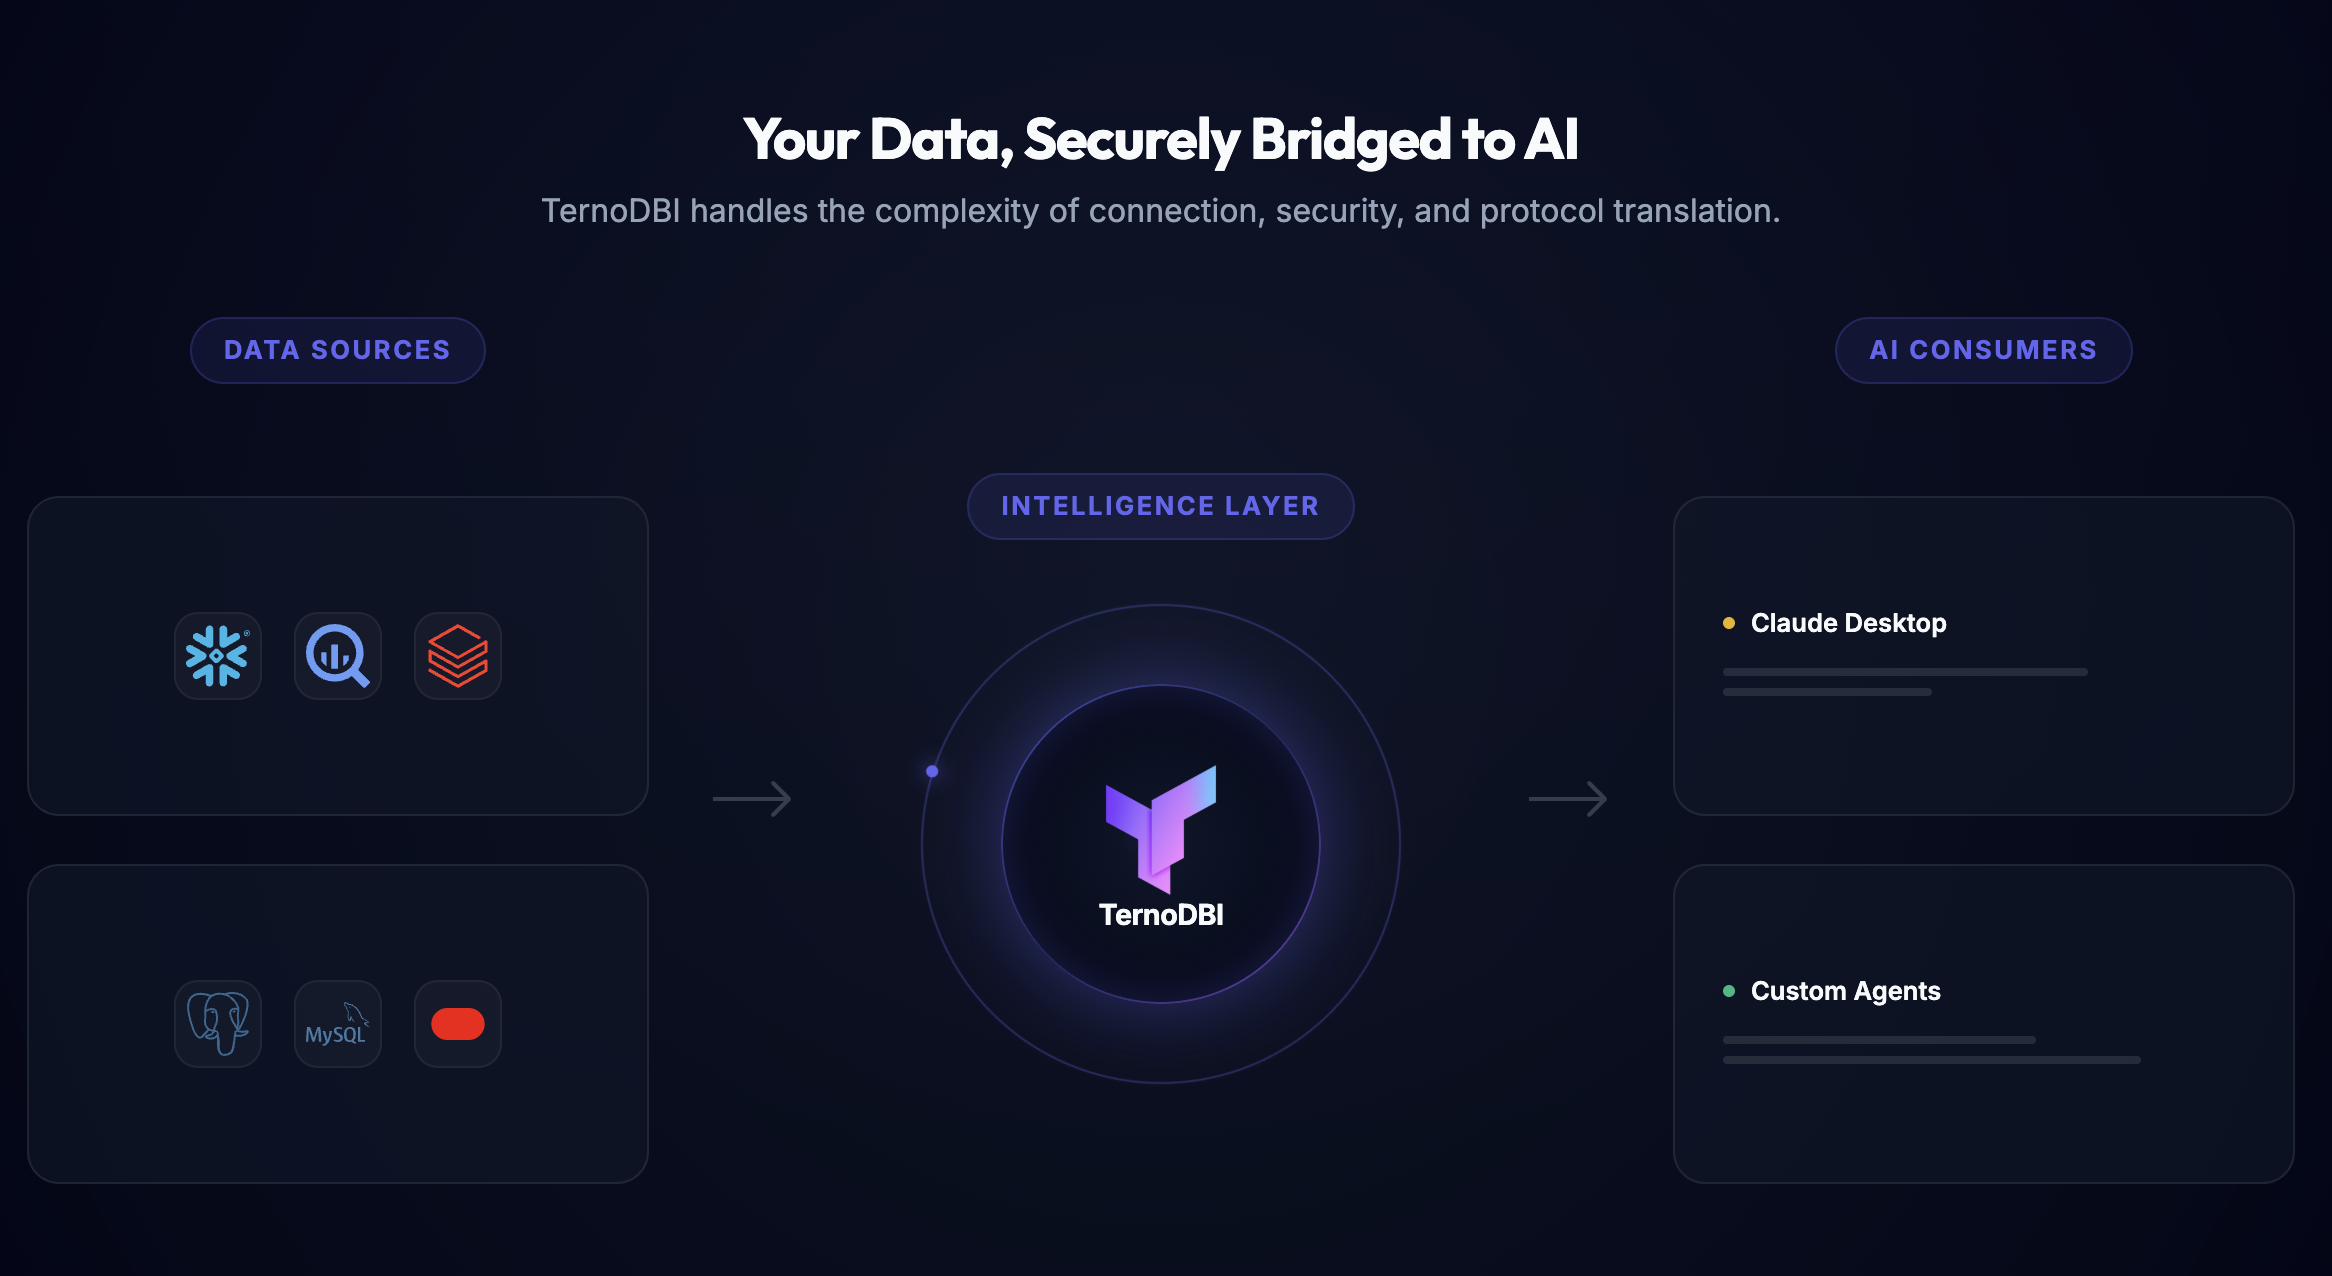
TernoDBI is a database intelligence layer designed for Security and Accuracy, bridging the gap between AI Agents and Enterprise Data. It acts as a powerful standalone Model Context Protocol (MCP) server, or it can be directly embedded into your existing Django projects. Either way, it provides a unified, secure API for interacting with warehouse-scale databases while enforcing strict access controls and optimizing the database schema context for LLMs.
Quick Start: Chat with your DB in 5 Minutes
The easiest way to get started is to run TernoDBI locally and connect your favorite AI agent.
- Install TernoDBI
pip install terno-dbi
- Start the Server
ternodbi start [port]
(By default, this starts the server on127.0.0.1:8376. It automatically runs migrations, creates a defaultadmin/adminuser, and sets up a default organisation on first boot.) - Configure your Database Open the admin panel at http://127.0.0.1:8376/admin and add your datasource connections.
- Generate an Access Token
Generate a token from the Admin UI or via the CLI:
# Query Token (for AI Agents)
ternodbi manage issue_token --name "My Agent" --type query

# Admin Token (for full system access)
ternodbi manage issue_token --name "System Admin" --type admin
- Configure MCP (See MCP Integration below)
- Start chatting with your enterprise data!
Key Features
- Multi-Database Support: Out-of-the-box unified connection handling for Postgres, MySQL, Snowflake, BigQuery, Databricks, Oracle, and SQLite.
- Split MCP Architecture:
- Query Server: Read-only operations (list tables, schema info, execute SELECT queries) highly optimized for AI agents.
- Admin Server: Write/Management operations (rename tables, update metadata, manage descriptions) designed for human-in-the-loop workflows.
- Enterprise-Grade Security:
- Row-Level Security (RLS): Define strict SQL-based filters (e.g.,
department_id = 5) that are automatically injected into every executed query. - Privacy-by-Default: Hide sensitive tables or columns from the LLM's context window unless explicitly exposed to specific Roles.
- SQLShield: Automatic AST-based SQL validation preventing prompt injection and destructive operations.
- Row-Level Security (RLS): Define strict SQL-based filters (e.g.,
- LLM-Ready Schema Enrichment:
- Semantic Metadata: Decouple physical database names (e.g.,
t_users_v2_fnl) from clean, user-facing semantic names (Customers). - Statistical Profiling: Automatic cardinality and distribution statistics injection to help LLMs consistently generate correct SQL filters.
- Semantic Metadata: Decouple physical database names (e.g.,
- High-Performance Pagination:
- Cursor-Based (HMAC): $O(1)$ performance. Benchmarks demonstrate a ~28x speedup over offset pagination.
- Server-Side Streaming: Effortlessly export millions of rows via server-side cursors.
Usage & Core APIs
Running the API Server
# Start on default port (8376)
ternodbi start

# Start on a custom port
ternodbi start 9000
Management Commands (CLI)
Automate your credential and access management simply via the built-in CLI:
# General Query Token (For standard AI Assistants)
ternodbi manage issue_token --name "Claude Agent" --type query --expires 30

# Admin Token (Full System Access)
ternodbi manage issue_token --name "System Admin" --type admin

# Scoped Token (Restricted to a Specific Datasource)
ternodbi manage issue_token --name "Finance Data Only" --type query --datasource 1
Query API & Pagination
TernoDBI provides versatile REST endpoints.
Offset Mode (Default) - Best for standard UI implementations.
POST /api/query/datasources/1/query/
{
    "sql": "SELECT * FROM users",
    "pagination_mode": "offset",
    "page": 2,
    "per_page": 50
}
Cursor Mode (High Performance) - Best for headless Agents & large Data Exports.
POST /api/query/datasources/1/query/
{
    "sql": "SELECT * FROM users",
    "pagination_mode": "cursor",
    "per_page": 50,
    "cursor": "eyJ2IjoxLCJ2YWx..."
}
TernoDBI as an MCP Server
TernoDBI exposes Model Context Protocol (MCP) servers to effortlessly plug into MCP-compatible clients.
Provided MCP Tools:
- Query Service:
list_datasource,list_tables,list_table_columns,execute_query(restricted securely via SQLShield). - Admin Service:
add_datasource,delete_datasource,validate_connection,sync_metadata,rename_table,rename_column,update_table_description,update_column_description,get_table_info.
Example: Connecting Claude Desktop
- Download and install Claude Desktop.
- Open Claude Desktop, navigate to Account → Settings → Developer.
- Click Edit Config to open your
claude_desktop_config.json. - Paste the following configuration:
{
  "mcpServers": {
    "ternodbi-query": {
      "command": "uvx",
      "args": [
        "--from",
        "terno-dbi",
        "dbi-mcp",
        "query"
      ],
      "env": {
        "TERNODBI_API_URL": "http://127.0.0.1:8376",
        "TERNODBI_API_KEY": "dbi_query_YOUR_TOKEN_HERE"
      }
    },
    "ternodbi-admin": {
      "command": "uvx",
      "args": [
        "--from",
        "terno-dbi",
        "dbi-mcp",
        "admin"
      ],
      "env": {
        "TERNODBI_API_URL": "http://127.0.0.1:8376",
        "TERNODBI_API_KEY": "dbi_admin_YOUR_TOKEN_HERE"
      }
    }
  }
}
(Note: If you started TernoDBI on a custom port, make sure to update the TERNODBI_API_URL accordingly.)
5. Restart Claude Desktop. You can now prompt Claude: "Show me the available datasources."
Advanced Integrations
Integrating TernoDBI inside a Custom Django Project
If you already have a mature Django infrastructure, TernoDBI can be integrated directly as a Django App.
Step-by-Step Integration:
- Install the package in your Django environment:
pip install terno-dbi - Add the core apps to your
INSTALLED_APPSinsettings.py:INSTALLED_APPS = [ ... 'terno_dbi.core', # Optional: include query or admin apps based on your needs ]
- Include TernoDBI's URL configurations in your root
urls.py:path('api/terno/', include('terno_dbi.core.urls')), # Mounts the core API endpoints
- Run
python manage.py migrateto apply the TernoDBI schema alongside your existing tables. - You can now use TernoDBI's internal models, query optimizers, and services directly programmatically inside your Django views or Celery tasks!
(Refer to our comprehensive Django Integration Guide for advanced overriding and customization).
Integrating with Custom AI Agents (LangChain, LlamaIndex, Python)
TernoDBI's uniform REST API allows any custom agent architecture to ingest data securely without needing an MCP host.
Step-by-Step Integration:
- Provision a specific
querytoken for your custom script using the CLI. - In your Agent implementation, define a tool to call
/api/query/datasources/to discover connections. - Your Agent flow should dictate:
- Call
/api/query/datasources/{id}/schema/to fetch the context-optimized tables and columns. - Inject this highly structured schema context into your LLM prompt.
- Send the LLM's generated
sqlstring payload viaPOSTto/api/query/datasources/{id}/query/. - Iterate based on the response structure or SQLShield validation errors gracefully.
- Call
(Refer to our Custom Agent SDK examples for reference implementations in Python and TypeScript).
Documentation
Detailed guides for setting up and mastering TernoDBI:
Contributing
We welcome contributions.
- Fork the repo.
- Create a feature branch:
git checkout -b feat/your-feature - Add tests & docs.
- Open a PR describing your change.
Please follow the repo's code style (Black/flake8) and include unit tests for security-critical logic.
Community & Support
If you need help, have a question, or want to discuss a new feature:
- Open an Issue for bug reports and feature requests.
- Start a Discussion for general questions or architectural feedback.
License
TernoDBI is proudly open-source and released under the Apache 2.0 License. See the LICENSE file for more details.
Built with precision for the next generation of Enterprise AI.
Release history Release notifications | RSS feed


Download files
Download the file for your platform. If you're not sure which to choose, learn more about installing packages.
Source Distribution
Built Distribution
Filter files by name, interpreter, ABI, and platform.
If you're not sure about the file name format, learn more about wheel file names.
Copy a direct link to the current filters
File details
Details for the file terno_dbi-0.1.23.tar.gz.
File metadata
- Download URL: terno_dbi-0.1.23.tar.gz
- Upload date:
- Size: 1.4 MB
- Tags: Source
- Uploaded using Trusted Publishing? No
- Uploaded via: twine/6.2.0 CPython/3.10.19
File hashes
| Algorithm | Hash digest | |
|---|---|---|
| SHA256 |
062e8d4f72335c0a041dbcf533ac6499896b64daaf9363dbfa8a1329832d262e
|
|
| MD5 |
8819b44b1b9211ce7f20ab5fcc063c43
|
|
| BLAKE2b-256 |
0546fa15a3f32f54634715b2bb784fe4d1d82b60cdfd231ed3af267650cd3a70
|
File details
Details for the file terno_dbi-0.1.23-py3-none-any.whl.
File metadata
- Download URL: terno_dbi-0.1.23-py3-none-any.whl
- Upload date:
- Size: 1.5 MB
- Tags: Python 3
- Uploaded using Trusted Publishing? No
- Uploaded via: twine/6.2.0 CPython/3.10.19
File hashes
| Algorithm | Hash digest | |
|---|---|---|
| SHA256 |
13bb9a3d7ed78443de51b2c68e4f4cb21302b2899c66b297e3890a899c335c36
|
|
| MD5 |
f50899a2b350699c653857053001582c
|
|
| BLAKE2b-256 |
749ba8b061f7f6105c3d92aaa194db4751fa92eb3a5132ed0d8a7077080bcb67
|


