Create modern frameless GUIs with Python, Tkinter and JSON

Project description
TkXUI Python Library
The TkXUI Python library allows you to create frameless, modern and fully customizable GUIs using the simplicity of the Tkinter API.
The library also implements a JSON loader to define your GUIs (windows, buttons, labels, etc.) with JSON for a fast and reliable UI design.
It supports all kind of widgets (both ttk and tkinter widgets), styling and theming like in CSS with id-class system.
Installation
If you are familiar with installing Python packages, you can use the following command:
pip install tkxui
Otherwise, you can simply download the source code from github and paste the tkxui folder in your project root directory.
Creating a window
In order to create your window, you have to import the tkxui library and implement a Tk object.
If you want a frameless window, pass FRAMELESS to the Tk's display parameter, otherwise it will create a normal window. If you want a system-like window pass NATIVE to the Tk's display parameter (default value).
import tkxui
import tkinter

# Setting up the window with frameless attribute
root = tkxui.Tk(display=tkxui.FRAMELESS)

# Setting window attributes
root.config(bg="#2A2A2A")
root.geometry("500x300")
root.title("My First TkXUI window !")

# Set the resizer's background color
root.resizer_bg("#2A2A2A")

# Create a label
label = tkinter.Label(root, bg="#2A2A2A", text="Hello TkXUI !", fg="white")
label.pack(fill=tkinter.BOTH, expand=1)

root.mainloop()
This is what we get :
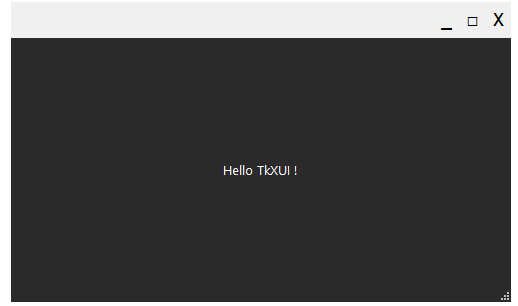
You can choose not to have a default border to your frameless window by passing False to the Tk's defaultBorder parameter (In this case, you would have to create your own border, there is a section down below that explains how to do it).
Loading JSON
You can define your GUI in a JSON file, like this :
{
    "doctype":"ui-definition",

    "main":{
        "tk.Frame":{
           "bg":"#2A2A2A",
           "name":"frame1",
           "pack_options":{
               "fill":"both",
               "expand":"1"
           },
           "tk.Label":{
                "text":"Hello TkXUI !",
                "bg":"#2A2A2A",
                "fg":"white",
                "name":"hello_label"
           },
           "ttk.Button":{
               "text":"Click me !!!",
               "name":"clickme_button"
           }
        }
    },

    "border":{
        "tk.Label":{
            "text":"TkXUI Window",
            "name":"window_title",
            "pack_options":{
                "side":"left",
                "padx":"(20, 0)"
            }
        }
    }
}
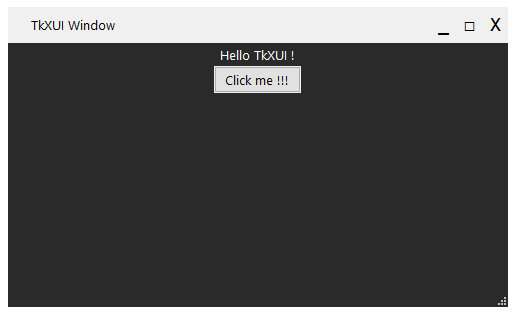
Here, we define what is in the window - main - (a label and a button) and what is in the border (a label) in a ui-definition file.
Don't forget to add this line on top of your file : "doctype":"ui-definition".
Each widget has a name so that we can access them in our code.
Then, we need to load it on our window. To do that, we need to create a JSONLoader object that takes the window as parameter :
import tkxui
import tkinter

# Setting up the window with frameless attribute
root = tkxui.Tk(display=tkxui.FRAMELESS)

# Setting window attributes
root.config(bg="#2A2A2A")
root.geometry("500x300")
root.title("My First TkXUI window !")

# Set the resizer's background color
root.resizer_bg("#2A2A2A")

# Load the JSON file
json_loader = tkxui.JSONLoader(root) # Create a JSONLoader object
json_loader.generate("ui.json") # Load our JSON file and generate our UI.

# We can access our widgets directly with their names
root.clickme_button.config(
    command=lambda:root.hello_label.config(text="Button clicked!")
)

root.mainloop()
Here is what we get :
Creating custom widgets
You can create your own widgets by defining them on your JSON file. Here is an example on how to use this feature :
{
    "doctype":"ui-definition",

    "widget:MyCustomWidget":{
        "tk.Frame":{
           "bg":"#2A2A2A",
           "name":"frame",
           "pack_options":{
               "fill":"both",
               "expand":"1"
           },
           "tk.Entry":{
                "name":"entry"
           },
           "tk.Button":{
               "text":"Submit",
               "border":"0",
               "name":"submit_button"
           }
        }
    },

    "main":{
        "@MyCustomWidget":{
            "name":"my_widget1"
        },
        "@MyCustomWidget":{
            "name":"my_widget2"
        }
    }
}
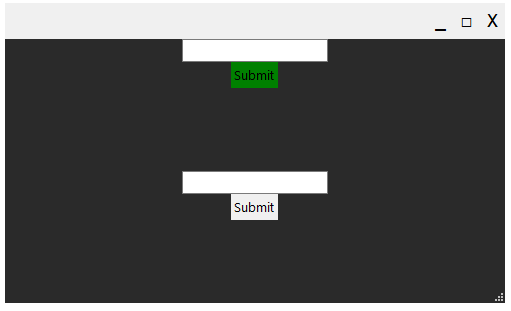
You can define your widget with widget:<YourWidgetName> and you can use it by typing @ plus the name of the widget wherever you want in the window's ui definition file.
This is going to create the same widget twice but all subwidgets will have a different parent so that you can access them explicitly.
For instance if you want to change the background color of the first custom widget's button you would call it using the name you gave for the custom widget instance (it means <window>.<widget name>.<subwidget>), e.g. :
# Change the color of the first custom widget's button
root.my_widget1.submit_button.config(bg="green")
Here is what we get :
Themes
The TkXUI library allows you apply themes and styles to your window.
In order to do that, we need to create another JSON file that is going to contain the theme definition (like a style.css file in CSS) :
{
    "doctype":"theme",

    "tk.Button":{
        "bg":"lightblue"
    },
    "tk.Entry":{
        "bg":"red"
    }
}
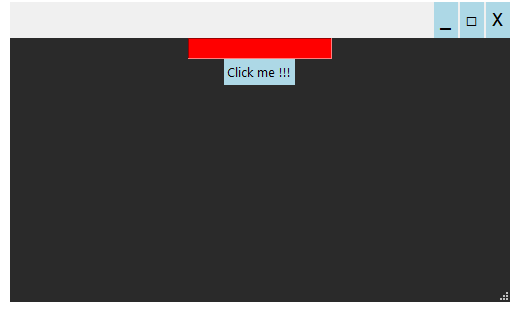
Don't forget to add "doctype":"theme" on top of your file. Here, we define that all buttons and entries, by default, have a background color of lightblue for the buttons and red for the entries.
In order to apply this theme, we need to generate the file with our JSONLoader object:
import tkxui

# Setting up the window with frameless attribute
root = tkxui.Tk(display=tkxui.FRAMELESS)

# Setting window attributes
root.config(bg="#2A2A2A")
root.geometry("500x300")
root.title("My First TkXUI window !")

# Set the resizer's background color
root.resizer_bg("#2A2A2A")

# Load the JSON file
json_loader = tkxui.JSONLoader(root) # Create a JSONLoader object
json_loader.generate("ui.json") # Load our JSON file and generate our UI.
json_loader.generate("theme.json") # Load our JSON file and apply the theme.
Here is our ui definition file :
{
    "doctype":"ui-definition",

    "main":{
        "tk.Frame":{
            "bg":"#2A2A2A",
            "name":"frame1",
            "pack_options":{
                "fill":"both",
                "expand":"1"
            },
            "tk.Entry":{
                "name":"entry1"
            },
            "tk.Button":{
                "text":"Click me !!!",
                "border":"0",
                "name":"clickme_button"
            }
        }
    }
}
And this is what we get with the theme applied :
As you can see, even the widgets of the border are affected by the theme.
Names and classes
You can also set attributes to a specific widget using its name or its class attribute.
ui.json:
{
    "doctype":"ui-definition",

    "main":{
        "tk.Frame":{
            "bg":"#2A2A2A",
            "name":"frame1",
            "pack_options":{
                "fill":"both",
                "expand":"1"
            },
            "tk.Entry":{
                "name":"entry1",
                "class":"my_class"
            },
            "tk.Button":{
                "text":"Click me !!!",
                "border":"0",
                "name":"clickme_button",
                "class":"my_class"
            }
        }
    }
}
theme.json:
{
    "doctype":"theme",

    ".my_class":{
        "bg":"blue",
        "fg":"white"
    },

    "#frame1":{
        "bg":"green"
    }
}
This is the final result, once we generated both files :
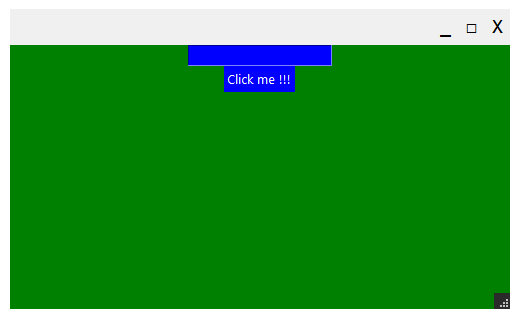
To change the window attributes, use window instead of the widget's name.
Customizing the border
There are several options to customize the window's border.
You can set a theme to the border in your JSON theme file using the border keyword and by specifying attributes for each border's subwidgets :
{
    "doctype":"theme",

    "border":{
        "border":{
            "bg":"green"
        },
        "maximize": {
            "fg": "white",
            "hoverfg": "white",
            "hoverbg": "darkgreen",
            "bg": "green"
        },
        "minimize": {
            "fg": "white",
            "hoverfg": "white",
            "hoverbg": "darkgreen",
            "bg": "green"
        },
        "close": {
            "fg": "white",
            "hoverfg": "white",
            "hoverbg": "red",
            "bg": "green"
        }
    }
}
You can also set those attributes using the config_border border method of your Tk object by passing a dictionnary as parameter.
This is what we get:
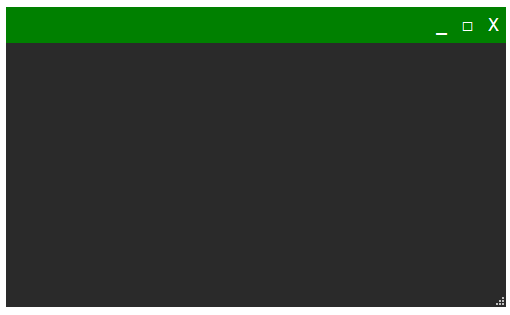
The last way to customize the window's border is to create your own border.
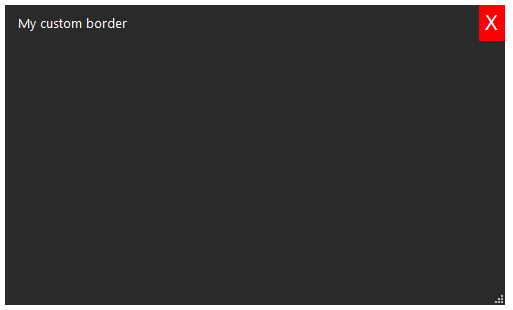
Here is an example of a custom window's border with only one close button and a title:
{
    "doctype":"ui-definition",

    "main":{
        "tk.Frame":{
            "bg":"#2A2A2A",
            "name":"border",
            "pack_options":{
                "fill":"x",
                "side":"top"
            },
            "tk.Label":{
                "name":"window_title",
                "pack_options":{
                    "side":"left",
                    "padx":"(10, 0)"
                },
                "bg":"#2A2A2A",
                "fg":"white",
                "text":"My custom border"
            },
            "tk.Button":{
                "name":"close",
                "pack_options":{
                    "side":"right"
                },
                "bg":"red",
                "border":"0",
                "fg":"white",
                "text":"X",
                "font":"Consolas, 15"
            }
        }
    }
}
Because we create our own window, we may not display the default window's border. It is very easy, just set defaultBorder to False when you create your Tk object :
root = tkxui.Tk(display=tkxui.FRAMELESS, defaultBorder=False)
Then, we need to make the window draggable, simply create a FramelessDragBehaviour object on top of our window and our draggable widget, the border frame :
root = tkxui.Tk(display=tkxui.FRAMELESS, defaultBorder=False) # Create the window

json_loader = tkxui.JSONLoader(root) # Create the JSON file loader
json_loader.generate("ui.json") # Now we have access to our border widget

custom_border_draggable_behaviour = tkxui.FramelessDragBehaviour(root, root.border) # Now the window is draggable with the border frame
Finally, you need to make sure the close button can close the window, simply add a command to it :
root.close.config(
    command=lambda:root.destroy()
)
Everything is now ready :
Border Events
By default a frameless window is reproducing Windows border events (for instance, when you drag a window to the top it will go fullscreen). You can disable that option by calling the disable_winbehaviours method on your window's object :
root.disable_winbehaviours()
To get back to default border, simply do this :
root.enable_winbehaviours()


Download files
Download the file for your platform. If you're not sure which to choose, learn more about installing packages.
Source Distribution
Built Distribution
Filter files by name, interpreter, ABI, and platform.
If you're not sure about the file name format, learn more about wheel file names.
Copy a direct link to the current filters
File details
Details for the file tkxui-1.1.0.tar.gz.
File metadata
- Download URL: tkxui-1.1.0.tar.gz
- Upload date:
- Size: 17.5 kB
- Tags: Source
- Uploaded using Trusted Publishing? No
- Uploaded via: twine/3.4.1 importlib_metadata/4.5.0 pkginfo/1.7.0 requests/2.25.1 requests-toolbelt/0.9.1 tqdm/4.61.0 CPython/3.9.5
File hashes
| Algorithm | Hash digest | |
|---|---|---|
| SHA256 |
ac45c7a0f6a0102f33b4b9afece7cde9a0864aca5869553b23c3a938b87790ca
|
|
| MD5 |
6083dda8bd87b9e4f18591ca96f9411c
|
|
| BLAKE2b-256 |
72d010dbe3ddf5bffb4ef5d22ad7c38e4b1ff68aebbd79b3157a99c277fdb759
|
File details
Details for the file tkxui-1.1.0-py3-none-any.whl.
File metadata
- Download URL: tkxui-1.1.0-py3-none-any.whl
- Upload date:
- Size: 19.2 kB
- Tags: Python 3
- Uploaded using Trusted Publishing? No
- Uploaded via: twine/3.4.1 importlib_metadata/4.5.0 pkginfo/1.7.0 requests/2.25.1 requests-toolbelt/0.9.1 tqdm/4.61.0 CPython/3.9.5
File hashes
| Algorithm | Hash digest | |
|---|---|---|
| SHA256 |
25156655aa1baadcc658a6c923b5da794a98d0504977947a09d3df259d982d75
|
|
| MD5 |
f7b02699d02dc2f77e8f66068e0fe9fb
|
|
| BLAKE2b-256 |
18679828f0692fc9679403f3b7a2826ac86e810427d3ebb1093e7e12b6ec9727
|


