
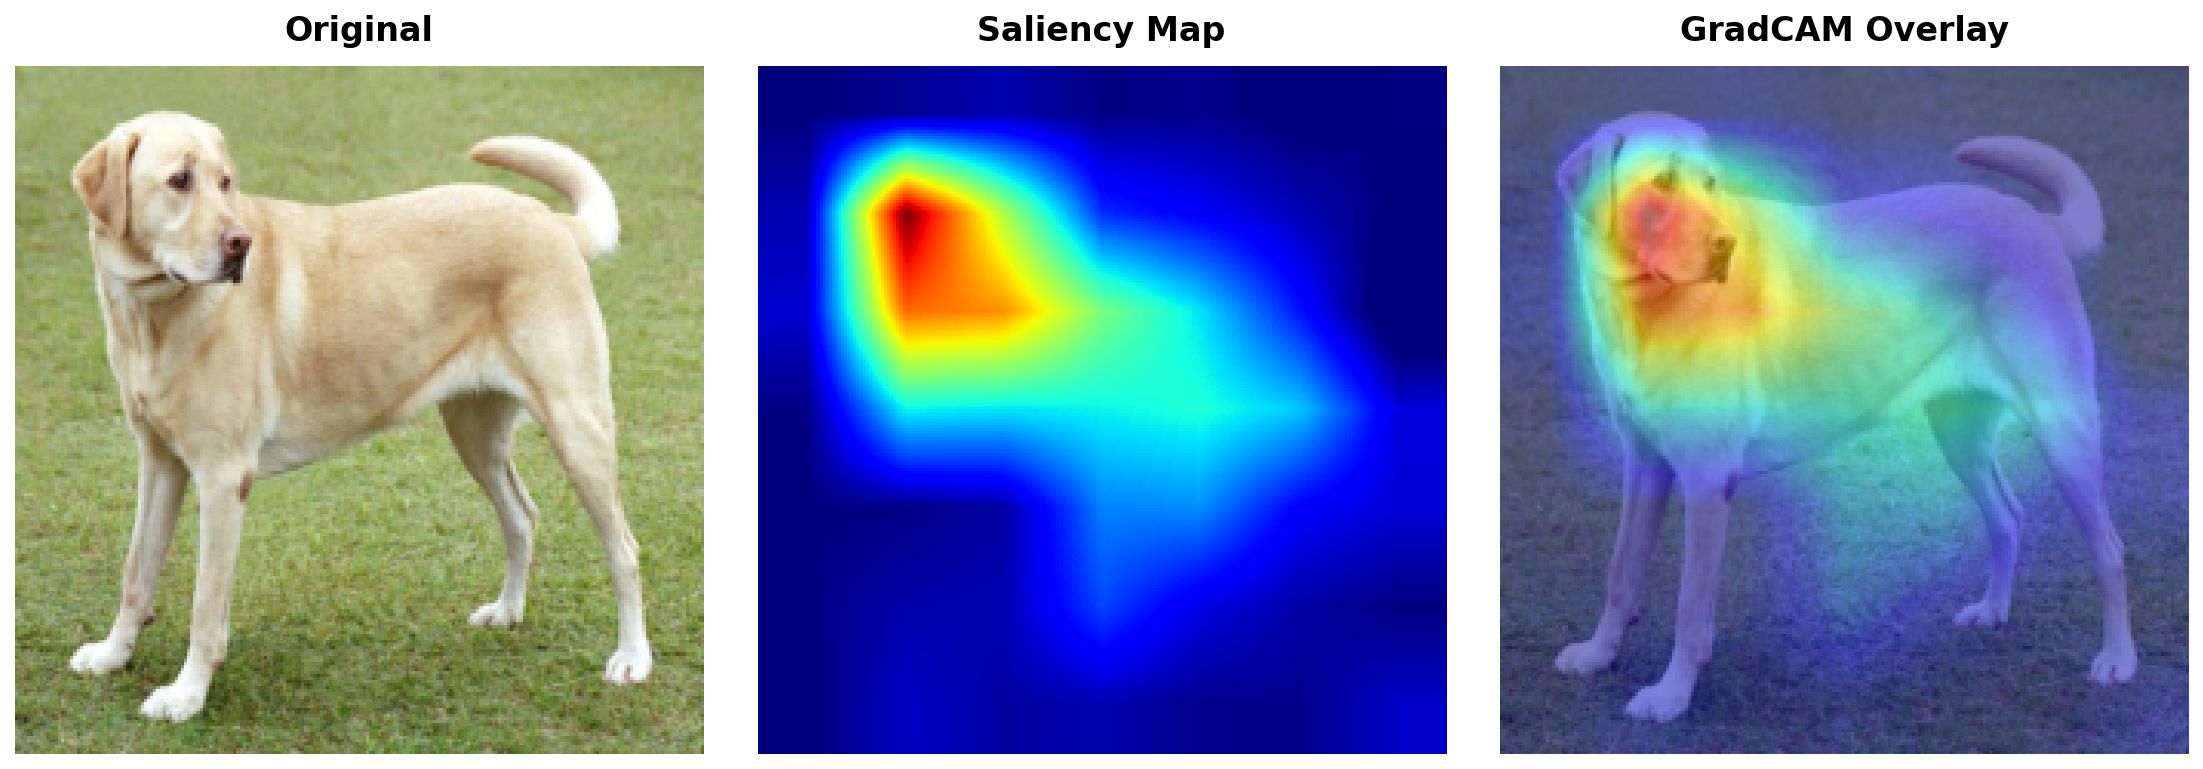
torchxai
Explain any PyTorch vision model in one line of code.
10 methods. 24 models verified end-to-end. CNNs, ViTs, YOLO26, RF-DETR, DINOv2, and more.




Documentation • Quickstart • Installation • Methods • Examples • API Reference • Troubleshooting
Why torchxai?
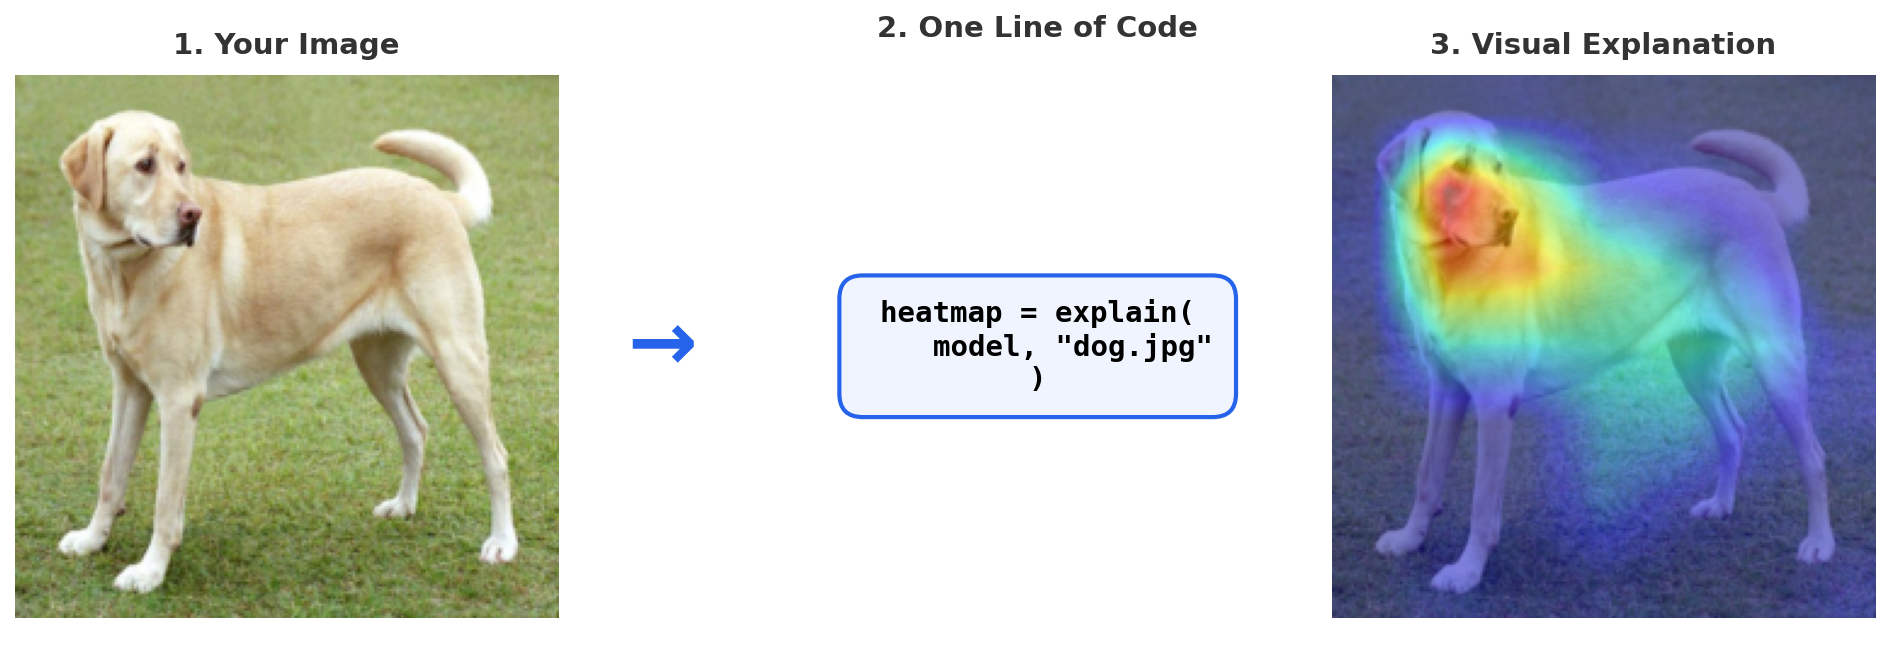
Most explainability libraries make you write 20+ lines of boilerplate, only work with specific model architectures, and crash on Vision Transformers. torchxai does it in one line:
from torchxai import explain
heatmap = explain(model, "photo.jpg")
That's it. It works with any PyTorch vision model — ResNet, ViT, EfficientNet, CLIP, YOLO, Swin, DeiT, DINO, and more. No config files. No architecture-specific code. No boilerplate.
What makes it different
| Feature | torchxai | pytorch-grad-cam | captum | tf-explain |
|---|---|---|---|---|
| One-line API | ✅ explain(model, img) |
❌ 15+ lines | ❌ 20+ lines | ❌ TF only |
| Auto-detects architecture | ✅ CNN + ViT + YOLO | ❌ Manual config | ❌ Manual config | ❌ |
| Vision Transformer support | ✅ Native | ⚠️ Partial | ⚠️ Partial | ❌ |
| String path input | ✅ explain(m, "dog.jpg") |
❌ | ❌ | ❌ |
| Headless server support | ✅ Auto Agg backend | ❌ Crashes | ❌ | ❌ |
| Built-in metrics | ✅ Insertion/Deletion/Stability | ❌ | ⚠️ Separate | ❌ |
| Graceful fallbacks | ✅ Always produces output | ❌ Crashes | ❌ Crashes | ❌ |
⚡ Quickstart
3 lines to your first explanation
from torchxai import explain
import torchvision.models as models

model = models.resnet50(pretrained=True)
heatmap = explain(model, "dog.jpg")  # Returns (224, 224) numpy array
Visualize it
from torchxai import explain, show_explanation
from PIL import Image

model = models.resnet50(pretrained=True)
heatmap = explain(model, "dog.jpg")
show_explanation(Image.open("dog.jpg"), heatmap, title="What the model sees")
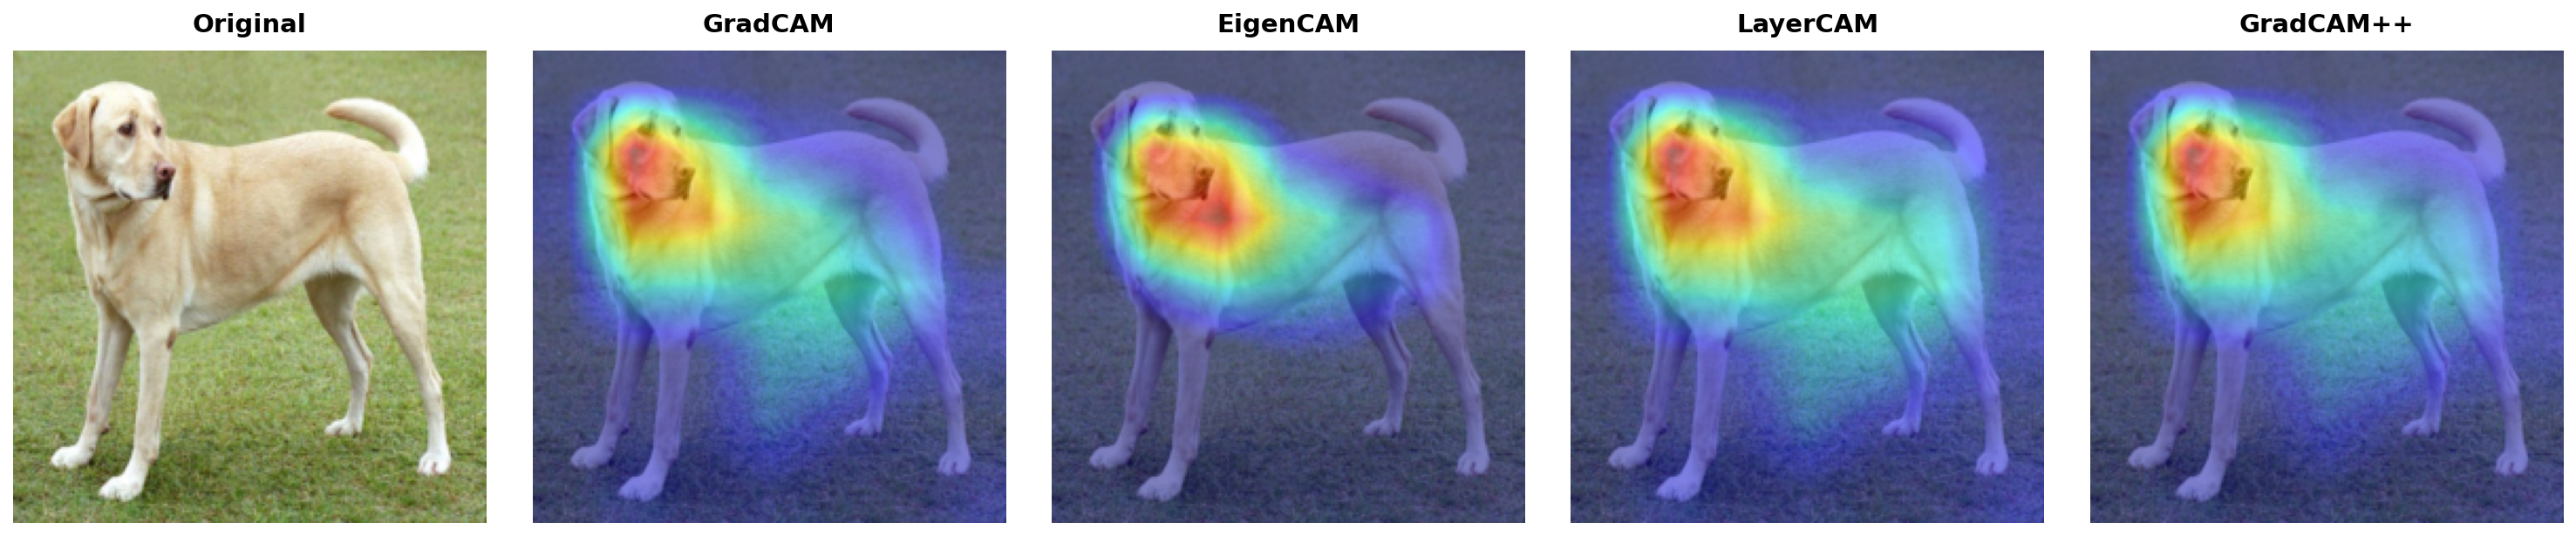
Compare methods side by side
from torchxai import explain, create_comparison
from PIL import Image

heatmaps = {
    "GradCAM": explain(model, img, method="gradcam"),
    "EigenCAM": explain(model, img, method="eigencam"),
    "LayerCAM": explain(model, img, method="layercam"),
    "GradCAM++": explain(model, img, method="gradcam_pp"),
}
create_comparison(Image.open("dog.jpg"), heatmaps, save_path="comparison.png")
📦 Installation
pip install torchxai-explain
Requirements: Python 3.8+ and PyTorch 1.9+. That's all.
For development:
git clone https://github.com/rigvedrs/torchxai.git
cd torchxai
pip install -e ".[dev]"
🔬 Methods
torchxai includes 10 explainability methods. Each produces a saliency heatmap showing which image regions matter most for the model's prediction.
| Method | Type | Needs Gradients | Best For |
|---|---|---|---|
| GradCAM | Gradient-weighted | ✅ | General-purpose CNN explanation |
| GradCAM++ | Gradient-weighted | ✅ | Multiple objects of same class |
| LayerCAM | Gradient-weighted | ✅ | Fine-grained spatial detail |
| EigenCAM | Activation-based | ❌ | Fast, gradient-free explanation |
| ScoreCAM | Perturbation-based | ❌ | Most faithful, no gradients |
| SmoothGrad | Input gradients | ✅ | Pixel-level attribution |
| Integrated Gradients | Axiomatic | ✅ | Theoretically grounded |
| RISE | Black-box sampling | ❌ | Model-agnostic, any architecture |
| Attention Rollout | Attention-based | ❌ | Vision Transformers (ViT) |
| Transformer Attribution | Gradient + Attention | ✅ | Class-specific ViT explanation |
Don't know which to pick? Just use explain(model, image) — it auto-selects the best method for your model architecture.
→ Detailed method guide with math and intuition
🎯 Features
Accept any input format
# Tensor (already preprocessed)
heatmap = explain(model, tensor)

# PIL Image
heatmap = explain(model, Image.open("dog.jpg"))

# File path (string or Path)
heatmap = explain(model, "dog.jpg")
heatmap = explain(model, Path("dog.jpg"))

# 3D tensor (auto-adds batch dimension)
heatmap = explain(model, torch.randn(3, 224, 224))
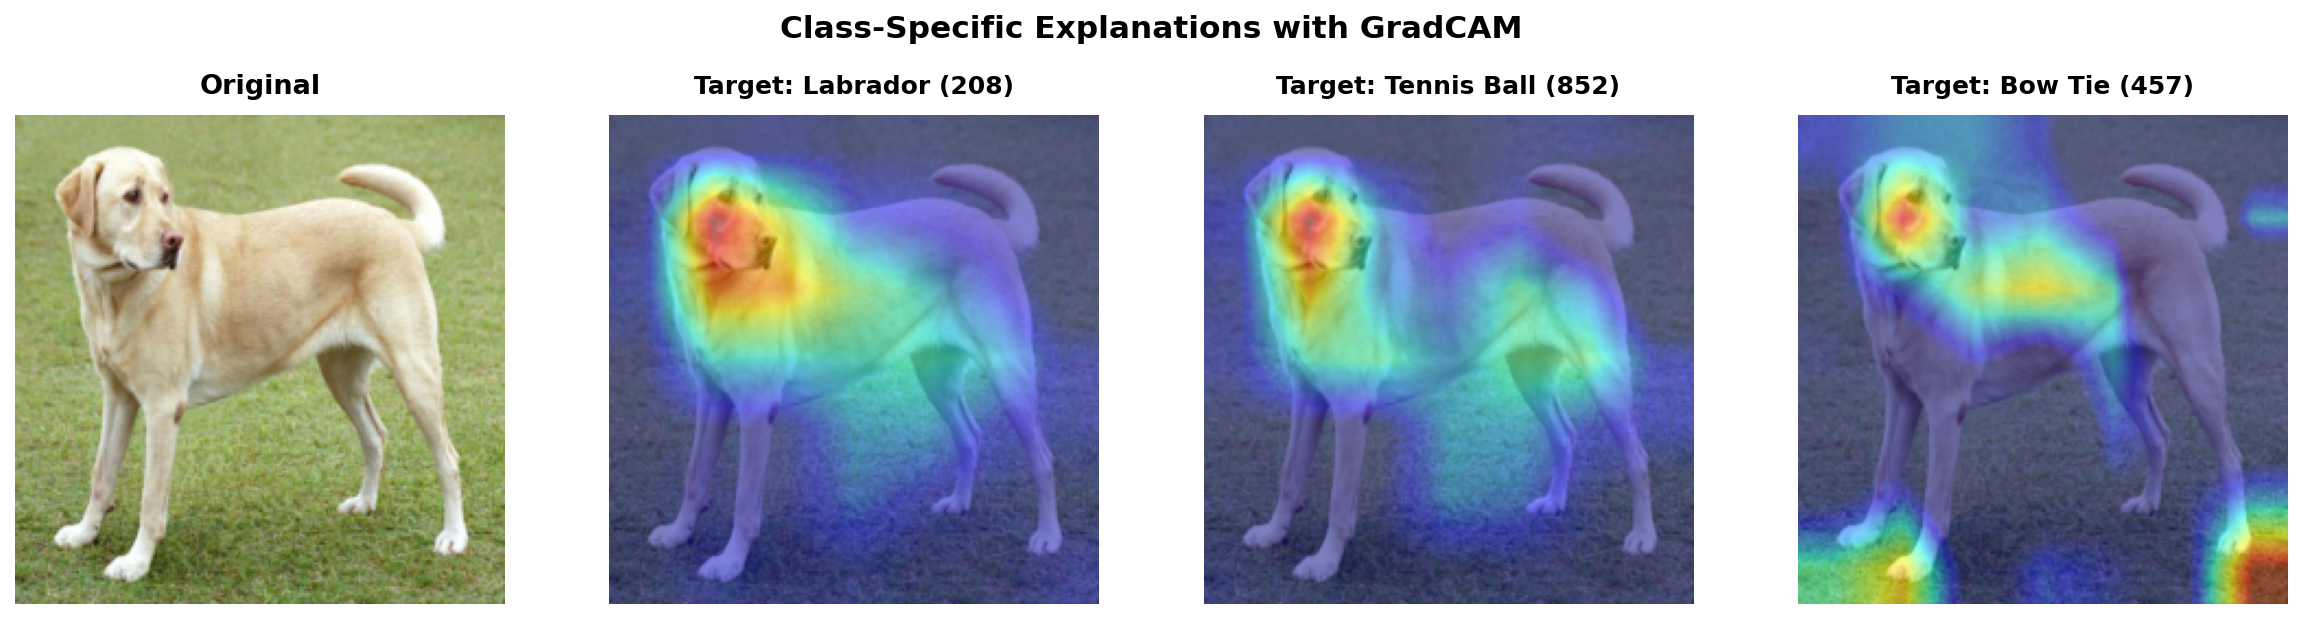
Class-specific explanations
Ask "why did the model predict THIS class?" instead of just "where is it looking?"
heatmap_dog = explain(model, img, target_class=208)      # Labrador
heatmap_ball = explain(model, img, target_class=852)      # Tennis ball
heatmap_collar = explain(model, img, target_class=457)    # Bow tie
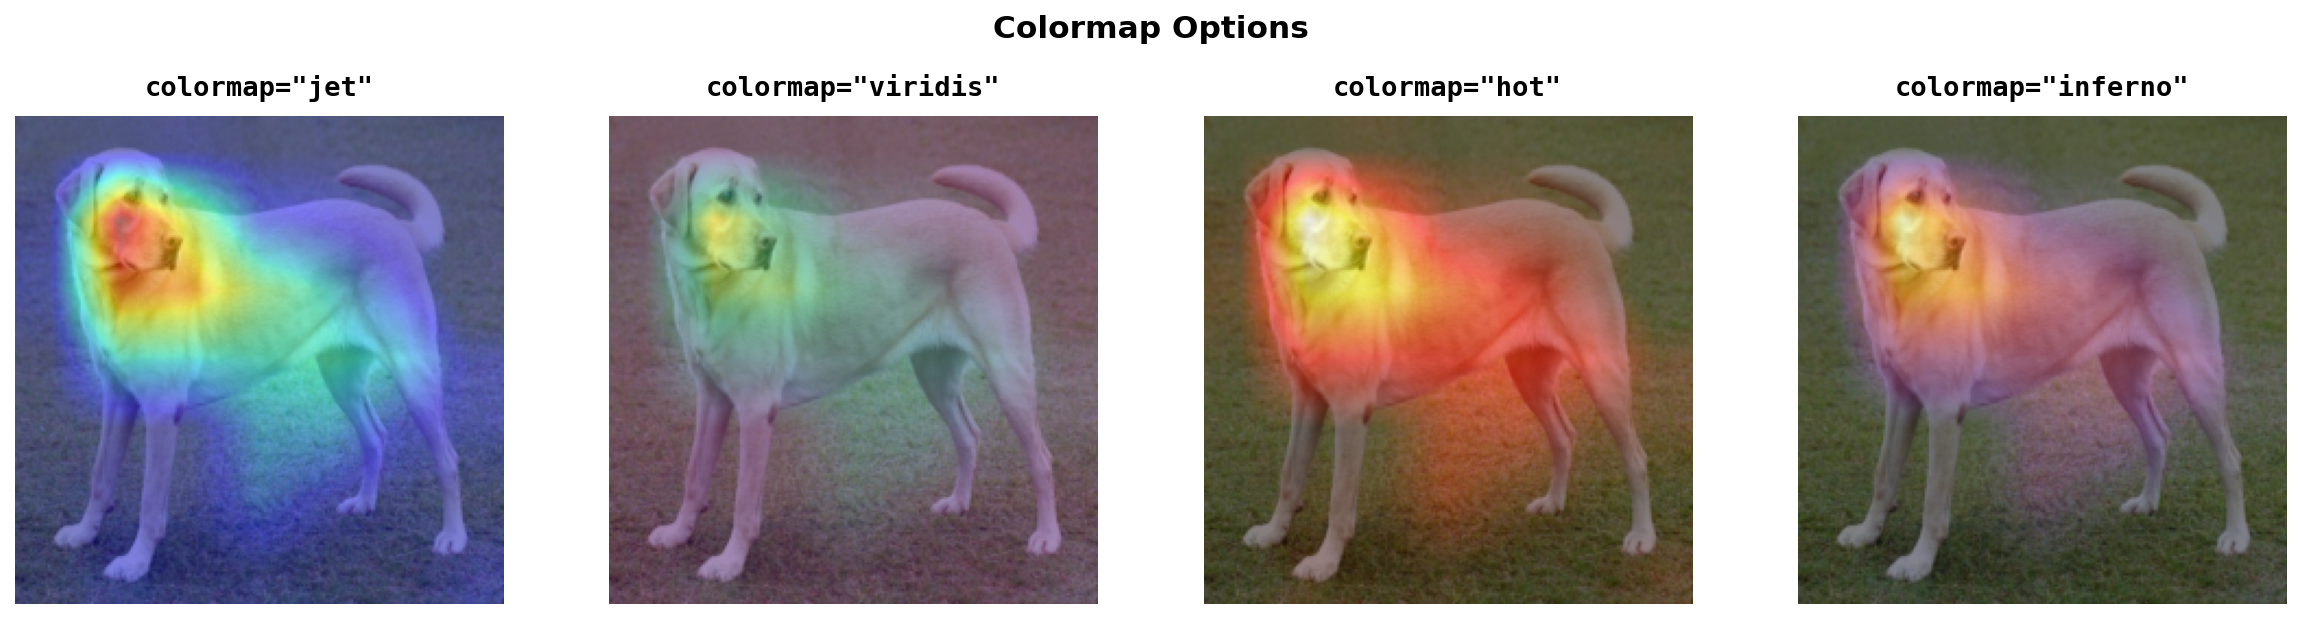
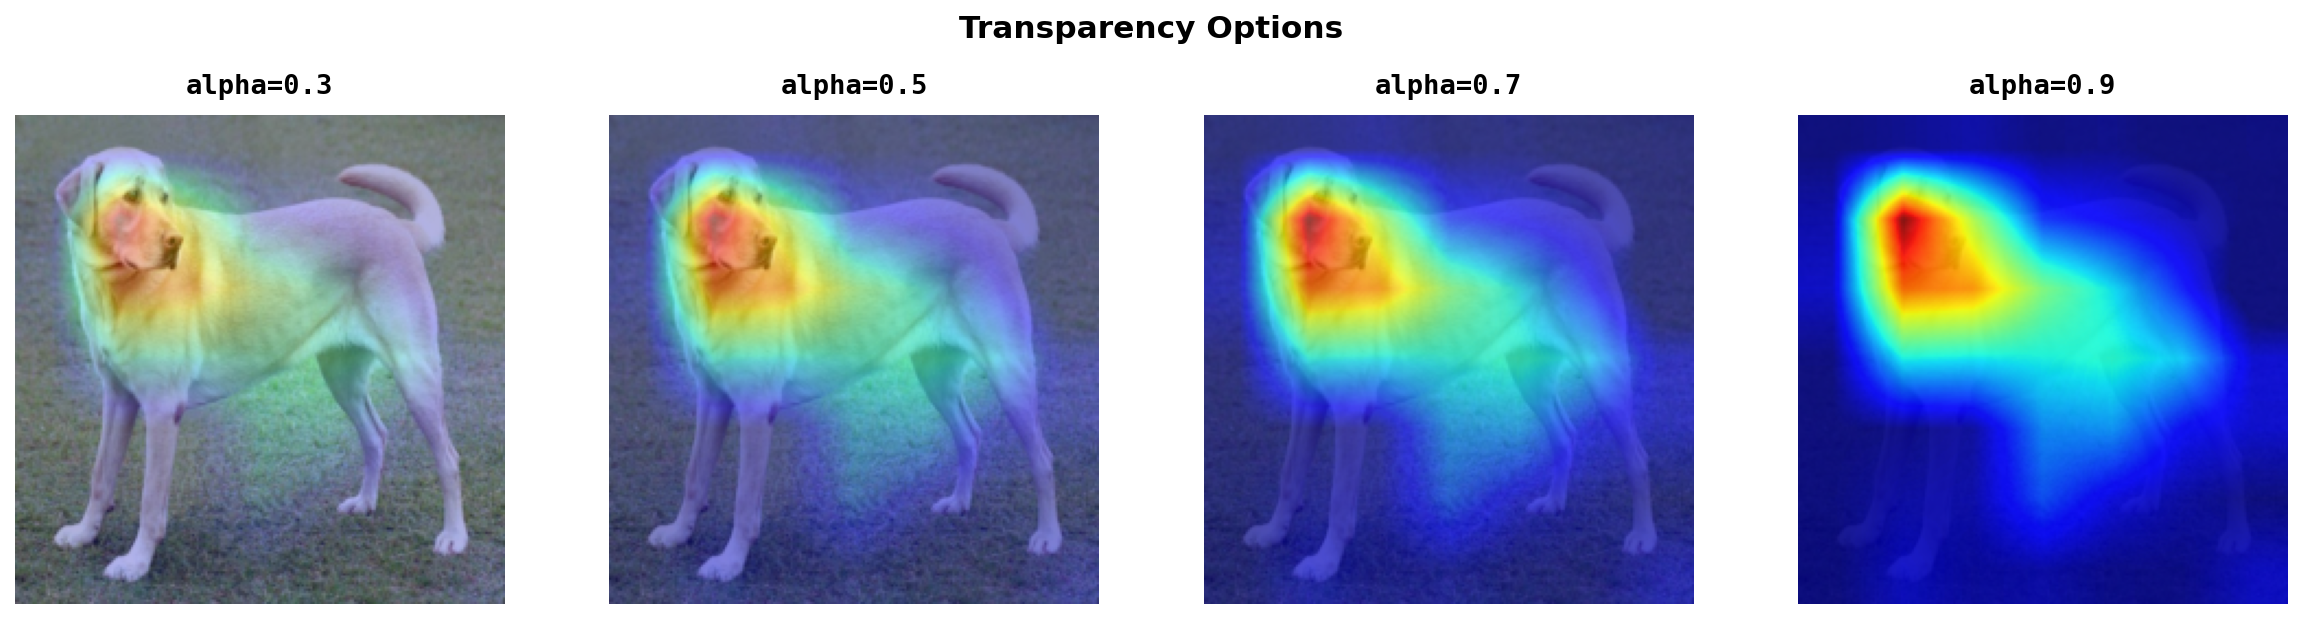
Customizable visualization
from torchxai import overlay_heatmap, show_explanation, save_heatmap

# Overlay on image
blended = overlay_heatmap(image, heatmap, colormap="jet", alpha=0.5)

# Side-by-side visualization
show_explanation(image, heatmap, save_path="output.png")

# Save raw heatmap
save_heatmap(heatmap, "heatmap.png", colormap="viridis")
Colormap options:
Transparency control:
Quantitative metrics
Don't just look at heatmaps — measure how good they are:
from torchxai import insertion_score, deletion_score, stability_score

# Does removing highlighted pixels drop confidence? (lower = better)
d_score = deletion_score(model, tensor, heatmap)

# Does revealing highlighted pixels restore confidence? (higher = better)
i_score = insertion_score(model, tensor, heatmap)

# Are explanations consistent under small perturbations? (higher = more stable)
s_score = stability_score(GradCAM(model), tensor)
Works on headless servers
No more TclError: no display name crashes. torchxai auto-detects headless environments (SSH, Docker, CI) and switches to the Agg matplotlib backend. Visualization functions save to files or return numpy arrays — no display required.
📖 Examples
CNN Explainability (ResNet, EfficientNet, VGG)
import torchvision.models as models
from torchxai import explain, show_explanation
from PIL import Image

# Any torchvision model
model = models.resnet50(pretrained=True)

# Explain
heatmap = explain(model, "cat.jpg")

# Visualize
show_explanation(Image.open("cat.jpg"), heatmap, save_path="resnet_explanation.png")
Vision Transformer (ViT, DeiT, Swin)
import timm
from torchxai import explain

# Any timm model — auto-detected
model = timm.create_model("vit_base_patch16_224", pretrained=True)
heatmap = explain(model, "photo.jpg")  # Just works
Custom target layer
from torchxai import GradCAM

# By name
cam = GradCAM(model, target_layer="layer3")

# By module reference
cam = GradCAM(model, target_layer=model.layer3[-1])

heatmap = cam("photo.jpg")
Batch comparison script
from torchxai import explain, create_comparison
from PIL import Image

model = ...  # Your model
image = Image.open("test.jpg")

results = {}
for method in ["gradcam", "eigencam", "layercam", "gradcam_pp"]:
    results[method] = explain(model, image, method=method)

create_comparison(image, results, save_path="all_methods.png")
📚 Documentation
| Document | Description |
|---|---|
| Getting Started | Installation, first explanation in 60 seconds |
| API Reference | Every function, every parameter, return types |
| Methods Guide | How each method works, when to use which |
| Advanced Usage | Custom layers, metrics, deployment, optimization |
| Troubleshooting | Common errors with exact fixes |
| Model Compatibility | Tested models with proof images |
| Contributing | How to contribute |
🤝 Contributing
Contributions are welcome. See CONTRIBUTING.md for guidelines.
git clone https://github.com/rigvedrs/torchxai.git
cd torchxai
pip install -e ".[dev]"
pytest tests/ -v
📄 License
MIT License. See LICENSE for details.
⭐ Citation
If you use torchxai in your research, please cite:
@software{torchxai2026,
  title={torchxai: Universal Explainability for PyTorch Vision Models},
  author={Rigved Sandeep Shirvalkar},
  year={2026},
  url={https://github.com/rigvedrs/torchxai}
}
If torchxai helps your work, consider giving it a ⭐
1 maintainer

Metadata
1 maintainer
Release files for torchxai-explain 0.3.0
For a detailed explanation of source distributions (sdists) and built distributions (wheels), please see the package formats documentation.
Source distribution (sdist)
| File | Size | Uploaded | |
|---|---|---|---|
| torchxai_explain-0.3.0.tar.gz | 65.4 kB | Details |
Built distribution (wheel)
| File | Interpreter | ABI | Platform | Reset |
|---|---|---|---|---|
| torchxai_explain-0.3.0-py3-none-any.whl | Python 3 | none | any | Details |
Total release size: 131.1 kB
Release files / torchxai_explain-0.3.0.tar.gz
| Download URL | torchxai_explain-0.3.0.tar.gz |
|---|---|
| Size | 65.4 kB |
| Tags | Source |
|
SHA-256 checksum How to use checksums |
571c7ac3e16a6a113d44f5b897984c035e5f2274a1039df6ca4b1e3c506a7f3d
|
|
BLAKE2b-256 checksum How to use checksums |
28fc61a18f8afdad66314674c89a58a8edb80f65555a65ebac14916bfd740845
|
| Upload date | |
|
Uploaded using Trusted Publishing? What is trusted publishing? |
Yes |
| Uploaded via |
twine/6.1.0 CPython/3.13.12
|
Provenance
Provenance describes where a file came from. On PyPI, provenance is shared via attestations, which provide a verifiable record of the build or publishing details. View details, limitations and caveats.


PyPI Publish Attestation
PyPI verified that this artifact, at this checksum, originated from the publisher listed below.
Signed by GitHub Actions, verified by PyPI on Jul 11, 2026.
Transparency logRelease files / torchxai_explain-0.3.0-py3-none-any.whl
| Download URL | torchxai_explain-0.3.0-py3-none-any.whl |
|---|---|
| Size | 65.7 kB |
| Tags | Python 3 |
|
SHA-256 checksum How to use checksums |
0a24b7bd34aec90eef9c568887aa2a7db5faae9067020465ea3fd676cfd9fa89
|
|
BLAKE2b-256 checksum How to use checksums |
453f709f8e0d91c4de1431cacd0010b89ade75aa1c0dbd4c4b48477060ba18b9
|
| Upload date | |
|
Uploaded using Trusted Publishing? What is trusted publishing? |
Yes |
| Uploaded via |
twine/6.1.0 CPython/3.13.12
|
Provenance
Provenance describes where a file came from. On PyPI, provenance is shared via attestations, which provide a verifiable record of the build or publishing details. View details, limitations and caveats.
PyPI Publish Attestation
PyPI verified that this artifact, at this checksum, originated from the publisher listed below.
Signed by GitHub Actions, verified by PyPI on Jul 11, 2026.
Transparency log












