


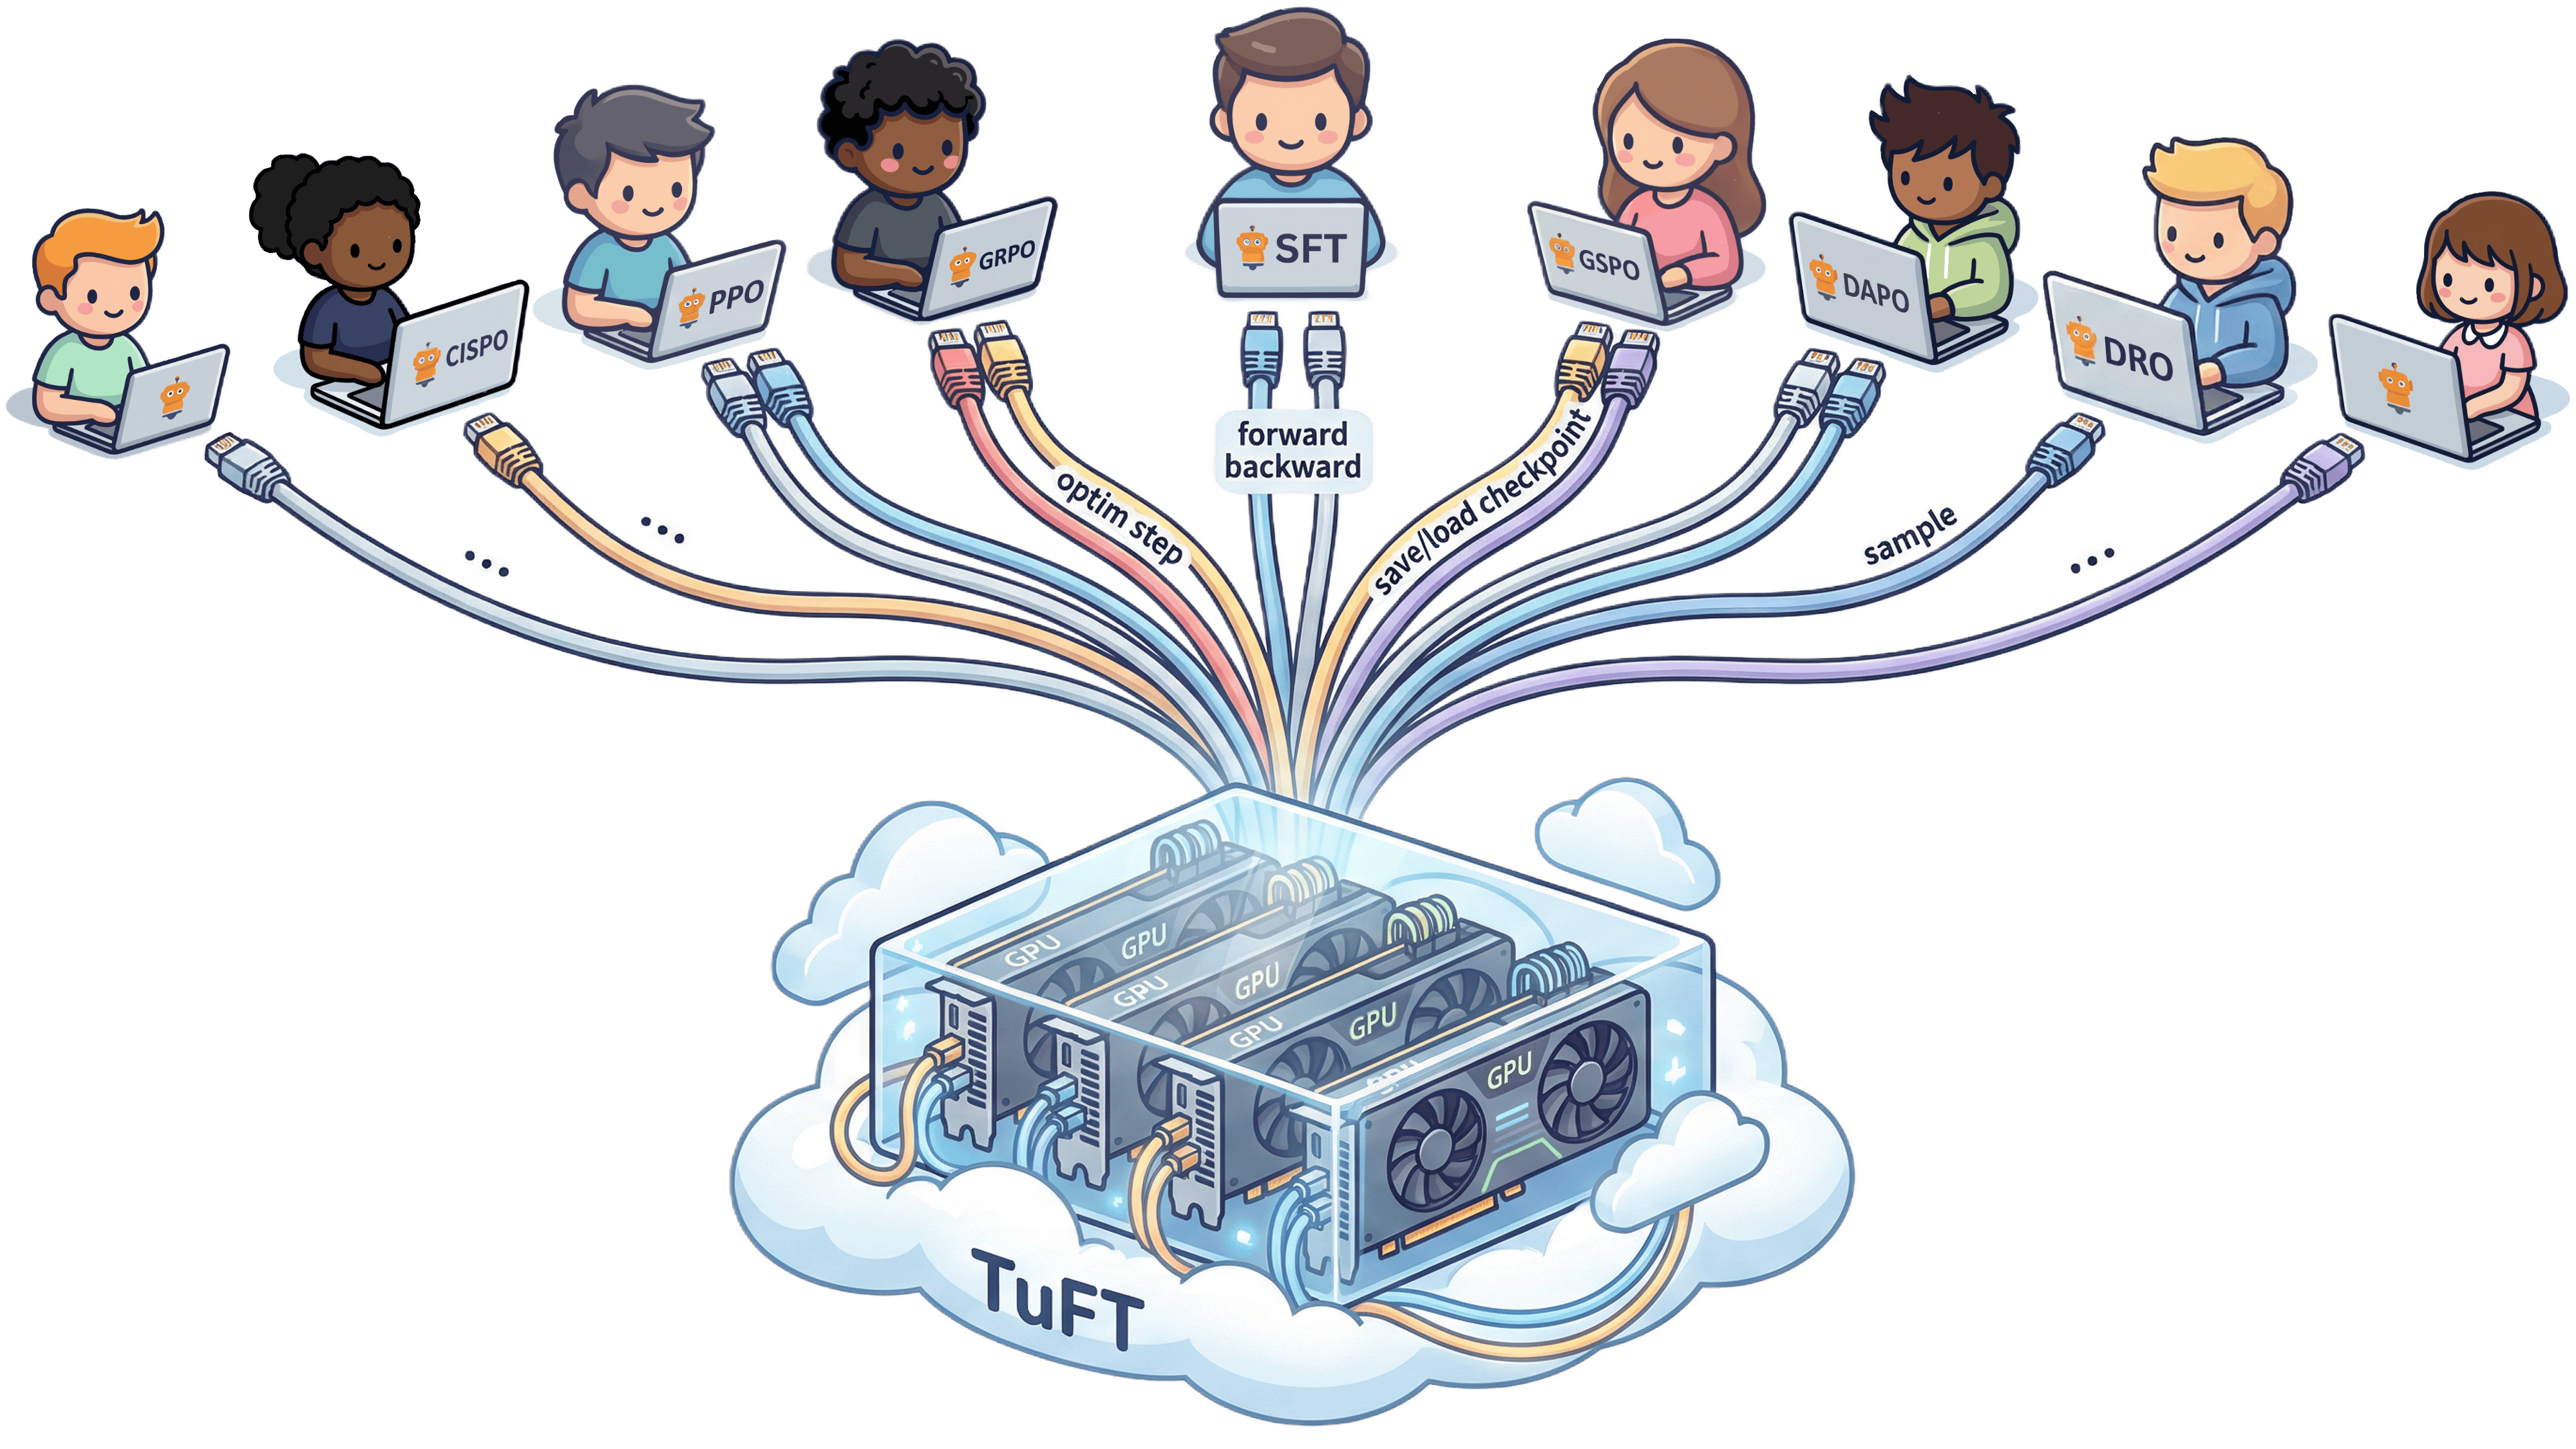
TuFT (Tenant-unified FineTuning) is a multi-tenant platform that lets multiple users fine-tune LLMs on shared infrastructure through a unified API. Access it via the Tinker SDK or compatible clients.
[!TIP] 🚀 No GPU? No problem! You can deploy TuFT to a pay-as-you-go cloud provider — Modal (serverless, scale-to-zero) or Lambda Cloud — and fine-tune from your laptop with no local GPU. See Deployment.
We're open source and welcome contributions! Join the community:
Table of Contents
- Quick Install
- Quick Start Example
- Installation
- Use the Pre-built Docker Image
- Deployment
- User Guide
- Architecture
- Development
Quick Install
Note: This script supports unix platforms. For other platforms, see Installation.
Install TuFT with a single command:
/bin/bash -c "$(curl -fsSL https://raw.githubusercontent.com/agentscope-ai/tuft/main/scripts/install.sh)"
This installs TuFT with full backend support (GPU dependencies, persistence, flash-attn) and a bundled Python environment to ~/.tuft. After installation, restart your terminal and run:
tuft
GPU wheel selection and installer options
By default (--torch-backend auto) the installer inspects the NVIDIA driver before downloading anything, selects the validated CUDA 13.0 wheel variant (cu130) for the pinned torch/vLLM stack, and runs import and CUDA smoke tests after installing. If the driver does not support CUDA 13.0, it fails with guidance instead of installing a broken environment. Pass a backend explicitly to override, e.g. when building an image on a machine without a GPU or using custom wheels:
# Explicit CUDA 13.0 wheels
/bin/bash -c "$(curl -fsSL https://raw.githubusercontent.com/agentscope-ai/tuft/main/scripts/install.sh)" -- --torch-backend cu130

# CPU-only environment
TUFT_TORCH_BACKEND=cpu /bin/bash -c "$(curl -fsSL https://raw.githubusercontent.com/agentscope-ai/tuft/main/scripts/install.sh)"
tuft upgrade reuses the backend recorded at install time (in $TUFT_HOME/torch-backend), so upgrades resolve packages the same way; override with tuft upgrade --torch-backend .... Use --skip-gpu-checks (or TUFT_SKIP_GPU_CHECKS=1) to turn GPU preflight/smoke-test failures into warnings.
The installer also honors these environment variables:
| Variable | Purpose |
|---|---|
TUFT_HOME |
Installation directory (default: ~/.tuft) |
TUFT_VENV |
Virtual environment location (default: $TUFT_HOME/venv), e.g. to place it on faster or larger storage |
TUFT_TORCH_BACKEND |
Default value for --torch-backend (auto, cpu, or cuNNN) |
TUFT_PYPI_REQUIREMENT |
Override the default PyPI requirement |
UV_CACHE_DIR, UV_LINK_MODE, UV_SYSTEM_CERTS, UV_DEFAULT_INDEX, UV_INDEX |
Passed through to uv for cache placement, link mode (e.g. copy across filesystems), system TLS trust stores, and package indexes/mirrors |
Quick Start Example
This example demonstrates how to use TuFT for training and sampling with the Tinker SDK. Make sure the server is running on port 10610 before running the code. See the Run the server section below for instructions on starting the server.
1. Data Preparation
Prepare your training data in the format expected by TuFT:
import tinker
from tinker import types

# Connect to the running TuFT server
client = tinker.ServiceClient(base_url="http://localhost:10610", api_key="local-dev-key")

# Discover available base models
capabilities = client.get_server_capabilities()
base_model = capabilities.supported_models[0].model_name

print("Supported models:")
for model in capabilities.supported_models:
    print("-", model.model_name or "(unknown)")

# Prepare training data
# In practice, you would use a tokenizer:
# tokenizer = training.get_tokenizer()
# prompt_tokens = tokenizer.encode("Hello from TuFT")
# target_tokens = tokenizer.encode(" Generalizing beyond the prompt")

# For this example, we use fake token IDs
prompt_tokens = [101, 42, 37, 102]
target_tokens = [101, 99, 73, 102]

datum = types.Datum(
    model_input=types.ModelInput.from_ints(prompt_tokens),
    loss_fn_inputs={
        "target_tokens": types.TensorData(
            data=target_tokens,
            dtype="int64",
            shape=[len(target_tokens)]
        ),
        "weights": types.TensorData(data=[1.0, 1.0, 1.0, 1.0], dtype="float32", shape=[4])
    },
)
Example Output:
Supported models:
- Qwen/Qwen3-4B
- Qwen/Qwen3-8B
2. Training
Create a LoRA training client and perform forward/backward passes with optimizer steps:
# Create a LoRA training client
training = client.create_lora_training_client(base_model=base_model, rank=8, train_unembed=False)

# Run forward/backward pass
fwdbwd = training.forward_backward([datum], "cross_entropy").result(timeout=30)
print("Loss metrics:", fwdbwd.metrics)

# Apply optimizer update
optim = training.optim_step(types.AdamParams(learning_rate=1e-4)).result(timeout=30)
print("Optimizer metrics:", optim.metrics)
Example Output:
Loss metrics: {'loss:sum': 2.345, 'step:max': 0.0, 'grad_norm:mean': 0.123}
Optimizer metrics: {'learning_rate:mean': 0.0001, 'step:max': 1.0, 'update_norm:mean': 0.045}
3. Save Checkpoint
Save the trained model checkpoint and sampler weights:
# Save checkpoint for training resumption
checkpoint = training.save_state("demo-checkpoint").result(timeout=60)
print("Checkpoint saved to:", checkpoint.path)

# Save sampler weights for inference
sampler_weights = training.save_weights_for_sampler("demo-sampler").result(timeout=60)
print("Sampler weights saved to:", sampler_weights.path)

# Inspect session information
rest = client.create_rest_client()
session_id = client.holder.get_session_id()
session_info = rest.get_session(session_id).result(timeout=30)
print("Session contains training runs:", session_info.training_run_ids)
Example Output:
Checkpoint saved to: tinker://550e8400-e29b-41d4-a716-446655440000/weights/checkpoint-001
Sampler weights saved to: tinker://550e8400-e29b-41d4-a716-446655440000/sampler_weights/sampler-001
Session contains training runs: ['550e8400-e29b-41d4-a716-446655440000']
4. Sampling
Load the saved weights and generate tokens:
# Create a sampling client with saved weights
sampling = client.create_sampling_client(model_path=sampler_weights.path)

# Prepare prompt for sampling
# sample_prompt = tokenizer.encode("Tell me something inspiring.")
sample_prompt = [101, 57, 12, 7, 102]

# Generate tokens
sample = sampling.sample(
    prompt=types.ModelInput.from_ints(sample_prompt),
    num_samples=1,
    sampling_params=types.SamplingParams(max_tokens=5, temperature=0.5),
).result(timeout=30)

if sample.sequences:
    print("Sample tokens:", sample.sequences[0].tokens)
    # Decode tokens to text:
    # sample_text = tokenizer.decode(sample.sequences[0].tokens)
    # print("Generated text:", sample_text)
Example Output:
Sample tokens: [101, 57, 12, 7, 42, 102]
Note: Replace fake token IDs with actual tokenizer calls when you have a tokenizer available locally.
Installation
Tip: For a quick one-command setup, see Quick Install. This section is for users who prefer to manage their own Python environment or need more control over the installation.
We recommend using uv for dependency management.
Install from Source Code
-
Clone the repository:
git clone https://github.com/agentscope-ai/TuFT
Potential environment issues:
TuFT relies on open-source platforms, so it may not function correctly if your environment lacks access to these resources. To help you diagnose connectivity or dependency issues, we provide a diagnostic script that checks the status of required prerequisites:
cd TuFT
bash scripts/env_check.sh
This script will assess your environment status and suggest possible solutions.
-
Create a virtual environment:
cd TuFT
uv venv --python 3.12
-
Activate environment:
source .venv/bin/activate
-
Install dependencies:
# Install minimal dependencies for non-development installs
uv sync

# If you need to develop or run tests, install dev dependencies
uv sync --extra dev

# If you want to run the full feature set (e.g., model serving, persistence),
# please install all dependencies
uv sync --all-extras
python scripts/install_flash_attn.py
# If you face issues with flash-attn installation, you can try installing it manually:
# uv pip install flash-attn --no-build-isolation
Install via PyPI
uv pip install "tuft>=0.1.8"

# Install optional dependencies as needed
uv pip install "tuft[dev,backend,persistence,examples]>=0.1.8"
Run the server
The CLI starts a FastAPI server:
tuft launch --port 10610 --config /path/to/tuft_config.yaml
The config file tuft_config.yaml specifies server settings including available base models, authentication, persistence, and telemetry. Below is a minimal example.
supported_models:
  - model_name: Qwen/Qwen3-4B
    model_path: Qwen/Qwen3-4B
    max_model_len: 32768
    tensor_parallel_size: 1
  - model_name: Qwen/Qwen3-8B
    model_path: Qwen/Qwen3-8B
    max_model_len: 32768
    tensor_parallel_size: 1
See config/tuft_config.example.yaml for a complete example configuration with all available options.
Use the Pre-built Docker Image
If you face issues with local installation or want to get started quickly, you can use the pre-built Docker image.
-
Pull the latest image from GitHub Container Registry:
docker pull ghcr.io/agentscope-ai/tuft:latest
-
Run the Docker container and start the TuFT server on port 10610:
docker run -it \
    --gpus all \
    --shm-size="128g" \
    --rm \
    -p 10610:10610 \
    -v <host_dir>:/data \
    ghcr.io/agentscope-ai/tuft:latest \
    tuft launch --port 10610 --config /data/tuft_config.yaml
Please replace
<host_dir>with a directory on your host machine where you want to store model checkpoints and other data. Suppose you have the following structure on your host machine:<host_dir>/ ├── checkpoints/ ├── Qwen3-4B/ ├── Qwen3-8B/ └── tuft_config.yamlThe
tuft_config.yamlfile defines the server configuration, for example:supported_models: - model_name: Qwen/Qwen3-4B model_path: /data/Qwen3-4B max_model_len: 32768 tensor_parallel_size: 1 - model_name: Qwen/Qwen3-8B model_path: /data/Qwen3-8B max_model_len: 32768 tensor_parallel_size: 1
Deployment
Don't have a GPU? Run TuFT on pay-as-you-go cloud compute — rent a GPU on demand and fine-tune from your laptop (no local GPU). The deploy/ helpers wrap the standard tuft launch server for popular cloud backends and walk you through configuring the deployment, running an end-to-end "talk like Yoda" training example on Qwen/Qwen3-0.6B, and downloading the trained adapter.
| Backend | Description |
|---|---|
| Modal | Serverless GPUs with scale-to-zero and per-second billing. |
| Lambda Cloud | A plain on-demand GPU VM, billed per minute until you terminate. |
See the full Deployment guides in the documentation.
User Guide
We provide practical examples and comprehensive guides for using TuFT. For full details, please visit the online documentation.
| Topic | Description |
|---|---|
| Chat SFT | Supervised fine-tuning on chat-formatted data with assistant-only loss masking. Notebook |
| Countdown RL | Reinforcement learning with GRPO-style training on verifiable tasks. Notebook |
| On-Policy Distillation | Distill a teacher into a student on the student's own samples via per-token reverse-KL. Example |
| Custom Losses | Client-defined objectives (e.g. composite DPO + NLL) via forward_backward_custom, supported on both HF and FSDP backends. |
| Persistence | Optional Redis-based server state persistence for crash recovery. |
| Observability | OpenTelemetry integration for tracing, metrics, and logs. |
| Console | Dashboard for monitoring training runs, checkpoints, and sampling playground. |
Architecture
TuFT provides a unified service API for agentic model training and sampling. The system supports multiple LoRA adapters per base model and checkpoint management.
graph TB
    subgraph Client["Client Layer"]
        SDK[Tinker SDK Client]
    end

    subgraph API["TuFT Service API"]
        REST[Service API<br/>REST/HTTP]
        Session[Session Management]
    end

    subgraph Backend["Backend Layer"]
        Training[Training Backend<br/>Forward/Backward/Optim Step]
        Sampling[Sampling Backend<br/>Token Generation]
    end

    subgraph Models["Model Layer"]
        BaseModel[Base LLM Model]
        LoRA[LoRA Adapters<br/>Multiple per Base Model]
    end

    subgraph Storage["Storage"]
        Checkpoint[Model Checkpoints<br/>& LoRA Weights]
    end

    SDK --> REST
    REST --> Session
    Session --> Training
    Session --> Sampling
    Training --> BaseModel
    Training --> LoRA
    Sampling --> BaseModel
    Sampling --> LoRA
    Training --> Checkpoint
    Sampling --> Checkpoint
Key Components
- Service API: RESTful interface for training and sampling operations
- Training Backend: Handles forward/backward passes and optimizer steps for LoRA fine-tuning
- Sampling Backend: Generates tokens from trained models
- Checkpoint Storage: Manages model checkpoints and LoRA weights
Development
Setup Development Environment
-
Install uv if you haven't already:
curl -LsSf https://astral.sh/uv/install.sh | sh
-
Install dev dependencies:
uv sync --extra dev
-
Set up pre-commit hooks:
uv run pre-commit install
Running Tests
uv run pytest
To skip integration tests:
uv run pytest -m "not integration"
For detailed testing instructions, including GPU tests, persistence testing, and writing new tests, see the Testing Guide.
Linting and Type Checking
Run the linter:
uv run ruff check .
uv run ruff format .
Run the type checker:
uv run pyright
Notebook Linting
For Jupyter notebooks:
uv run nbqa ruff notebooks/
Secret Detection
Scan and update the secrets baseline:
uv run detect-secrets scan > .secrets.baseline
Audit detected secrets to mark false positives:
uv run detect-secrets audit .secrets.baseline
Contributing
Please ensure all tests pass and pre-commit hooks succeed before creating new PRs.
We welcome suggestions and contributions from the community! Join us on:
- DingTalk Group
- Discord (on AgentScope's Server)
1 maintainer

Download files
Download the file for your platform. If you're not sure which to choose, learn more about installing packages.
Source Distribution
Built Distribution
Filter files by name, interpreter, ABI, and platform.
If you're not sure about the file name format, learn more about wheel file names.
Copy a direct link to the current filters
File details
Details for the file tuft-0.2.0.tar.gz.
File metadata
- Download URL: tuft-0.2.0.tar.gz
- Upload date:
- Size: 3.7 MB
- Tags: Source
- Uploaded using Trusted Publishing? Yes
- Uploaded via:
twine/7.0.0 CPython/3.13.14
File hashes
| Algorithm | Hash digest | |
|---|---|---|
| SHA256 |
be5a8ff86f0ae23eb2808926deecf129df2a63d5f1c3206f6622cd2ed0302703
|
|
| MD5 |
455298d20ed11d061afb833ff00562a3
|
|
| BLAKE2b-256 |
ceb61053f07e4c06a9b07c51c8da9907a60944461b682697d5cc57049335ff13
|
Provenance
The following attestation bundles were made for tuft-0.2.0.tar.gz:
Publisher:
publish.yml on agentscope-ai/TuFT
-
Statement:
-
Statement type:
https://in-toto.io/Statement/v1 -
Predicate type:
https://docs.pypi.org/attestations/publish/v1 -
Subject name:
tuft-0.2.0.tar.gz -
Subject digest:
be5a8ff86f0ae23eb2808926deecf129df2a63d5f1c3206f6622cd2ed0302703 - Sigstore transparency entry: 2568636426
- Sigstore integration time:
-
Permalink:
agentscope-ai/TuFT@102eefd4cf8fb0241ba656d14df4928f0b2c0c9e -
Branch / Tag:
refs/heads/main - Owner: https://github.com/agentscope-ai
-
Access:
public
-
Token Issuer:
https://token.actions.githubusercontent.com -
Runner Environment:
github-hosted -
Publication workflow:
publish.yml@102eefd4cf8fb0241ba656d14df4928f0b2c0c9e -
Trigger Event:
workflow_dispatch
-
Statement type:
File details
Details for the file tuft-0.2.0-py3-none-any.whl.
File metadata
- Download URL: tuft-0.2.0-py3-none-any.whl
- Upload date:
- Size: 182.4 kB
- Tags: Python 3
- Uploaded using Trusted Publishing? Yes
- Uploaded via:
twine/7.0.0 CPython/3.13.14
File hashes
| Algorithm | Hash digest | |
|---|---|---|
| SHA256 |
eb232c391c5b8b2121ad934e0bef4dbce64a74d7d7a29c7186325fd2a6a16620
|
|
| MD5 |
4e60c38e8c2fe0533f192ebb96e4f163
|
|
| BLAKE2b-256 |
773f00cb2ab98d41de0ce1cd7a4190e649daf392902d269d0107bcfb8181bafd
|
Provenance
The following attestation bundles were made for tuft-0.2.0-py3-none-any.whl:
Publisher:
publish.yml on agentscope-ai/TuFT
-
Statement:
-
Statement type:
https://in-toto.io/Statement/v1 -
Predicate type:
https://docs.pypi.org/attestations/publish/v1 -
Subject name:
tuft-0.2.0-py3-none-any.whl -
Subject digest:
eb232c391c5b8b2121ad934e0bef4dbce64a74d7d7a29c7186325fd2a6a16620 - Sigstore transparency entry: 2568636448
- Sigstore integration time:
-
Permalink:
agentscope-ai/TuFT@102eefd4cf8fb0241ba656d14df4928f0b2c0c9e -
Branch / Tag:
refs/heads/main - Owner: https://github.com/agentscope-ai
-
Access:
public
-
Token Issuer:
https://token.actions.githubusercontent.com -
Runner Environment:
github-hosted -
Publication workflow:
publish.yml@102eefd4cf8fb0241ba656d14df4928f0b2c0c9e -
Trigger Event:
workflow_dispatch
-
Statement type:







