

Tunly
Quick SSH tunnels, tidy tray.


GNOME tray applet to manage multiple named SSH dynamic (SOCKS5) tunnels and toggle the system proxy in one click. Exclusive model: at most one tunnel active at a time — it drives the system proxy and is reverted on stop, drop, or quit.
- One click — pick a tunnel in the tray, ssh comes up, system proxy follows.
- Always reverted — stop, crash, drop, or quit: your proxy never stays pointed at a dead port.
- Multiple tunnels — named profiles, each with its own host, port, and auth.
- Any auth — ssh-agent, a specific key file, or password (GNOME keyring / prompt; never written to disk).
- Self-healing — health-checks the tunnel and cleans up if ssh dies underneath.
- Transparent mode (optional) — route everything through the tunnel with iptables, not just apps that read the proxy setting. See below.
- No daemons, no root — a single Python/GTK process running as you. (Transparent mode is the one exception: it needs root for the firewall rules.)
Proxy mode vs transparent mode
By default Tunly sets the GNOME system proxy. That only covers apps that bother to
read it — Firefox, Chrome, GTK apps. curl, yt-dlp, git, apt and most CLI
tools ignore it and leave over your real IP.
Tick Transparent (whole system) in the tray to force all outbound TCP through the tunnel with iptables. No per-app configuration, nothing to opt in.
| Proxy mode (default) | Transparent mode | |
|---|---|---|
| Covers | apps that read the proxy setting | everything (TCP) |
| Root | no | yes, once per session via polkit |
| DNS | app-dependent | forced through the tunnel |
| UDP | direct | rejected, so QUIC falls back to TCP |
ICMP (ping) |
works | blocked outright, LAN included |
| IPv6 | direct | rejected, so apps fall back to tunnelled v4 |
pingwill not work while transparent mode is on — that is the kill switch, not a broken network. ICMP cannot ride a SOCKS5 TCP tunnel, so it is rejected rather than allowed out over your real IP. Usecurlto test connectivity.
Transparent mode is fail-closed: while it is on, traffic that cannot go through
the tunnel is rejected rather than leaked. If Tunly dies — even by SIGKILL — the
privileged helper notices its pipe close and removes every rule on its own. Rules
are never persisted, so a reboot also clears them. To clean up by hand:
tunly --repair
It also needs a DNS server (set it in Manage tunnels…, default 1.1.1.1),
because your local resolver's upstream is usually a private router address that is
unreachable from the exit node. One consequence worth knowing: split-horizon DNS
from a corporate resolver stops resolving while transparent mode is on.
📖 Full user guide — first run, auth setup, troubleshooting.
📱 On Android? See Tunly Mobile —
the same named SSH tunnels, routing your whole device through a VpnService.
You need an SSH server
Tunly is a client. It doesn't provide servers — it tunnels your traffic
through an SSH server you control and then out to the internet, so your exit
IP becomes that server's IP. You need a Linux box you can SSH into with outbound
internet; almost any small VPS works (the tunnel only needs sshd + bandwidth —
no special software on the server).
Create a small Linux VM, note its public IP, and you're the root/sudo user.
Popular options (prices/tiers change — verify before signing up):
| Provider | Cheapest | Free tier | Notes |
|---|---|---|---|
| Google Cloud | — | 1× e2-micro/month free in select US regions |
Free-tier VM is enough for a tunnel |
| AWS | Lightsail ~$3.50/mo | EC2 t3.micro free for 12 months |
Lightsail is the simplest AWS path |
| Hetzner Cloud | ~€4/mo (CX22) | — | Cheapest reliable paid VPS; EU + US regions |
| Vultr | ~$2.50–5/mo | — | Many regions, hourly billing |
| DigitalOcean | $4/mo droplet | Signup credit (often $200/60 days) | Beginner-friendly |
| Linode (Akamai) | $5/mo | Signup credit | Simple, well-documented |
| Fly.io | small VMs, usage-based | limited free allowance | Container-style, quick to spin up |
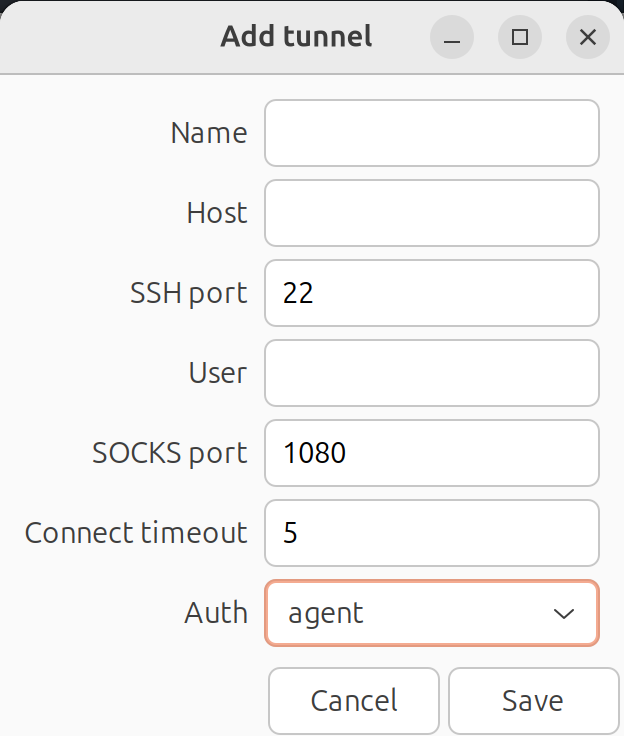
Then: add your key with ssh-copy-id user@SERVER_IP, open Manage tunnels…,
add a tunnel with that host/user/auth, and pick it from the tray. Harden the box
with key-only auth (PasswordAuthentication no) and a firewall on port 22.
Quick install (Debian/Ubuntu)
wget https://github.com/thelinuxer/tunly/releases/latest/download/tunly_0.1.4_all.deb
sudo apt install ./tunly_0.1.4_all.deb
Requirements
System packages (all preinstalled on a standard GNOME desktop; no pip):
python3+python3-gi(GTK 3 introspection)gir1.2-appindicator3-0.1orgir1.2-ayatanaappindicator3-0.1gir1.2-notify-0.7(optional — desktop notifications)ssh,curl
Optional, per auth method:
- Password auth works out of the box via an
SSH_ASKPASShelper (no extra deps). Ifsshpassis installed it is used instead. - Remember password in keyring needs
secret-tool(libsecret-tools). Without it, password-auth tunnels prompt on each connect.
Install
The GTK/AppIndicator bindings are system packages (GObject-Introspection typelibs), not PyPI wheels — so sandboxed formats (Flatpak/Snap) can't drive the host proxy and are not used. Pick one:
A. Debian / Ubuntu (.deb) — recommended for clean system integration
make deb                 # produces tunly_<ver>_all.deb (needs dpkg-deb)
sudo apt install ./tunly_*.deb   # pulls gir1.2-* deps automatically
B. pipx (any distro)
Because AppIndicator has no PyPI package, the venv must see the system bindings:
sudo apt install python3-gi gir1.2-gtk-3.0 \
     gir1.2-ayatanaappindicator3-0.1 openssh-client
pipx install --system-site-packages tunly   # from PyPI (or "." from a checkout)
# then, for the app menu + icon:
tunly --install-desktop --autostart
C. Arch Linux
A PKGBUILD ships in packaging/aur/:
cd packaging/aur && makepkg -si
D. From source (make install)
sudo make install PREFIX=/usr/local # installs launcher + .desktop + icon
Run
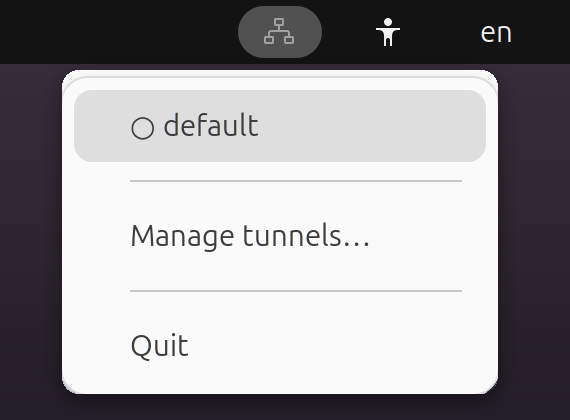
After install, launch tunly (from the app menu or the shell). An icon appears
in the top-bar tray (green = a tunnel is active, grey = none). Click it → per-tunnel
start/stop, Manage tunnels…, Quit.
Run in place without installing:
PYTHONPATH=src python3 -m tunly &
Menu/autostart integration for a pipx or in-place run:
tunly --install-desktop            # add --autostart to launch on login
tunly --uninstall-desktop          # remove it
Managing tunnels
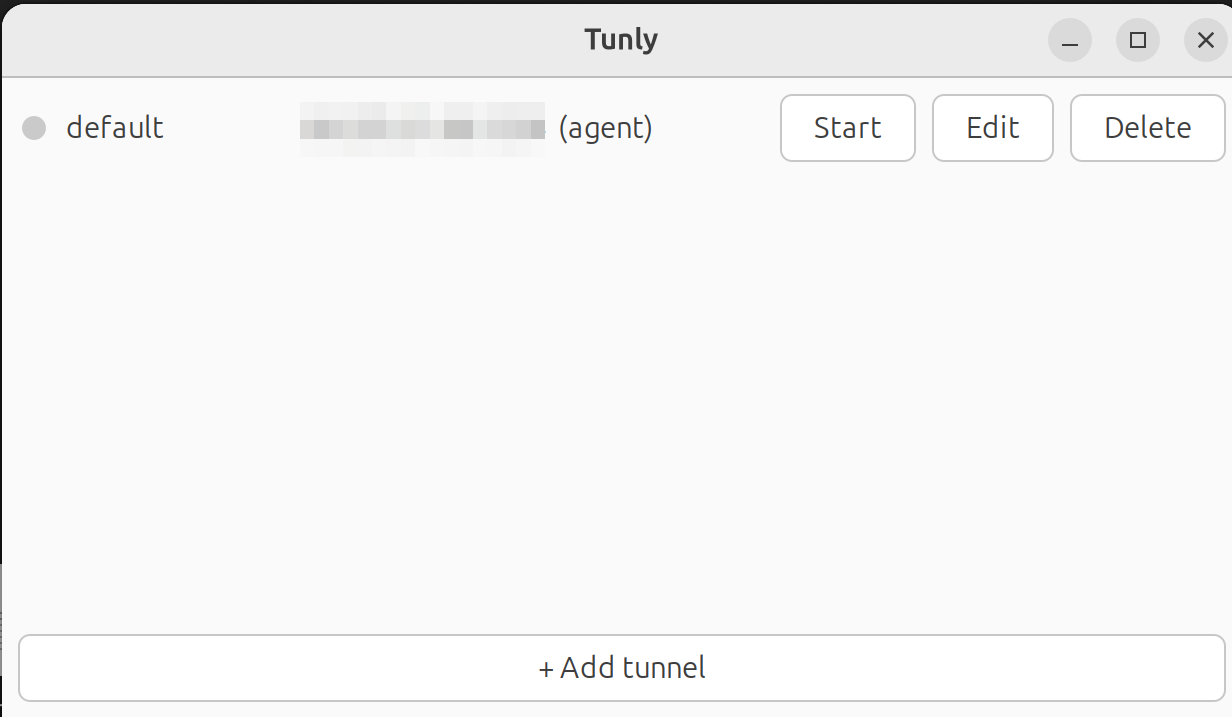
Manage tunnels… opens a window listing every tunnel with a status dot and
Start/Stop, Edit, Delete buttons, plus + Add tunnel. Each tunnel has a
unique name and its own SOCKS port.
SSH auth methods (per tunnel)
| auth | behaviour |
|---|---|
agent |
ssh-agent + default keys (default) |
key |
private key file (-i <path> -o IdentitiesOnly=yes) |
password |
GTK prompt at connect (or keyring); fed to ssh with no plaintext on disk |
Config
~/.config/tunly/tunnels.json — created on first run. A legacy
config.ini (single-tunnel format) is auto-migrated to tunnel default.
Passwords are never written here (keyring or prompt-only).
Self-test
Real end-to-end check (spawns ssh, sets + reverts proxy, prints exit IP). Point it at your own reachable SSH server via env vars — nothing is hardcoded:
SSTRAY_TEST_HOST=vps.example.com SSTRAY_TEST_USER=alice \
  PYTHONPATH=src python3 -m tunly --selftest   # or: tunly --selftest
Security notes
- Passwords are never written to
tunnels.json. They come from the GNOME keyring (secret-tool) or a prompt, and reachsshviasshpass -eor anSSH_ASKPASShelper — no plaintext on disk. The password does transit the ssh child's environment (as withsshpass), readable only by the same user via/proc/<pid>/environ. - Host-key policy is
StrictHostKeyChecking=accept-new: unknown host keys are trusted on first connect (TOFU) so the non-interactive tunnel can come up; a changed key is still refused. If you need strict first-connect verification, pre-populate~/.ssh/known_hosts. - Runs entirely as your user; it changes only your GNOME proxy settings and spawns
ssh. No privileged operations, no shell interpolation of user input.
Releasing
Versions are tag-driven; pyproject.toml is the single source of truth
(the .deb version derives from it at build time). To cut a release:
# 1. bump `version` in pyproject.toml (and the Quick install URL above), commit
# 2. tag and push — CI builds wheel/sdist + .deb and attaches them to a GitHub Release
git tag v0.2.0 && git push origin v0.2.0
CI fails the release if the tag and pyproject.toml version disagree.
Unit tests run on every push (.github/workflows/ci.yml); live SSH integration
tests run locally with SSTRAY_TEST_HOST=<server> pytest tests/.
Enabling PyPI publishing (one-time): on pypi.org → Publishing → add a trusted
publisher with repository thelinuxer/tunly, workflow release.yml, environment
pypi; create a matching pypi environment in the GitHub repo settings; then
uncomment the pypi job in .github/workflows/release.yml. After that every tagged
release also lands on PyPI (pipx install tunly).
Design
See docs/2026-07-05-tunly-design.md.
1 maintainer

Download files
Download the file for your platform. If you're not sure which to choose, learn more about installing packages.
Source Distribution
Built Distribution
Filter files by name, interpreter, ABI, and platform.
If you're not sure about the file name format, learn more about wheel file names.
Copy a direct link to the current filters
File details
Details for the file tunly-0.3.0.tar.gz.
File metadata
- Download URL: tunly-0.3.0.tar.gz
- Upload date:
- Size: 53.3 kB
- Tags: Source
- Uploaded using Trusted Publishing? Yes
- Uploaded via:
twine/7.0.0 CPython/3.13.14
File hashes
| Algorithm | Hash digest | |
|---|---|---|
| SHA256 |
37fe51a4129b5a3c3947e54d089f5f79a97ca9475d1ff820c4b4be590d5085a2
|
|
| MD5 |
6d9b81ec2429a9b62bfeb2361222d74c
|
|
| BLAKE2b-256 |
1f28bcd89528c918a02a7e0e570a0aa17d467cc14c587a6a6ab6391698d3426e
|
Provenance
The following attestation bundles were made for tunly-0.3.0.tar.gz:
Publisher:
release.yml on thelinuxer/tunly
-
Statement:
-
Statement type:
https://in-toto.io/Statement/v1 -
Predicate type:
https://docs.pypi.org/attestations/publish/v1 -
Subject name:
tunly-0.3.0.tar.gz -
Subject digest:
37fe51a4129b5a3c3947e54d089f5f79a97ca9475d1ff820c4b4be590d5085a2 - Sigstore transparency entry: 2452536789
- Sigstore integration time:
-
Permalink:
thelinuxer/tunly@7665ab53e73229d2a5ac0f97da179d328b0f9387 -
Branch / Tag:
refs/tags/v0.3.0 - Owner: https://github.com/thelinuxer
-
Access:
public
-
Token Issuer:
https://token.actions.githubusercontent.com -
Runner Environment:
github-hosted -
Publication workflow:
release.yml@7665ab53e73229d2a5ac0f97da179d328b0f9387 -
Trigger Event:
push
-
Statement type:
File details
Details for the file tunly-0.3.0-py3-none-any.whl.
File metadata
- Download URL: tunly-0.3.0-py3-none-any.whl
- Upload date:
- Size: 32.7 kB
- Tags: Python 3
- Uploaded using Trusted Publishing? Yes
- Uploaded via:
twine/7.0.0 CPython/3.13.14
File hashes
| Algorithm | Hash digest | |
|---|---|---|
| SHA256 |
21d6494625a79c94718f6e866c7aed20e46d639fd5cf872d372cf44763db2c97
|
|
| MD5 |
2e2ed6b86ab897bbccae2a84480998c6
|
|
| BLAKE2b-256 |
2e83a4289b4f7a8418fb353b5822db6af2cd931a815a453bb6331c0093cab6d6
|
Provenance
The following attestation bundles were made for tunly-0.3.0-py3-none-any.whl:
Publisher:
release.yml on thelinuxer/tunly
-
Statement:
-
Statement type:
https://in-toto.io/Statement/v1 -
Predicate type:
https://docs.pypi.org/attestations/publish/v1 -
Subject name:
tunly-0.3.0-py3-none-any.whl -
Subject digest:
21d6494625a79c94718f6e866c7aed20e46d639fd5cf872d372cf44763db2c97 - Sigstore transparency entry: 2452536836
- Sigstore integration time:
-
Permalink:
thelinuxer/tunly@7665ab53e73229d2a5ac0f97da179d328b0f9387 -
Branch / Tag:
refs/tags/v0.3.0 - Owner: https://github.com/thelinuxer
-
Access:
public
-
Token Issuer:
https://token.actions.githubusercontent.com -
Runner Environment:
github-hosted -
Publication workflow:
release.yml@7665ab53e73229d2a5ac0f97da179d328b0f9387 -
Trigger Event:
push
-
Statement type:














