An uber-quick tool to create a Pelican static-site and deploy it to GitHub Pages.

Project description

turbopelican


An uber-quick tool to create a Pelican static-site and deploy it to GitHub Pages.
Explanation
GitHub lets you host static websites at your own subdomain. If your GitHub
username is mrjohndoe, you can host a website at
https://mrjohndoe.github.io. The same applies for organizations. If your
GitHub organization is called MySpecialOrg, you can host a website at
https://myspecialorg.github.io.
turbopelican is a tool which swiftly creates a static website to deploy at
your subdomain. Any developer with a GitHub account and uv installed
(see here) can
deploy a website in minutes.
Usage
Before you run turbopelican, create a new repository where you will keep the
source for your website.
ℹ️ NOTE: Make sure that the site-url uses the GitHub repository's name. For example, if you want the website to be
https://johndoe.github.io, your GitHub repository will need to be calledjohndoe.github.io.

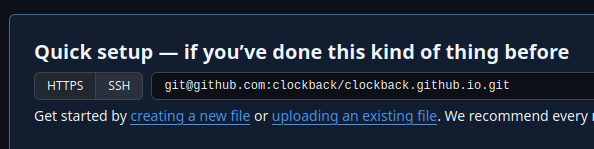
After your repository is created, copy the git repository URL. You'll need it later.
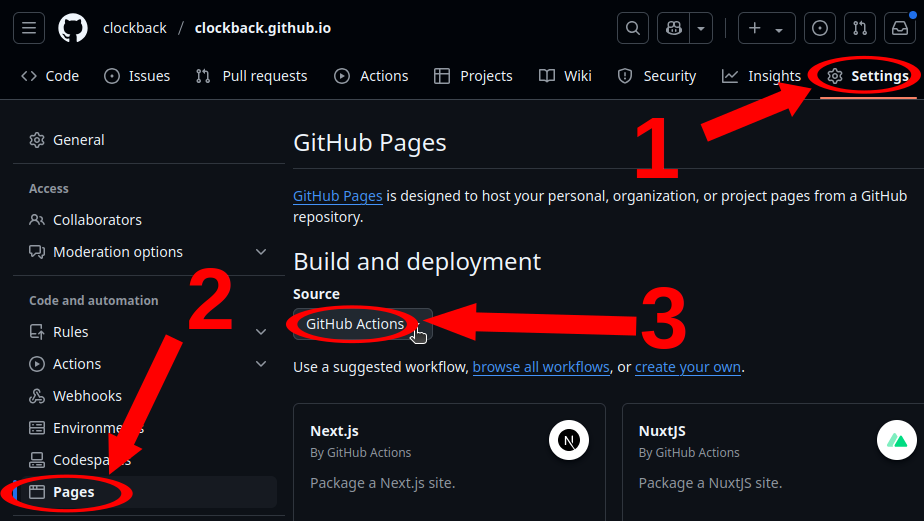
Then enter your settings for your repository, and under "Code and automation" click "Pages". The section "Build and deployment" allows you to choose a source. Chose "GitHub actions".
Next, you need to run turbopelican. Users are recommended to run
turbopelican using uvx:

You can use the defaults, or choose your own values. In the example above, I
have decided to give the website a non-default name, but I have left the other
settings. turbopelican then creates a new repository
my-turbopelican-website, with everything ready to push to GitHub.
ℹ️ NOTE: Make sure that the site-url uses the GitHub repository's name. For example, if you want the website to be
https://johndoe.github.io, your GitHub repository will need to be calledjohndoe.github.io.
You will then need to push your code to GitHub:
cd my-turbopelican-website
git remote add origin git@github.com:my-turbopelican-website/my-turbopelican-website.github.io.git # Use your own git repo reference
git push -q --set-upstream origin main
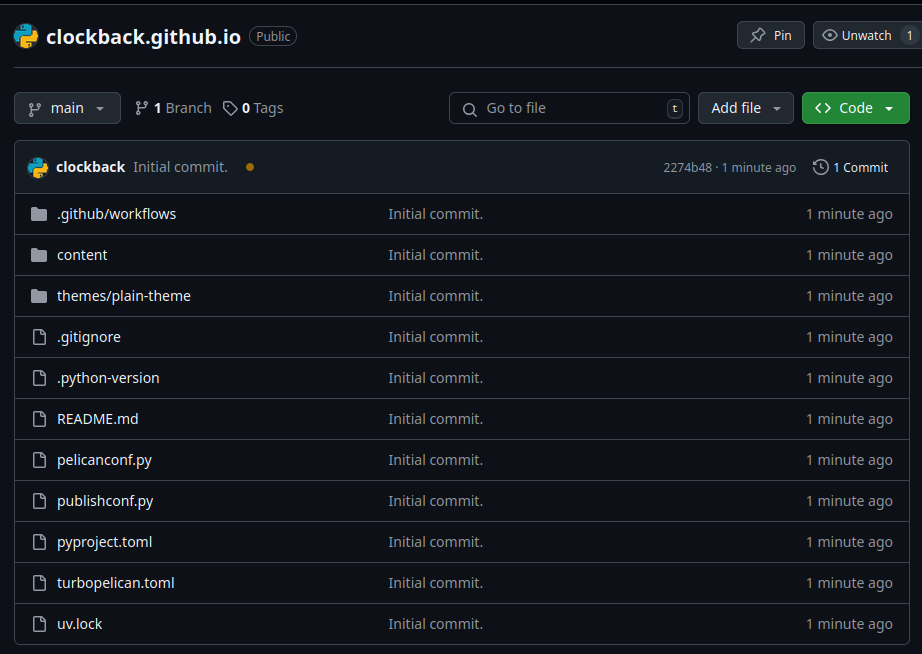
Now look at your repository on GitHub. You should be able to see the repository:
If you navigate back to the settings for GitHub Pages, you should see a message informing you that your website is already live.
ℹ️ NOTE: It may take a minute for this prompt to appear, because GitHub Actions must first deploy your website.
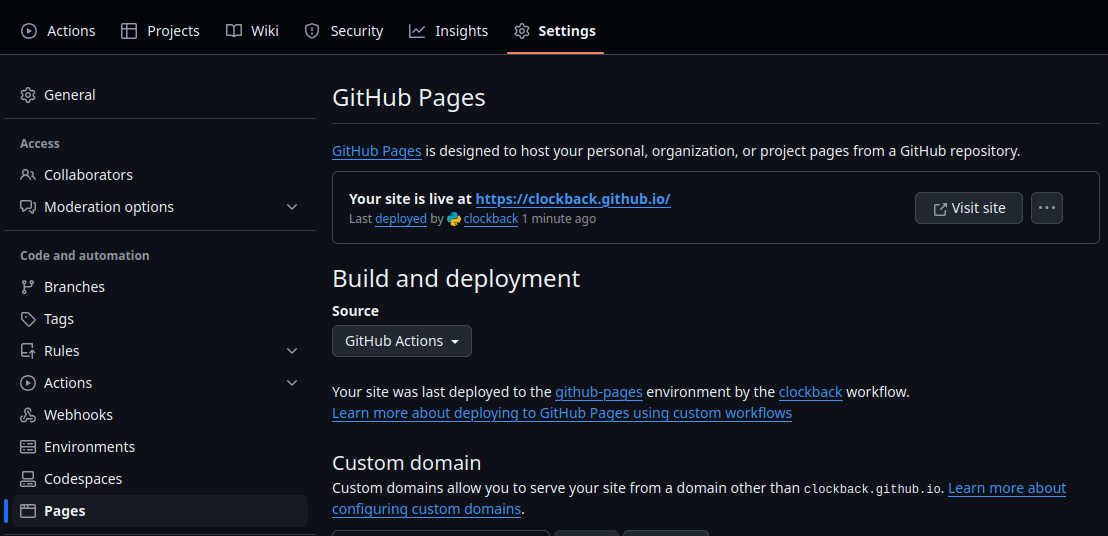
If you follow the link, you should be able to see your newly deployed website.
You can learn more about Pelican here.
It is also possible to add a GitHub Page website to an existing repository
using the turbopelican adorn command, which works similarly to the
turbopelican init command.
Configuration
Pelican still targets Python 3.9, which does not bundle built-in support for
reading TOML configuration. Projects using turbopelican require Python 3.11
or higher, and therefore adopt the newer convention of placing configuration
in a TOML file rather than Python scripts. Generally, you should only need to
modify turbopelican.toml, rather than pelicanconf.py or publishconf.py.
Development
Ensure you have uv and git installed. You will need to create a fork of the repository. Then you should navigate to GitHub Actions (https://github.com/yourusername/turbopelican/actions) and enable workflows on your repository. After that, you can clone your fork onto your computer.
git clone git@github.com:yourusername/turbopelican.git
cd turbopelican
uv sync
When you need to check that the branch can pass CI, you can run the Makefile like so:
make ci
Once you push your branch to GitHub, the workflow "Run CI" should run. If you have not enabled workflows yet, do so, and then run the workflow manually. Pull requests should be made only for branches which pass CI. Once it has passed, you should then open a pull request. If you are contributing a new feature or breaking changes, you should set the base reference to the current feature branch. Otherwise, you should set the base reference to main.
NeoVim
Contributors to turbopelican are encouraged to use NeoVim as their IDE during development, in conjunction with nvim-lspconfig. When you launch NeoVim, you should pass the project's IDE settings like so:
. .venv/bin/activate
nvim -u init.lua
This will ensure that you receive Ruff and Pyright warnings in your editor. It will also automatically format any Python code on write.
Release history Release notifications | RSS feed


Download files
Download the file for your platform. If you're not sure which to choose, learn more about installing packages.
Source Distribution
Built Distribution
Filter files by name, interpreter, ABI, and platform.
If you're not sure about the file name format, learn more about wheel file names.
Copy a direct link to the current filters
File details
Details for the file turbopelican-0.6.1.tar.gz.
File metadata
- Download URL: turbopelican-0.6.1.tar.gz
- Upload date:
- Size: 966.1 kB
- Tags: Source
- Uploaded using Trusted Publishing? No
- Uploaded via: uv/0.6.8
File hashes
| Algorithm | Hash digest | |
|---|---|---|
| SHA256 |
860785fa30d8231a0d913d4b7dedc89127dae7c9e8fa54e61cd4f1cd22f8ac64
|
|
| MD5 |
d914a3ccce334b022049b0e9cdf07bf2
|
|
| BLAKE2b-256 |
ab2d7514407d8324cce066bb6333ce8b57b7f9f7eea521912a75983809a12690
|
File details
Details for the file turbopelican-0.6.1-py3-none-any.whl.
File metadata
- Download URL: turbopelican-0.6.1-py3-none-any.whl
- Upload date:
- Size: 96.4 kB
- Tags: Python 3
- Uploaded using Trusted Publishing? No
- Uploaded via: uv/0.6.8
File hashes
| Algorithm | Hash digest | |
|---|---|---|
| SHA256 |
af1caabef25d5bc94cabe23e052e78dd6991ea5aab1a1537cd41077b828b8e0a
|
|
| MD5 |
a10c97841a991a809730d7b86ddda4a6
|
|
| BLAKE2b-256 |
cd581676a8b6c08c49711fdc7ebe0ffa2eb29bea6435750778452d3652efba87
|


