A package to register whole slide images

Project description


VALIS, which stands for Virtual Alignment of pathoLogy Image Series, is a fully automaated pipeline to register whole slide images (WSI) using rigid and/or non-rigid transformtions. A full description of the method is descriped in the paper by Gatenbee et al. 2021. VALIS uses Bio-Formats, OpenSlide, libvips, and scikit-image to read images and slides, and so is able to work with over 300 image formats. Registered images can be saved as ome.tiff slides that can be used in downstream analyses. ome.tiff format is opensource and widely supported, being readable in several different programming languages (Python, Java, Matlab, etc…) and software, such as QuPath, HALO by Idica Labs, etc…
The registration pipeline is fully automated and goes as follows:
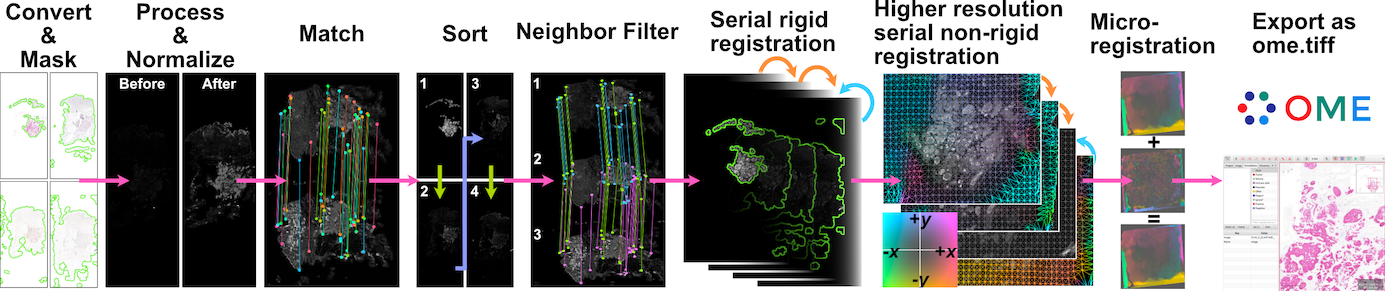
Images/slides are converted to numpy arrays. As WSI are often too large to fit into memory, these images are usually lower resolution images from different pyramid levels.
Images are processed to single channel images. They are then normalized to make them look as similar as possible. Masks are then created to focus registration on the tissue.
Image features are detected and then matched between all pairs of image.
If the order of images is unknown, they will be optimally ordered based on their feature similarity. This increases the chances of successful registration because each image will be aligned to one that looks very similar.
Images will be aligned towards (not to) a reference image. If the reference image is not specified, it will automatically be set to the image at the center of the stack.
Rigid registration is performed serially, with each image being rigidly aligned towards the reference image. That is, if the reference image is the 5th in the stack, image 4 will be aligned to 5 (the reference), and then 3 will be aligned to the now registered version of 4, and so on. Only features found in both neighboring slides are used to align the image to the next one in the stack. VALIS uses feature detection to match and align images, but one can optionally perform a final step that maximizes the mutual information betweeen each pair of images.
The registered rigid masks are combined to create a non-rigid registration mask. The bounding box of this mask is then used to extract higher resolution versions of the tissue from each slide. These higher resolution images are then processed as above and used for non-rigid registration, which is performed either by:
aliging each image towards the reference image following the same sequence used during rigid registation.
using groupwise registration that non-rigidly aligns the images to a common frame of reference. Currently this is only possible if SimpleElastix is installed.
One can optionally perform a second non-rigid registration using an even higher resolution versions of each image. This is intended to better align micro-features not visible in the original images, and so is referred to as micro-registration. A mask can also be used to indicate where registration should take place.
Error is estimated by calculating the distance between registered matched features in the full resolution images.
The transformations found by VALIS can then be used to warp the full resolution slides. It is also possible to merge non-RGB registered slides to create a highly multiplexed image. These aligned and/or merged slides can then be saved as ome.tiff images. The transformations can also be use to warp point data, such as cell centroids, polygon vertices, etc…
In addition to registering images, VALIS provides tools to read slides using Bio-Formats and OpenSlide, which can be read at multiple resolutions and converted to numpy arrays or pyvips.Image objects. One can also slice regions of interest from these slides and warp annotated images. VALIS also provides functions to convert slides to the ome.tiff format, preserving the original metadata. Please see examples and documentation for more details.
Full documentation can be found at ReadTheDocs.
Installation
conda (recommened for non-Windows users)
VALIS will soon be available in the conda-forge channel of conda. However, unfortunately libvips, a core dependency, is not yet available for Windows users on conda-forge.
pip
VALIS can be downloaded from PyPI as the valis-wsi package using the pip command. However, VALIS requires several system level packages, which will need to be installed first.
Prerequisites
VALIS uses Bioforamts to read many slide formats. Bioformats is written in Java, and VALIS uses the Python package jpype to access the Bioformats jar. Therefore, the user will need to have installed a Java Development Kit (JDK) containing the Java Runtime Environment (JRE):
Download appropriate JDK from java downloads
Edit your system and environment variables to update the Java home
$ export JAVA_HOME=/usr/libexec/java_homeVerify the path has been added:
$ echo $JAVA_HOMEshould print something like
usr/libexec/java_home(optional) If you will be working with files that have extensions: ‘.vmu’, ‘.mrxs’ ‘.svslide’, you will also need to install OpenSlide. Note that this is not the same as openslide-python, which contains Python wrappers for OpenSlide.
VALIS uses pyvips to warp and save the whole slide images (WSI) as ome.tiffs. Pyvips requires libvips (not a Python package) to be on your library search path, and so libvips must be installed separately. See the pyvips installation notes for instructions on how to do this for your operating system. If you already have libvips installed, please make sure it’s version is >= 8.11.
Install
Once the above prerequisites have been satistifed, valis can be installed using pip, idealy within a virtual environment
$ python3 -m venv venv_valis
$ source ./venv_valis/bin/activate
$ python3 -m pip install --upgrade pip
$ python3 pip install valis-wsi
SimpleElastix (optional)
The defaults used by VALIS work well, but VALIS also provides optional classes that require SimpleElastix. In particular, these classes are:
affine_optimizer.AffineOptimizerMattesMI, which uses sitk.ElastixImageFilter to simultaneously maximize Mattes Mutual Information and minimize the spatial distance between matched features.
non_rigid_registrars.SimpleElastixWarper, which uses sitk.ElastixImageFilter to find non-rigid transformations between pairs of images.
non_rigid_registrars.SimpleElastixGroupwiseWarper, which uses sitk.ElastixImageFilter to find non-rigid transformations using groupwise registration.
To install SimpleElastix, you should probably uninstall the current version of SimpleITK in your environment, and then install SimpleElastix as described in the SimpleElastix docs.
Examples
Slide registration
In this example, the slides that need to be registered are located in /path/to/slides. This process involves creating a Valis object, which is what conducts the registration. In this example no reference image is specfied, and so all images will be aligned towards the center of the image stack. In this case, the resulting images will be cropped to the region where all of the images overlap. However, one can specify the reference image when intialzing the Valis object, by setting reference_img_f to the filename of the image the others should be aligned towards. When the reference image is specifed, the images will be cropped such that only the regions which overlap with the reference image will be saved. While this is the default behavior, one can also specify the cropping method by setting the crop parameter value when initialzing the Valis object. The cropping method can also be changed when saving the registered images (see below).
from valis import registration
slide_src_dir = "/path/to/slides"
results_dst_dir = "./slide_registration_example"
registered_slide_dst_dir = "./slide_registration_example/registered_slides"

# Create a Valis object and use it to register the slides in slide_src_dir
registrar = registration.Valis(slide_src_dir, results_dst_dir)
rigid_registrar, non_rigid_registrar, error_df = registrar.register()
The next example shows how align each image to a reference image, followed up by micro-registration. The reference image the others should be aligned towards is set with the reference_img_f argument when initialzing the Valis object. This initial registration is followed up by micro-registration in order to better align features that were not present in the smaller images used for the first registration (The size of the images used for micro-registration can is set with the max_non_rigid_registartion_dim_px argument in Valis.register_micro). Setting align_to_reference to True will align each image directly to the reference image, as opposed to towards it.
from valis import registration
slide_src_dir = "/path/to/slides"
results_dst_dir = "./slide_registration_example"
registered_slide_dst_dir = "./slide_registration_example/registered_slides"
reference_slide = "HE.tiff"

# Create a Valis object and use it to register the slides in slide_src_dir, aligning towards the reference slide.
registrar = registration.Valis(slide_src_dir, results_dst_dir, reference_img_f=reference_slide)
rigid_registrar, non_rigid_registrar, error_df = registrar.register()

# Perform micro-registration on higher resolution images, aligning directly to the reference image
registrar.register_micro(max_non_rigid_registartion_dim_px=2000, align_to_reference=True)
After registration is complete, one can view the results to determine if they are acceptable. In this example, the results are located in ./slide_registration_example. Inside this folder will be 6 subfolders:
data contains 2 files:
a summary spreadsheet of the alignment results, such as the registration error between each pair of slides, their dimensions, physical units, etc…
a pickled version of the registrar. This can be reloaded (unpickled) and used later. For example, one could perfom the registration locally, but then use the pickled object to warp and save the slides on an HPC. Or, one could perform the registration and use the registrar later to warp points found in the (un-registered) slide.
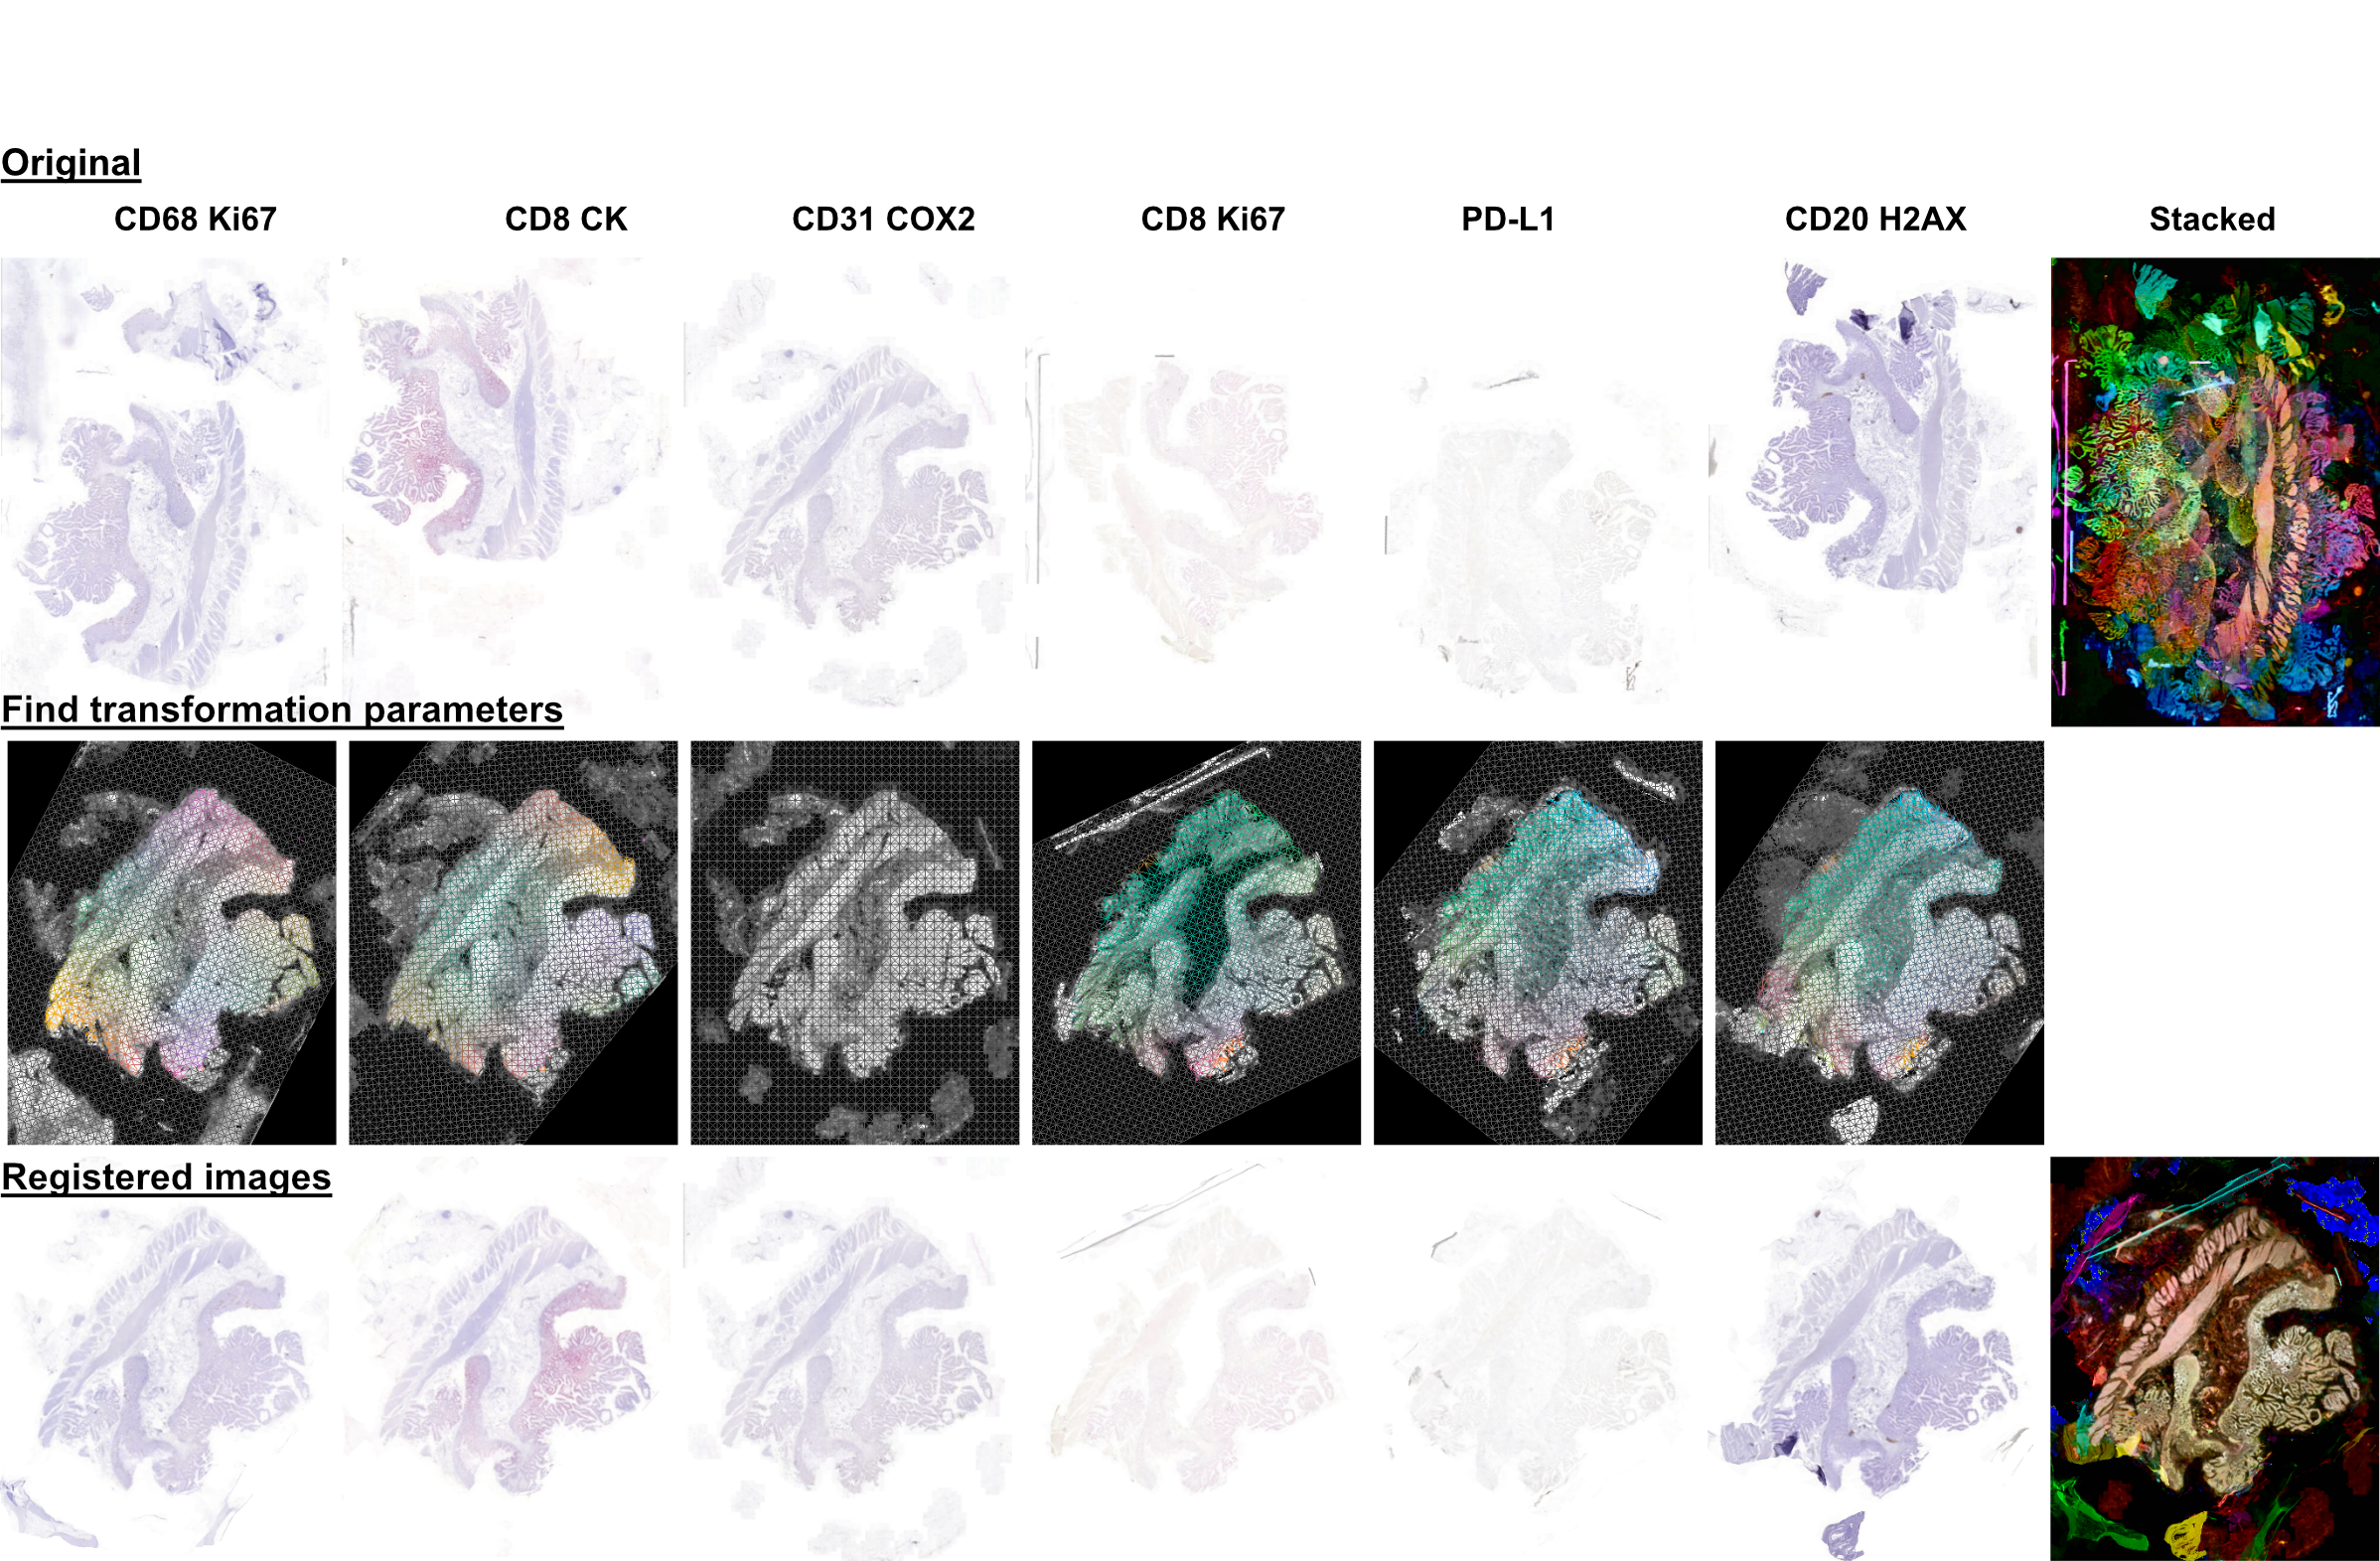
overlaps contains thumbnails showing the how the images would look if stacked without being registered, how they look after rigid registration, and how they look after non-rigid registration. The rightmost images in the figure above provide examples of these overlap images.
rigid_registration shows thumbnails of how each image looks after performing rigid registration. These would be similar to the bottom row in the figure above.
non_rigid_registration shows thumbnaials of how each image looks after non-rigid registration. These would be similar to the bottom row in the figure above.
deformation_fields contains images showing what the non-rigid deformation would do to a triangular mesh. These can be used to get a sense of how the images were altered by non-rigid warping. In these images, the color indicates the direction of the displacement, while brightness indicates it’s magnitude. These would be similar to those in the middle row in the figure above.
processed shows thumnails of the processed images. These are thumbnails of the images that were actually used to perform the registration. The pre-processing and normalization methods should try to make these images look as similar as possible.
masks show the images with outlines of their rigid registration mask drawn around them. If non-rigid registration is being performed, there will also be an image of the reference image with the non-rigid registration mask drawn around it.
If the results look good, then one can warp and save all of the slides as ome.tiffs. When saving the images, there are three cropping options:
crop="overlap"will crop the images to the region where all of the images overlap.crop="reference"will crop the images to the region where they overlap with the reference image.crop="all"will not perform any cropping. While this keep the all of the image, the dimensions of the registered image can be substantially larger than one that was cropped, as it will need to be large enough accomodate all of the other images.
While the cropping setting can also be set when initializing the Valis object, any of the above cropping methods can be used when saving the images.
# Save all registered slides as ome.tiff
registrar.warp_and_save_slides(registered_slide_dst_dir, crop="overlap")

# Kill the JVM
registration.kill_jvm()
The ome.tiff images can subsequently be used for downstream analysis, such as QuPath
One can also choose to save individual slides. This is accomplished by accessing the Slide object associated with a particular file, slide_f and then “telling” it to save the slide as out_f.ome.tiff.
slide_obj = registrar.get_slide(slide_f)
slide_obj.warp_and_save_slide("out_f.ome.tiff")
Finally, if the non-rigid registration is deemed to have distored the image too much, one can apply only the rigid transformation by setting non_rigid=False in slide_obj.warp_and_save_slide or registrar.warp_and_save_slides.
Create multiplex image from immunofluorescence images
Following registration, VALIS can merge the slides to create a single composite image. However, this should only be done for non-RGB images, such as multi/single-channel immunofluorescence images. An example would be slides of multiple CyCIF rounds. The user also has the option to provide channel names, but if not provided the channel names will become the “channel (filename)” given the channel name in the metadata. For example, if the file name is round1.ndpis then the DAPI channel name will be “DAPI (round1)”). In this example, the channel names are taken from the filename, which have the form “Tris CD20 FOXP3 CD3.ndpis”, “Tris CD4 CD68 CD3 1in25 ON.ndpis”, etc… The channel names need to be in a dictionary, where key=filename, value = list of channel names.
First, create a VALIS object and use it to register slides located in slide_src_dir
from valis import registration
slide_src_dir = "/path/to/slides"
results_dst_dir = "./slide_merging_example"  # Registration results saved here
merged_slide_dst_f = "./slide_merging_example/merged_slides.ome.tiff"  # Where to save merged slide

registrar = registration.Valis(slide_src_dir, results_dst_dir)
rigid_registrar, non_rigid_registrar, error_df = registrar.register()
Check the results in results_dst_dir, and if the look good merge and save the slide. Once complete, be sure to kill the JVM.
# Create function to extract channel names from the image.
def cnames_from_filename(src_f):
    """Get channel names from file name
    Note that the DAPI channel is not part of the filename
    but is always the first channel.
    """

    f = valtils.get_name(src_f)
    return ["DAPI"] + f.split(" ")[1:4]

channel_name_dict = {f:cnames_from_filename(f) for f in registrar.original_img_list}
merged_img, channel_names, ome_xml = \
    registrar.warp_and_merge_slides(merged_slide_dst_f,
                                    channel_name_dict=channel_name_dict,
                                    drop_duplicates=True)

registration.kill_jvm() # Kill the JVM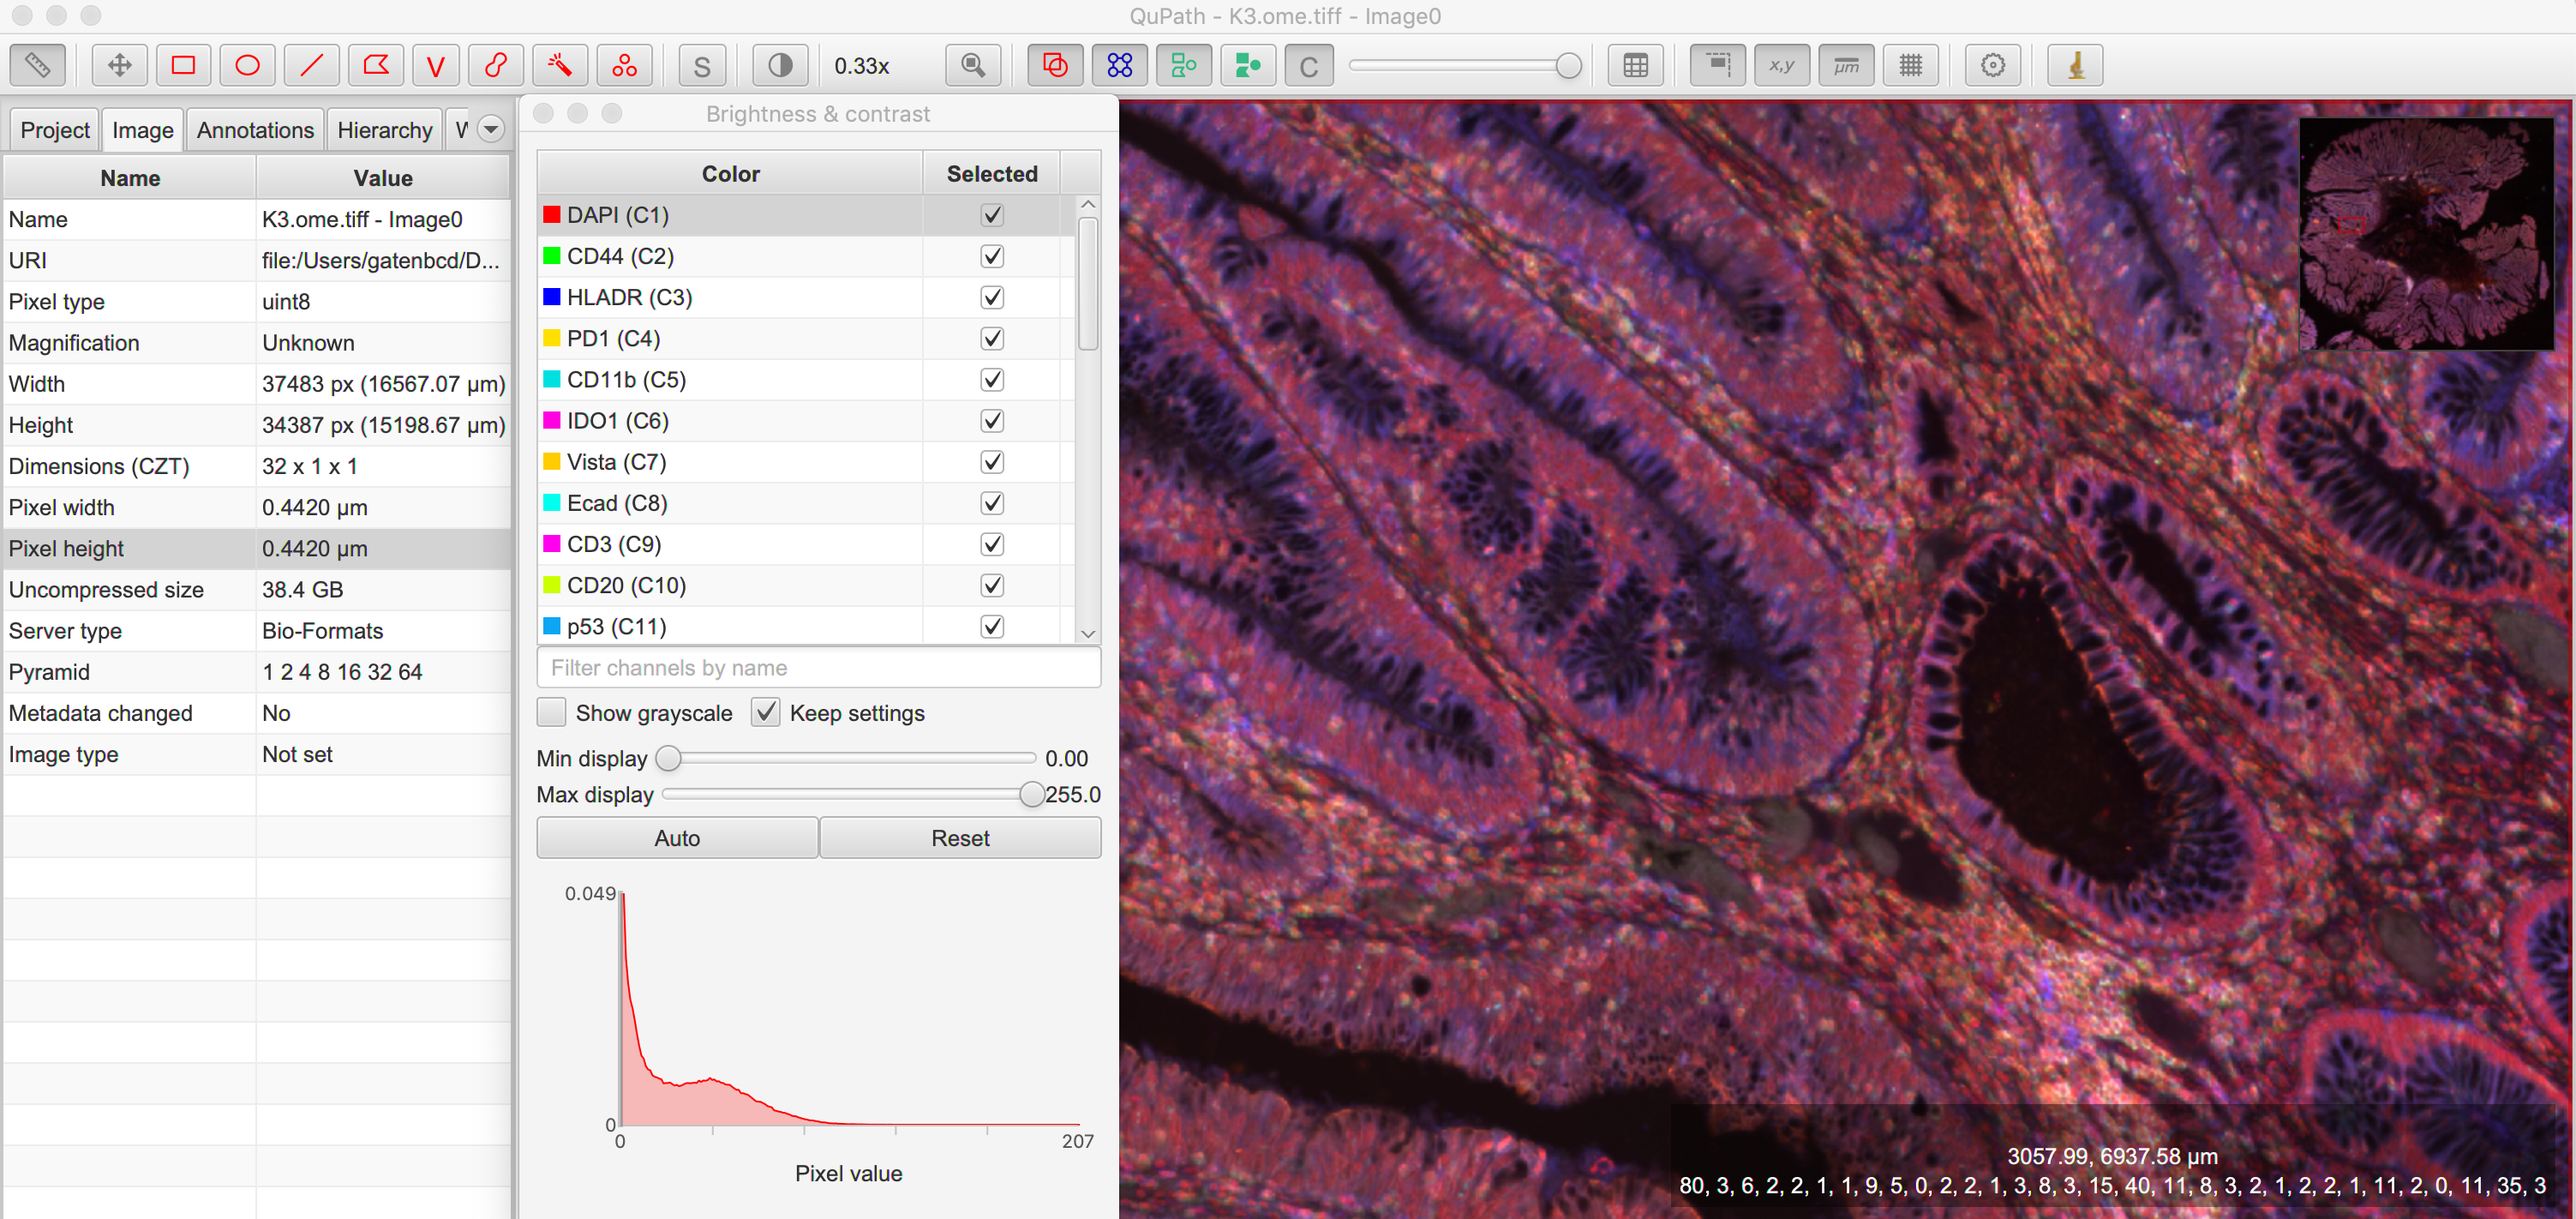
Warping points
Once the registration parameters have been found, VALIS can be used to warp point data, such as cell coordinates, mask polygon vertices, etc… In this example, slides will be registered, and the registration parameters will then be used warp cell positions located in a separate .csv. This accomplished by accessing the Slide object associated with each registered slide. This is done by passing the slide’s filename (with or without the extension) to registrar.get_slide. This Slide object can the be used to warp the individual slide and/or points associated with the un-registered slide. This can be useful in cases where one has already performed an analysis on the un-registered slides, as one can just warp the point data, as opposed to warping each slide and re-conducting the analysis.
In this first example, cell segmentation and phenotyping has already been performed on the unregistered images. We can now use the Valis object that performed the registration to warp the cell positions to their location in the registered images.
import os
import numpy as np
import pandas as pd
import pathlib
import pickle
from valis import registration
slide_src_dir = "path/to/slides"
point_data_dir = "path/to/cell_positions"
results_dst_dir = "./point_warping_example"
# Load a Valis object that has already registered the images.
registrar_f = "path/to/results/data/registrar.pickle"
registrar = registration.load_registrar(registrar_f)
# Get .csv files containing cell coordinates
point_data_list = list(pathlib.Path(point_data_dir).rglob("*.csv"))
# Go through each file and warp the cell positions
for f in point_data_list:
# Get Slide object associated with the slide from which the point data originated
# Point data and image have similar file names
fname = os.path.split(f)[1]
corresponding_img = fname.split(".tif")[0]
slide_obj = registrar.get_slide(corresponding_img)
# Read data and calculate cell centroids (x, y)
points_df = pd.read_csv(f)
x = np.mean(points_df[["XMin", "XMax"]], axis=1).values
y = np.mean(points_df[["YMin", "YMax"]], axis=1).values
xy = np.dstack([x, y])[0]
# Use Slide to warp the coordinates
warped_xy = slide_obj.warp_xy(xy)
# Update dataframe with registered cell centroids
points_df[["registered_x", "registered_y"]] = warped_xy
# Save updated dataframe
pt_f_out = os.path.split(f)[1].replace(".csv", "_registered.csv")
full_pt_f_out = os.path.join(results_dst_dir, pt_f_out)
points_df.to_csv(full_pt_f_out, index=False)
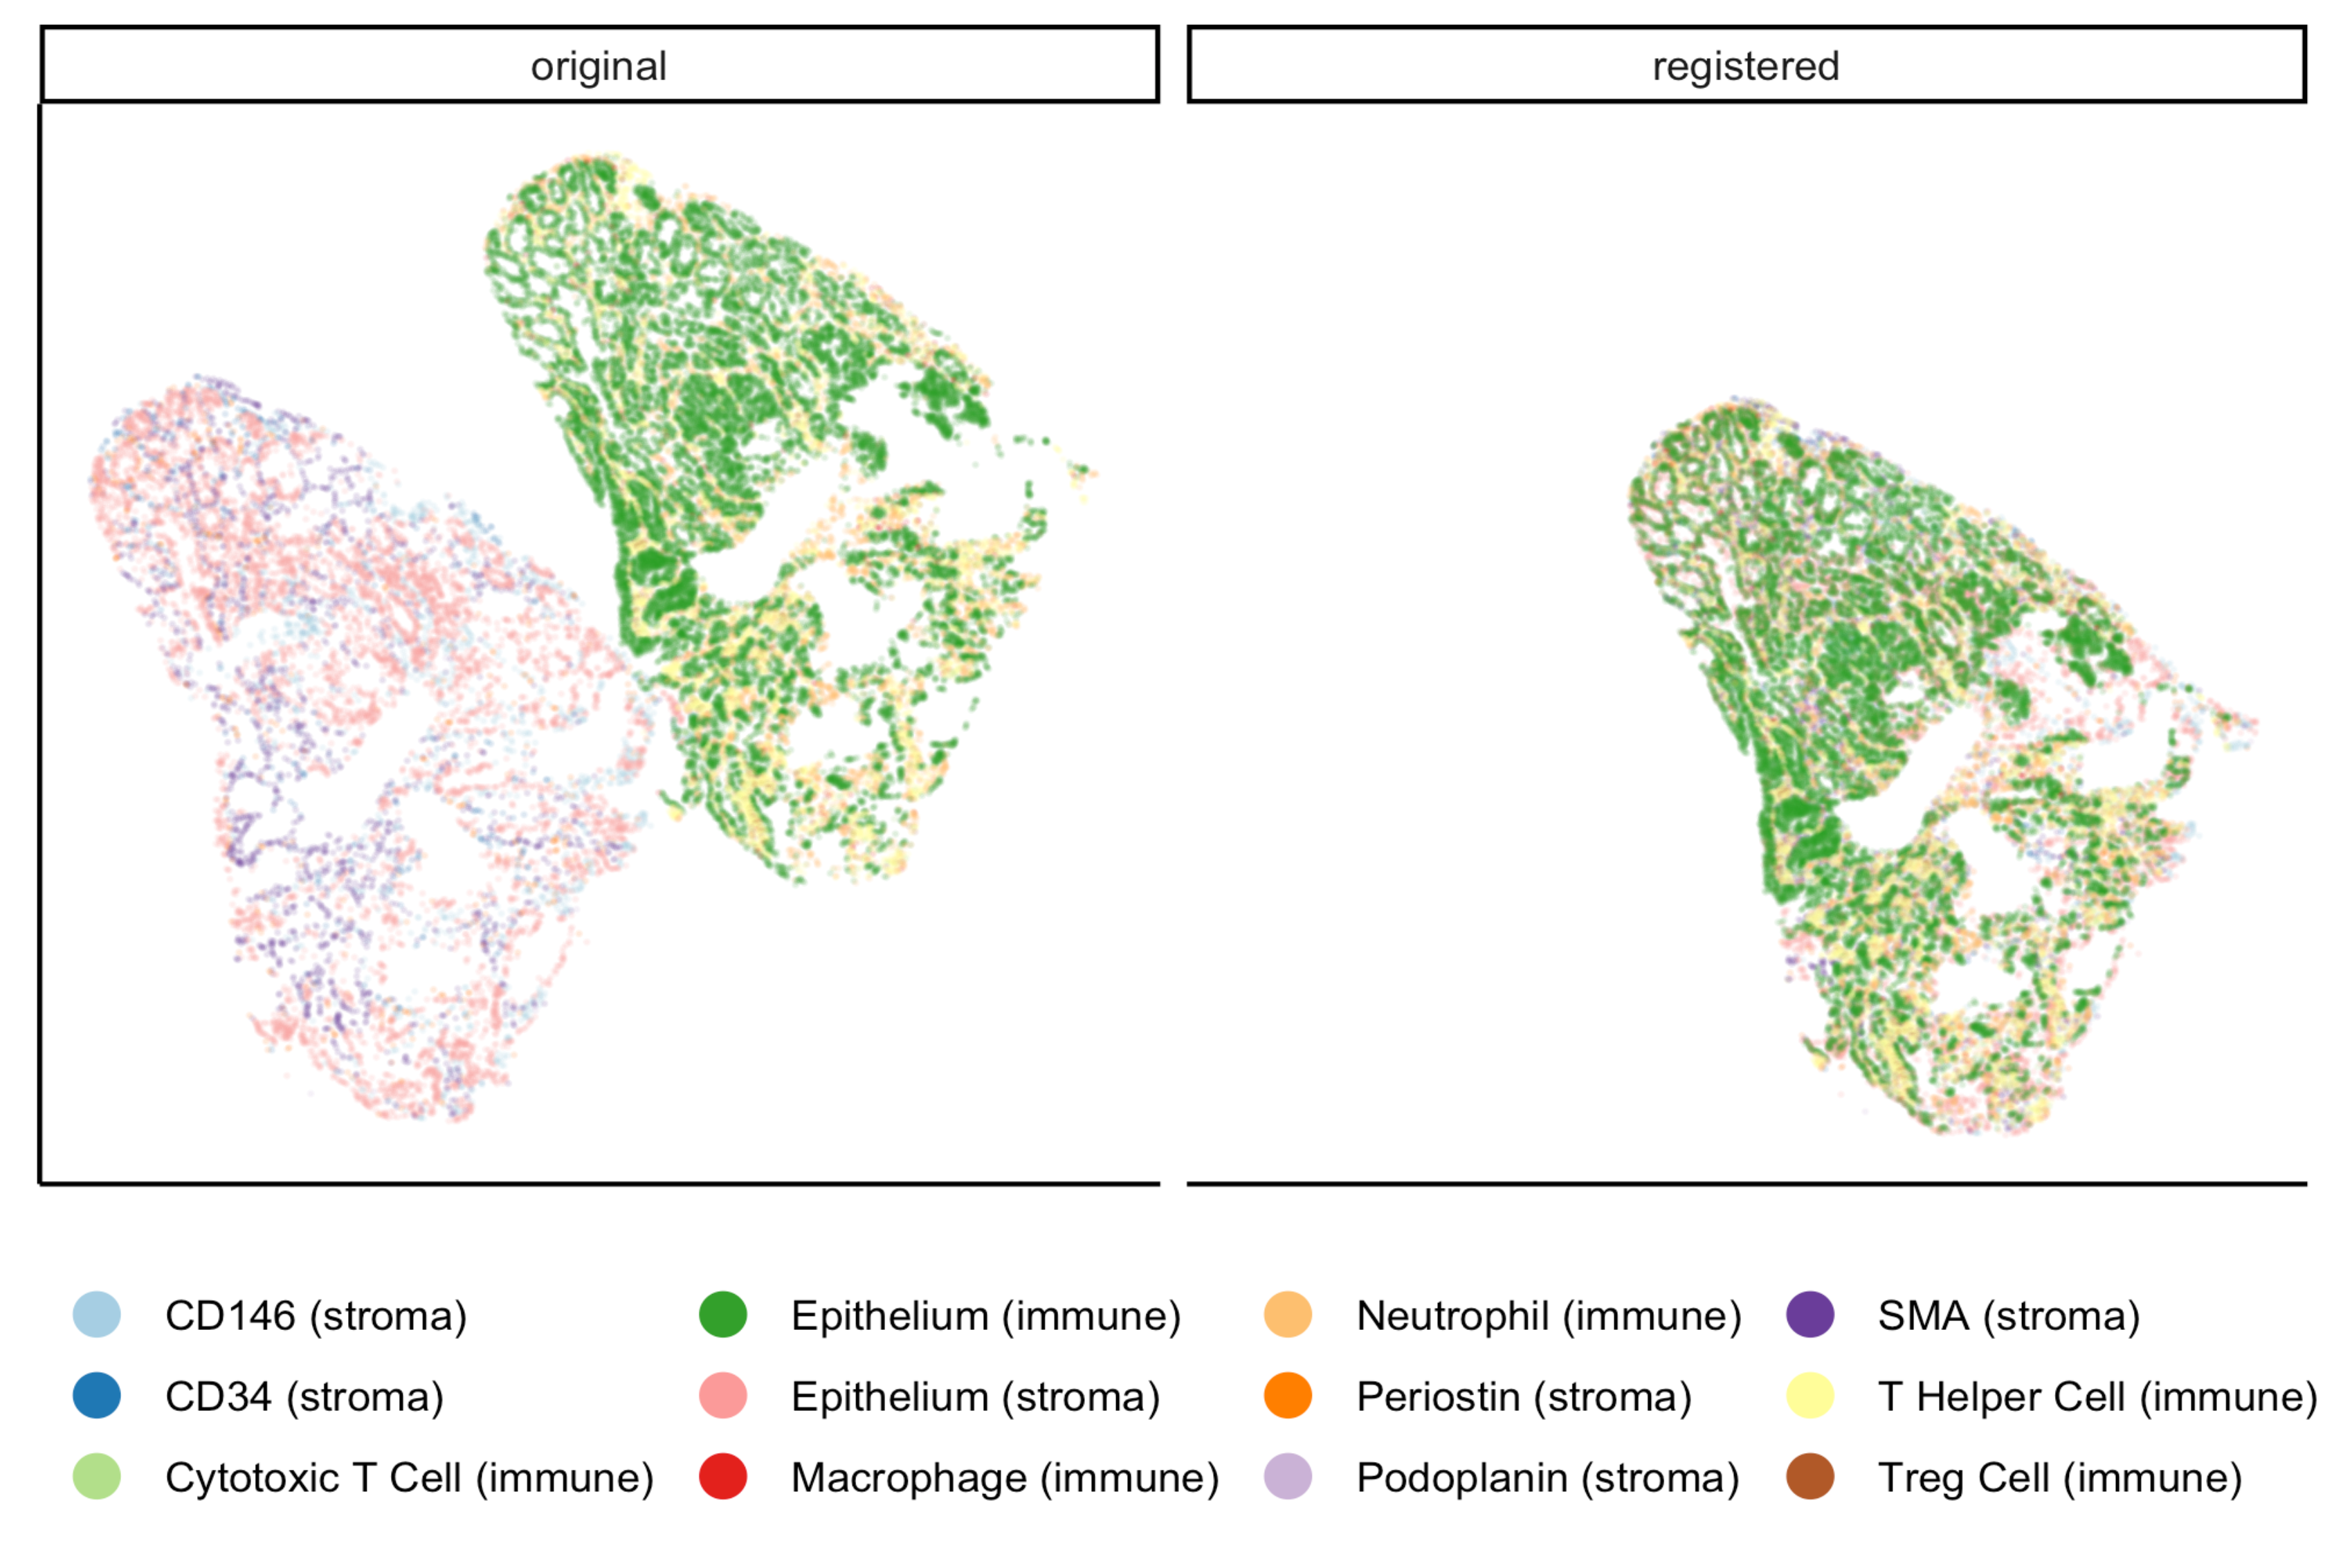
registration.kill_jvm() # Kill the JVMHere is a comparison of before and after applying registration to cell positions found in the original un-aligned images:
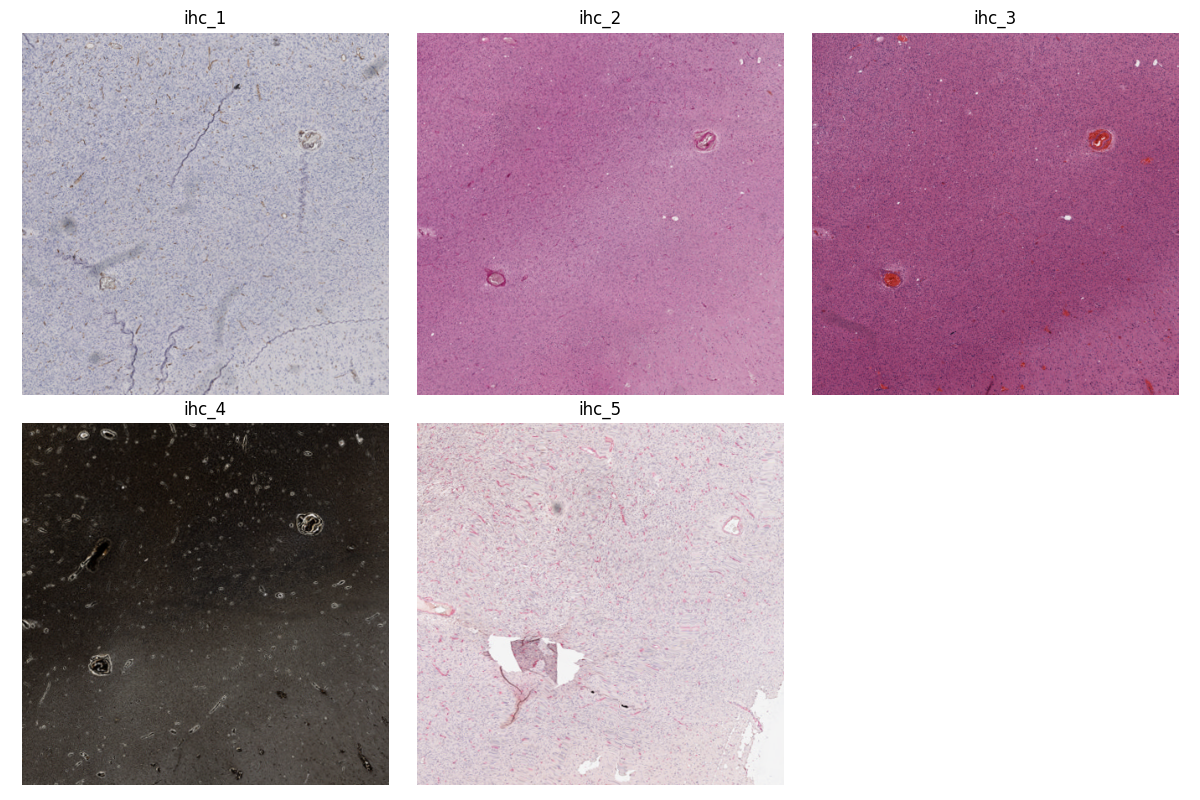
In this second example, a region of interest (ROI) was marked in one of the unregistered images, in this case “ihc_2.ome.tiff” . Using the Slide object associated with “ihc_2.ome.tiff”, we can warp those ROI coordinates to their position in the registered images, and then use those to slice the registered ROI from each slide. Because VALIS uses pyvips to read and warp the slides, this process does not require the whole image to be loaded into memory and warped. As such, this is fast and does not require much memory. It’s also worth noting that because the points are being warped to the registred coordinate system, the slide that is the source of the ROI coordinates does not have to be the same slide that was treated as the reference image during registration.
import os
import pickle
import numpy as np
import matplotlib.pyplot as plt
import pathlib
from valis import registration, warp_tools

# Load a registrar that has already registered the images.
registrar_f = "./expected_results/registration/ihc/data/ihc_registrar.pickle"
registrar = registration.load_registrar(registrar_f)
# Set the pyramid level from which the ROI coordinates originated. Usually 0 when working with slides.
COORD_LEVEL = 0

# ROI coordinates, in microns. These came from the unregistered slide, "ihc_2.ome.tiff"
bbox_xywh_um = [14314, 13601, 3000, 3000]
bbox_xy_um = warp_tools.bbox2xy(bbox_xywh_um)

# Get slide from which the ROI coordinates originated
pt_source_img_f = "ihc_2.ome.tiff"
pt_source_slide = registrar.get_slide(pt_source_img_f)

# Convert coordinates to pixel units
um_per_px = pt_source_slide.reader.scale_physical_size(COORD_LEVEL)[0:2]
bbox_xy_px = bbox_xy_um/np.array(um_per_px)

# Warp coordinates to position in registered slides
bbox_xy_in_registered_img = pt_source_slide.warp_xy(bbox_xy_px,
                                                    slide_level=COORD_LEVEL,
                                                    pt_level=COORD_LEVEL)

bbox_xywh_in_registered_img = warp_tools.xy2bbox(bbox_xy_in_registered_img)
bbox_xywh_in_registered_img = np.round(bbox_xywh_in_registered_img).astype(int)

# Create directory where images will be saved
dst_dir = "./expected_results/roi"
pathlib.Path(dst_dir).mkdir(exist_ok=True, parents=True)

# Warp each slide and slice the ROI from it using each pyips.Image's "extract_area" method.
fig, axes = plt.subplots(2, 3, figsize=(12, 8), sharex=True, sharey=True)
ax = axes.ravel()
for i, slide in enumerate(registrar.slide_dict.values()):
    warped_slide = slide.warp_slide(level=COORD_LEVEL)
    roi_vips = warped_slide.extract_area(*bbox_xywh_in_registered_img)
    roi_img = warp_tools.vips2numpy(roi_vips)
    ax[i].imshow(roi_img)
    ax[i].set_title(slide.name)
    ax[i].set_axis_off()

fig.delaxes(ax[5]) # Only 5 images, so remove 6th subplot
out_f = os.path.join(dst_dir, f"{registrar.name}_roi.png")
plt.tight_layout()
plt.savefig(out_f)
plt.close()

# Opening the slide initialized the JVM, so it needs to be killed
registration.kill_jvm()
The extracted and registered ROI are shown below:
Converting slides to ome.tiff
In addition to registering slide, VALIS can convert slides to ome.tiff, maintaining the original metadata. If the original is image is not RGB, the option perceputally_uniform_channel_colors=True can be used to give each channel a perceptually uniform color, derived from the JzAzBz colorspace. An advantage of using perceptually uniform colors is that markers should appear brighter only if there is higher expression, not because the color (such as yellow) is perceived to be brighter.
from valis import slide_io
slide_src_f = "path/to/slide
converted_slide_f = "converted.ome.tiff"
slide_io.convert_to_ome_tiff(slide_src_f,
                            converted_slide_f,
                            level=0,
                            perceputally_uniform_channel_colors=True)
slide_io.kill_jvm()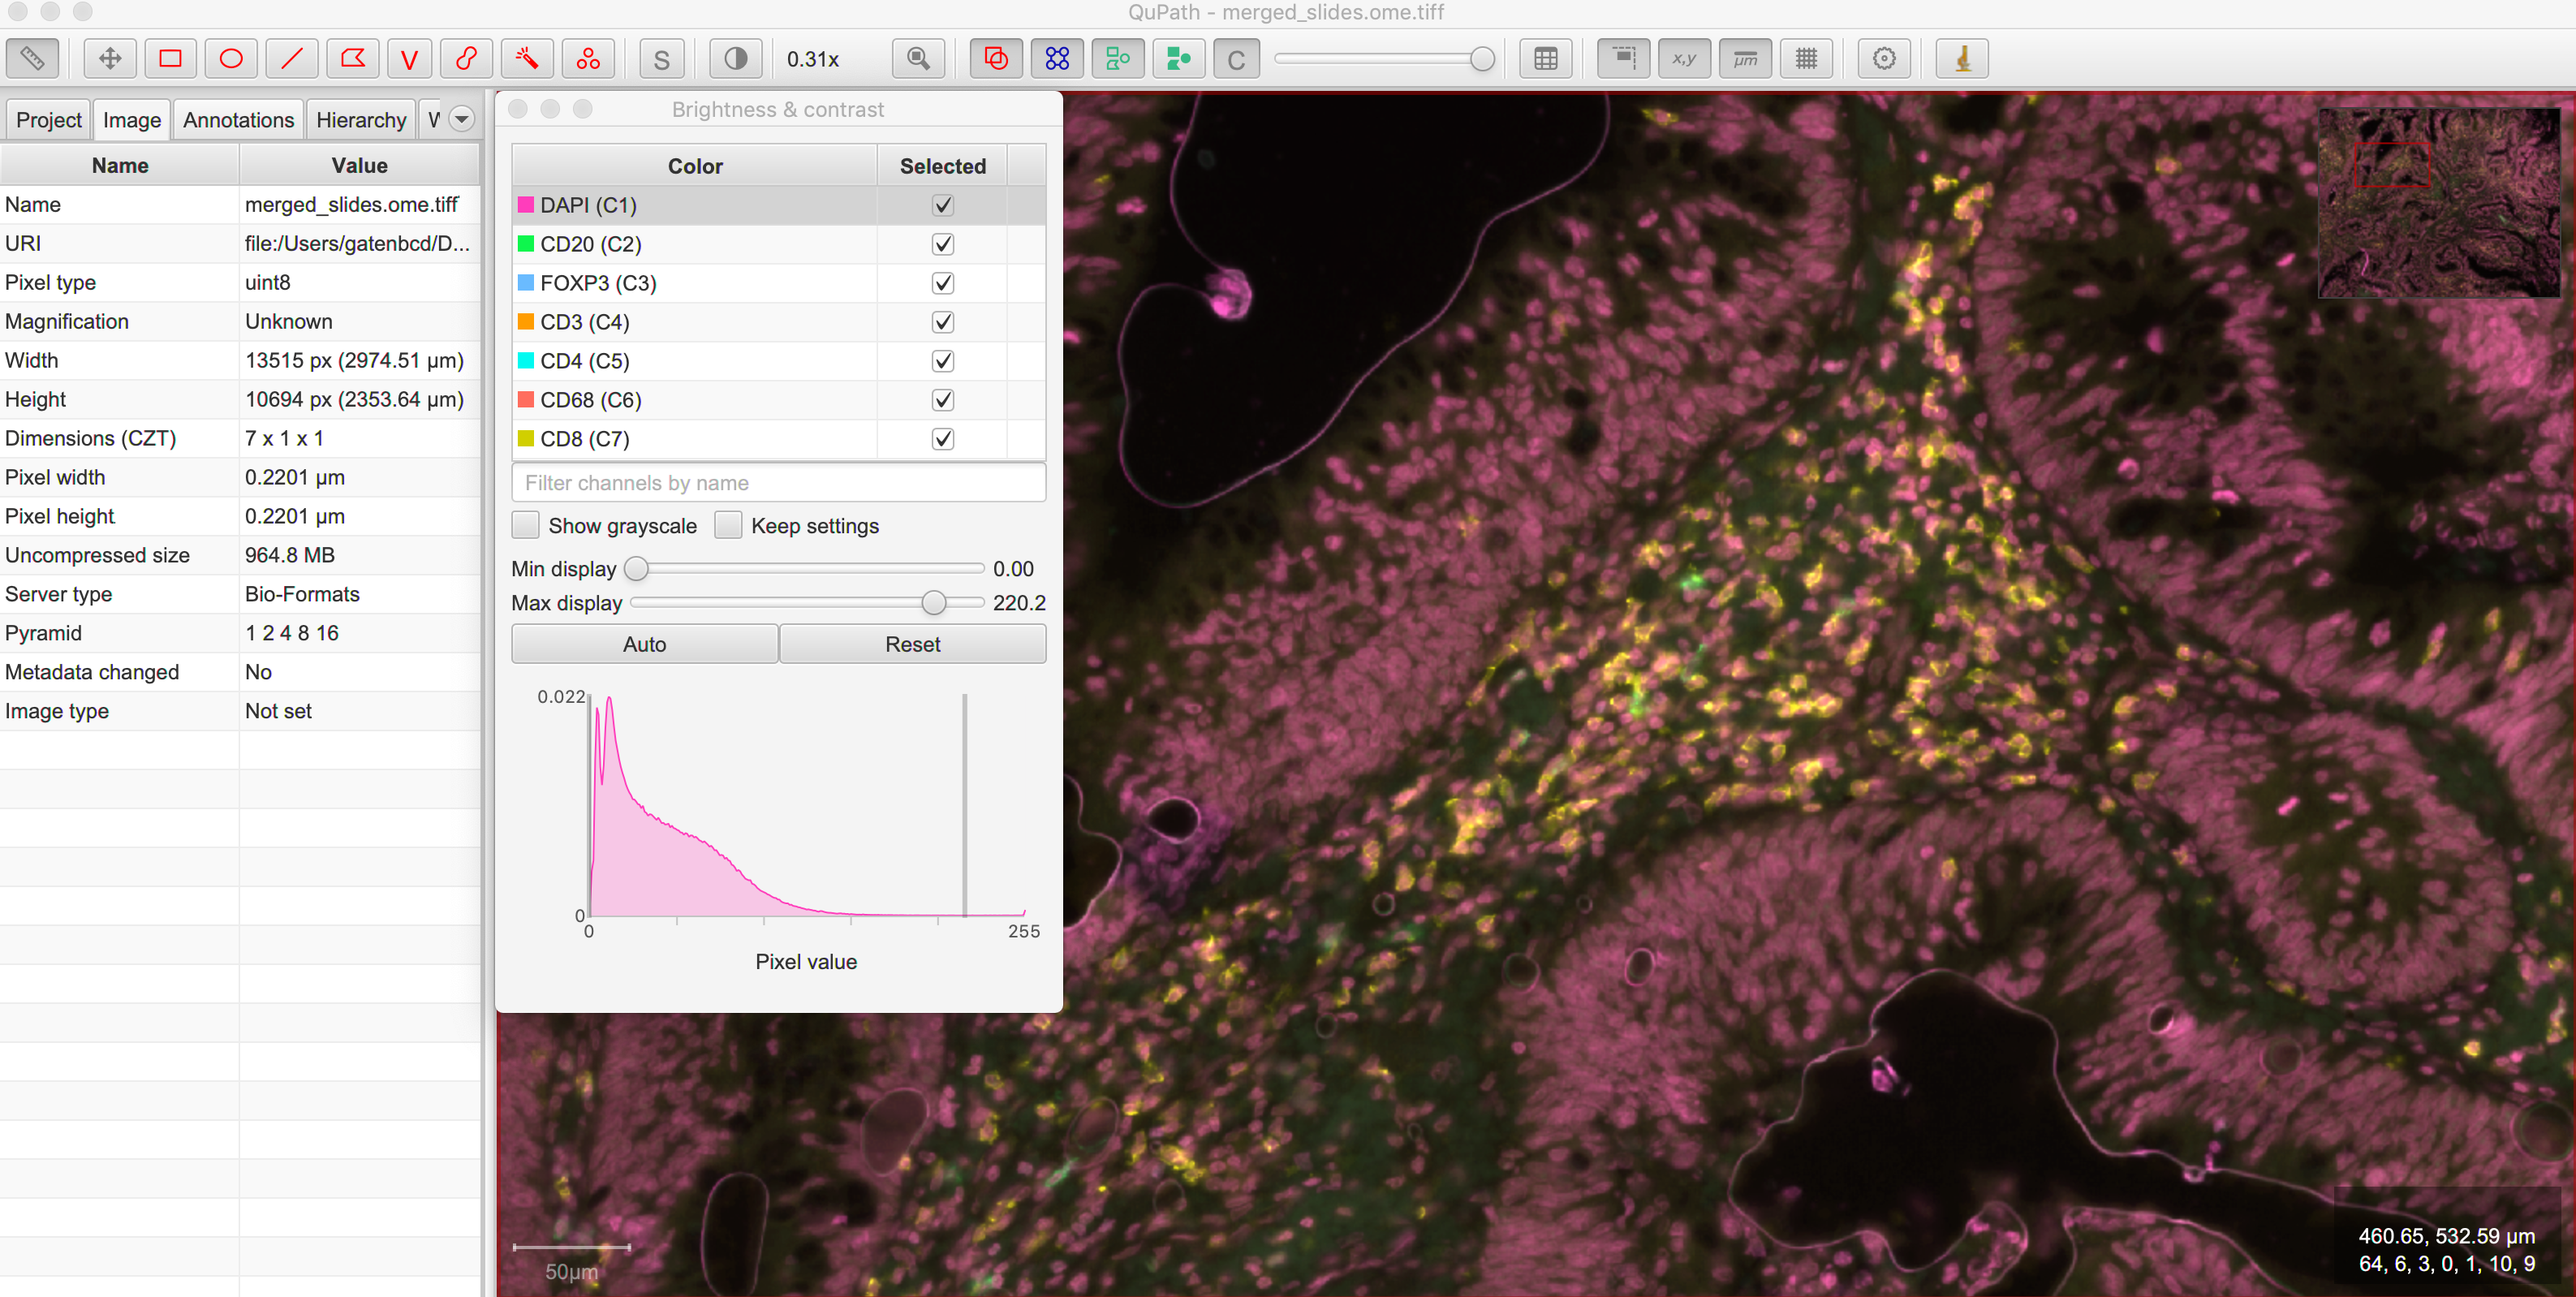
Reading slides
VALIS also provides functions to read images/slides using libvips, Bio-Formats, or Openslide. These reader objects also contain some of the slide’s metatadata. The slide2image method will return a numpy array of the slide, while slide2vips will return a pyvips.Image, which is ideal when working with very large images. The user can specify the pyramid level, series, and bounding box, but the default is level 0, series 0, and the whole image. See slide_io.SlideReader and slide_io.MetaData for more details.
from valis import slide_io
slide_src_f = "path/to/slide.svs
series = 0

# Get reader for slide format
reader_cls = slide_io.get_slide_reader(slide_src_f, series=series) #Get appropriate slide reader class
reader = reader_cls(slide_src_f, series=series) # Instantiate reader

#Get size of images in each pyramid level (width, height)
pyramid_level_sizes_wh = reader.metadata.slide_dimensions

# Get physical units per pixel
pixel_physical_size_xyu = reader.metadata.pixel_physical_size_xyu

# Get channel names (None if image is RGB)
channel_names = reader.metadata.channel_names

# Get original xml metadata
original_xml = reader.metadata.original_xml

# Get smaller pyramid level 3 as a numpy array
img = reader.slide2image(level=3)

# Get full resolution image as a pyvips.Image
full_rez_vips = reader.slide2vips(level=0)

# Slice region of interest from level 0 and return as numpy array
roi_img = reader.slide2image(level=0, xywh=(100, 100, 500, 500))

slide_io.kill_jvm()
Warping slides with custom transforms
VALIS provides the functions to apply transformations to slides and then save the registered slide, meaning the user can provide their own transformation parameters. In this example, src_f is the path to the file associated with the slide, M is the inverse rigid registration matrix, and bk_dxdy is a list of the backwards non-rigid displacement fields (i.e. [dx, dy]), each found by aligning the fixed/target image to the moving/source image.
One may also need to provide the shape of the image (row, col) used to find the rigid transformation (if applicable), which is the transformation_src_shape_rc argument. In this case, it is the shape of the processed image that was used during feature detection. Similarly, transformation_dst_shape_rc is the shape of the registered image, in this case the shape of the processed image after being warped. Finally, aligned_slide_shape_rc is the shape of the warped slide. Please see slide_io.warp_and_save_slide for more information and options, like defining background color, crop area, etc..
from valis import slide_io

# Read and warp the slide #
slide_src_f = "path/to/slide
dst_f = "path/to/write/slide.ome.tiff"
series = 0
pyramid_level=0

slide_io.warp_and_save_slide(src_f=slide_src_f,
                             dst_f=dst_f,
                             transformation_src_shape_rc=processed_img_shape_rc,
                             transformation_dst_shape_rc=small_registered_img_shape_rc,
                             aligned_slide_shape_rc=aligned_slide_shape_rc,
                             level=pyramid_level,
                             series=series,
                             M=M,
                             dxdy=dxdy)


slide_io.kill_jvm()
Using non-defaults
The defaults used by VALIS work well, but one may wish to try some other values/class, and/or create their own affine optimizer, feature detector, non-rigid registrar, etc… This examples shows how to conduct registration using non-default values
from valis import registration, feature_detectors, non_rigid_registrars, affine_optimizer
slide_src_dir = "path/to/slides"
results_dst_dir = "./slide_registration_example_non_defaults"
registered_slide_dst_dir = "./slide_registration_example/registered_slides"


# Select feature detector, affine optimizer, and non-rigid registration method.
# Will use KAZE for feature detection and description
# SimpleElastix will be used for non-rigid warping and affine optimization
feature_detector_cls = feature_detectors.KazeFD
non_rigid_registrar_cls = non_rigid_registrars.SimpleElastixWarper
affine_optimizer_cls = affine_optimizer.AffineOptimizerMattesMI

# Create a Valis object and use it to register the slides in slide_src_dir
registrar = registration.Valis(slide_src_dir, results_dst_dir,
                               feature_detector_cls=feature_detector_cls,
                               affine_optimizer_cls=affine_optimizer_cls,
                               non_rigid_registrar_cls=non_rigid_registrar_cls)


rigid_registrar, non_rigid_registrar, error_df = registrar.register()

registration.kill_jvm() # Kill the JVM
Change Log
Version 1.0.0rc11 (August 26, 2022)
Fixed bug when providing rigid transformations (Issue 14, https://github.com/MathOnco/valis/issues/14).
Can now warp one image onto another, making it possible to transfer annotations using labeled images (Issue 13 https://github.com/MathOnco/valis/issues/13). This can be done using a Slide object’s
warp_img_from_tomethod. See example in examples/warp_annotation_image.pyImageProcesserobjects now have acreate_maskfunction that is used to build the masks for rigid registration. These are then used to create the mask used for non-rigid registration, where they are combined such that the final mask is where they overlap and/or touch.Non-rigid registration performed on higher resolution version of the image. The area inside the non-rigid mask is sliced out such that it encompasses the area inside the mask but has a maximum dimension of
Valis.max_non_rigid_registartion_dim_px. This can improve accuracy when the tissue is only a small part of the image. If masks aren’t created, this region will be where all of the slides overalp.Version used to submit results to the ACROBAT Grand Challenge. Code used to perform registration can be found in examples/acrobat_grand_challenge.py. This example also shows how to use and create a custom
ImageProcesserand perform micro-registration with a mask.
Version 1.0.0rc10 (August 11, 2022)
Fixed compatibility with updated interpolation package (Issue 12).
Version 1.0.0rc9 (August 4, 2022)
Reduced memory usage for micro-registration and warping. No longer copying memory before warping, and large displacement fields saved as .tiff images instead of .vips images.
Reduced unwanted accumulation of displacements
viz.draw_matchesnow returns an image instead of a matplotlib pyplotPull request 9-11 bug fixes (many thanks to crobbins327 and zindy): Not converting uint16 to uint8 when reading using Bio-Formats or pyvips; fixed rare error when filtering neighbor matches;
viz.get_gridconsistent on Linux and Windows; typos.
Version 1.0.0rc8 (July 1, 2022)
Now compatible with single channel images. These images are treated as immunofluorescent images, and so custom pre-processing classes and arguments should be passed to
if_processing_clsandif_processing_kwargsof theValis.registermethod. The current method will perform adaptive histogram equalization and scales the image to 0-255 (seepreprocessing.ChannelGetter). Also, since it isn’t possible to determine if the single channel image is a greyscale RGB (light background) or single channel immunofluorescence (or similar with dark background), the background color will not be estimated, meaning that in the registered image the area outside of the warped image will be black (as opposed to the estimated background color). Tissue masks will still be created, but if it seems they are not covering enough area then try settingcreate_masksto False when initializing theValisobject.
Version 1.0.0rc7 (June 27, 2022)
Can set size of image to be used for non-rigid registration, which may help improve aligment of micro-architectural structures. However this will increase the amount of time it takes to perform non-rigid registration, and will increase amount of memory used during registration, and the size of the pickled :code: Valis object. To change this value, set the
max_non_rigid_registartion_dim_pxparameter when initializing theValisobject.Can now do a second non-rigid registartion on higher resolution images, including the full resolution one. This can be done with the
Valis.register_micro. If the images are large, they will be sliced into tiles, and then each tile registered with one another. The deformation fields will be saved separately as .vips images within the data folder.Added
registration.load_registrarfunction to open aValisobject. This should be used instead of pickle.load.Creating and applying tissue masks before registration. This improves image normalization, reduces the number of poor feature matches, and helps remove unwanted non-rigid deformations (especially around the image edges), all of which improve alignment accuracy. This step can be skipped by setting
create_masksto False when initializing theValisobject.Now possible to directly non-rigidly align to the reference image specified by
reference_img_f. This can be done by settingalign_to_referenceto True when initializing theValisobject. The default is False, which means images will be aligned serially towards the reference image. This option is also available withValis.register_micro, meaning that one could do a second alignment, but aligning all directly to a reference image.RANSAC filtered matches found for rigid registration undergo second round of filtering, this time using Tukey’s method to remove matches whose distance after being warped would be considered outliers.
Now have option off whether or not to compose non-rigid transformations. This can be set specifying the
compose_non_rigidargument when initialzing the Valis object.Can provide rigid transformation matrices by passing in a dictionary to the
do_rigidparameter when initializing theValisobject. Settingdo_rigidto False will completely skip the rigid registration step. See the documentation for initializing the Valis object for more details.Added examples of how to read slides and use custom transforms
Benchmarked using ANHIR Grand Challenge dataset and posted results on leaderboard.
bioformats_jar has been deprecated, so added support for its replacement, scyjava. However, the default behavior will be to use the bioformats_jar JAR file if it’s already been installed. One can also now specify the JAR file when calling
init_jvm.
Version 1.0.0rc6 (April 18, 2022)
More accurate color mixing with fewer artifacts. Affects overlap images and pseudo-colored multi-channel images.
Initializing ‘is_flattended_pyramid’ with False. Pull request #6
Reformatting flattened pyramids to have same datatype as that in metadata.
Saving all images using pyvips. Should be faster.
Using Bio-Formats to read non-RGB ome-tiff. Addresses an issue where converting non-RGB ome-tiff to numpy was very slow.
Version 1.0.0rc5 (April 5, 2022)
Can provide a reference image that the others will be aligned towards. To do this, when initializinig the Valis object, set the
reference_img_fargument to be the file name of the reference image. If not set by the user, the reference image will be set as the one at the center of the ordered image stackBoth non-rigid and rigid now align towards a reference image, meaning that reference image will have neither rigid nor non-rigid transformations applied to it.
Two cropping methods. First option is to crop seach registered slides to contain only the areas where all registered images overlap. The second option is to crop the registered slide to contain only the area that intersects with the reference image. It is also possible to not crop an image/slide.
Images are now cropped during the warp, not after, and so is now faster and requires less memory. For example, on a 2018 MacBook Pro with a 2.6 GHz Intel Core i7 processor, it takes 2-3 minutes to warp and save a 41399 x 43479 RGB image.
Warping of images and slides done using the same function, built around pyvips. Faster, more consistent, and should prevent excessive memory usage.
Fixed bug that caused a crash when warping large ome.tiff images.
Read slides and images using pyvips whenever possible.
Background color now automatically set to be same as the brightest (IHC) or darkest (IF) pixel in the image. Because of this, the “bg_color” argument in the slide warping functions was removed.
Reduced accumulation of unwanted non-rigid deformations
Displacement fields drawn on top of non-rigid registered image to help determine where the deformations occured.
If a slide has multiple series, and a series is not specficed, the slide reader will read the series containing the largest image.
License
MIT © 2021-2022 Chandler Gatenbee
Release history Release notifications | RSS feed


Download files
Download the file for your platform. If you're not sure which to choose, learn more about installing packages.
Source Distribution
Built Distribution
Filter files by name, interpreter, ABI, and platform.
If you're not sure about the file name format, learn more about wheel file names.
Copy a direct link to the current filters
File details
Details for the file valis_wsi-1.0.0rc11.tar.gz.
File metadata
- Download URL: valis_wsi-1.0.0rc11.tar.gz
- Upload date:
- Size: 183.7 kB
- Tags: Source
- Uploaded using Trusted Publishing? No
- Uploaded via: twine/4.0.1 CPython/3.9.7
File hashes
| Algorithm | Hash digest | |
|---|---|---|
| SHA256 |
b20a14728c2fb99220c4d5e56afefb2b1f9f72f5b14f5671b61d601fa04de72e
|
|
| MD5 |
3cc06ccc6496f0e6a73d38254ff502e5
|
|
| BLAKE2b-256 |
eca700e545e17f02c0ac41761038d067b34a742fa2dee3b17588f8cf3674975b
|
File details
Details for the file valis_wsi-1.0.0rc11-py3-none-any.whl.
File metadata
- Download URL: valis_wsi-1.0.0rc11-py3-none-any.whl
- Upload date:
- Size: 165.3 kB
- Tags: Python 3
- Uploaded using Trusted Publishing? No
- Uploaded via: twine/4.0.1 CPython/3.9.7
File hashes
| Algorithm | Hash digest | |
|---|---|---|
| SHA256 |
c6d16dbeb46dce85e52b6ee27756014f13dbf7537df0ed86e91f4280c2a8a3d7
|
|
| MD5 |
b32ce70349edd958fe1fb77e7340be36
|
|
| BLAKE2b-256 |
fdd8876e453d8777e9b80040dd54be02c390a9d1cd4a084792e4c89b4b902306
|


