
Waldmann EnOcean bridge
Control Waldmann luminaires that have a TALK MODUL EnOcean wireless module from Home Assistant, using the bidirectional EnOcean profile EEP D2-41-00 (Status Data, Sensor Data, Maintenance Data, Light Control).
waldmann-bridge runs as a service with an EnOcean USB stick and connects to
Home Assistant over MQTT. It publishes MQTT Discovery configs, so after you pair
a luminaire it shows up in Home Assistant automatically, with a light for each
head plus its sensors. A small web UI takes care of pairing, configuration and
debugging.
There's also a waldmann command line tool built on the same code, see
docs/cli.md.
The EnOcean part talks ESP3 to the USB stick through pyserial and implements
D2-41-00 and the UTE teach-in directly from the EEP tables. (No dependencies on
python-enocean, EEP.xml and/or BeautifulSoup.)
This is an independent project. It is not affiliated with, endorsed by or supported by Waldmann GmbH & Co. KG. "Waldmann" and "TALK MODUL" are trademarks of their owner.
Hardware
| USB stick | EnOcean USB300/USB500 or similar, ESP3 at 57600 baud, 868.3 MHz in the EU |
| Luminaire | Waldmann YARA family (or KIRK ceiling sensor) with TALK MODUL EnOcean |
| Manual | Waldmann 405488810 "TALK MODUL EnOcean", chapter 7 |
| Profile | D2-41-00 |
The serial port is detected automatically (/dev/cu.usbserial-*,
/dev/ttyUSB*, /dev/serial/by-id/*EnOcean*). Use --port to set it
yourself.
Install
Run it as a service on a Raspberry Pi or any other Linux machine that's always on:
sudo python3 -m venv /opt/waldmann-enocean
sudo /opt/waldmann-enocean/bin/pip install "waldmann-enocean[bridge]"
sudo /opt/waldmann-enocean/bin/waldmann-bridge --install-service
The last command installs a systemd service and starts it. The service runs as
its own unprivileged user, and keeps its config and pairings in
/var/lib/waldmann-enocean. If python3 -m venv fails, run
sudo apt install python3-venv first.
A password for the web UI is generated on the first run and written to the log:
sudo journalctl -u waldmann-enocean | grep -A3 "password generated"
Open http://<host>:8099/, log in and enter your MQTT broker under
Settings. No command-line options are needed. The broker defaults to
127.0.0.1:1883 and everything else can be set in the UI. MQTT changes are
applied right away, only changing the serial port or the web port needs a
restart.
The web UI uses plain HTTP. That's fine on your own network, but put a reverse proxy with TLS in front of it if you want to reach it from outside.
To update to a new version:
sudo /opt/waldmann-enocean/bin/pip install -U "waldmann-enocean[bridge]"
sudo systemctl restart waldmann-enocean
To remove the service (your config and pairings are kept):
sudo systemctl disable --now waldmann-enocean
sudo rm /etc/systemd/system/waldmann-enocean.service
To try it on a laptop first:
pipx install "waldmann-enocean[bridge]"
waldmann-bridge --mqtt-host 192.168.1.10
Requires Python 3.10 or newer. The CLI only needs pyserial, the [bridge]
extra adds paho-mqtt.
Pairing
The luminaire sends a UTE teach-in telegram and the bridge answers it, as described in chapter 7.2 of the TALK MODUL manual. (Chapter 6.1 is the teach-in for RPS switches, which doesn't work for VLD.)
-
Click Start pairing on the Status tab. You can also use the Pair new luminaire button in Home Assistant, or publish to
<base>/bridge/pair/set. -
Open the service flap on the column (a paper clip works) and briefly press key C on the wireless module:
- press once to send the teach-in of profile 1
- press twice to send the teach-in of profile 2
Use the profile that has the VLD telegram enabled in the LIGHT ADMIN app. If only profile 1 is set to VLD, a single short press is enough. A profile set to RPS sends a switch teach-in instead, which doesn't give you two-way control. The teach-in key on a luminaire head works the same way.
-
The bridge answers the teach-in, saves the luminaire and publishes its discovery configs. The device then appears in Home Assistant.
Nothing happening, or does the luminaire send data but ignore your commands? See troubleshooting.
What you get in Home Assistant
Each luminaire becomes a device, with for every head:
- a light with on/off, brightness, color temperature and the VTL chronotypes as effects
- a select for the VTL chronotype (off, normal, owl, lark)
- a binary sensor for presence
- sensors for illuminance, temperature, humidity and the maintenance counters (only the ones your luminaire actually reports)
- a Refresh button to poll the luminaire
There's also a bridge device with a Pair new luminaire button.
When you set a color temperature, the bridge also turns VTL off, otherwise the luminaire overrides it. To turn VTL back on, pick VTL normal, VTL owl or VTL lark from the light's effect menu, or use the VTL select. Brightness changes keep the head's current mode and VTL setting. See Caveats for why.
Web UI
The web UI runs on port 8099 and needs a login. You can change the password
under Settings or with --web-password. If you've forgotten it, set a new
one for the service like this:
sudo /opt/waldmann-enocean/bin/waldmann-bridge \
    --config /var/lib/waldmann-enocean/config.json --web-password NEW-PASSWORD
sudo systemctl restart waldmann-enocean
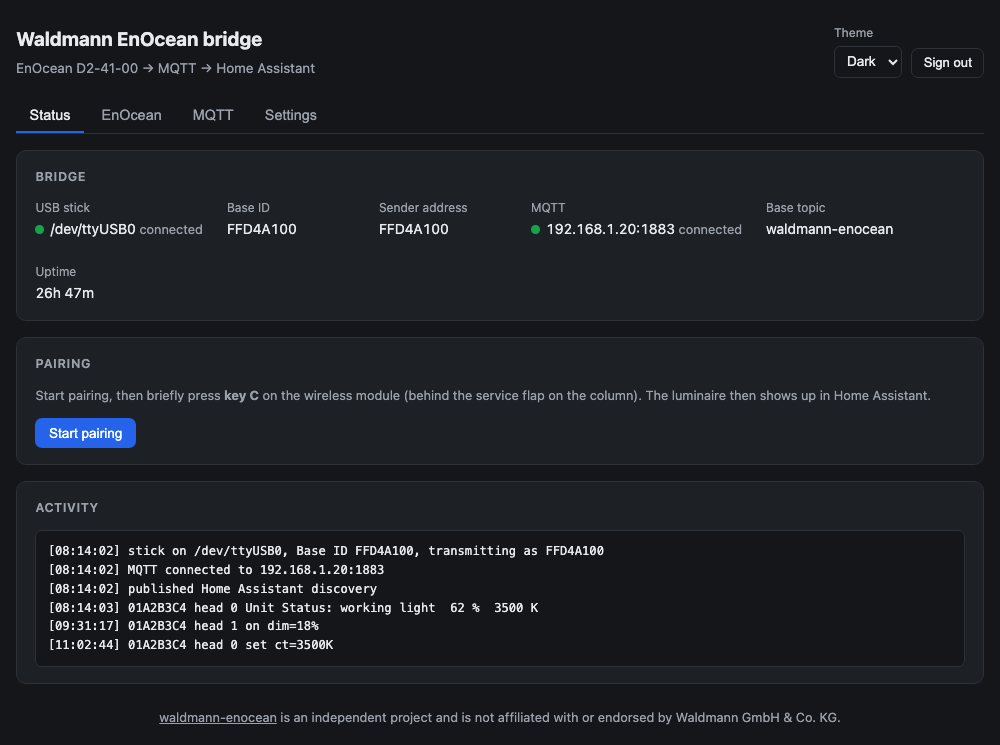
Status shows the USB stick, Base ID, MQTT connection and an activity log, and has the Start pairing button.
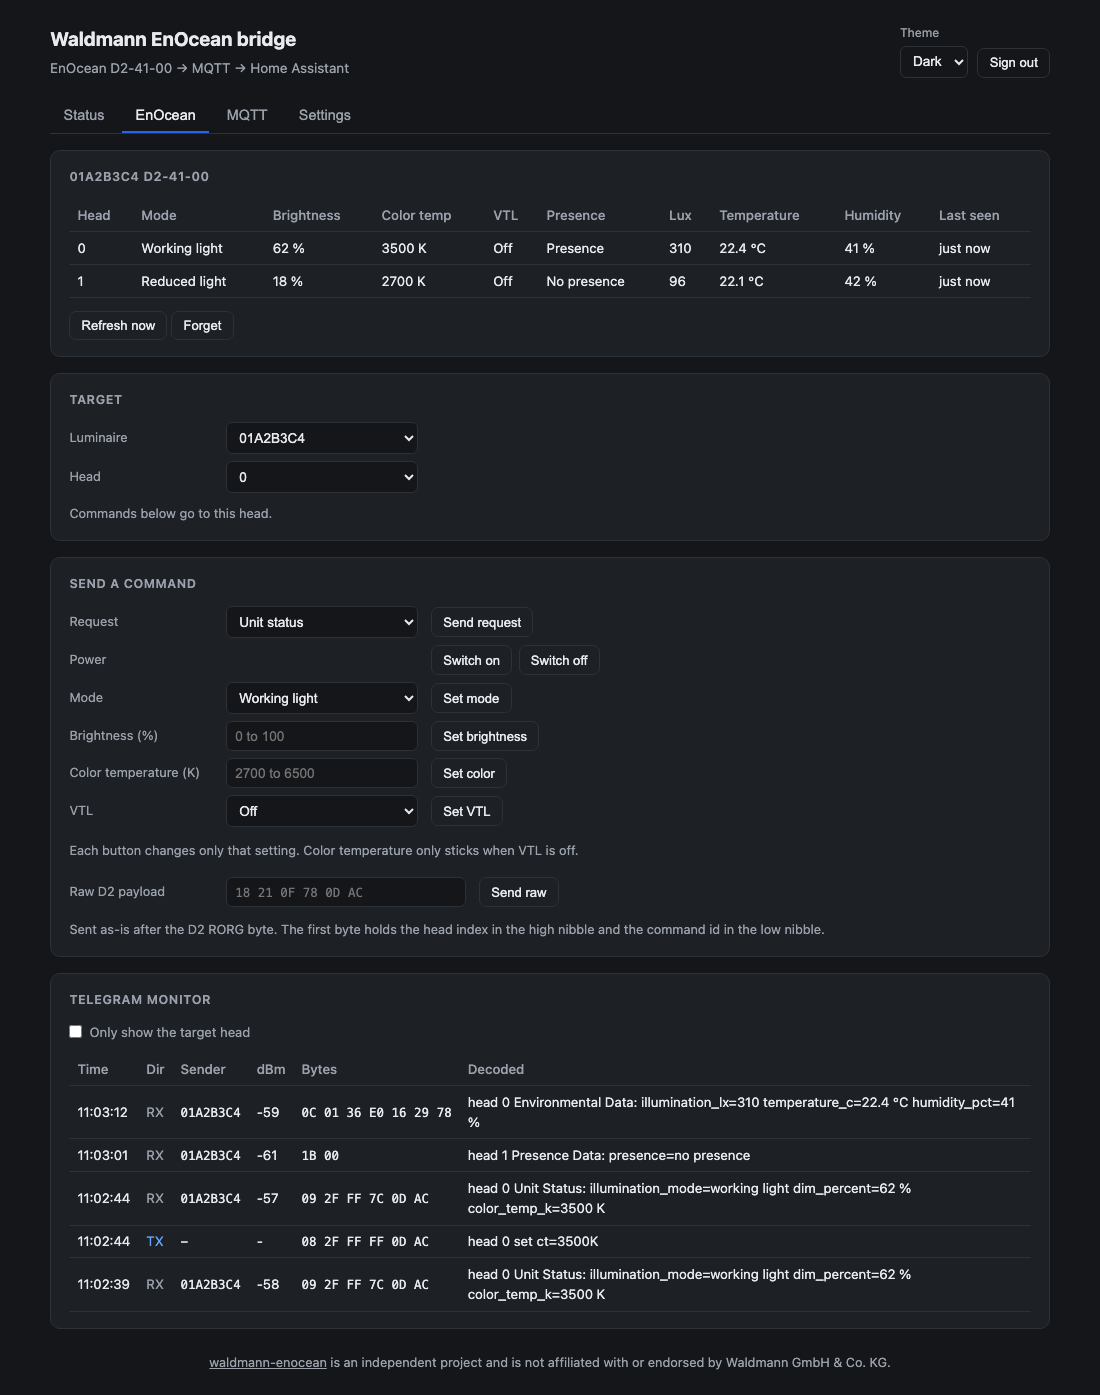
EnOcean (the screenshot at the top) shows the live state of every head. Pick a luminaire and head to switch it on or off, send a request, or change mode, brightness, color temperature or VTL one at a time. You can also send raw D2 payloads, and the telegram monitor shows everything that's sent and received, optionally filtered to the selected head.
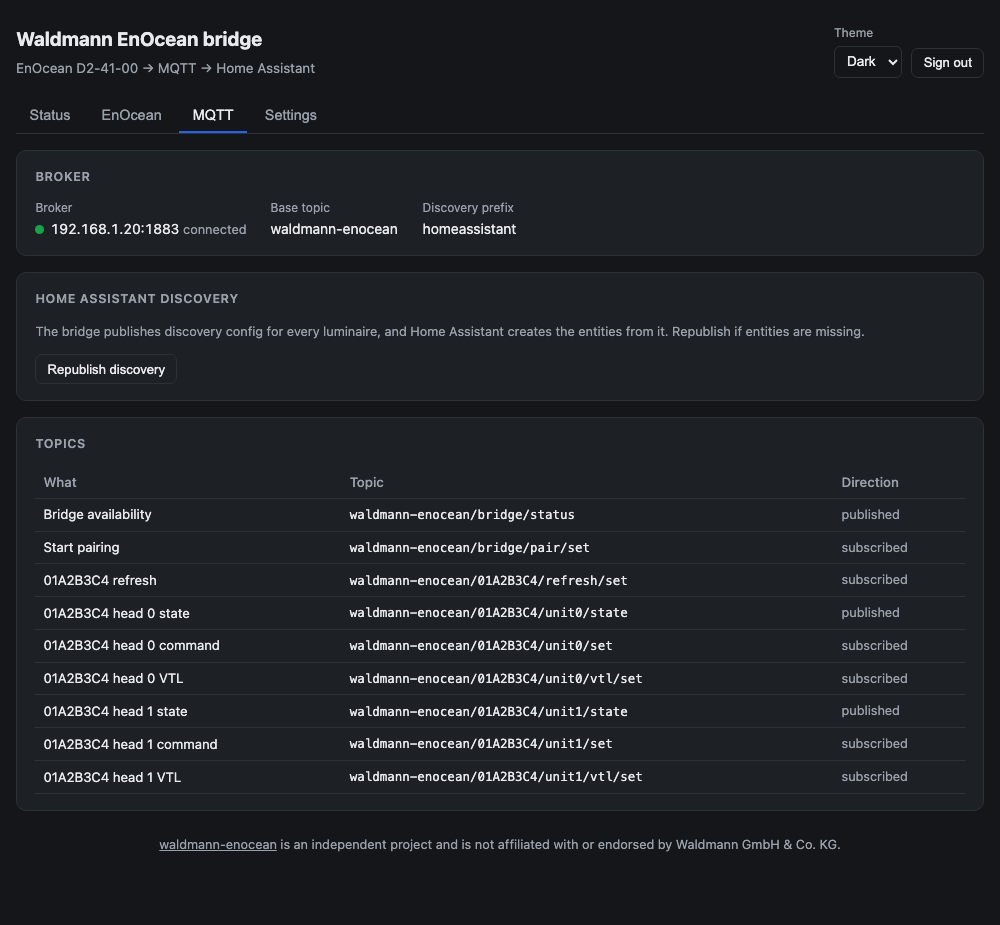
MQTT shows the broker connection, base topic and discovery prefix, all the topics the bridge uses, and a button to republish discovery.
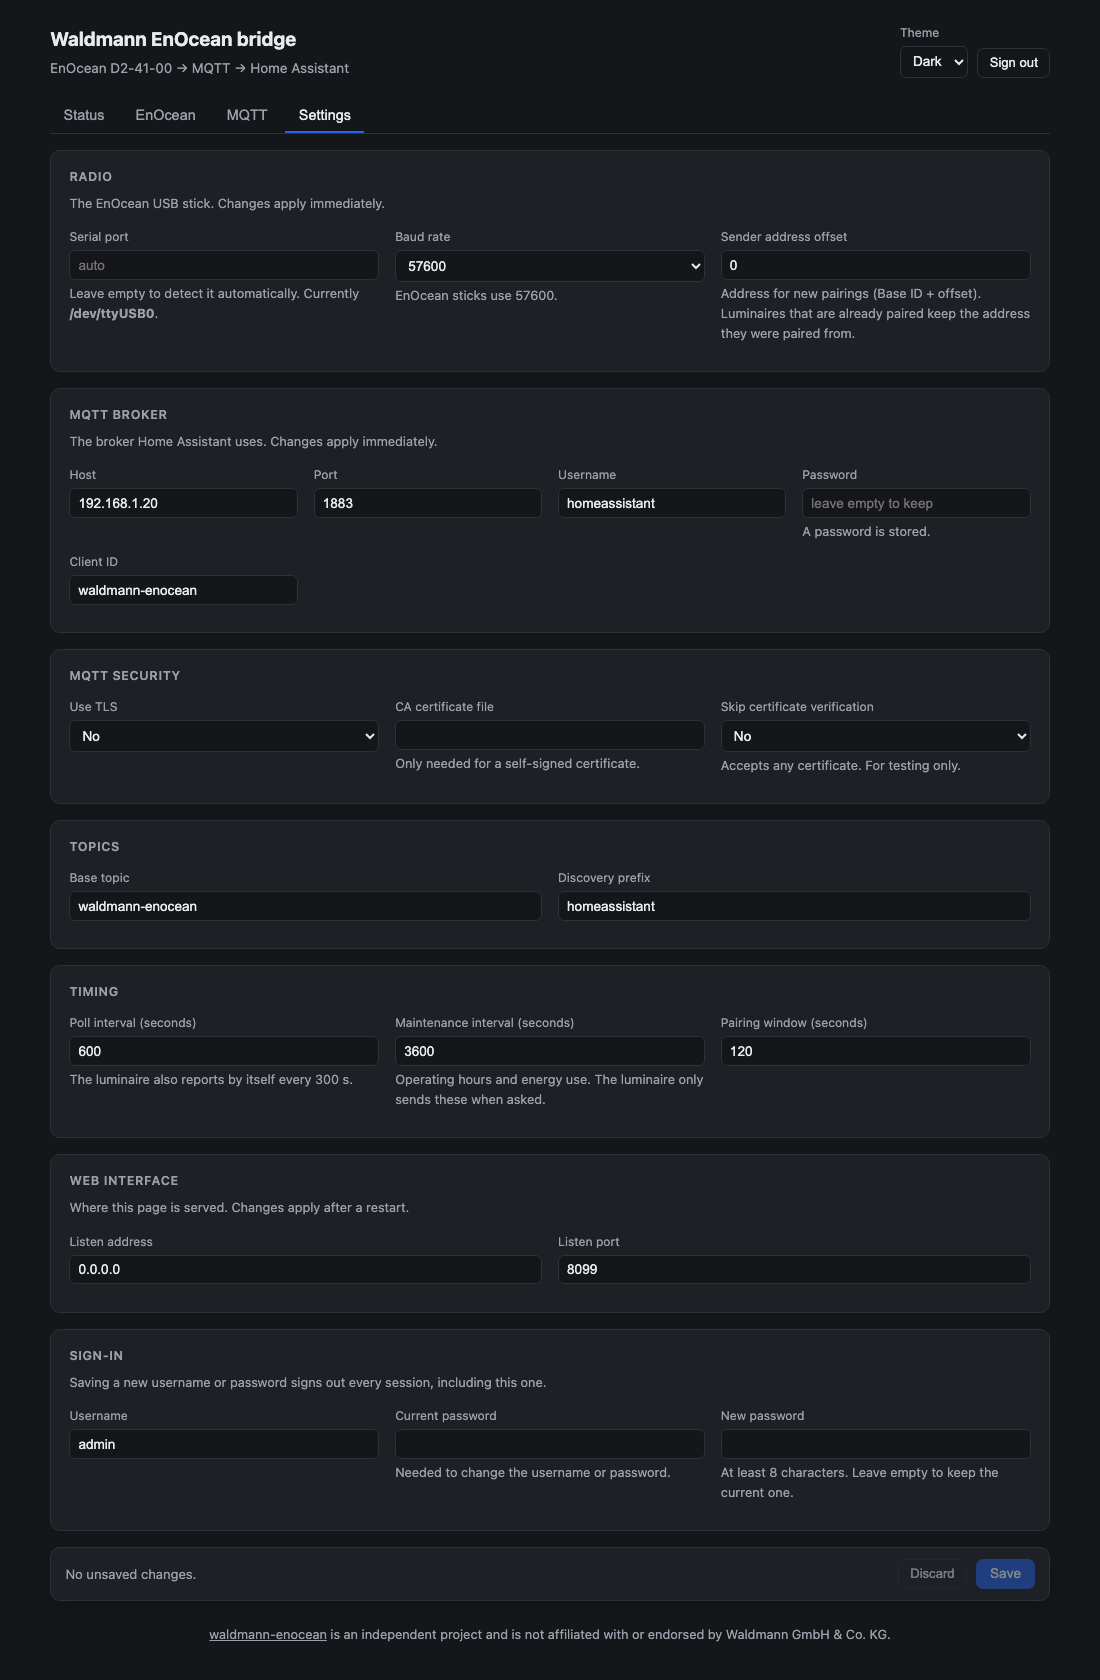
Settings covers the USB stick, MQTT broker and TLS, topics, timing, the web server and the sign-in.
Caveats
A few things on the luminaire side can make it look like a command didn't work:
- Color temperature only sticks with VTL off. With VTL on, the chronotype sets the color temperature itself. The bridge turns VTL off when you set a color temperature from Home Assistant.
- Brightness needs an illumination mode in the same telegram, otherwise the luminaire ignores it. The bridge and the CLI send the head's current mode along, so a head in reduced light stays in reduced light and a head that's off turns on in working light.
- Brightness also needs daylight control turned off in the Waldmann User app. With daylight control on, the luminaire keeps regulating to its own light level.
More details in docs/protocol.md.
Topics
waldmann-enocean/bridge/status          online | offline (also the LWT)
waldmann-enocean/bridge/pair/set        any payload starts pairing
waldmann-enocean/<id>/unit<N>/state     JSON state, retained
waldmann-enocean/<id>/unit<N>/set       Home Assistant JSON light command
waldmann-enocean/<id>/unit<N>/vtl/set   off | normal | owl | lark
waldmann-enocean/<id>/refresh/set       poll this luminaire now
You can change the base topic in the settings, and the MQTT tab shows the actual topics for your luminaires. If you change the base topic after Home Assistant has picked up your luminaires, you'll end up with orphaned entities, see docs/internals.md.
Where things are stored
The config and the pairings are kept together in one directory:
~/.waldmann-enocean/config.json     broker, topics, web login
~/.waldmann-enocean/devices.json    paired luminaires
Make a backup of devices.json. Without it you lose your pairings, and the
devices disappear from Home Assistant.
The directory is picked in this order:
--config/--store$WALDMANN_ENOCEAN_HOME$STATE_DIRECTORY(set by systemd, so the service uses/var/lib/waldmann-enocean)~/.waldmann-enocean
The luminaire remembers the pairing by the Base ID of the USB stick. If you move
the stick to another machine, copy devices.json along and it keeps working, or
just pair again.
Documentation
| docs/cli.md | the waldmann command line and RPS switch emulation |
| docs/protocol.md | how D2-41-00 behaves on a TALK MODUL, and troubleshooting |
| docs/internals.md | notes on how the bridge works |
License
MIT, see LICENSE.
1 maintainer

Metadata
1 maintainer
Release files for waldmann-enocean 0.1.0
For a detailed explanation of source distributions (sdists) and built distributions (wheels), please see the package formats documentation.
Source distribution (sdist)
| File | Size | Uploaded | |
|---|---|---|---|
| waldmann_enocean-0.1.0.tar.gz | 571.5 kB | Details |
Built distribution (wheel)
| File | Interpreter | ABI | Platform | Reset |
|---|---|---|---|---|
| waldmann_enocean-0.1.0-py3-none-any.whl | Python 3 | none | any | Details |
Total release size: 634.0 kB
Release files / waldmann_enocean-0.1.0.tar.gz
| Download URL | waldmann_enocean-0.1.0.tar.gz |
|---|---|
| Size | 571.5 kB |
| Tags | Source |
|
SHA-256 checksum How to use checksums |
9a296c80e8c50c8d7cc58bf3f99283baef366a7a9693df69e313297852ea7dff
|
|
BLAKE2b-256 checksum How to use checksums |
0e8b89d1f7f6dc07f25650670919660597ed0eb7456ddb11d5ef9e0e23474ee1
|
| Upload date | |
|
Uploaded using Trusted Publishing? What is trusted publishing? |
Yes |
| Uploaded via |
twine/7.0.0 CPython/3.13.14
|
Provenance
Provenance describes where a file came from. On PyPI, provenance is shared via attestations, which provide a verifiable record of the build or publishing details. View details, limitations and caveats.


PyPI Publish Attestation
PyPI verified that this artifact, at this checksum, originated from the publisher listed below.
Signed by GitHub Actions, verified by PyPI on Sep 27, 2026.
Transparency logRelease files / waldmann_enocean-0.1.0-py3-none-any.whl
| Download URL | waldmann_enocean-0.1.0-py3-none-any.whl |
|---|---|
| Size | 62.4 kB |
| Tags | Python 3 |
|
SHA-256 checksum How to use checksums |
058b636e5935a6b846ae1db26dafd22272461ad08761a108cd9b4d4c73e006b8
|
|
BLAKE2b-256 checksum How to use checksums |
dcc362f7db9ce67250d49cfb89a74a5412a6fd5c76a593c95d191df12deda074
|
| Upload date | |
|
Uploaded using Trusted Publishing? What is trusted publishing? |
Yes |
| Uploaded via |
twine/7.0.0 CPython/3.13.14
|
Provenance
Provenance describes where a file came from. On PyPI, provenance is shared via attestations, which provide a verifiable record of the build or publishing details. View details, limitations and caveats.
PyPI Publish Attestation
PyPI verified that this artifact, at this checksum, originated from the publisher listed below.
Signed by GitHub Actions, verified by PyPI on Sep 27, 2026.
Transparency log













