Wappalyzer-based tech stack detection library
Verified details
These details have been verified by PyPIProject links
GitHub Statistics
Maintainers

Project description
Wappalyzer Next
This project is a command line tool and python library that uses Wappalyzer extension (and its fingerprints) to detect technologies. Other projects that emerged after the discontinuation of the official open-source project are using outdated fingerprints and lack accuracy when used on dynamic web apps. This project bypasses those limitations.
Installation
Before installing wappalyzer, you will need to install Firefox and geckodriver. Below are detailed steps for setting up geckodriver but you may use google/youtube for help.
Setting up geckodriver
Step 1: Download GeckoDriver
- Visit the official GeckoDriver releases page on GitHub:
https://github.com/mozilla/geckodriver/releases - Download the version compatible with your system:
- For Windows:
geckodriver-vX.XX.X-win64.zip - For macOS:
geckodriver-vX.XX.X-macos.tar.gz - For Linux:
geckodriver-vX.XX.X-linux64.tar.gz
- For Windows:
- Extract the downloaded file to a folder of your choice.
Step 2: Add GeckoDriver to the System Path
To ensure Selenium can locate the GeckoDriver executable:
- Windows:
- Move the
geckodriver.exeto a directory (e.g.,C:\WebDrivers\). - Add this directory to the system's PATH:
- Open Environment Variables.
- Under System Variables, find and select the
Pathvariable, then click Edit. - Click New and enter the directory path where
geckodriver.exeis stored. - Click OK to save.
- Move the
- macOS/Linux:
- Move the
geckodriverfile to/usr/local/bin/or another directory in your PATH. - Use the following command in the terminal:
sudo mv geckodriver /usr/local/bin/
Ensure/usr/local/bin/is in your PATH.
- Move the
Install as a command-line tool
pipx install wappalyzer
Install as a library
To use it as a library, install it with pip inside an isolated container e.g. venv or docker. You may also --break-system-packages to do a 'regular' install but it is not recommended.
Install with docker
Steps
- Clone the repository:
git clone https://github.com/s0md3v/wappalyzer-next.git
cd wappalyzer-next
- Build and run with Docker Compose:
docker compose up -d
- To scan URLs using the Docker container:
- Scan a single URL:
docker compose run --rm wappalyzer -i https://example.com
- Scan Multiple URLs from a file:
docker compose run --rm wappalyzer -i https://example.com -oJ output.json
For Users
Some common usage examples are given below, refer to list of all options for more information.
- Scan a single URL:
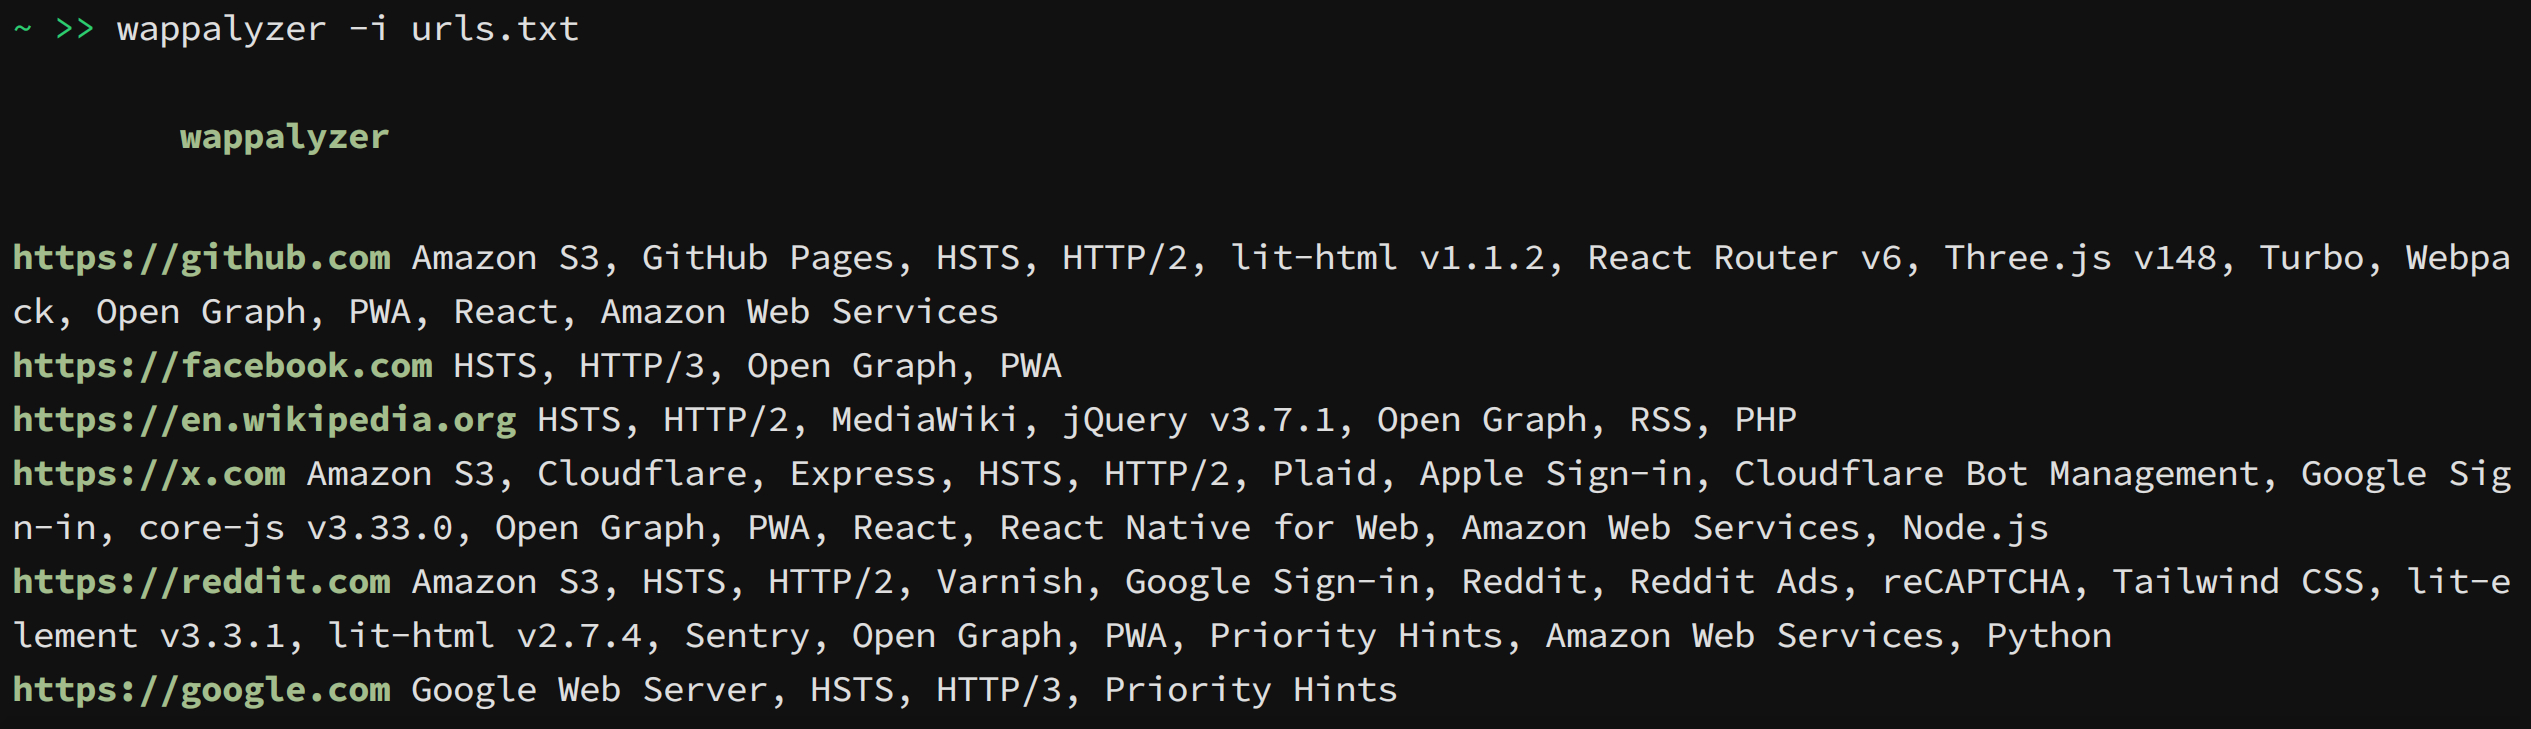
wappalyzer -i https://example.com - Scan multiple URLs from a file:
wappalyzer -i urls.txt -t 10 - Scan with authentication:
wappalyzer -i https://example.com -c "sessionid=abc123; token=xyz789" - Export results to JSON:
wappalyzer -i https://example.com -oJ results.json
Options
Note: For accuracy use 'full' scan type (default). 'fast' and 'balanced' do not use browser emulation.
-i: Input URL or file containing URLs (one per line)--scan-type: Scan type (default: 'full')fast: Quick HTTP-based scan (sends 1 request)balanced: HTTP-based scan with more requestsfull: Complete scan using wappalyzer extension
-t, --threads: Number of concurrent threads (default: 5)-oJ: JSON output file path-oC: CSV output file path-oH: HTML output file path-c, --cookie: Cookie header string for authenticated scans
For Developers
The python library is available on pypi as wappalyzer and can be imported with the same name.
Using the Library
The main function you'll interact with is analyze():
from wappalyzer import analyze

# Basic usage
results = analyze('https://example.com')

# With options
results = analyze(
    url='https://example.com',
    scan_type='full',  # 'fast', 'balanced', or 'full'
    threads=3,
    cookie='sessionid=abc123'
)
analyze() Function Parameters
url(str): The URL to analyzescan_type(str, optional): Type of scan to perform'fast': Quick HTTP-based scan'balanced': HTTP-based scan with more requests'full': Complete scan including JavaScript execution (default)
threads(int, optional): Number of threads for parallel processing (default: 3)cookie(str, optional): Cookie header string for authenticated scans
Return Value
Returns a dictionary with the URL as key and detected technologies as value:
{
  "https://github.com": {
    "Amazon S3": {"version": "", "confidence": 100, "categories": ["CDN"], "groups": ["Servers"]},
    "lit-html": {"version": "1.1.2", "confidence": 100, "categories": ["JavaScript libraries"], "groups": ["Web development"]},
    "React Router": {"version": "6", "confidence": 100, "categories": ["JavaScript frameworks"], "groups": ["Web development"]},
  "https://google.com" : {},
  "https://example.com" : {},
}}
FAQ
Why use Firefox instead of Chrome?
Firefox extensions are .xpi files which are essentially zip files. This makes it easier to extract data and slightly modify the extension to make this tool work.
What is the difference between 'fast', 'balanced', and 'full' scan types?
- fast: Sends a single HTTP request to the URL. Doesn't use the extension.
- balanced: Sends additional HTTP requests to .js files, /robots.txt and does DNS queries. Doesn't use the extension.
- full: Uses the official Wappalyzer extension to scan the URL in a headless browser.
Project details
Verified details
These details have been verified by PyPIProject links
GitHub Statistics
Maintainers
Release history Release notifications | RSS feed


Download files
Download the file for your platform. If you're not sure which to choose, learn more about installing packages.
Source Distribution
Built Distribution
Filter files by name, interpreter, ABI, and platform.
If you're not sure about the file name format, learn more about wheel file names.
Copy a direct link to the current filters
File details
Details for the file wappalyzer-1.0.20.tar.gz.
File metadata
- Download URL: wappalyzer-1.0.20.tar.gz
- Upload date:
- Size: 35.7 MB
- Tags: Source
- Uploaded using Trusted Publishing? Yes
- Uploaded via: twine/6.1.0 CPython/3.13.7
File hashes
| Algorithm | Hash digest | |
|---|---|---|
| SHA256 |
0a4aee1e87ee5780273467bc58d07632abcfbdc46a165b1e31a9ae1272e3e812
|
|
| MD5 |
e27814b6dc99c87761caf789ee82c928
|
|
| BLAKE2b-256 |
e3d11c627ba7e237f764030189b0d21b25024bd22604d6948d8cf95296b42cbc
|
Provenance
The following attestation bundles were made for wappalyzer-1.0.20.tar.gz:
Publisher:
pypi.yml on s0md3v/wappalyzer-next
-
Statement:
-
Statement type:
https://in-toto.io/Statement/v1 -
Predicate type:
https://docs.pypi.org/attestations/publish/v1 -
Subject name:
wappalyzer-1.0.20.tar.gz -
Subject digest:
0a4aee1e87ee5780273467bc58d07632abcfbdc46a165b1e31a9ae1272e3e812 - Sigstore transparency entry: 872433177
- Sigstore integration time:
-
Permalink:
s0md3v/wappalyzer-next@88ceb4873d4f14a3c44a1bb22c38c3db47919fe5 -
Branch / Tag:
refs/tags/1.0.20 - Owner: https://github.com/s0md3v
-
Access:
public
-
Token Issuer:
https://token.actions.githubusercontent.com -
Runner Environment:
github-hosted -
Publication workflow:
pypi.yml@88ceb4873d4f14a3c44a1bb22c38c3db47919fe5 -
Trigger Event:
push
-
Statement type:
File details
Details for the file wappalyzer-1.0.20-py3-none-any.whl.
File metadata
- Download URL: wappalyzer-1.0.20-py3-none-any.whl
- Upload date:
- Size: 35.8 MB
- Tags: Python 3
- Uploaded using Trusted Publishing? Yes
- Uploaded via: twine/6.1.0 CPython/3.13.7
File hashes
| Algorithm | Hash digest | |
|---|---|---|
| SHA256 |
ec438240409d77db45aeac6ff132f8ec89c52399d7a592b4998ecaa86768bade
|
|
| MD5 |
52c1046688f0a79138246b88a038b8f5
|
|
| BLAKE2b-256 |
82e67c1304db6b753354b755d43d988e692837d65861cfced2e33c2fa61b8a13
|
Provenance
The following attestation bundles were made for wappalyzer-1.0.20-py3-none-any.whl:
Publisher:
pypi.yml on s0md3v/wappalyzer-next
-
Statement:
-
Statement type:
https://in-toto.io/Statement/v1 -
Predicate type:
https://docs.pypi.org/attestations/publish/v1 -
Subject name:
wappalyzer-1.0.20-py3-none-any.whl -
Subject digest:
ec438240409d77db45aeac6ff132f8ec89c52399d7a592b4998ecaa86768bade - Sigstore transparency entry: 872433178
- Sigstore integration time:
-
Permalink:
s0md3v/wappalyzer-next@88ceb4873d4f14a3c44a1bb22c38c3db47919fe5 -
Branch / Tag:
refs/tags/1.0.20 - Owner: https://github.com/s0md3v
-
Access:
public
-
Token Issuer:
https://token.actions.githubusercontent.com -
Runner Environment:
github-hosted -
Publication workflow:
pypi.yml@88ceb4873d4f14a3c44a1bb22c38c3db47919fe5 -
Trigger Event:
push
-
Statement type:


