
Whispr



Safely inject secrets into your app's environment from your favorite secret vault (Ex: AWS Secrets Manager, Azure Key Vault etc.).
Whispr uses keys (with empty values) specified in a .env file and fetches respective secrets from a vault, and sets them as environment variables before launching an application.
Install whispr easily with pip!
pip install whispr
Key Features of Whispr:
- Safe Secret Injection: Fetch and inject secrets from your desired vault using HTTPS, SSL encryption, strict CERT validation.
- Just In Time (JIT) Privilege: Set environment variables for developers only when they're needed.
- Secure Development: Eliminate plain-text secret storage and ensure a secure development process.
- Customizable Configurations: Configure project-level settings to manage multiple secrets for multiple projects.
- No Custom Scripts Required: Whispr eliminates the need for custom bash scripts or cloud CLI tools to manage secrets, making it easy to get started.
- Easy Installation: Cross-platform installation with PyPi.
- Generate Random Sequences for key rotation: Whispr can generate crypto-safe random sequences with a given length. Great for secret rotation.
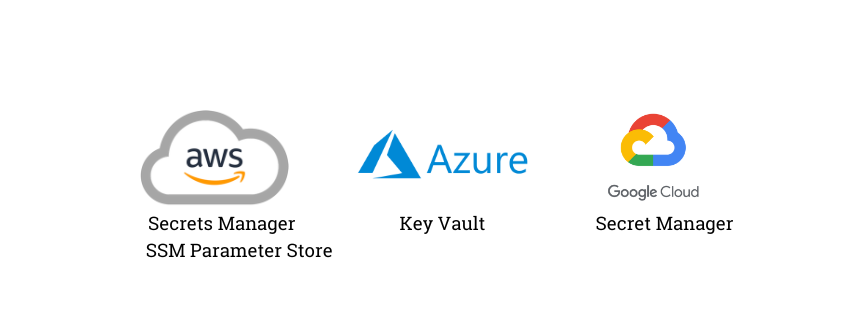
Supported Vault Technologies:
- AWS Secrets Manager
- AWS SSM Parameter Store
- Microsoft Azure Key Vault
- Google Cloud Secret Manager
Why use Whispr ?
The MITRE ATT&CK Framework Tactic 8 (Credential Access) suggests that adversaries can exploit plain-text secrets and sensitive information stored in files like .env. It is essential to avoid storing
sensitive information in unencrypted files. To help developers, Whispr can safely fetch and inject secrets from a vault into the app environment or pass them as standard input just in time. This enables developers to securely manage
credentials and mitigate advisory exploitation tactics.
In simple terms, you can store your secrets in AWS Secrets Manager/Parameter Store, create an empty .env file with keys mapped to cloud vault secret, then inject those mapped secrets into your program's environment.
Getting Started
Installing Whispr
To get started with latest version of Whispr, simply run:
pip install -U whispr
Configuring Your Project
Step 1: Initialize Whispr
Run whispr init <vault_type> in your terminal to create a whispr.yaml file in your project root. This file will store your configuration settings.
The available vault types are: aws, azure, and gcp.
Example whispr.yaml contents (For: AWS):
env_file: '.env'
secret_name: <your_secret>
vault: aws
type: secrets-manager
This default configuration will inject fetched secrets into os.environ of main process.
For AWS SSM parameter store, the same config looks like this:
env_file: '.env'
secret_name: <your_secret>
vault: aws
type: parameter-store
If your app should receive injected values as command arguments (instead of environment variables), use no_env: true.
With this option, Whispr appends KEY=VALUE pairs to the executed command.
env_file: '.env'
secret_name: <your_secret>
vault: aws
type: parameter-store
no_env: true # Setting true will send KEY1=VAL1 secret pairs as command args
See whispr.yaml.example for configuration related to other supported vault types.
Setting Up Your Injectable Secrets
Step 2: Create or Configure a Secret File
Create a new .env file with empty values for your secret keys. For example:
POSTGRES_USERNAME=
POSTGRES_PASSWORD=
Note: You can also control filename with env_file key in your whispr.yaml.
Step 3: Authenticating to Your Vault (Ex:AWS)
- Authenticate to AWS using Short-term credentials.
- Alternatively, set temporary AWS credentials using a config file or environment variables.
Note: Use respective authentication methods for other vaults.
Launch any Application using Whispr (Requires a configuration file: whispr.yaml)
In contrary to programmatic access, if you want to run a script/program do: whispr run '<your_app_command_with_args>' (mind the single quotes around command) to inject your secrets before starting the subprocess.
Examples:
whispr run 'python main.py' # Inject secrets and run a Python program
whispr run 'node server.js --threads 4' # Inject secrets and run a Node.js express server
whispr run 'django manage.py runserver' # Inject secrets and start a Django server
whispr run '/bin/sh ./script.sh' # Inject secrets and run a custom bash script. Script should be permitted to execute
whispr run 'semgrep scan --pro' # Inject Semgrep App Token and scan current directory with Semgrep SAST tool.
Whispr comes with handy utilities like:
- Audit a secret from vault
# Also equivalent to whispr secret get --vault=aws --secret-name=my_secret --region=us-east-1
whispr secret get -v aws -s my_secret -r us-east-1
- Generate a crypto-safe random sequences for rotated secrets
# Also equivalent to whispr secret gen-random --length=16 --exclude='*/^'
whispr secret gen-random -l 16 -e '*/^'
Programmatic access of Whispr (Doesn't require a configuration file)
Instead of using Whispr as an execution tool, a Python program can programmatically inject secrets from a vault and launch a sub-process:
pip install whispr
Then from Python code you can import important functions like this:
from whispr.utils.vault import fetch_secrets
from whispr.utils.process import execute_command

# Assuming there is a AWS parameter store secret with name: my/secret with JSON-like string with values:
# '{"MY_DB_PASSWORD": "random_string"}'

config = {
  "vault": "aws",
  "secret_name": "my/secret",
  "type": "parameter-store",
  "region": "us-west-2"
}

secrets = fetch_secrets(config)

# Create a subprocess of a shell command/app with secrets.
command = "printenv"
# Environment list will have MY_DB_PASSWORD=random_string
cp = execute_command(command.split(), no_env=False, secrets=secrets) # cp is CompletedProcess object.

command = "sh script.sh"
# script.sh will have access to env var MY_DB_PASSWORD
# The injected secrets are scoped to subprocess environment only
cp = execute_command(command.split(), no_env=False, secrets=secrets) # cp is CompletedProcess object.
Developer checks
Run quality and test checks before opening a PR:
ruff check src tests
bandit -q -r src
pytest --cov=whispr tests
That's it. This is a programmatic equivalent to the tool usage which allows programs to fetch secrets from vault at run time.
TODO
Support:
- Bitwarden Vault
- HashiCorp Vault
- 1Password Vault
- K8s secret patching
- Container patching (docker)
- Increased test coverage
1 maintainer

Metadata
1 maintainer
Release files for whispr 0.8.1
For a detailed explanation of source distributions (sdists) and built distributions (wheels), please see the package formats documentation.
Source distribution (sdist)
| File | Size | Uploaded | |
|---|---|---|---|
| whispr-0.8.1.tar.gz | 153.8 kB | Details |
Built distribution (wheel)
| File | Interpreter | ABI | Platform | Reset |
|---|---|---|---|---|
| whispr-0.8.1-py3-none-any.whl | Python 3 | none | any | Details |
Total release size: 171.5 kB
Release files / whispr-0.8.1.tar.gz
| Download URL | whispr-0.8.1.tar.gz |
|---|---|
| Size | 153.8 kB |
| Tags | Source |
|
SHA-256 checksum How to use checksums |
22112034a16b1bb59586f9c6c4b717288d771508f848f447fee489a9e6665919
|
|
BLAKE2b-256 checksum How to use checksums |
b525878dd1bfb0375dd5795eda71c825e0b771a7f482a4ea487862272f1d9b9b
|
| Upload date | |
|
Uploaded using Trusted Publishing? What is trusted publishing? |
Yes |
| Uploaded via |
twine/6.1.0 CPython/3.13.7
|
Provenance
Provenance describes where a file came from. On PyPI, provenance is shared via attestations, which provide a verifiable record of the build or publishing details. View details, limitations and caveats.


PyPI Publish Attestation
PyPI verified that this artifact, at this checksum, originated from the publisher listed below.
Signed by GitHub Actions, verified by PyPI on Jun 4, 2026.
Transparency logRelease files / whispr-0.8.1-py3-none-any.whl
| Download URL | whispr-0.8.1-py3-none-any.whl |
|---|---|
| Size | 17.6 kB |
| Tags | Python 3 |
|
SHA-256 checksum How to use checksums |
65dc202c96cb169ecd4a44cd63dd594365cf64359fe3ec1c92d7d17161477cba
|
|
BLAKE2b-256 checksum How to use checksums |
3798da8dd0867ef34ae333e8e5bcc955cfbc68e481cbbdc0097f520e62743f72
|
| Upload date | |
|
Uploaded using Trusted Publishing? What is trusted publishing? |
Yes |
| Uploaded via |
twine/6.1.0 CPython/3.13.7
|
Provenance
Provenance describes where a file came from. On PyPI, provenance is shared via attestations, which provide a verifiable record of the build or publishing details. View details, limitations and caveats.
PyPI Publish Attestation
PyPI verified that this artifact, at this checksum, originated from the publisher listed below.
Signed by GitHub Actions, verified by PyPI on Jun 4, 2026.
Transparency log













