
xvr: X-ray to Volume Registration







A PyTorch package for training patient-specific 2D/3D registration models in 5 minutes.
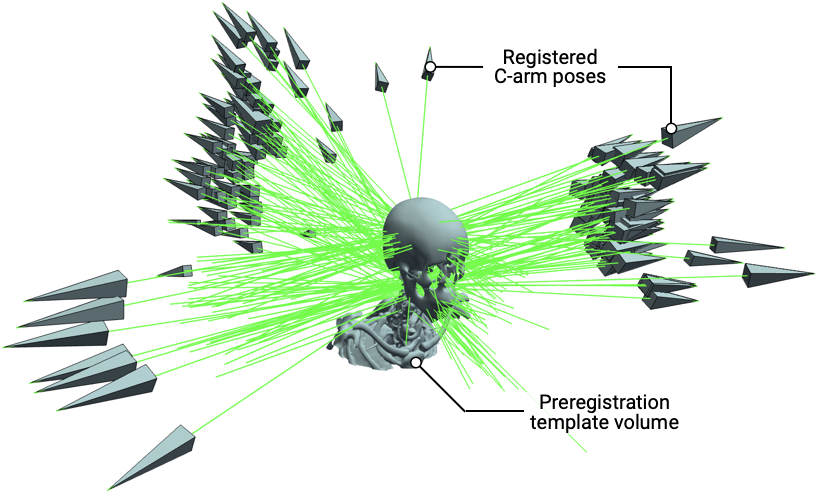
Highlights
- 🚀 A single CLI/API for training models and registering clinical data
- ⚡️ 100x faster patient-specific model training than
DiffPose - 📐 Submillimeter registration accuracy with new image-similarity metrics
- 🩺 Human-interpretable pose parameters for training your own models
- 🐍 Pure Python/PyTorch implementation
- 🖥️ Supports macOS, Linux, and Windows
xvr is built upon DiffDRR, the differentiable X-ray renderer.
Installation
xvr is distributed on PyPI under the package name xvreg.
Install the Python API and CLI:
pip install xvreg # or `uv add xvreg`
If you just want the CLI, use uv:
uv tool install xvreg
Verify the installation version (should match the latest release on GitHub):
xvr --version
CLI Usage
xvr provides a command-line interface for training/finetuning pose regression models and registering clinical data with gradient-based iterative optimization with trained models. It is designed to be modular and extensible, allowing users to easily train models on new datasets and anatomical structures without any manual annotations. Full documentation is available here.
$ xvr --help

Usage: xvr COMMAND

Commands:
register     Use gradient-based optimization to register XRAY to a CT/MR.
restart      Restart model training from a checkpoint.
train        Train a pose regression model.
--help -h    Display this message and exit.
--version    Display application version.
Development
xvr is built using uv, an extremely fast Python project manager.
If you want to modify xvr (e.g., adding different loss functions, network architectures, etc.), uv makes it easy to set up a development environment:
# Download xvr
git clone https://github.com/eigenvivek/xvr && cd xvr

# Install uv and build the environment with all dev requirements
curl -LsSf https://astral.sh/uv/install.sh | sh
uv sync --all-groups

# Install pre-commit hooks locally
uv tool install prek
uvx prek install -f
To verify your virtual environment, you can run
uv run xvr --version
Alternatively, you can directly use the virtual environment that uv creates:
source .venv/bin/activate
xvr --version
xvr's pre-commit hooks automatically take care of things like linting and formatting, so hack away! All PRs are welcome.
Experiments
Reproducing the paper's registration results requires a CUDA GPU. First, build the environment with uv:
git clone https://github.com/eigenvivek/xvr.git && cd xvr
uv sync --all-groups
Then download the pretrained models (3.7 GB) and datasets (4.8 GB) from HuggingFace:
uvx hf download eigenvivek/xvr      --repo-type model   --local-dir experiments/models/
uvx hf download eigenvivek/xvr-data --repo-type dataset --local-dir experiments/data/
Registration runs three datasets (DeepFluoro, Femur, Ljubljana) × three initializations (de novo, finetuned, foundation) as nine SLURM array jobs:
./experiments/run.sh register
The scripts are in experiments/scripts/{dataset}/register/. Four #SBATCH directives are cluster-specific: update --partition, --qos, --account, and --gres to match your platform. Metrics were computed on an NVIDIA RTX 6000 Ada with PyTorch 2.10.
If you don't have SLURM, you can run the subjects in series by manually supplying the array index:
for m in de_novo finetuned foundation; do
    for i in $(seq 1 6);  do SLURM_ARRAY_TASK_ID=$i bash experiments/scripts/deepfluoro/register/$m.sh; done
    for i in $(seq 1 5);  do SLURM_ARRAY_TASK_ID=$i bash experiments/scripts/femur/register/$m.sh;      done
    for i in $(seq 1 10); do SLURM_ARRAY_TASK_ID=$i bash experiments/scripts/ljubljana/register/$m.sh;  done
done
Once every job has finished, score the results:
./experiments/run.sh evaluate
This writes experiments/results/registration.csv, rebuilt from scratch on each run, with one row per x-ray per pose (init and final) recording mPE, mRPE, mTRE, dGeo, the final NCC, and runtime.
Citing xvr
If you find xvr useful for your work, please consider citing our paper:
@article{gopalakrishnan2026rapid,
  title={Rapid patient-specific neural networks for X-ray to volume registration},
  author={Gopalakrishnan, Vivek and Chlorogiannis, David-Dimitris and Abumoussa, Andrew and Larson, Anna M and Haouchine, Nazim and Orbach, Darren B and Frisken, Sarah and Dey, Neel and Golland, Polina},
  journal={Nature},
  pages={1--9},
  year={2026},
  publisher={Nature Publishing Group UK London}
}
1 maintainer

Release files for xvreg 0.1.0
For a detailed explanation of source distributions (sdists) and built distributions (wheels), please see the package formats documentation.
Source distribution (sdist)
| File | Size | Uploaded | |
|---|---|---|---|
| xvreg-0.1.0.tar.gz | 638.2 kB | Details |
Built distribution (wheel)
| File | Interpreter | ABI | Platform | Reset |
|---|---|---|---|---|
| xvreg-0.1.0-py3-none-any.whl | Python 3 | none | any | Details |
Total release size: 686.7 kB
Release files / xvreg-0.1.0.tar.gz
| Download URL | xvreg-0.1.0.tar.gz |
|---|---|
| Size | 638.2 kB |
| Tags | Source |
|
SHA-256 checksum How to use checksums |
a5e16e7a1010a285116d667ae6f919dd5a837db4e1829c182fe3bd570902b500
|
|
BLAKE2b-256 checksum How to use checksums |
bd1e2df6664f91ed08c5aa38bd05e72a4908f13b10932845617109fe11291a9f
|
| Upload date | |
|
Uploaded using Trusted Publishing? What is trusted publishing? |
Yes |
| Uploaded via |
twine/7.0.0 CPython/3.13.14
|
Provenance
Provenance describes where a file came from. On PyPI, provenance is shared via attestations, which provide a verifiable record of the build or publishing details. View details, limitations and caveats.


PyPI Publish Attestation
PyPI verified that this artifact, at this checksum, originated from the publisher listed below.
Signed by GitHub Actions, verified by PyPI on Sep 21, 2026.
Transparency logRelease files / xvreg-0.1.0-py3-none-any.whl
| Download URL | xvreg-0.1.0-py3-none-any.whl |
|---|---|
| Size | 48.5 kB |
| Tags | Python 3 |
|
SHA-256 checksum How to use checksums |
200173385501f94b0016ebd03d06a0778f3b8947d21d7f588bba92411bff4d76
|
|
BLAKE2b-256 checksum How to use checksums |
f8dcbf66e405a225c86bdd6fd620957ec56f994a6b838aed0f98ed6567e533d6
|
| Upload date | |
|
Uploaded using Trusted Publishing? What is trusted publishing? |
Yes |
| Uploaded via |
twine/7.0.0 CPython/3.13.14
|
Provenance
Provenance describes where a file came from. On PyPI, provenance is shared via attestations, which provide a verifiable record of the build or publishing details. View details, limitations and caveats.
PyPI Publish Attestation
PyPI verified that this artifact, at this checksum, originated from the publisher listed below.
Signed by GitHub Actions, verified by PyPI on Sep 21, 2026.
Transparency log












